Rimage 2000i Alignment Manual
Hide thumbs
Also See for 2000i:
- User manual (192 pages) ,
- Knowledge base (43 pages) ,
- Reference manual (4 pages)
Advertisement
Quick Links
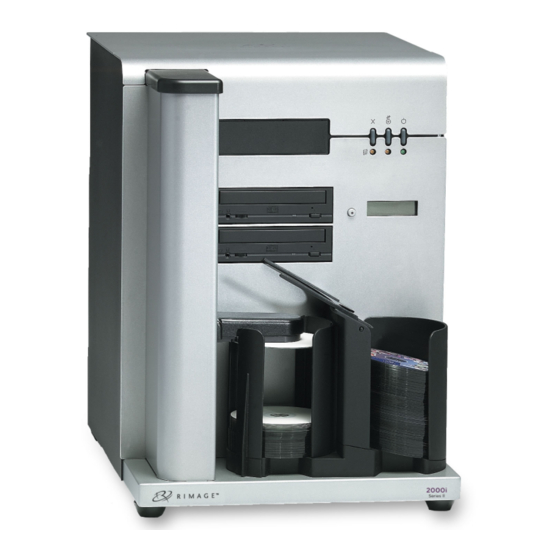
Rimage 2000i
Align a Recorder
Use this procedure to align a recorder in a Rimage 2000i.
Rimage approved parts must be used for this process. The product warranty may become void if parts not approved by Rimage are
used; equipment or parts are tampered with, misused, neglected, or modified in any respect without the written consent of Rimage.
Caution! Some cables in this system are latched. Equipment damage may occur if cables are not disconnected appropriately.
Note: Your system may not look exactly like the system pictured.
Before you begin
1.
Stop or pause all jobs.
2.
Power off the Rimage 2000i.
3.
Disconnect the power cord from the power outlet.
Prepare the System
1.
If the cables are still connected at the back of the
Rimage 2000i, disconnect the cables.
•
FireWire cable (if present)
•
USB cable
•
Power cord
2.
Remove the back panel.
a.
Remove the Torx T10 screws (Qty. 6) that
secure the back panel.
b.
While firmly grasping the top of the back
panel, lift and pull back to remove it.
3.
Remove the left and right side panels (Qty. 2) by
sliding them straight back and off the system.
2000557_C
Right Side Panel
© 2009, Rimage Corporation
Required tools:
•
T10 Torx screwdriver
•
5/64" Allen wrench
Back Panel
FireWire Cable
USB Cable
Power
Cord
Left Side Panel
Operator
(if present)
1
Advertisement

Related Manuals for Rimage 2000i


Summary of Contents for Rimage 2000i
- Page 1 Use this procedure to align a recorder in a Rimage 2000i. Rimage approved parts must be used for this process. The product warranty may become void if parts not approved by Rimage are used; equipment or parts are tampered with, misused, neglected, or modified in any respect without the written consent of Rimage.
- Page 2 Align a Recorder Rimage 2000i On the left and right sides of the Rimage 2000i, adjust the Allen screws (Qty. 4 total, 2 per side) so that they are just loose enough for the recorder to be moved. Important! You should be able to move the recorder slightly.
- Page 3 • If the recorder is out of alignment, continue to Align the Recorder section on page 4. • If the recorder is aligned, continue to the Prepare the System for Use section on page 4. 2000557_C © 2009, Rimage Corporation...
- Page 4 Remove the left and right side panels. Remove the back panel. Remove the Torx T10 screws (Qty. 6) that secure the back panel. While firmly grasping the top of the back panel, lift and pull back to remove it. 2000557_C © 2009, Rimage Corporation...
- Page 5 Connect the cables to the back of the system. (if present) • Power cord • USB cable USB Cable • FireWire cable (if present) Connect the power cord to the power outlet. The system is ready for use. Power Cord 2000557_C © 2009, Rimage Corporation...
-
Page 6: Support Information
Contact Rimage Services Europe: equipment and software described in this document at any time without any prior notice. Rimage Corporation reserves the right to revise this Website: www.rimage.de publication and to make changes from time to time in the content hereof Email: support@rimage.de...