Table of Contents
Advertisement
Available languages
Available languages
Quick Links
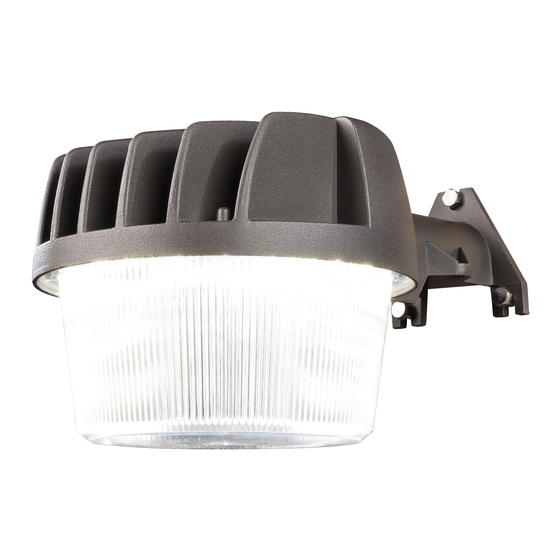
Models 8805 / 8806
READ ALL INSTRUCTIONS CAREFULLY BEFORE BEGINNING INSTALLATION.
Lag Screws
Cover Plate
Bolt (x2)
Photocell
SPECIFICATIONS
Model
Lumens
Kelvin
Wattage
Power Requirements
© 2018 HeathCo LLC
Installation Instructions
8805
8806
2400
3600
5000
5000
20
30
120 VAC, 60 Hz
LED Dusk-to-Dawn Security Light
WARNING: Turn power off at the fuse or circuit breaker.
NOTICE: Designed for wall mount ONLY.
NOTE: All wiring must be run in accordance with the National Electrical
Code (Canadian Electrical Code in Canada) through conduit or another
acceptable means. Contact a qualified electrician if there is any question
as to the suitability of the system.
1. Select a location on a flat wall with structurally sound wood and from 10 to
25 feet (3 to 7.6 m) from the ground. The wood should be at least one inch
thick to safely secure the fixture.
2. Using the fixture as a guide, mark the 3 mounting holes.
3. Install the two bottom lag screws first. Screw in the lag screws so that there
is about 3/8" (9.5 mm) of space under the head.
4. Place the fixture on these two lag screws and install the top lag screw. Tighten
the top lag screw first, then tighten the remaining lag screws.
5. Secure your outdoor cable or flexible conduit to the cover plate with a fitting
in accordance with the National Electrical Code (Canadian Electrical Code
in Canada).
6. Connect the fixture wires to the service wires (black to black, white to white,
and bare or green wire to ground wire).
7. Install the cover plate. Secure with the two bolts provided.
8. Caulk around the light fixture edges with silicone weather sealant.
9. Turn on the circuit breaker and light switch.
10. To test the light during daylight, cover the photocell with black tape and ensure
the light works properly.
11. Uncover the photocell and your unit will operate automatically – on at dusk,
off at dawn.
1
209561-02A
Advertisement
Table of Contents

Related Manuals for Heath Zenith 8805


Summary of Contents for Heath Zenith 8805
- Page 1 LED Dusk-to-Dawn Security Light Models 8805 / 8806 Installation Instructions READ ALL INSTRUCTIONS CAREFULLY BEFORE BEGINNING INSTALLATION. Lag Screws WARNING: Turn power off at the fuse or circuit breaker. NOTICE: Designed for wall mount ONLY. NOTE: All wiring must be run in accordance with the National Electrical Code (Canadian Electrical Code in Canada) through conduit or another acceptable means.
-
Page 2: Care And Cleaning
Care and Cleaning • To prolong the original appearance, clean the light fixture with clear water and a soft, damp cloth only. • Do not use paints, solvents, or other chemicals on this light fixture. They could cause a premature deterioration of the finish. This is not a defect in the finish and will not be covered by the warranty. -
Page 3: Especificaciones
Luz LED de seguridad del anochecer al amanecer Modelos 8805 / 8806 Instrucciones de Instalación ANTES DE EMPEZAR LA INSTALACIÓN LEA CUIDADOSAMENTE TODAS LAS INSTRUCCIONES. Tirafondos ADVERTENCIA: Apague la energía en el fusible o cortacircuitos. AVISO: Diseñado para montaje sobre pared SOLAMENTE. -
Page 4: Cuidado Y Limpieza
Cuidado y limpieza • Para prolongar la apariencia original, limpie la lámpara solo con agua limpia y un paño suave y húmedo. • No use pinturas, solventes ni otros químicos en este aparato de luz. Podrían ser la causa de una prematura deterioración del acabado. Esto no es un defecto del acabado y no será... - Page 5 Éclairage de sécurité nocturne à DEL Modèles 8805 / 8806 Mode d’installation LIRE SOIGNEUSEMENT LES DIRECTIVES AVANT D’ENTREPRENDRE L’INSTALLATION. Tire-fond AVERTISSEMENT : Coupez l’alimentation au disjoncteur ou au fusible. AVIS : Conçus pour installation au mur SEULEMENT. NOTE : Le câblage doit être conforme aux exigences du Code national de l’électricité...
-
Page 6: Entretien Et Nettoyage
Entretien et nettoyage • Pour prolonger l’apparence originale, nettoyez uniquement au moyen d’un chiffon doux trempé dans de l’eau. • N’appliquez aucune peinture, solvant ou produit chimique sur ce luminaire. Cela pourrait causer une détérioration prématurée du fini. Cela ne constitue pas un défaut du fini, de sorte que ce n’est pas couvert par la garantie. - Page 7 This device complies with Part 15 of the FCC Rules. Operation is subject to the following two conditions: (1) this device may not cause harmful interference, and (2) this device must accept any interference received, including interference that may cause undesired operation. CAN ICES-005 (B)/NMB-005 (B) Note: This equipment has been tested and found to comply with the limits for a Class B digital device, pursuant to part 15 of the FCC Rules.
- Page 8 Mounting Hole Template Patrón para el agujero de montaje Gabarit des orifices de montage Drill three 3/16 inch (4.8 mm) pilot holes as indicated. Perfore tres agujeros pilotos de 3/16 pulgadas (4.8 mm) como se indica. Percez trois orifices pilotes de 3/16 po (4,8 mm) comme illustré.