NEC Univerge SV9500 User Manual
Hide thumbs
Also See for Univerge SV9500:
- User manual (263 pages) ,
- User manual (281 pages) ,
- Reference sheet (2 pages)
Table of Contents
Advertisement
Quick Links
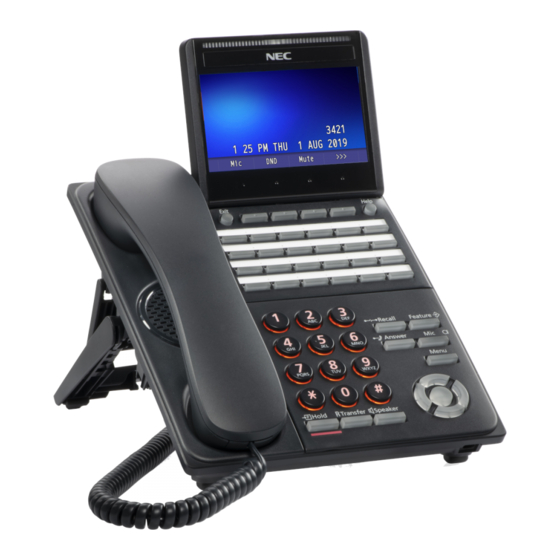
UNIVERGE DT930/DT920(8LCX)
USER'S GUIDE
Before using this product and document, please read the following document carefully.
Also, please keep this document to the place where you can see any time.
Safety Precautions and Regulatory Notices for DT Series (GVT-034084-001)
The latest version of document can be downloaded from the following URL
https://mind.bcom.nec.co.jp/customernet/safety-info/table_t.html
GVT-118709-001
Issue 1.0
December, 2019
Advertisement
Table of Contents

Related Manuals for NEC Univerge SV9500


Summary of Contents for NEC Univerge SV9500
- Page 1 Also, please keep this document to the place where you can see any time. Safety Precautions and Regulatory Notices for DT Series (GVT-034084-001) The latest version of document can be downloaded from the following URL https://mind.bcom.nec.co.jp/customernet/safety-info/table_t.html GVT-118709-001 Issue 1.0 December, 2019...
- Page 2 NEC Platforms, Ltd. and shall not be reproduced without prior written approval from NEC Platforms, Ltd. All brand names and product names on this document are trademarks or registered trademarks of their respective companies.
-
Page 3: Outline Of This Manual
PREFACE PREFACE This manual describes operating procedures of UNIVERGE IP Phone DT930 / DT920(8LCX) Multiline Terminal to be connected to UNIVERGE SV9500 communication server. OUTLINE OF THIS MANUAL This manual consists of; INTRODUCTION Please read through this chapter before use for your understanding and proper use of this product. -
Page 4: Terms In This Manual
PREFACE TERMS IN THIS MANUAL The following table shows the terms described in this manual. TERMS DESCRIPTION Dial Tone You will hear the dial tone from handset when you lift up the hand set. If you press speaker key, you will hear the dial tone from speaker. Special Dial If you press the transfer key while you are in conversation with calling party, you will Tone... -
Page 5: Table Of Contents
CONTENTS CONTENTS IMPORTANT NOTICE ....................i OUTLINE OF THIS MANUAL ..................ii INTRODUCTION ........................ii TERMINAL SETUP ......................ii FEATURE OPERATION ....................... ii APPENDIX ........................... ii ABOUT THE MARKS USED IN THIS MANUAL ............ii TERMS IN THIS MANUAL ................... iii CONTENTS ......................iv INTRODUCTION ..................... -
Page 6: Contents
CONTENTS TO SET KEY TOUCH TONE ..................21 TO SET MUSC ON HOLD ..................21 TO SET PREFIX ......................21 TO SET CALENDAR FORMAT .................. 21 TO SET TIME FORMAT ..................... 22 TO ENABLE/DISABLE VOLUME LEVEL DISPLAY ........... 22 TO SET SCREEN SAVER ..................22 TO SET BRIGHTNESS OF LCD BACK LIGHT ............ - Page 7 CONTENTS SYSTEM ........................43 HOW TO SELECT A SYSTEM SOFT KEY................. 43 SAMPLE DISPLAY ......................43 HOW TO USE SYSTEM SOFT KEYS ................44 PHONEBOOK ......................45 PERSONAL PHONE BOOK ....................45 CALL HISTORY ......................50 TO START HISTORY ......................50 TO CALL ..........................
- Page 8 CONTENTS TO SET ..........................59 TO VERIFY ........................59 TO REGISTER NAME ONTO ONE-TOUCH SPEED CALLING KEY ......... 60 SPEED CALLING - STATION/GROUP ............... 60 TO SET ..........................60 TO MAKE A CALL ......................60 SPEED CALLING – SYSTEM ..................60 TO SET SPEED CALLING –...
- Page 9 CONTENTS PHONEBOOK ......................68 SYSTEM PHONEBOOK ..................... 68 LOCAL PHONEBOOK ......................69 CALL HISTORY (SISTEM SIDE) ................71 TO VIEW CALL HISTORY ....................71 TO MAKE A CALL FROM CALL HISTORY ................ 71 TO MAKE A CALL WITH PREFIX ..................71 TO DELETE SPECIFIC DATA ....................
-
Page 10: Introduction
INTRODUCTION INTRODUCTION FACE LAYOUT [ITK-24CG-1 TEL] [ITK-8TCGX-1 TEL] [ITK-8LCX-1 TEL]... -
Page 11: Specifications
INTRODUCTION SPECIFICATIONS 24CG ITEM ITK-24CG-1/ ITK-24CG-1A / ITK-24CG-1P / ITK-24CG-1U 4.3 inch TFT, with back light LCD color Color (16,194,277 colors) Programmable 24 keys line/feature key Fixed feature key 13 keys (with Menu key and Cursor key) Soft key 4 keys Back light LCD and digit key (lit for 10 seconds when operating) Phonebook... - Page 12 INTRODUCTION 8TCGX (Touch Panel) / 8LCX (Self-Labeling) Item ITK-8TCGX-1 / ITK-32TCG-1A / ITK-32TCG- ITK-8LCX-1 / ITK-32LCG-1A / ITK-32LCG-1P / 1P / ITK-32TCG-1U / ITK-8TCGX-1U ITK-32LCG-1U / ITK-8LCG-1U / ITK-8LCX-1U 4.3 inch TFT, Touch Panel 3.5 inch TFT LCD color Color (16,194,277 colors) Color (16,777,216 colors) Programmable 8/16/32 keys on Touch Panel...
-
Page 13: Keys And Parts
INTRODUCTION KEYS AND PARTS This section explains keys and parts of terminal. ITK-24CG-1 TEL (18) (17) (16) (15) (14) (13) (12) (11) (10) - Page 14 INTRODUCTION ITK-8LCX-1 TEL (Self-Labeling) (18) (14) (17) (15) (20) (16) (13) (12) (11) (10) ITK-8TCGX-1 TEL (Touch Panel) (18) (17) (19) (13) (12) (11) (10) x...
- Page 15 INTRODUCTION Touch button area (19) (20) (16) NAME FUNCTION Handset Used for sending/receiving voice. To return previous window. Back key Speaker Originating a call with handsfree. Dial keypad Dial the called party number or feature access code. To place a call on hold. Hold key Allows the terminal user to transfer established calls to another Transfer key...
- Page 16 INTRODUCTION NAME FUNCTION (11) Feature key (with light) To activate features such as terminal setup and to program One- Touch Speed Calling keys. (12) Answer key (with light) When LED on this key is lit, press this key to answer the incoming call.
-
Page 17: Outline
INTRODUCTION OUTLINE Display Example for DT930 (Touch Panel model) This section explains about the outline of a Information area telephone. STARTING OF A TELEPHONE The telephone displays the screen that is set as the home screen. The home screen can be set to either the favorite screen/call screen/line screen. - Page 18 INTRODUCTION The icon CLOCK AND CALENDER Icon The explanation name This area consists of a calendar and clock. This icon appears when The default display format follows setting of the there is a missed call. Once Missed Call system. you check the missed call, It is possible to change the format by user this icon will disappear.
-
Page 19: Call Screen
INTRODUCTION Display Example for DT920 (Self-Labeling model) CALL SCREEN System information display area This screen is displayed by pressing local soft key 3 (Call screen). When pressing a digit key or a function key, or incoming call arrival, this screen is displayed. You can make a call, talk, and use system service from this screen. - Page 20 INTRODUCTION LOCAL SOFTKEY AREA In addition, cursor keys can be The soft keys that are provided by the terminal are used as follows. displayed in this area. It is possible to go to favorite screen, phone book screen and history screen (same operation as favorite screen).
-
Page 21: Line Screen
INTRODUCTION LINE SCREEN TO CLOSE CALL SCREEN AUTOMATICALLY This screen shows the line key information registered in system. When Call screen is displayed with the "Auto On Touch Panel model, the line key status is Close" method, the screen returns to the original displayed with the line key lamp icon. - Page 22 INTRODUCTION Display Example for DT920 (Self-Labeling model) You can go to the line screen by moving the page from the call screen. The line key pages can be System information display area Line key Line key switched by a page move operation. The call screen is displayed by moving to out of the pages direction from the first page or the last page, or press local soft key 3 (Call screen).
-
Page 23: Phone Book
INTRODUCTION PHONE BOOK CALL HISTORY There are two types of Phonebooks are available. You can use the either of system side feature or One is the “Personal Phonebook” which is saved terminal side feature. To display the history, press in the each terminal. The other is “System the local soft key 4 (History screen) at the favorite Phonebook”... -
Page 24: Installation Procedure
INTRODUCTION INSTALLATION PROCEDURE Please attach the Faceplate securely. If not, the terminal will not operate ATTACHING OR REMOVING properly because a key is possibly FACEPLATE AND DESI PRINTER being pushed by the Faceplate. SHEET REMOVING FACEPLATE AND ADJUSTING ANGLE OF TILT LEGS DESI PRINTER SHEET The height can be adjusted by moving the legs Remove DESI Printer Sheet with following ways. -
Page 25: Connecting Lan Cable
CONNECTING LAN CABLE ILPA-R UNIT is required when PoE Hub supports NEC Proprietary Protocol (The ILPA-R UNIT converts IEEE802.3af to NEC Proprietary Protocol). When ILPA-R UNIT is used, 1000BASE-T is not available. -
Page 26: Connecting Headset
According to the following procedure, Headset is connected to HEADSET Connector which is located bottom of terminal. For the headset that is supported, please contact the NEC's dealer or NEC. The headset which can be connected to the terminal is "HW510 (A10)/HW251N (A10) (manufactured by Plantronics)". -
Page 27: Terminal Setup
TERMINAL SETUP TO SET RINGING OF HEADSET TERMINAL SETUP Following explains how to enable/disable the ringing ■ While you set up terminal, the “soft of headset. key” means local soft key. ■ If the Back / Exit button is pressed This feature is required both in the while the terminal setting menu is terminal and in the system settings at... -
Page 28: When Distinctive Ringing Patterns To Distinguish Internal And External Incoming Calls Is Not Provided
TERMINAL SETUP WHEN DISTINCTIVE RINGING ITEM FREQUENCY (Hz) REMARKS PATTERNS TO DISTINGUISH INTERNAL AND EXTERNAL INCOMING CALLS IS NOT PROVIDED Tone 16Hz modulation Type 7 Tone 1100 1100 Envelope You can set ringer tone from “Settings”. The Type 8 following explains how to set. Tone Door Phone Type 9... -
Page 29: To Set Illumination Pattern For Call Indicator Lamp
TERMINAL SETUP TO ENABLE/DISABLE RTP ALARM Tone Type 1 to Tone Type 8: Following explains how to enable/disable RTP In the preview function, each ringer Alarm. The RTP Alarm tone allows the terminal user tone sounds continuously. However to be notified that the voice packet is not received in when “... -
Page 30: To Set Key Touch Tone
TERMINAL SETUP When selecting “ Download”, the Music If the “ 0 Automatic” is selected, this on Hold file must be downloaded in feature is activated in accordance with advance. If there is no downloaded file, the system data setting. If it is not you hear no tone in the preview specified by the system data this function (in actual operating conditions,... -
Page 31: To Set Time Format
TERMINAL SETUP TO ENABLE/DISABLE VOLUME Calendar 12 hour clock LEVEL DISPLAY Type1 MON 3 JUN 2019 3:13 PM Type2 3 JUN MON 3:13 PM Determines whether or not to display the Type3 JUN 3 MON 3:13 PM following volume levels: handset receiver volume, Type4 6- 3 MON 3:13 PM speaker volume, ringer tone volume and LCD... -
Page 32: To Set Brightness Of Lcd Back Light
TERMINAL SETUP This terminal has a screen saver Select “ 6 Advanced”. (When GUI mode is classic, menu number is 7.) enabled by default. If you disabled the screen saver and the same screen is Select “ 2 Backlight Fade Control”. displayed for a long time, an (When GUI mode is classic, menu number is 5.) afterimage may appear on the display,... -
Page 33: To Select Wallpaper
TERMINAL SETUP The language is set by system data Display the Menu screen, and select “Settings” setting at initial installation. Therefore, it is not required to change the Select “ 1 User Settings”. language on the terminal from default setting ( 0 Automatic). For details, please contact the system Select “... -
Page 34: To Change Gui Mode
TERMINAL SETUP Select “ 1 Turn Off Display”. Select “ 3 GUI Mode”. (When GUI mode is classic, menu number is 4.) (Menu number depends on the terminal type.) Select “ 1 Turn Off Display Mode”. Select desired mode. GUI MODE Select whether to launch Turn Off Display. -
Page 35: To Enable/Disable Animation
TERMINAL SETUP TO ENABLE/DISABLE ANIMATION Select a desired screen Following explains how to set whether to enable animation when the screen change. The default setting is “ 0 Automatic”. If the “ 0 Automatic” is selected, this Animation is available for DT930 feature is activated in accordance with (Touch Panel model) the system data setting. -
Page 36: To Change Password
TERMINAL SETUP TO CHANGE PASSWORD Press the menu button to display the menu screen. Following explains how to change an existing The screen that is displayed as the portal icon in password. The password is used for the that time is the XML application screen that following occasions. -
Page 37: To Set Usability
TERMINAL SETUP TO SET USABILITY TO DOWNLOAD A FILE Following explains how to set the Pop-up You can download files for Music on Hold, Ringer operation of Home key. Tone and Wallpaper. When downloading these files, the terminal needs to be connected to the network that has FTP, TFTP or HTTPS server. - Page 38 TERMINAL SETUP Select “ 2 Download Address” Enter the file name with digit keys. The default file name is displayed. Press Soft key (BK) once to delete the Enter an IP address/address (URI) of the default file name. FTP/TFTP/HTTPS server which stores...
-
Page 39: To Back Up Or Restore The Setting Data Of Terminal
TERMINAL SETUP TO BACK UP OR RESTORE THE CHECK POINTS ACTIONS SETTING DATA OF TERMINAL Check whether the Place the download This section explains how to make a backup of the download file is placed file in the specified setting data which has been entered in the terminal in the folder of the folder of the server. - Page 40 TERMINAL SETUP The IP address input screen can be Enter a User ID with digit keys. switched to URI input screen by the Soft key (IP/URI). Please refer to “HOW TO INPUT CHARACTERS” for how to enter the Press Soft Key (IP/URI) ...
-
Page 41: To Restore The Setting Data Of Terminal
TERMINAL SETUP CHECK POINTS ACTIONS Enter a User ID with digit keys. Check whether IP Set the proper IP address/address (URI) address/address of FTP/TFTP/HTTPS (URI) of Please refer to “HOW TO INPUT server is correct or not. FTP/TFTP/HTTPS CHARACTERS” for how to enter the server. - Page 42 TERMINAL SETUP The IP address input screen can be CHECK POINTS ACTIONS switched to URI input screen by the Check whether the Place the download Soft key (IP/URI). download file is placed file in the specified in the folder of the folder of the server.
-
Page 43: To Set Bluetooth Device
TERMINAL SETUP TO SET Bluetooth DEVICE Bluetooth device is available for DT930 (Touch Panel model). Please contact dealer about recommended Bluetooth device. If you do not use the recommended device, there may be a case that it When the inquiring device has no cannot connect with terminal or name, more than 21Byte, or more than... -
Page 44: To Check The Pairing Device And Dissconnect
TERMINAL SETUP In case of temporarily disconnection between terminal and Bluetooth device by switch off or Bluetooth mode off, Bluetooth device reconnect to the terminal when terminal switch on or Bluetooth mode on. Example using Voyager5200: You can reconnect by press talk button. -
Page 45: Operation
OPERATION There are three types of shortcut OPERATION display. FAVORITE ■ Small Photo & Name Displays the photo registered in the FAVORITE SCREEN contact in a small size, and displays On the favorite screen, short cut icons that you the shortcut name below the photo. registered are displayed. -
Page 46: To Register Shortcut
OPERATION DT920 (Self-Labeling model) A short cut name is indicated approximately 10 Press programmable key on the sides of screen. characters. It depends on character string. When exceeding the width of the indication area, right end of characters string are cut, and it's indicated. TO REGISTER SHORTCUT Following explains how to register a shortcut. -
Page 47: To Use The Shortcut
OPERATION Input a desired number. From 1 up to 16 digit characters can be registered. TO USE THE SHORTCUT Following explains how to use a shortcut. For example, in case of making call of the Contact Input a desired shortcut name. person which is registered in the terminal phone book. - Page 48 OPERATION Using the Service menu shortcut When a service menu shortcut is selected, screen display is different depending number of registered service. ■When there are multiple services When a service menu shortcut is selected, screen displays service list Please make sure the dial number is that has registered.
-
Page 49: To Edit The Shortcut
OPERATION TO EDIT THE SHORTCUT Select “Edit shortcut” The option menu is displayed, select “Edit You can edit the registered shortcut information. shortcut”. ■In this function, the information can Select data only be edited that is set at the Data select screen is displayed. Select data that shortcut registration. - Page 50 OPERATION Confirm the deletion. Select shortcut to delete. Press Enter or local soft key 4. HOW TO SELECT A SHORTCUT Short cut is deleted from favorite screen. When shortcut deletion succeeds, the following message is indicated. ■ DT930 (24CG) Use the cursor keys to move orange focus to a desired shortcut and press the enter key.
-
Page 51: To Change Shortcut Display
OPERATION Short cut is deleted from favorite screen. When shortcut deletion succeeded, following message is indicated. If you would like to delete shortcut more, press soft key 3. Then, it is displayed operation TO CHANGE SHORTCUT DISPLAY Following explains how to change the display for the shortcuts on the favorite screen. -
Page 52: System
OPERATION In addition, cursor keys can be used as follows. SYSTEM Call screen is displayed when you make a call, receiving an incoming call, or using system service. Directory You can use system soft key instead of dialing feature number. Available key is displayed Shortcut menu according to the terminal status. -
Page 53: How To Use System Soft Keys
OPERATION DIAL TONE/DIALING: HOW TO USE SYSTEM SOFT KEYS 31313 Followings are some sample operations of features using soft keys. PickUp/G CF-ALL >>> SETTING DO NOT DISTURB Push system soft key (>>>>): Press “DND”. “DND” flashes. 31313 CF-NoAns CF-Busy >>> CANCELLING DO NOT DISTURB Press “DND”. -
Page 54: Phonebook
OPERATION PHONEBOOK You can use the personal phonebook and system phonebook. It is possible to search and display the person registered in the phonebook, or make call. This feature is required system data setting at initial installation. For details, please contact the system administrator. - Page 55 OPERATION TO SEARCH PERSON Icon Data Description Press local soft key 4 (Option) on the list display. Display the assigned Group group name. Select “ 1 Search” on the option menu. Display the ring tone when Ring Tone incoming call arrival. Input the name to search.
- Page 56 OPERATION TO CALL WITH PREFIX When you finish to edit data, press local soft key 2 (Save). Following explains how to make call with prefix number. TO REGISTER Refer to the “TO SET PREFIX” about setting of prefix number. Press local soft key 1 (Option) at phone book list screen.
- Page 57 OPERATION Category Icon When the new entry is made from the terminal, the photo data cannot be Company registered. Cell Phone The number of name character is up to Voice Mail 32. Refer to the “HOW TO INPUT Home CHARACTERS” about how to input character.
- Page 58 OPERATION The setting is effective with the following order. Name -> Group -> terminal. TO DELETE Refer to “TO SEARCH PERSON” and display search result. Press local soft key 1 (Option) with focused data. Select “ 5 Delete” If you select “ 6 Delete All”, it is possible to delete all data in the personal phonebook.
-
Page 59: Call History
OPERATION CALL HISTORY This feature allows the telephone to register up to 50 records into its memory. If the number of registered records exceeds 50, a record will be deleted in order of occurrence. ■ When an incoming call comes in while Displayed icons are following. -
Page 60: To Register History Data To Directory
OPERATION directory. Select “ 2 Prefix” Select the register number Focus on the desired prefix number. Select from #1 to #4 Press local soft key 4 (Make call) or Enter key. If you select the #1 when #1 data is already exist, data is overwritten. -
Page 61: How To Input Characters
OPERATION HOW TO INPUT CHARACTERS MULTI WINDOWS The characters that can be input very depending on This terminal can use multiple XML applications at the menu. the same time. Maximum four applications can be Example: Password input screen, run simultaneously, including Phone Screen and other application that is registered in Home URL. -
Page 62: In Case Of Starting 5 Application
OPERATION When XML application is started newly, a XML Following error message is indicated. application window icon is shown to the right side of Press “Next” the portal icon. New started application icon After error message is indicated, if you do not operate 10 seconds, starting new application is canceled. -
Page 63: About Update Xml Icon
OPERATION ABOUT UPDATE XML ICON XML service icon is the shrinkage image of application. When there is instruction to display service icon newly from application, “NEW” icon is indicated. When the application update, “UPDATE”icon is indicated. NEW icon UPDATE icon “NEW”... -
Page 64: Feature Operation
FEATURE OPERATION TO LOGOUT FEATURE OPERATION The terminal which is operated with Login Mode can log out. Logout operation is as follows. This chapter describes how to login/logout, how to input characters and how to make a call/hold, Press the preassigned Logout key on the terminal etc. -
Page 65: Double Height Characters On Lcd
FEATURE OPERATION DOUBLE HEIGHT CHARACTERS TO MAKE AN EXTERNAL CALL When a dialed telephone number is registered in ON LCD Personal Directory, the corresponding name One of the three lines in the LCD can be displayed information will be displayed on LCD while you are in double height size. -
Page 66: To Make An Internal Call
FEATURE OPERATION TO MAKE AN INTERNAL CALL TO ANSWER AN EXTERNAL CALL When a dialed station number is registered in When a calling party telephone number is Personal Directory, the corresponding name registered in the Personal Directory, the information is displayed on the LCD while you are corresponding name information is displayed on the hearing a ringback tone or are engaged in a LCD while you are hearing a ringing tone or are... -
Page 67: Multiline Operation
FEATURE OPERATION MULTILINE OPERATION This feature allows you to accommodate the lines Any station with this line key (other telephone’s station number) other than My appearance can retrieve the call. Line on the Programmable Line/Feature Keys. When accommodating other telephone’s station Line key will be disabled while the number on the Programmable Line/Feature Key, information of XML application is... -
Page 68: If Unanswered
FEATURE OPERATION IF UNANSWERED ONE-TOUCH SPEED CALLING KEYS After preprogrammed time, Automatic Recall is initiated. TO MAKE A CALL Call Indicator lamp flashes and the user hears Automatic Recall Ringer. Press the desired One- Touch Speed Calling key. TO TRANSFER CALL Speaker lamp lights red. -
Page 69: To Register Name Onto One-Touch Speed Calling Key
Press a desired One-Touch Speed Calling key. Speed Calling key changes as follows: The LCD displays previously stored digits. “NEC BNET” Dial the Speed Calling – System Access Code and To delete the entry, press DEL or BK the abbreviated call code. -
Page 70: To Operate From Speed Calling - System Key
FEATURE OPERATION TO OPERATE FROM SPEED CALLING – SYSTEM KEY A new entry overwrites the previously saved phone number (the existing Press the Speed Calling –System key. number temporarily displays when you try to set a new number) If the DT830G does not have the Speed Calling – System key, dial the Speed Calling –... -
Page 71: To Edit The Registered Data
FEATURE OPERATION TO EDIT THE REGISTERED DATA Press Clear soft key. TO ENTER THE PHONE NUMBER TO DELETE THE PHONE NUMBER Locate the cursor (underscore) with LEFT/RIGHT DATA soft key (these soft keys are displayed pressing >>> soft key), or pressing Left/Right cursor key. Press Delete soft key (this soft key is played pressing >>>... -
Page 72: Redial
FEATURE OPERATION REDIAL LAST NUMBER REDIAL When Redial feature is enabled at When Redial feature is enabled at installation, Last Number Redial installation, Last Number Redial feature and Speed Calling features feature and Speed Calling features using Redial key are not available. For using Redial key are not available. -
Page 73: Voice Call
FEATURE OPERATION VOICE CALL THREE- PARTY CONFERENCE While Station A and Station B are engaged in a USING FEATURE KEY Two-party connection, Station A presses Transfer. Station A hears Special Dial Tone. Lift handset. Station B hears the music on hold. Dial desired station number. -
Page 74: Do Not Disturb
FEATURE OPERATION DO NOT DISTURB While the telephone is locked, menu TO SET key becomes disabled. Also, any features provided by the Telephony Press DND when the telephone is in idle state Server, such as call origination or call (one hook). answering, cannot be performed. -
Page 75: Emergency Call
FEATURE OPERATION EMERGENCY CALL The user can make a call to a predetermined The default password to release a emergency telephone number while the telephone security lock is “0000”. Be sure to is locked (in Security mode). This function is change the default password before available on the telephone with Security. - Page 76 FEATURE OPERATION The user can make a call to only the predetermined number. When telephone numbers other than the predetermined emergency number are dialed, the following message appears (after a few seconds, the display goes back to ”Dial Emergency Number Only” screen) After a conversation, replace the handset.
-
Page 77: Phonebook
32 digits can be registered for each dial number. Up result. to 24 characters can be registered for each name. The registered Phonebook data for “NEC BNET” appears. From this screen, you can make a call by going off-hook or pressing Speaker. -
Page 78: Local Phonebook
Press “Local”. Name Entry screen appears. Local Phonebook screen appears. Press “Add”. Enter a name (in this example, “NEC” is entered) Enter a name and press Enter key or the “OK” key. and Press Enter key or “OK” key. (If no appropriate data exists, the message “Entry not... - Page 79 FEATURE OPERATION TO EDIT AN ENTRY TO DELETE A RECORD Press >>> soft key twice while the target Example: Phonebook data is displayed. To Modify Name “Home” to “House” and Telephone Number “0123456789” to “0123456712” Press “DEL” soft key. Press Enter key or the “OK” key to delete the Press >>>...
-
Page 80: Call History (Sistem Side)
FEATURE OPERATION CALL HISTORY (SISTEM SIDE) While the history data is displayed, the This feature can store up to 20 records. If user cannot make a call by dialing a exceeding 20 records, a record will be deleted in telephone number. order of occurrence. -
Page 81: To Delete Specific Data
Enter a desired name, and press “OK”. (In this example, “NEC ABIKO” is entered.) Recording ICON LED Status status Call recording is... -
Page 82: To Record A Call Manually
FEATURE OPERATION TO RECORD A CALL MANUALLY TO RECORD A CALL AUTOMATICALLY Here explains the procedure for recording a call When automatic call recording is set, call recording manually. Call recording is started by pressing a starts when a user goes off-hook or presses the Programmable Feature Key where Call Recording Speaker key. -
Page 83: Headset Operation
FEATURE OPERATION HEADSET OPERATION The table below shows supported headsets and To switch to headset mode, press headset cables for the terminal. Headset key during a conversation. Headset Supported Cable HW510/HW251N ADJUSTING HEADSET RINGER TONE WT100 Voyager APN-91 VOLUME Legend CS You can adjust the ringer tone volume for a headset W710 APD80... -
Page 84: How To Use The Wireless Headset
FEATURE OPERATION HOW TO USE THE WIRELESS To Answer a Call HEADSET When using Wireless Headset (WT100 (APN- Bluetooth Press the Call control key of the Headset while the terminal is ringing, and the 91)/Voyager Legend CS (APN-91) (manufactured Headset key lights red. - Page 85 FEATURE OPERATION ■In environments with many Bluetooth devices, it may be difficult to find the Headset to be used. Make the Headset to be used searchable (pairing status) first, and then perform a search on the terminal. ■Depends on the around environment, or distance with Bluetooth supported devices, Sound skips (sounds are interrupted) or noise may occur.
-
Page 86: Appendix A. Menu List
APPENDIX A. MENU LIST APPENDIX A. MENU LIST This chapter shows the Setting Menu List. This manual does not describe menus that are displayed in grayout on the LCD. It is not possible to set the menus that are displayed in grayout. USER SETTINGS Select this option to configure the user settings. -
Page 87: Talk
APPENDIX A. MENU LIST TALK DEFAULT MENU ITEM DESCRIPTION VALUE RTP Alarm Select this option to specify whether to use the RTP Alarm. Automatic DTMF Tone Select this option to specify whether to use the DTMF tone. (This Automatic feature does not work even if it is set.) Key Touch Select this option to set the key touch tone generated when the digit Automatic... -
Page 88: Option Device - Bluetooth (8Tcgx Only)
APPENDIX A. MENU LIST DEFAULT MENU ITEM DESCRIPTION VALUE Advanced Select this option to set up for the following additional data. Wallpaper Select this option to specify the Home Screen background. Default Font Color Select this option to specify the font color for the Time Color 16 Display/Feature Information Display area. -
Page 89: Download
APPENDIX A. MENU LIST DOWNLOAD Set the data required when downloading a file. DEFAULT MENU ITEM DESCRIPTION VALUE Download Files Select this option to download files or to set the data required when downloading a file. Hold Music Select this option to download a file for Music on Hold. MOH.wav Ring Tone Select this option to download files for ringer tones. -
Page 90: Data Backup/Restore
APPENDIX A. MENU LIST DATA BACKUP/RESTORE Select this option to set the data required for a file backup/restore. DEFAULT MENU ITEM DESCRIPTION VALUE Data Backup Select this option to specify the file name to be backed up. PersonalData.tgz Data Restore Select this option to specify the file name to be restored. -
Page 91: Appendix B. Input Characters
APPENDIX B. INPUT CHARACTERS APPENDIX B. INPUT CHARACTERS CHARACTER CODE FOR NAME INFORMATION OF ONE-TOUCH SPEED CALLING KEY DIAL ‘ & ‘ &... -
Page 92: Character Code Table For Menu Contents
APPENDIX B. INPUT CHARACTERS CHARACTER CODE TABLE FOR MENU CONTENTS PASSWORD INPUT INPUT DIAL INPUT (1 - 10): Showing number of times pressing the key. SP: Showing blank space. When inputting password characters, “*” are displayed on the screen. - Page 93 APPENDIX B. INPUT CHARACTERS INPUT THE USER ID, PASSWORD (FTP/HTTPS SERVER), FOLDER NAME, FILE NAME, ADDRESS (URI) INPUT DIAL & < > & < >...
- Page 94 APPENDIX B. INPUT CHARACTERS INPUT DIAL & INPUT (1 – 29): Showing number of times pressing the key. SP: Showing blank space. Input mode switches over by pressing the repeatedly. (“ English Character (capital letter)”→“ English Character (lowercase)”→“ number”→“ English Character (capital letter)”). When inputting password characters, “*”...
- Page 95 APPENDIX B. INPUT CHARACTERS INPUT THE IP ADDRESS INPUT DIAL INPUT (1 - 10): Showing number of times pressing the key. (1) For separator of IP address.