Table of Contents
Advertisement
Quick Links
Advertisement
Table of Contents

Related Manuals for Canon imageRUNNER 2206


Summary of Contents for Canon imageRUNNER 2206
- Page 1 2206 User's Guide USRMA-3373-01 2018-11 en Copyright CANON INC. 2018...
-
Page 2: Table Of Contents
Contents Basic Operations ............................2 ............................4 Parts and Their Functions ............................... 5 External View ................................ 7 Internal View ............................... 9 Control Panel ................................ 11 Display ........................14 Customizing the <Home> Screen ..............................16 Using the Display ..............................19 Placing Documents ................................. - Page 3 ................74 Registering Combinations of Frequently Used Print Settings ..........................76 Changing Default Settings Using the Machine as a Scanner ..................... 79 ............................. 80 Scanning from the Machine ............................83 Scanning from a Computer ..........................84 Scanning Using an Application ......................
- Page 4 ................................156 Drum ............................... 157 Fixing Assembly ..........................159 Replacing the Toner Cartridges ..................... 161 Configuring Purchase Information for Consumables ........................163 How to Replace the Toner Cartridges ..........................166 How to Replace the Drum Unit ............................. 170 Printing Reports and Lists ......................
- Page 5 Basic Operations Basic Operations Basic Operations ..............................2 ............................. 4 Parts and Their Functions ..............................5 External View ..............................7 Internal View ..............................9 Control Panel ..............................11 Display ......................14 Customizing the <Home> Screen ..............................16 Using the Display ..............................
-
Page 6: Basic Operations
Basic Operations Basic Operations 3EEJ-000 This chapter describes basic operations, such as how to use the control panel or how to load the paper and documents, that are frequently performed to use the functions of the machine. ◼ Parts and Their Functions This section describes the exterior and interior parts of the machine and their functions, as well as how to use the keys on the control panel and how to view the display. - Page 7 Basic Operations ◼ Entering Sleep Mode This section describes how to set the sleep mode. Entering Sleep Mode(P. 39)
-
Page 8: Parts And Their Functions
Basic Operations Parts and Their Functions 3EEJ-001 This section describes the parts of the machine (exterior, front and back side, and interior) and how they function. In addition to describing the parts of the machine used for such basic operations as placing documents, loading paper, and replacing the toner cartridges, this section also describes the keys on the control panel and display. -
Page 9: External View
Basic Operations External View 3EEJ-002 Multi-purpose tray Load the paper into the multi-purpose tray when you want to temporarily use a type of paper different from that which is loaded in the paper drawer. Loading Paper in the Multi-Purpose Tray(P. 25) Platen cover Secures the originals placed on the platen glass. - Page 10 Basic Operations Power socket Connect the power cord. Power switch Turns the power ON or OFF. To restart the machine, turn OFF the machine, wait for at least 10 seconds, and turn it back ON. Toner code This code indicates the type of genuine toner that can be used with the machine. Use toner with a code that includes the same letters as the code on the front cover of the machine.
-
Page 11: Internal View
Basic Operations Internal View 3EEJ-003 Platen glass Place documents to scan on the platen glass. Also, use the platen glass to place thick or bound documents such as books. Placing Documents(P. 19) Drawer 1 left cover Open this cover when clearing a paper jam in paper drawer 1. Clearing Jams(P. - Page 12 Basic Operations Front cover Open this cover to replace the toner cartridge or drum unit. How to Replace the Toner Cartridges(P. 163)
-
Page 13: Control Panel
Basic Operations Control Panel 3EEJ-004 [Home] key Press to display the <Home> screen. Customizing the <Home> Screen(P. 14) Display You can view the progress of copy and other jobs and error statuses. The display is a touch panel, allowing you to operate the screen by touch to specify settings. Display(P. - Page 14 Basic Operations [Status Monitor] key Press to check the status of printing, or to view the usage history. You can also check the status of the machine, such as the remaining amounts of paper and toner, or whether any errors occurred. Display(P.
-
Page 15: Display
Basic Operations Display 3EEJ-005 The <Home> screen for initiating operations and screens for specifying settings appear in the display. You can also view job progress and messages here. Touch the display to operate it. <Home> Screen The <Home> screen is displayed when the power is turned ON or by pressing on the control panel. - Page 16 Basic Operations <Error Information/Notification> Displays the details of any errors that occurred. Countermeasures for Each Message(P. 130) <Device Information> Displays the status of the machine, such as the amount of paper or toner remaining. <Paper Information> Displays whether paper is loaded in each paper source. <Toner Level>...
- Page 17 Basic Operations When <You have notifications.> or <Tap Icon on Right ->> Is Displayed to view the notification. When an Error Occurs In some cases when an error occurs, instructions on how to respond to the error are displayed. Follow the on- screen instructions to solve the problem.
-
Page 18: Customizing The
Basic Operations Customizing the <Home> Screen 3EEJ-006 You can change the order that buttons in the <Home> screen are displayed in according to your application or a preferred arrangement. ◼ Changing the Home Screen Button Display Order Press and tap <Home Screen Settings>. ●...Screen - Page 19 Basic Operations ◼ To Insert Blanks in <Home> Screen Press and tap <Home Screen Settings>. ● If a screen appears prompting you to enter a PIN, enter the correct PIN, and tap <Apply>. Setting the System Manager PIN(P. 91) Tap <Insert and Delete Blank>. Tap the button where you want to insert a blank, and tap <Insert>.
-
Page 20: Using The Display
Basic Operations Using the Display 3EEJ-007 The display is a touch panel, allowing you to operate directly on the screen. Avoid the following actions. The display may misfunction or be damaged. ● Pressing forcefully ● Pressing with pointed objects (fingernails, ballpoint pen, pencil, etc.) ●... - Page 21 Basic Operations If an item is mistakenly touched Slide your finger away then release it from the screen to cancel the selection. To return to the previous screen Press to return to the previous screen. ◼ Scrolling the screen The scroll bar is displayed on the screen when there is still information that is undisplayed. If the scroll bar is displayed, tap to scroll the screen.
- Page 22 Basic Operations To move the cursor When is displayed, tap to move the cursor. Changing setting values To adjust a value on a scale, tap <-> / <+>. ● You can change a variety of display-related settings, such as the scrolling speed or display language: Display Settings(P.
-
Page 23: Placing Documents
Basic Operations Placing Documents 3EEJ-008 Place documents on the platen glass. For information about the scannable area of a document, see Main Unit(P. 191) . Use documents that are completely dry When placing documents, make sure that any glue, ink, or correction fluid on the documents has completely dried. -
Page 24: Loading Paper
Basic Operations Loading Paper 3EEJ-009 You can load the paper into the paper drawer or multi-purpose tray. Load the paper you usually use into the paper drawer. The paper drawer is convenient when using large amounts of paper. Use the multi-purpose tray when you temporarily use size or type of paper that is not loaded in the paper drawer. - Page 25 Basic Operations ● Highly textured paper ● Glossy paper Paper handling and storage ● Store the paper on a flat surface. ● Keep the paper wrapped in its original package to protect the paper from moisture or dryness. ● Do not store the paper in such a way that may cause it to curl or fold. ●...
-
Page 26: Loading Paper In The Paper Drawer
Basic Operations Loading Paper in the Paper Drawer 3EEJ-00A Load the paper that you usually use in the paper drawer. When you want to print on paper that is not loaded in the paper drawer, load the paper in the multi-purpose tray. Loading Paper in the Multi-Purpose Tray(P. - Page 27 Basic Operations While squeezing the top part of the front guide, slide it to align with the size indicator for the paper to be loaded. Prepare paper. ● Fan the paper stack well, and tap it on a flat surface to align the edges. Size abbreviations on the paper guides The abbreviations on the paper guides in the paper drawer indicate paper sizes as follows: ●...
- Page 28 Basic Operations Do not exceed the load limit mark when loading paper Make sure that the paper stack does not exceed the load limit mark. Loading too much paper can cause paper jams. When loading envelopes or paper with a logo, see Loading Envelopes in the Multi-Purpose Tray(P.
-
Page 29: Loading Paper In The Multi-Purpose Tray
Basic Operations Loading Paper in the Multi-Purpose Tray 3EEJ-00C When you want to print on paper that is not loaded in the paper drawer, load the paper in the multi-purpose tray. Load the paper that you usually use in the paper drawer. Loading Paper in the Paper Drawer(P. - Page 30 Basic Operations Insert the paper into the multi-purpose tray until the paper stops. ● Load the paper with the print side face down. ● Fan the paper stack well, and tap it on a flat surface to align the edges. Do not exceed the load limit mark when loading paper Make sure that the paper stack does not exceed the load limit mark ( ).
- Page 31 Basic Operations ● You can use only the paper printed with this machine.
-
Page 32: Loading Envelopes In The Multi-Purpose Tray
Basic Operations Loading Envelopes in the Multi-Purpose Tray 3EEJ-00E Make sure to flatten any curls on envelopes before loading them. Also pay attention to the orientation of envelopes and which side is face up. Before Loading Envelopes(P. 28) Loaded Orientation(P. 29) This section describes how to load envelopes in the orientation you want, as well as procedures that you need to complete before loading envelopes. - Page 33 Basic Operations Loosen any stiff corners of the envelopes and flatten any curls. Align the edges of the envelope on a flat surface. Loaded Orientation Load the envelopes in portrait orientation, short edge first, with the non-glued side (front side) face up. Load the envelopes, as shown in the illustrated bellow ( : feeding direction).
- Page 34 Basic Operations...
-
Page 35: Loading Preprinted Paper
Basic Operations Loading Preprinted Paper 3EEJ-00F When you use paper that has been preprinted with a logo, pay attention to the orientation of the paper when loading it in the paper source. Load the paper properly so that printing is performed on the same side as the logo. Loading Paper with Logos in Portrait Orientation(P. - Page 36 Basic Operations Paper drawer Multi-purpose tray Pay attention to the orientation when placing a document. Place as follows, with the document facing down on the platen glass. Platen glass Loading Paper with Logos in Landscape Orientation The loading method varies depending on the size of the paper with the logo and the paper source that is used. When Loading A4-size Paper with Logos Load the paper so that the logo faces up in the paper drawer and faces down in the multi-purpose tray, as shown in the illustrations below.
- Page 37 Basic Operations Paper drawer Multi-purpose tray Pay attention to the orientation when placing a document. Place as follows, with the document facing down on the platen glass. Platen glass...
-
Page 38: Specifying Paper Size And Type
Basic Operations Specifying Paper Size and Type 3EEJ-00H You must specify the paper size and type settings to match the paper that is loaded. Make sure to change the paper settings when you load the paper that is different from the previously loaded paper. You can also register a default paper size and paper type for the multi-purpose tray, which is convenient if you always load paper of the same size and type. - Page 39 Basic Operations When a frequently used paper size is known You can set the machine to display only frequently used paper sizes in the selection screen. Press Tap <Select Frequently Used Paper Sizes>. Select the paper source. Select the frequently used paper sizes. The paper sizes without check mark are displayed in the <Paper Size (Other Sizes)>...
-
Page 40: Registering A Custom Paper Size
Basic Operations Registering a Custom Paper Size 3EEJ-00J You can register a custom paper size and type to load in the multi-purpose tray. Press Tap <Multi-Purpose Tray>. Tap <On>. Tap <Custom>. Specify the paper size. Specify the length of the <X> side. ●... - Page 41 Basic Operations Specify the length of the <Y> side. ● Tap <Y>. ● Input the length of the <Y> side, and tap <Apply>. Tap <Apply>. Select the paper type. LINKS Loading Paper in the Paper Drawer(P. 22) Loading Paper in the Multi-Purpose Tray(P. 25)
-
Page 42: Setting Auto Shutdown Time
Basic Operations Setting Auto Shutdown Time 3EEJ-00L By enabling this setting, you can set the machine to automatically shut down. The machine automatically turns OFF after the specified period of idle time has elapsed since entering the sleep mode. You can cut electric power consumption at night and on holidays if you forget to turn OFF the machine. -
Page 43: Entering Sleep Mode
Basic Operations Entering Sleep Mode 3EEJ-00R The sleep mode function reduces the amount of power consumed by the machine by disabling power flow to the control panel. If no operations will be performed on the machine for a while, such as during a lunch break, you can save power simply by pressing on the control panel. - Page 44 Basic Operations Exiting Sleep Mode Press . You can also tap the display or press any key other than to exit sleep mode.
- Page 45 Copying Copying Copying .................................. 42 ............................44 Basic Copy Operations ............................46 Selecting Copy Paper ..............................47 Canceling Copies ............................49 Various Copy Settings ............................ 50 Enlarging or Reducing ..........................51 Selecting Document Type ............................52 Adjusting Density ................. 53 Copying Multiple Documents onto One Sheet (2 on 1/4 on 1) ...................
-
Page 46: Copying
Copying Copying 3EEJ-00S This chapter describes basic copy operations and various other useful functions. ◼ Using Basic Operations Basic Copy Operations(P. 44) Selecting Copy Paper(P. 46) Canceling Copies(P. 47) ◼ Using Copy Settings to Suit Your Needs Enlarging or Reducing(P. 50) Collating Copies by Page(P. - Page 47 Copying Copying Multiple Documents Splitting Facing Page Documents onto One Sheet (2 on 1/4 on 1) into Separate Pages for (P. 53) Copying(P. 60) ◼ Simplifying Your Frequent Copy Operations Changing Default Settings(P. 62) Registering Frequently Used Copy Settings(P. 63)
-
Page 48: Basic Copy Operations
Copying Basic Copy Operations 3EEJ-00U Place the document(s). Placing Documents(P. 19) Press and tap <Copy>. Enter the number of copies. ● Enter a quantity from 1 to 999. ● Tap <Clear> to cancel the entered quantity. Specify the copy settings as necessary. ●... - Page 49 Copying Press ● Copying starts. ● If you want to cancel copying, tap <Cancel> <Yes>. Canceling Copies(P. 47) When placing documents on the platen glass in step 1 Depending on the copy settings you made, the screen for selecting the document size is displayed when copying multiple documents.
-
Page 50: Selecting Copy Paper
Copying Selecting Copy Paper 3EEJ-00W Specify the paper source that contains the paper to use for printing out copies. NOTE ● You must first specify the size and type of paper that is loaded in the paper source. Specifying Paper Size and Type(P. 34) Loading Paper(P. -
Page 51: Canceling Copies
Copying Canceling Copies 3EEJ-00X If you want to cancel copying immediately after pressing , tap <Cancel> on the screen or press on the control panel. You can also cancel copying after checking the copy status. ◼ Tap <Cancel> on the Screen That is Displayed While Copying ◼... - Page 52 Copying Copy details The number of copies, settings, and other details are displayed. If you only want to check the details without canceling copying, press to return to the copy main screen. <Cancel> Cancels copying. LINKS Basic Copy Operations(P. 44)
-
Page 53: Various Copy Settings
Copying Various Copy Settings 3EEJ-00Y A variety of settings are available to suit your needs, such as when you want to save paper or make your documents easier to read. Enlarging or Reducing(P. 50) Collating Copies by Page(P. 58) Selecting Document Type(P. -
Page 54: Enlarging Or Reducing
Copying Enlarging or Reducing 3EEJ-010 You can enlarge or reduce copies by using a preset copy ratio such as <A5> → <A4>, or by setting a custom copy ratio in increments of 1%. NOTE <Copy Ratio> is not available when using <ID Card Copy>. <Copy>... -
Page 55: Selecting Document Type
Copying Selecting Document Type 3EEJ-011 You can select the optical image quality for the copy depending on the document type, such as text-only documents, documents with charts and graphs, or magazine photos. <Copy> <Original Type> Select the document type <Text> Suitable when copying documents that only contain text. -
Page 56: Adjusting Density
Copying Adjusting Density 3EEJ-012 You can adjust the density of the copy if the text or images in a document are too light or dark. You can also automatically set an optimal density for a document. <Copy> <Density> Adjust the density <Apply>... -
Page 57: Copying Multiple Documents Onto One Sheet (2 On 1/4 On 1)
Copying Copying Multiple Documents onto One Sheet (2 on 1/4 on 1) 3EEJ-013 You can copy two or four documents onto a single sheet at a reduced size. This decreases the number of pages, enabling you to save paper. ● Using <2 on 1>/<4 on 1>... - Page 58 Copying LINKS Basic Copy Operations(P. 44)
-
Page 59: Copying Both Sides Of An Id Card Onto One Page
Copying Copying Both Sides of an ID Card onto One Page 3EEJ-014 You can use <ID Card Copy> to copy the front and back sides of a card onto the same side of a page. This function is useful when copying a driver's license or ID card. ●... -
Page 60: Erasing Dark Borders And Frame Lines (Erase Frame)
Copying Erasing Dark Borders and Frame Lines (Erase Frame) 3EEJ-015 When copying documents that are smaller than the output paper size, frame lines may appear around the edges in the copied image. When copying facing pages from thick book, dark borders may appear. <Erase Frame> enables you to erase these frame lines and dark borders. - Page 61 Copying Basic Copy Operations(P. 44)
-
Page 62: Collating Copies By Page
Copying Collating Copies by Page 3EEJ-016 When preparing multiple copies of multi-page documents, you can select <Group>, <Collate>, <Rotate + Group>, or <Rotate + Collate> for the order of copied papers. This function is useful when preparing handouts for meetings or presentations. <Copy>... - Page 63 Copying <Rotate + Collate> The copies are collated by sequential page order, and each group is rotated 90 degrees. For example, if you are making three copies of a five-page document, the printouts will be arranged in the following order. LINKS Basic Copy Operations(P.
-
Page 64: Splitting Facing Page Documents Into Separate Pages For Copying
Copying Splitting Facing Page Documents into Separate Pages for Copying 3EEJ-017 You can copy documents with two facing pages such as books and magazines into separate pages, dividing the left and right pages. NOTE ● When scanning a facing page document, place it on the platen glass. Place the document face down with its corner aligned with the top-left corner of the platen glass, as shown below. -
Page 65: Configuring Copy Settings To Your Needs
Copying Configuring Copy Settings to Your Needs 3EEJ-018 The default settings are the settings that are displayed whenever you turn ON the machine, or when you press . If you register your frequently used settings as default settings, you can eliminate the need to configure the same settings every time you make copies. -
Page 66: Changing Default Settings
Copying Changing Default Settings 3EEJ-019 The default settings are the settings that are displayed whenever you turn ON the machine, or when you press . If you change these default settings to match the operations that you perform frequently, you can eliminate the need to configure the same settings every time you make copies. -
Page 67: Registering Frequently Used Copy Settings
Copying Registering Frequently Used Copy Settings 3EEJ-01A You can register up to four frequently used combinations of copy settings. By simply selecting a registered setting combination when it is needed, you can eliminate the need to configure the same settings every time you make copies, such as if you frequently set the number of copies to 5, set <Erase Frame>... - Page 68 Using the Machine as a Printer Using the Machine as a Printer Using the Machine as a Printer ........................ 65 ........................... 66 Printing from a Computer .............................. 68 Canceling Prints .......................... 71 Checking the Printing Status ....................... 73 Configuring Print Settings to Your Needs ..............
-
Page 69: Using The Machine As A Printer
Using the Machine as a Printer Using the Machine as a Printer 3EEJ-01C There are many ways to use the machine as a printer. You can print documents on your computer by using the printer driver. Make full use of the print functions to suit your needs. ◼... -
Page 70: Printing From A Computer
Using the Machine as a Printer Printing from a Computer 3EEJ-01E You can print a document made with an application on your computer by using the printer driver. There are useful settings on the printer driver, such as enlarging/reducing, that enable you to print your documents in various ways. Before you can use this function, you need to complete some procedures, such as installing the printer driver on your computer. - Page 71 Using the Machine as a Printer Click [Print] or [OK]. ➠ Printing starts. ● If you want to cancel printing, see Canceling Prints(P. 68) . LINKS Checking the Printing Status(P. 71)
-
Page 72: Canceling Prints
Using the Machine as a Printer Canceling Prints 3EEJ-01F You can cancel printing from your computer or on the control panel of the machine. From a Computer(P. 68) From the Control Panel(P. 69) From a Computer You can cancel printing from the printer icon displayed on the system tray on the desktop. Double-click the printer icon. - Page 73 Using the Machine as a Printer From the Control Panel Cancel printing using ◼ Press to Cancel If the Screen Displays a List of Documents When is Pressed Tap the document to cancel. ◼ to Cancel <Copy/Print Job> <Job Status> Select the document on the <Copy/Print Job Status>...
- Page 74 Using the Machine as a Printer Several pages may be output after you cancel printing. LINKS Basic Printing Operations(P. 66) Checking the Printing Status(P. 71)
-
Page 75: Checking The Printing Status
Using the Machine as a Printer Checking the Printing Status 3EEJ-01H You can check the current print statuses. ● When <Display Job Log> is set to <Off>, you cannot check the print logs. Display Job Log(P. 115) Useful in the Following Cases ●... - Page 76 Using the Machine as a Printer Canceling Prints(P. 68)
-
Page 77: Configuring Print Settings To Your Needs
Using the Machine as a Printer Configuring Print Settings to Your Needs 3EEJ-01J You can register combinations of settings as "profiles" to suit your different printing objectives. Also, you can register the settings that you frequently use as the default settings. Once the default settings are registered, they are displayed automatically in the printer driver screen, and you can skip the operations to specify them and proceed to printing immediately. -
Page 78: Registering Combinations Of Frequently Used Print Settings
Using the Machine as a Printer Registering Combinations of Frequently Used Print Settings 3EEJ-01K Specifying combinations of settings such as "1-sided landscape orientation on A4 size paper in save toner mode" every time you print is time consuming. If you register your frequently used combinations of print settings as "profiles," you can specify print settings simply by selecting one of the profiles from the list. - Page 79 Using the Machine as a Printer Editing a profile By clicking [Edit] on the right side of [Profile] on the screen shown in step 1, you can change the name, icon, or comment of the profiles you have previously registered. However, you cannot edit the pre-registered profiles. Selecting a Profile Simply select the profile that suits your objective, and click [OK].
-
Page 80: Changing Default Settings
Using the Machine as a Printer Changing Default Settings 3EEJ-01L The default settings are the settings that are first displayed whenever you open the print settings screen of the printer driver. You can change these settings to the settings that you use most often. For example, if you always want to print 2 document pages on each printout page, set [2 on 1] as the default page layout setting. - Page 81 Using the Machine as a Printer LINKS Basic Printing Operations(P. 66) Registering Combinations of Frequently Used Print Settings(P. 74)
- Page 82 Using the Machine as a Scanner Using the Machine as a Scanner Using the Machine as a Scanner ......................79 ..........................80 Scanning from the Machine ..........................83 Scanning from a Computer ........................84 Scanning Using an Application ..................... 86 Configuring Scan Settings in ScanGear MF...
-
Page 83: Using The Machine As A Scanner
Using the Machine as a Scanner Using the Machine as a Scanner 3EEJ-01R You can scan original documents by using the control panel of the machine or an application on a computer. Whichever way you use, the scanned documents are converted into electronic file formats such as PDFs. Use the scan function to convert large-volume paper documents into files so that you can organize them easily. -
Page 84: Scanning From The Machine
Using the Machine as a Scanner Scanning from the Machine 3EEJ-01S The sequence of "scanning a document and saving it to a computer" can only be done when scanning from the machine. Scan while specifying what computer documents will be saved to; whether to scan documents in color or black and white; whether to save documents as PDFs or JPEGs;... - Page 85 Using the Machine as a Scanner Scan type Color Resolution File format <Color Scan> Color 300 dpi JPEG (Exif) <Black & White Scan> 300 dpi Black and white PDF (searchable <Custom 1> Color 300 dpi JPEG (Exif) <Custom 2> Color 300 dpi JPEG (Exif) Documents are scanned in black and white only, with no intermediate shades of gray.
- Page 86 Using the Machine as a Scanner Tap <Finish Scan>. ● The save destination folder is displayed on the computer. About the save destination folder ● By default, the scanned data is saved to the [My Documents] folder. A subfolder named with the scanning date is created, and the data is saved to that folder.
-
Page 87: Scanning From A Computer
Using the Machine as a Scanner Scanning from a Computer 3EEJ-01U There are two ways to scan from a computer: using MF Scan Utility and using an application such as an image- processing or word-processing application. Scanning Using MF Scan Utility MF Scan Utility is an application included with the machine that enables you to scan documents or images to a computer. -
Page 88: Scanning Using An Application
Using the Machine as a Scanner Scanning Using an Application 3EEJ-01W You can scan originals from applications such as image-processing or word-processing software. The scanned image is directly loaded in the application, allowing you to edit or process the image immediately. The following procedure varies depending on the application. - Page 89 Using the Machine as a Scanner ● Scanning starts. ● When scanning is complete, the scanned image is forwarded to an application. LINKS Configuring Scan Settings in ScanGear MF(P. 86)
-
Page 90: Configuring Scan Settings In Scangear Mf
Using the Machine as a Scanner Configuring Scan Settings in ScanGear MF 3EEJ-01X You can use ScanGear MF to configure advanced scan settings when you scan. The way of starting ScanGear MF differs depending of the way of scanning from the computer. - Page 91 Security Security Security .................................. 88 ..................89 Protecting the Machine from Unauthorized Access ..........................90 Setting Access Privileges ......................91 Setting the System Manager PIN ........................92 Restricting the Machine's Functions ..........................93 Restricting USB Functions...
-
Page 92: Security
Security Security 3EEJ-01Y Confidential information is handled by information devices everywhere, including computers and printers, and any of these devices may become a target for malicious third parties at anytime. Attackers may directly gain unauthorized access to your devices, or indirectly take advantage of negligence or improper use. Either way, you may incur unanticipated losses when your confidential information is leaked. -
Page 93: Protecting The Machine From Unauthorized Access
Security Protecting the Machine from Unauthorized Access 3EEJ-020 Prevent unauthorized third parties from accessing and using the machine. -
Page 94: Setting Access Privileges
Security Setting Access Privileges 3EEJ-021 Protect the machine from unauthorized access by only allowing users with access privileges to use the machine. When privileges are set, the user must enter a PIN to change settings. System Manager PIN System Manager PIN is intended exclusively for Administrators having full access privileges. If you specify this PIN, you need to log on to the machine using this PIN in order to access <System Management Settings>. -
Page 95: Setting The System Manager Pin
Security Setting the System Manager PIN 3EEJ-022 Set a System Manager PIN that is intended exclusively for Administrators. You can access <System Management Settings> only when the PIN has been entered correctly. It is recommended that only Administrators know the PIN. Tap <Menu>... -
Page 96: Restricting The Machine's Functions
Security Restricting the Machine's Functions 3EEJ-023 Some of the functions of the machine may rarely be used or provide opportunities for misuse. For security purposes, the machine can be set to limit its capabilities by partially or completely disabling these functions. Restricting USB Functions Restricting USB Functions(P. -
Page 97: Restricting Usb Functions
Security Restricting USB Functions 3EEJ-024 You can disable the USB port located on the right side of the machine. If this port is disabled, the machine cannot communicate with a computer via USB. Tap <Menu> in the <Home> screen. Tap <System Management Settings>. ●... - Page 98 Setting Menu List Setting Menu List Setting Menu List ............................. 95 ................................96 Preferences ..............................99 Timer Settings ............................. 104 Common Settings ..............................106 Copy Settings ..............................108 Printer Settings ..........................109 Adjustment/Maintenance .......................... 114 System Management Settings...
-
Page 99: Setting Menu List
Setting Menu List Setting Menu List 3EEJ-025 There are various settings in this machine. You can adjust each of the settings in detail. Access these settings by tapping <Menu> in the <Home> screen. You can print the setting menu in list form to check the current settings: User Data List/System Manager Data List(P. -
Page 100: Preferences
Setting Menu List Preferences 3EEJ-026 All the settings about the display are listed with short descriptions. Default settings are marked with a dagger ( ). If a screen for entering a PIN is displayed Enter the PIN and tap <Apply>. Setting the System Manager PIN(P. - Page 101 Setting Menu List Contrast Adjust the brightness of the display to suit the installation location of the machine. Five Levels <Menu> <Preferences> <Display Settings> <Contrast> Use <->/<+> to adjust the brightness <Apply> Invert Screen Colors Select <On> to invert the display colors. Select <On> if the display is hard to view even after the brightness was adjusted in <Contrast>.
- Page 102 Setting Menu List <Menu> <Preferences> <Display Settings> <Notify to Check Paper Settings> Select <On> or <Off> Message Display Time Specify the interval in seconds at which two different messages are alternately displayed. 1 to 2 to 5 (sec.) <Menu> <Preferences> <Display Settings>...
-
Page 103: Timer Settings
Setting Menu List Timer Settings 3EEJ-027 All the settings about the timer are listed with short descriptions. Default settings are marked with a dagger ( ). NOTE Asterisks ( Settings marked with " " may be unavailable or vary or have different defaults depending on your country or region. - Page 104 Setting Menu List <Menu> <Timer Settings> <Date/Time Settings> <Time Format> Select the display setting Current Date/Time Settings Set the current date and time. Use to move the cursor, and to specify the date and time or switch between <AM>/<PM>. <Menu> <Timer Settings>...
- Page 105 Setting Menu List Start: Month, Week, Day End: Month, Week, Day <Menu> <Timer Settings> <Date/Time Settings> <Daylight Saving Time Settings> Select a month and day <Apply> Auto Reset Time If a key is not pressed for a specified period of time, the screen and the settings are initialized to display the default screen (Auto Reset).
- Page 106 Setting Menu List <Menu> <Timer Settings> <Function After Auto Reset> Select <Default Function> or <Selected Function> Auto Sleep Time If the machine has not been operated or has had no data to process for a specified period of time, the machine enters sleep mode to save energy consumption (Auto Sleep).
- Page 107 Setting Menu List <Menu> <Timer Settings> <Auto Shutdown Time> Set the Auto Shutdown time <Apply>...
-
Page 108: Common Settings
Setting Menu List Common Settings 3EEJ-028 All the settings about the operation of the paper drawer are listed with short descriptions. Default settings are marked with a dagger ( ). Paper Source Auto Selection (P. 104) Paper Source Auto Selection Enable or disable the automatic drawer selection feature for the paper sources. - Page 109 Setting Menu List Functions Select the function for which you want to configure automatic drawer selection. NOTE: Select <Other> for functions such as printing reports and lists. Paper Sources Select the paper source for which you want to enable. NOTE: <Multi-Purpose Tray>...
-
Page 110: Copy Settings
Setting Menu List Copy Settings 3EEJ-029 All the settings about the copy are listed with short descriptions. Default settings are marked with a dagger ( ). Change Default Settings (P. 106) Auto Recognize Original Orientation (P. 107) Initialize Default Settings (P. 107) Change Default Settings You can change the factory default settings about copy. - Page 111 Setting Menu List ID Card Copy Select Layout Finishing Group Collate Rotate + Group Rotate + Collate Book -> 2 Pages Erase Frame Original Frame Book Frame Auto Recognize Original Orientation Automatically rotate images by calculating original size/copy ratio/etc, and print them on paper loaded in the paper source.
-
Page 112: Printer Settings
Setting Menu List Printer Settings 3EEJ-02A All the settings about the printer are listed with short descriptions. Default settings are marked with a dagger ( ). Paper Size Override (P. 108) Print Quality(P. 108) Paper Size Override Select whether to switch between printing on A4 and Letter size paper if one of these paper sizes is loaded but the other is not. -
Page 113: Adjustment/Maintenance
Setting Menu List Adjustment/Maintenance 3EEJ-02C All the settings about adjustment and maintenance are listed with short descriptions. Default settings are marked with a dagger ( ). Printer Density (P. 109) Toner Save (P. 109) Speed/Image Quality Priority for Rotate + Collate (P. 110) Special Processing(P. - Page 114 Setting Menu List Speed/Image Quality Priority for Rotate + Collate When <Rotate + Collate> is set, you can specify either <Speed Priority> or <Image Quality Priority>. Speed Priority Image Quality Priority <Menu> <Adjustment/Maintenance> <Speed/Image Quality Priority for Rotate + Collate> Select <Speed Priority>...
- Page 115 Setting Menu List Mode 5 <Menu> <Adjustment/Maintenance> <Special Processing> <Special Printing Mode M> Select the mode Special Printing Mode N Change the <Special Printing Mode N> setting if paper curls or jams when printing on paper that has absorbed moisture. If <Mode 3> is set, the effect of this setting is maximized, but it may take the machine longer to print. Mode 1 Mode 2 Mode 3...
- Page 116 Setting Menu List <Menu> <Adjustment/Maintenance> <Special Processing> <Special Printing Mode S> Select the mode Special Printing Mode P Set the <Special Printing Mode P> setting to <On> if paper curls when printing on a lightweight paper. NOTE If both <Special Printing Mode P> and <Special Printing Mode N> are enabled, <Special Printing Mode P> overrides <Special Printing Mode N>.
- Page 117 Setting Menu List Clean Fixing Assembly Clean the fixing assembly after a toner cartridge is replaced or if black streaks appear on printouts. Fixing Assembly(P. 157)
-
Page 118: System Management Settings
Setting Menu List System Management Settings 3EEJ-02E All the settings about System Management Settings are listed with short descriptions. Default settings are marked with a dagger ( ). If a screen for entering a PIN is displayed Enter the PIN and tap <Apply>. Setting the System Manager PIN(P. - Page 119 Setting Menu List Germany (DE) Spain (ES) Greece (GR) Sweden (SE) Hungary (HU) Switzerland (CH) Ireland (IE) Ukraine (UA) Italy (IT) Great Britain (GB) Jordan (JO) Other Luxembourg (LU) <Menu> <System Management Settings> <Select Country/Region> Select a country or region Auto Online for Remote Scan Select whether to use this feature to go online for remote scanning, even without using the control panel.
- Page 120 Select how to install the firmware update according to the environment of the machine. ● <Via PC> Select to manually install the firmware update available on the Canon Web site yourself. For instructions on how to install the update, see the instruction manual available on the Web site. ●...
- Page 121 Setting Menu List Select to check details for the current firmware. Via PC Version Information Initialize Menu Select to restore the settings listed below to the factory defaults. You can restore all the settings listed below at once, or you can restore individual settings separately. Initializing Menu(P.
- Page 122 Troubleshooting Troubleshooting Troubleshooting ............................. 119 ..............................121 Clearing Jams ........................ 130 Countermeasures for Each Message ......................133 Countermeasures for Each Error Code ............................134 Common Problems ........................136 Installation/Settings Problems ..........................137 Copy/Printing Problems ..........................138 Miscellaneous Problems ........................139 When You Cannot Print Properly ......................
-
Page 123: Troubleshooting
Countermeasures for Each Message(P. 130) Countermeasures for Each Error Code(P. 133) ◼ Common Problems If you suspect that the machine is malfunctioning, see the following sections before contacting Canon. Common Problems(P. 134) Installation/Settings Problems(P. 136) Copy/Printing Problems(P. 137) Miscellaneous Problems(P. 138) ◼... - Page 124 Troubleshooting...
-
Page 125: Clearing Jams
Do not forcibly remove the jammed document or paper from the machine Forcibly removing the paper may damage parts. If you are not able to remove the paper, contact your local authorized Canon dealer. When a Problem Cannot Be Solved(P. 149) Paper Jams in the Paper Drawer 1 Remove the jammed paper from the output tray. - Page 126 Troubleshooting Press the button on the left cover of the main unit, and open the left cover. Open the drawer 1 left cover.
- Page 127 Troubleshooting Remove the jammed paper. Grip the handle, and pull out the paper drawer 1 until it stops. Remove the jammed paper. Gently push the paper drawer 1 back into the machine until it clicks. Close the drawer 1 left cover. Place your hand where the hand symbol is located on the left cover of the main unit, and then gently close the left cover until it clicks into place in the closed position.
- Page 128 Troubleshooting Paper Jams around the Output Area Remove the jammed paper from the output tray. Press the button on the left cover of the main unit, and open the left cover. Remove the jammed paper.
- Page 129 Troubleshooting The fixing assembly and its surroundings inside the printer are hot during use. Make sure the fixing assembly is completely cool before removing the jammed paper. Touching the fixing assembly when it is still hot may result in burns. Open the drawer 1 left cover.
- Page 130 Troubleshooting Place your hand where the hand symbol is located on the left cover of the main unit, and then gently close the left cover until it clicks into place in the closed position. Paper Jams around the Fixing Assembly Remove the jammed paper from the output tray.
- Page 131 Troubleshooting Remove the jammed paper. The fixing assembly and its surroundings inside the printer are hot during use. Make sure the fixing assembly is completely cool before removing the jammed paper. Touching the fixing assembly when it is still hot may result in burns. Close the drawer 1 left cover.
- Page 132 Troubleshooting Press the button on the left cover of the main unit, and open the left cover. Remove any jammed paper.
- Page 133 Troubleshooting Place your hand where the hand symbol is located on the left cover of the main unit, and then gently close the left cover until it clicks into place in the closed position.
-
Page 134: Countermeasures For Each Message
Troubleshooting Countermeasures for Each Message 3EEJ-04S If the memory is full or you encounter operation problems, a message appears on the display. Find out more information about messages in the following list. Could not perform cleaning. Paper jammed during cleaning. ●... - Page 135 Troubleshooting Paper Size & Settings Mismatch The paper size setting on the control panel does not match the loaded paper size. ● Match the paper size setting specified in <Paper Settings> and the size of the paper that is actually loaded. To use the loaded paper Change the setting of <Paper Settings>...
- Page 136 Turn OFF the power switch, wait 10 seconds, and turn it back ON. If the problem persists, turn OFF the power switch, disconnect the power cord, and contact your local authorized Canon dealer or the Canon help line. Be sure to provide the displayed <Ennn-nnnn>.
-
Page 137: Countermeasures For Each Error Code
Troubleshooting Countermeasures for Each Error Code 3EEJ-04U If printing is not successful or another error occurs, that error appears on a message on the <Status Monitor> screen as a three-digit number (error code). Check the following to find out causes and solutions for each error code. For details of the <Status Monitor>... -
Page 138: Common Problems
3EEJ-02L If you encounter problems when using the machine, check the items in this section before contacting us. If the problems persist, contact your local authorized Canon dealer. Check the Following Is the machine turned ON? Is the power cord connected? ●... - Page 139 Turn OFF the power switch, wait 10 seconds, and turn it ON again. If the problem is solved, the [Error] indicator will turn off and the display will return to standby mode. If the [Error] indicator keeps blinking, unplug the power cord and contact your local authorized Canon dealer. When a Problem Cannot Be Solved(P. 149) Paper Is Not Fed, or Multiple Sheets of Paper Are Fed at a Time.
-
Page 140: Installation/Settings Problems
Troubleshooting Installation/Settings Problems 3EEJ-02R Common Problems(P. 134) also. Problem with the USB Connection Cannot communicate. ● Change the USB cable. If you are using a long USB cable, replace it with a short one. ● If you are using a USB hub, connect the machine directly to your computer using a USB cable. -
Page 141: Copy/Printing Problems
Connect to another USB port on the computer. ● Can you print from a USB connection to another computer? If you also cannot print from other computers, contact your local authorized Canon dealer or the Canon help line. Printing seems to be slow. * ●... -
Page 142: Miscellaneous Problems
However, if you smell something burning, immediately turn OFF the machine, unplug the power plug from the AC power outlet, and contact your local authorized Canon dealer. Continued use may lead to a fire or electrical shock. Water Droplets From in the Output Area. -
Page 143: When You Cannot Print Properly
When You Cannot Print Properly 3EEJ-02W If printing results are not satisfactory, or paper creases or curls, try the following solutions. If the problems persist, contact your local authorized Canon dealer. Streaks Appear on White Streaks Appear(P. 141) Toner Smudges and Splatters Printouts(P. - Page 144 Troubleshooting Paper Curls(P. 145) Printouts Are Skewed(P. 147) Paper Is Not Fed/Two or More Sheets Are Fed Together(P. 147)
-
Page 145: Printing Results Are Not Satisfactory
Troubleshooting Printing Results Are Not Satisfactory 3EEJ-02X Dirt inside the machine may affect printing results. Perform care and cleaning to the machine first. Cleaning the Machine(P. 152) Streaks Appear on Printouts Are you using appropriate paper? ● Check usable paper, and replace with appropriate paper. Available Paper(P. - Page 146 Troubleshooting Are you using appropriate paper? ● Check usable paper, and replace with appropriate paper. Available Paper(P. 194) Loading Paper(P. 20) Is toner running low? ● Check how much toner is left, and replace the toner cartridges as necessary. Replacing the Toner Cartridges(P. 159) Printouts Are Faded Is toner running low? ●...
- Page 147 Troubleshooting Available Paper(P. 194) Loading Paper(P. 20) Is the drum in the toner cartridge deteriorated? ● Replace the toner cartridge with a new one. Replacing the Toner Cartridges(P. 159) Print Density Is Uneven Is toner running low? ● Check how much toner is left, and replace the toner cartridges as necessary. Replacing the Toner Cartridges(P.
- Page 148 Troubleshooting The Toner Adheres to the Hand The paper type setting specified is not appropriate. ● Select the appropriate paper type setting. Loading Paper(P. 20) The paper type loaded is not appropriate. ● Make sure that the number and type of the paper loaded in the paper drawer meets the paper requirements.
-
Page 149: Paper Creases Or Curls
Troubleshooting Paper Creases or Curls 3EEJ-02Y Paper Creases Is paper loaded correctly? ● If paper is not loaded below the load limit mark or is loaded obliquely, it may crease. Loading Paper(P. 20) Are you using paper that has absorbed moisture? ●... - Page 150 Troubleshooting Specifying Paper Size and Type(P. 34) Available Paper(P. 194)
-
Page 151: Paper Is Fed Incorrectly
Troubleshooting Paper Is Fed Incorrectly 3EEJ-030 Printouts Are Skewed Do the paper guides align with the edges of the paper? ● If the paper guides are too loose or too tight, the printouts are skewed. Loading Paper(P. 20) Is the paper source the multi-purpose tray? ●... - Page 152 Troubleshooting Loading Paper(P. 20) ● Check whether mixed sizes and types of paper are loaded together.
-
Page 153: When A Problem Cannot Be Solved
Troubleshooting When a Problem Cannot Be Solved 3EEJ-031 If you have read this chapter and a problem is yet to be resolved, contact your authorized Canon dealer. Do not disassemble or repair the machine yourself ● If you disassemble or repair the machine yourself, it may not be covered by the warranty. - Page 154 Maintenance Maintenance Maintenance ..............................151 ............................152 Cleaning the Machine ................................. 153 Exterior ..............................154 Platen Glass .............................. 155 Transfer Roller ................................156 Drum ............................157 Fixing Assembly ........................159 Replacing the Toner Cartridges ................... 161 Configuring Purchase Information for Consumables ......................
-
Page 155: Maintenance
Maintenance Maintenance 3EEJ-032 This chapter describes upkeep of the machine, including how to clean the machine and initialize settings. ◼ Basic Cleaning Cleaning the Machine(P. 152) ● The machine becomes dirty Exterior(P. 153) ● Smudge marks appear on originals or printouts Platen Glass(P. -
Page 156: Cleaning The Machine
Maintenance Cleaning the Machine 3EEJ-033 Regularly clean the machine to prevent deterioration in printing quality and to ensure that you use it safely and easily. Where to Clean Exterior of the machine and ventilation slots Exterior(P. 153) Interior of the machine and fixing assembly Fixing Assembly(P. -
Page 157: Exterior
Maintenance Exterior 3EEJ-034 Regularly wipe the exterior of the machine, especially around the ventilation slots, to keep the machine in good condition. Turn OFF the machine, and unplug the power cord from the AC power outlet. ● When you turn OFF the machine, data that is waiting to be printed is deleted. Clean the exterior of the machine and the ventilation slots. -
Page 158: Platen Glass
Maintenance Platen Glass 3EEJ-035 Regularly wipe off the dust from the platen glass and the underside of the platen cover to prevent smudges to be printed on documents or printouts. Turn OFF the machine, and unplug the power cord from the AC power outlet. ●... -
Page 159: Transfer Roller
Maintenance Transfer Roller 3EEJ-036 When the transfer roller inside the machine becomes dirty, print quality may deteriorate or dots may appear on printouts. If this happens, follow the procedure below to clean the transfer roller. Note that you cannot clean the transfer roller when the machine has documents waiting to be printed. -
Page 160: Drum
Maintenance Drum 3EEJ-037 When the drum unit inside the machine becomes dirty, print quality may deteriorate. If this happens, follow the procedure below to clean the drum unit. Note that you cannot clean the drum unit when the machine has documents waiting to be printed. -
Page 161: Fixing Assembly
Maintenance Fixing Assembly 3EEJ-038 Dirt may adhere to the fixing assembly inside the machine and cause black streaks to appear on printouts. To clean the fixing assembly, perform the following procedure. Note that you cannot clean the fixing assembly when the machine has documents waiting to be printed. - Page 162 Maintenance ● After cleaning is completed and the message <Finished.> appears, press to return to the <Home> screen.
-
Page 163: Replacing The Toner Cartridges
Maintenance Replacing the Toner Cartridges 3EEJ-039 The machine will display a message when a toner cartridge is nearly empty. Note that the print quality becomes poor if you continue printing without taking any action. You can check the remaining toner level on the display. When a Message Appear(P. - Page 164 Maintenance ◼ Checking Toner Level You can check the level of remaining toner according to the following, whenever you want to. It is recommended that you check the level before you start to print a large job. <Device Information> <Toner Level> Check the toner level Toner Level Displays the amount of remaining toner.
-
Page 165: Configuring Purchase Information For Consumables
Maintenance Configuring Purchase Information for Consumables 3EEJ-03A You can scan and register the documentation of your local authorized Canon dealer (business card, information, etc.). You can print their contact information when you run out of consumables. Registering/Editing Purchase Information(P. 161) Printing Purchase Information(P. - Page 166 Maintenance Press and tap <Menu> <Output Rprt.> <Purchase Information for Consumables>. Tap <Print> <OK> press Deleting Purchase Information Delete purchase information that you no longer need. Press and tap <Menu> <Output Rprt.> <Purchase Information for Consumables>. Tap <Delete Purchase Information> <Yes>.
-
Page 167: How To Replace The Toner Cartridges
Maintenance How to Replace the Toner Cartridges 3EEJ-03C When replacing the toner cartridge, the procedure is also displayed on the screen. Check the information displayed on the screen in addition to the following procedure. Open the front cover. While pressing the unlock tab on the grip ( ), turn the toner cartridge in the direction of the arrow (clockwise). - Page 168 Maintenance Shake the new toner cartridge 5 or 6 times as shown below to evenly distribute the toner inside the cartridge. Install the toner cartridge. ● Make sure that the side of the cartridge with the label is facing up, and push the toner cartridge into the machine as far as it will go.
- Page 169 Maintenance ● Pull out the seal slowly, otherwise the toner may scatter and soil your clothes or skin. ● Make sure that you pull out the seal completely, otherwise print errors may occur. ● Make sure that you pull the seal straight out. Pulling the seal upwards or downwards may break the seal.
-
Page 170: How To Replace The Drum Unit
Maintenance How to Replace the Drum Unit 3EEJ-03E When the drum unit needs to be replaced, a message appears on the display. Follow the procedure below to replace the drum unit. Press the button on the left cover, and open the left cover. To avoid damage to the drum unit, always open the left cover wider than 50 mm. - Page 171 Maintenance Turn a screw and remove it. While gripping the handle of the drum unit, pull the unit out slightly upward. Remove a new drum unit from the package. Do not remove the protective cover before attaching the drum unit to the machine. Hold the protective cover of the drum unit, and align it with the slots inside the main unit.
- Page 172 Maintenance While holding the protective cover, insert the drum unit. Be careful not to touch the blue-green part of the drum. Remove the protective cover of the drum unit. Turn a screw and attach it.
- Page 173 Maintenance Turn the unlock lever to its vertical position. Check the counter enter the date and counter value in the drum counter label. Affix the counter label ( ) on the drum unit. Close the front cover and left cover.
-
Page 174: Printing Reports And Lists
Maintenance Printing Reports and Lists 3EEJ-03F You can check the machine settings by printing reports and lists. User Data List/System Manager Data List You can check the list of the settings ( Setting Menu List(P. 95) ) as well as the content that has been registered in the machine. -
Page 175: User Data List/System Manager Data List
Maintenance User Data List/System Manager Data List 3EEJ-03H You can check the list of setting items ( Setting Menu List(P. 95) ) and current settings registered in the machine. This list includes the paper size and type registered in the machine. <Menu>... -
Page 176: Copy/Print Charge Log Report
Maintenance Copy/Print Charge Log Report 3EEJ-03J You can check the counter numbers which are used for the total counter (charge counter). <Menu> <Output Rprt.> <Print List> <Copy/Print Charge Log Report> Check that the size and type of paper displayed on the screen is loaded in the machine <OK>... -
Page 177: Viewing The Counter Value
● Each item of the counter is counted under the following conditions. ● Depending on the settings performed by the local authorized Canon dealer, the following counter may not be displayed or counter not listed below may be displayed. Number... - Page 178 Maintenance The counted number per one printed/scanned sheet for each item on the counter is as follows: "number in the Size (Large or Small) column" × "number in the Number of Printed/Scanned Sides (One-Sided or Two-Sided) column" Example: For large, single-sided print, the number added to <102: Total 2> is 2 × 1 = 2. Large: Standard size larger than A3/11"...
-
Page 179: Initializing Settings
Maintenance Initializing Settings 3EEJ-03L You can restore the following settings: Initializing Menu(P. 176) Initializing System Management Settings(P. 177) Initializing All Data/Settings(P. 178) -
Page 180: Initializing Menu
Maintenance Initializing Menu 3EEJ-03R You can restore the settings of the machine ( Setting Menu List(P. 95) ). If a screen for entering a PIN is displayed, enter the PIN and tap <Apply>. Setting the System Manager PIN(P. 91) <Menu> <System Management Settings>... -
Page 181: Initializing System Management Settings
Maintenance Initializing System Management Settings 3EEJ-03S You can restore the settings of the machine ( Setting Menu List(P. 95) ). Some settings require restarting the machine to be initialized. If a screen for entering a PIN is displayed, enter the PIN and tap <Apply>. Setting the System Manager PIN(P. -
Page 182: Initializing All Data/Settings
Maintenance Initializing All Data/Settings 3EEJ-03U To make changes to registered data and settings all at once such as when changing the installation location of the machine, you can delete registered data and initialize all settings ( Setting Menu List(P. 95) ) together at the same time. -
Page 183: Replacement Parts
Be careful of counterfeit toners ● Please be aware that there are counterfeit Canon toners in the marketplace. Use of counterfeit toner may result in poor print quality or machine performance. Canon is not responsible for any malfunction, accident or damage caused by the use of counterfeit toner. For more information, see global.canon/ctc. - Page 184 Appendix Appendix Appendix ................................181 ............................182 Third Party Software ............................183 Feature Highlights ........................184 Going Green and Saving Money ............................. 186 Improving Efficiency ..............................187 Going Digital .............................. 189 So Much More ..............................190 Specifications ..............................191 Main Unit .............................
-
Page 185: Appendix
Appendix Appendix 3EEJ-03X This chapter contains technical specifications of this machine, instructions on how to use the User's Guide, disclaimers, copyright information, and other important information for customers. -
Page 186: Third Party Software
Appendix Third Party Software 3EEJ-03Y For information related to third-party software, click the following icon(s). -
Page 187: Feature Highlights
Appendix Feature Highlights 3EEJ-040 This section describes tips for leveraging the features of the machine by category. You can make use of the features according to your intended purposes and operating environment. Going Green and Saving Money(P. 184) Improving Efficiency(P. 186) Going Digital(P. -
Page 188: Going Green And Saving Money
Appendix Going Green and Saving Money 3EEJ-041 Print Multiple Pages on a Single Sheet To really start saving paper, shrink multiple pages onto a single sheet - 2 or 4 pages for copies, and up to 16 pages for print jobs sent from your computer. To copy multiple pages of a document onto one sheet: Copying Multiple Documents onto One Sheet (2 on 1/4 on 1)(P. - Page 189 Appendix There's a setting that uses less toner. Give it a try and save toner and money. For more information about this function, see Printing from a Computer(P. 66) .
-
Page 190: Improving Efficiency
Appendix Improving Efficiency 3EEJ-042 Make Print Settings Quickly with Intuitive Operation You can easily specify the page layout as well as binding position, etc. intuitively on the preview image in the printer driver. The simple click-operation allows you to conveniently make settings while viewing how settings are applied. -
Page 191: Going Digital
Appendix Going Digital 3EEJ-043 Scan Only What You Need What if you're scanning a whole page of a newspaper but all you're really interested in is a headline and a photo? Use ScanGear MF. You can select what you want from a preview, and then have the scanner disregard the rest. - Page 192 Appendix For more information about this function, see Scanning from a Computer(P. 83) . Add Images to a Work in Progress Some applications work with the machine to let you easily import scanned images directly into documents you're working on. This way you can skip the steps of opening a separate application just for receiving the scanned images and then exporting them to the application you're really using.
-
Page 193: So Much More
Appendix So Much More 3EEJ-044 Make Posters Blow up a regular one-sheet printout and make an exceptionally large poster. A large poster will be printed out on nine sheets. Put them together in a 3x3 grid, and voila! For more information about this function, see Printing from a Computer(P. -
Page 194: Specifications
Appendix Specifications 3EEJ-04W Specifications are subject to change without notice for product improvement or future release. ◼ Machine Specifications Main Unit(P. 191) Available Paper(P. 194) ◼ Functional Specifications Scan Function(P. 197) Printer Functions(P. 198) ◼ Environment To Use the Machine System Environment(P. -
Page 195: Main Unit
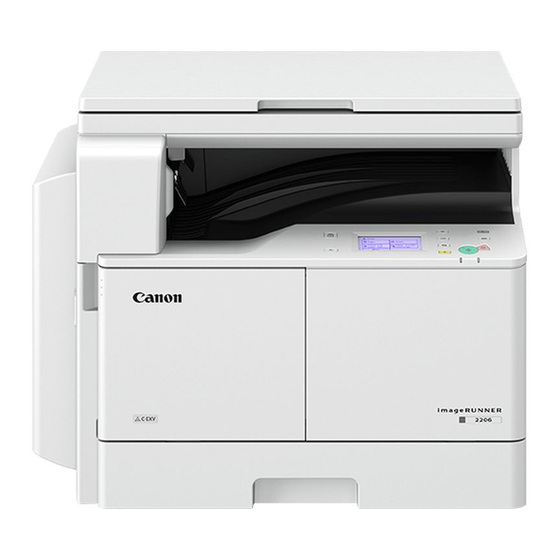
Main Unit 3EEJ-04X ● For information on paper sizes and types for each paper source, see " Available Paper(P. 194) ." Name Canon imageRUNNER 2206 Type Desktop Color Supported Black and White Resolution for Reading 600 dpi x 600 dpi... - Page 196 Appendix (A4) Scanning Speed ● Full Color: 3.42 seconds ● Black and White: 1.71 seconds (A4) Magnification 25 % to 400 % (in 1 % increments) Paper drawer Paper Feeding System/Capacity 300 sheets (64 g/m²)/250 sheets (80 g/m²) x 1 Multi-purpose tray ●...
- Page 197 Appendix Copy/print speeds are measured based on internal testing using A4 size paper copied/printed with 100% copy/print ratio to original on one-sided paper. Internal testing involved continuously copying/printing the same one page of content on plain paper (copy speed is tested by copying on the platen glass). Copy/print speeds may vary depending on paper type, paper size or paper feeding direction.
-
Page 198: Available Paper
Appendix Available Paper 3EEJ-04Y The paper types that can be used with this machine are shown in the following table. ◼ Supported Paper Sizes : Available : Unavailable Paper Sizes Multi-Purpose tray Paper Drawer 1 11" x 17" Legal Letter LetterR Statement StatementR... - Page 199 Appendix Paper Sizes Multi-Purpose tray Paper Drawer 1 Oficio (Brazil) Oficio (Mexico) Oficio (Argentina) Letter (Argentina) LetterR (Argentina) Letter (Government) LetterR (Government) Legal (Government) Foolscap (Australia) Foolscap 16KR Legal (India) Custom Envelope No.10 (COM10) Envelope Monarch Envelope ISO-C5 Envelope DL Can be used for printing reports or lists.
- Page 200 Appendix ◼ Supported Paper Types Chlorine-free paper can be used with this machine. : Available : Unavailable Paper Type Multi-Purpose tray Paper Drawer 1 Plain 1 Plain 2 Heavy 1 Heavy 2 Recycled Color Pre-Punched Bond Transparency Labels Envelope Usable paper sizes are A4, A4R, Letter, LetterR.
-
Page 201: Scan Function
Appendix Scan Function 3EEJ-050 Type Color Scanner Original Scanning Size (Max) Same as "Acceptable Originals" in "Main Unit" Main Unit(P. 191) Resolution (Max) 600 dpi x 600 dpi Scanning Speed Same as "Scanning Speed" in "Main Unit" Main Unit(P. 191) Interface USB 1.1 Full-Speed, USB 2.0 Hi-Speed Protocol Supported... -
Page 202: Printer Functions
Appendix Printer Functions 3EEJ-051 Type Internal Print Size Available Paper(P. 194) Print Speed Same as "Copy Speed" in "Main Unit" Main Unit(P. 191) Resolution Data Processing 600 dpi x 600 dpi Page Description Language (PDL) UFR II-LT Resident Fonts None Interface USB 1.1 Full-Speed, USB 2.0 Hi-Speed... -
Page 203: System Environment
Appendix System Environment 3EEJ-053 System Requirements for the User's Guide Windows ● Internet Explorer 9 and later ● Microsoft Edge ● Firefox ● Firefox ESR ● Chrome macOS ● Safari ● Firefox ● Chrome Linux ● Firefox ● Safari Android ●... -
Page 204: Options
Appendix Options 3EEJ-054 Installing options on the machine enables you to use more features. ◼ Knowing What Types of Options are Available Optional Equipment(P. 201) -
Page 205: Optional Equipment
Appendix Optional Equipment 3EEJ-04C The functionality of the machine can be expanded by installing optional equipment to the machine. Install the optional equipment to meet your needs such as by loading a large amount of paper. Optional Paper Drawer(P. 201) Optional Paper Drawer You can install the optional paper drawer to the machine. -
Page 206: Manuals And Their Contents
Appendix Manuals and Their Contents 3EEJ-04E The manuals listed below are included with the machine. Refer to them as necessary. Read this manual first. It describes the flow of settings to perform before using this machine. Getting Started This manual describes all the functions of the machine in a manual that is viewed using a Web browser. -
Page 207: Using User's Guide
Appendix Using User's Guide 3EEJ-055 The User's Guide is a manual that can be viewed on your computer or mobile device and it describes all of the functions of the machine. You can search from your intended use or enter a keyword to quickly find the page you are looking for. -
Page 208: Screen Layout Of User's Guide
Appendix Screen Layout of User's Guide 3EEJ-056 The User's Guide is divided into different screens, and the content of each screen varies. Top Page Appears when User's Guide is started. Click to also display all of the sections under the chapters. Click to return to the previous display. - Page 209 Appendix Topic Page Contains information about how to configure and use the machine. Navigation See what chapter topic you are currently viewing. Click to jump to the corresponding page. To return to the previous page, click "Back" on your Web browser.
- Page 210 Appendix [Enter keyword(s) here] Enter a keyword or keywords and click to display the search results. You can search for pages containing all the keywords by separating the keywords by a space (blank). Also you can only search for pages containing an exact phrase by enclosing the keywords in double quotation marks. Search result Displays the search results of the pages that contain the specified keywords.
- Page 211 Computer Screens Used in This Manual Unless otherwise noted, displays used in the User's Guide are those for the imageRUNNER 2206. Depending on the operating system you are using, the appearance of the displays used in this manual may slightly differ from...
- Page 212 Appendix Basic Windows Operations 3EEJ-057 Displaying the Printer Folder(P. 208) Printing a Test Page in Windows(P. 208) Checking the Printer Port(P. 209) Checking Bidirectional Communication(P. 210) NOTE ● Depending on the computer that you use, the operation may differ. ◼ Displaying the Printer Folder Windows 7/Server 2008 R2 [Start]...
- Page 213 Appendix Click [Print Test Page] in [General] tab. ➠ The test page is printed. ◼ Checking the Printer Port Open the printer folder. Displaying the Printer Folder(P. 208) Right-click the printer driver icon for this machine, and click [Printer properties] or [Properties].
- Page 214 Appendix In the [Ports] tab, check that the port is selected correctly. ◼ Checking Bidirectional Communication Open the printer folder. Displaying the Printer Folder(P. 208) Right-click the printer driver icon for this machine, and click [Printer properties] or [Properties].
- Page 215 Appendix In the [Ports] tab, make sure that the [Enable bidirectional support] check box is selected.
- Page 216 If you wish to set a longer Activation Time or would like to completely deactivate the Power Save Mode, please consider that this device may then only switch to a lower energy level after a longer period of time or not at all. Canon does not recommend extending the Activation Times from the optimum ones set as default.
- Page 217 The duplex function has been auto enabled during the set up and driver installation and Canon strongly recommends that you do not disable this function. You should continue to use the duplex function to reduce the environmental impact of your work with this product at all times.
- Page 218 Appendix The Adobe PDF logo is a trademark or registered trademark of Adobe Systems Incorporated in the United States and other countries. Copyright © 2008 Adobe Systems Incorporated. All rights reserved. Protected by U.S. Patents 6,185,684; 6,205,549; 7,213,269; 7,272,628; 7,278,168; Patents pending in the U.S. and other countries.
- Page 219 SIL OPEN FONT LICENSE This Font Software is licensed under the SIL Open Font License, Version 1.1. This license is copied below, and is also available with a FAQ at: http://scripts.sil.org/OFL ----------------------------------------------------------- SIL OPEN FONT LICENSE Version 1.1 - 26 February 2007 ----------------------------------------------------------- PREAMBLE The goals of the Open Font License (OFL) are to stimulate worldwide...
- Page 220 SIL OPEN FONT LICENSE 1) Neither the Font Software nor any of its individual components, in Original or Modified Versions, may be sold by itself. 2) Original or Modified Versions of the Font Software may be bundled, redistributed and/or sold with any software, provided that each copy contains the above copyright notice and this license.
- Page 221 The Software Subjected to the Other License Conditions Please refer to Table of Software and respective License terms below, for more detail and corresponding license conditions. Table of Software Names of Software Terms and Conditions of the License: See Page Adobe PDF Scan Library bldimake FreeType...
- Page 222 Adobe PDF Scan Library Portions use software under the following terms: ______________________________________________________________________________________ This product contains either BSAFE and/or TIPEM software by RSA Security Inc. ______________________________________________________________________________________ This product includes software developed by the Apache Software Foundation (http://www.apache.org/). Copyright (c) 1998-2000 The Apache Software Foundation. All rights reserved. Redistribution and use in source and binary forms, with or without modification, are permitted provided that the following conditions are met: 1.
- Page 223 This software consists of voluntary contributions made by many individuals on behalf of the Apache Software Foundation and was originally based on software copyright (c) 1999, International Business Machines, Inc., http://www.ibm.com. For more information on the Apache Software Foundation, please see <http://www.apache.org/>.
- Page 224 The Loki Library Portions Copyright (c) 2001 by Andrei Alexandrescu . This code accompanies the book: Alexandrescu, Andrei. "Modern C++ Design: Generic Programming and Design Patterns Applied". Portions Copyright (c) 2001. Addison-Wesley. Permission to use, copy, modify, distribute and sell this software for any purpose is hereby granted without fee, provided that the above copyright notice appear in all copies and that both that copyright notice and this permission notice appear in supporting documentation.
- Page 225 bldimake Copyright (c) 1985, 1986, 1987, 1988 The Open Group All right Reserved. Permission to use, copy, modify, distribute, and sell this software and its documentation for any purpose is hereby granted without fee, provided that the above copyright notice appear in all copies and that both that copyright notice and this permission notice appear in supporting documentation.
- Page 226 FreeType The FreeType Project LICENSE ---------------------------- 2006-Jan-27 Copyright 1996-2002, 2006 by David Turner, Robert Wilhelm, and Werner Lemberg Introduction ============ The FreeType Project is distributed in several archive packages; some of them may contain, in addition to the FreeType font engine, various tools and contributions which rely on, or relate to, the FreeType Project.
- Page 227 somewhere in your documentation that you have used the FreeType code. (`credits') We specifically permit and encourage the inclusion of this software, with or without modifications, in commercial products. We disclaim all warranties covering The FreeType Project and assume no liability related to The FreeType Project. Finally, many people asked us for a preferred form for a credit/disclaimer to use in compliance with this license.
- Page 228 engine'. This license applies to all files distributed in the original FreeType Project, including all source code, binaries and documentation, unless otherwise stated in the file in its original, unmodified form as distributed in the original archive. If you are unsure whether or not a particular file is covered by this license, you must contact us to verify this.
- Page 229 original files must be preserved in all copies of source files. o Redistribution in binary form must provide a disclaimer that states that the software is based in part of the work of the FreeType Team, in the distribution documentation. We also encourage you to put an URL to the FreeType web page in your documentation, though this isn't mandatory.
- Page 230 o freetype@nongnu.org Discusses general use and applications of FreeType, as well as future and wanted additions to the library and distribution. If you are looking for support, start in this list if you haven't found anything to help you in the documentation. o freetype-devel@nongnu.org Discusses bugs, as well as engine internals, design issues, specific licenses, porting, etc.
- Page 231 Incl Copyright (c) 1994-96 SunSoft, Inc. Permission is hereby granted, free of charge, to any person obtaining a copy of this software and associated documentation files (the "Software"), to deal in the Software without restriction, including without limitation the rights to use, copy, modify, merge, publish, distribute, sublicense, and/or sell copies of the Software, and to permit persons to whom the Software is furnished to do so, subject to the following conditions:...
- Page 232 JPEG "this software is based in part on the work of the Independent JPEG Group.". - 12 -...
- Page 233 math Copyright (c) 1993 by Sun Microsystems, Inc. All rights reserved. Developed at SunPro, a Sun Microsystems, Inc. business. Permission to use, copy, modify, and distribute this software is freely granted, provided that this notice is preserved. copysignf.c:* Copyright (c) 1993 by Sun Microsystems, Inc. All rights reserved. math_private.h:* Copyright (c) 1993 by Sun Microsystems, Inc.
- Page 234 pcftypes.h Copyright (c) 2000, 2001, 2002 by Francesco Zappa Nardelli Permission is hereby granted, free of charge, to any person obtaining a copy of this software and associated documentation files (the "Software"), to deal in the Software without restriction, including without limitation the rights to use, copy, modify, merge, publish, distribute, sublicense, and/or sell copies of the Software, and to permit persons to whom the Software is furnished to do so, subject to the following conditions:...
- Page 235 Copyright (c) 1989-95 GROUPE BULL Permission is hereby granted, free of charge, to any person obtaining a copy of this software and associated documentation files (the "Software"), to deal in the Software without restriction, including without limitation the rights to use, copy, modify, merge, publish, distribute, sublicense, and/or sell copies of the Software, and to permit persons to whom the Software is furnished to do so, subject to the following conditions:...