
Related Manuals for Axor Uno 45113 1 Series


Summary of Contents for Axor Uno 45113 1 Series
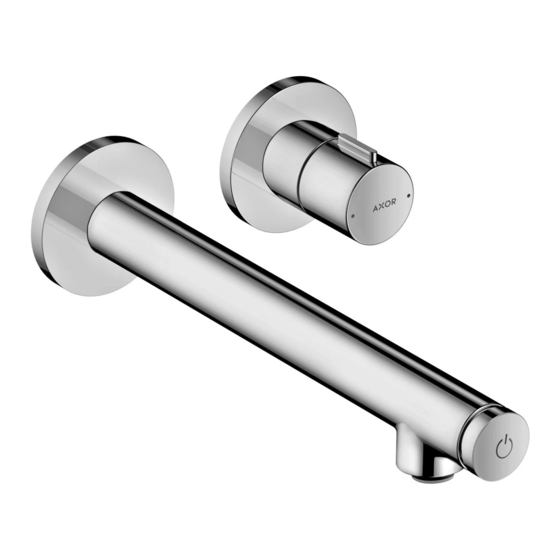
- Page 1 EN Installation / User Instructions / Warranty FR Instructions de montage / Mode d'emploi / Garantie ES Instrucciones de montaje / Manejo / Garantía AXOR Uno 45113xx1 I N S T A L L A T I O N...
-
Page 2: Données Techniques
F R A N A I S E N G L I S H T EC HN IC A L I N F ORMAT IO N D ONNÉ ES TEC HN IQUE S Water pressure Pression d’eau Recommended 15 - 75 PSI (0.1 - 0.5 MPa) recommandée 15 - 75 PSI (0.1 - 0.5 MPa) Maximum... -
Page 3: Datos Tecnicos
E S P A Ñ O L DATOS TEC N ICO S TOOLS REQUIRED / OUTILE S UTILES / HERRA MIENTA S ÚTIL ES Presión en servicio recomendada 15 - 75 PSI (0.1 - 0.5 MPa) max. 145 PSI (1 MPa) Temperatura del agua caliente recomendada 120°-140°... - Page 4 AXOR Uno 45113xx1 6⅝" (168 mm) 4" (100 mm) 10⅜" (262 mm) 1¾"-2⅞" (45 - 73 mm) ⅜" (8 mm) 1⅛" (29 mm) 1½" (37 mm) 8¾" (221mm) I N S T A L L A T I O N S U G G E S T I O N S / S U G G E S T I O N S D ' I N S T A L L A T I O N / S U G E R E N C I A S P A R A L A I N S T A L A C I Ó...
- Page 5 I N S T A L L A T I O N / I N S T A L L A T I O N / I N S T A L A C I Ó N ¹ ⁄ ₁ ₆ "...
- Page 6 30 mm 17 mm E N G L I S H F R A N A I S E S P A Ñ O L Seal the wall around Scellez le mur autour des Selle la pared alrededor the plaster shields using protecteurs à...
- Page 7 E N G L I S H F R A N A I S E S P A Ñ O L Lightly grease the o-ring on the Graissez légèrement le joint Lubrique levemente el retén anu- cartridge adapter. torique de l’adaptateur de lar en el adaptador del cartucho.
- Page 8 24 mm 5.9 ft-lb 8 Nm E N G L I S H F R A N A I S E S P A Ñ O L Install the clamping nut in the Installez l’écrou de serrage sur le Instale la tuerca de sujeción del cartridge port of the rough.
- Page 9 E N G L I S H F R A N A I S E S P A Ñ O L Measure the disance between Mesurez la distance entre le mur Mida la distancia entre la pared the wall and the end of the et l’extrémité...
- Page 10 1¼" (33 mm) 1⅝"- 2" 40 - 50 mm 2"-2¼" ⅞" (23 mm) 50 - 58 mm 2¼"-2⅝" ½" (14 mm) 58 - 68 mm...
- Page 11 E N G L I S H F R A N A I S E S P A Ñ O L Select the appropriate sleeves. Choisissez les gaines Seleccione los manguitos appropriées. apropiados. Connect the sleeves to the escutcheons. Raccordez les gaines aux Conecte los manguitos a los écussons.
- Page 12 ( X + ¹ ¹ ⁄ ₁ ₆ " X + ¹¹⁄ ₁ ₆" X + 17 mm E N G L I S H F R A N A I S E S P A Ñ O L Cut the threaded portion of the Coupez la partie filetée du bec Corte la parte roscada del surti-...
- Page 13 32 mm E N G L I S H F R A N A I S E S P A Ñ O L Wrap the threads with several Enroulez du ruban de plomberie Envuelva las roscas del surtidor layers of plumbers’ tape. autour des filets du bec.
- Page 14 E N G L I S H F R A N A I S E S P A Ñ O L Push the escutcheon assembly Poussez l’ensemble de l’écusson Empuje el escudo contra la against the wall. contre le mur. pared.
- Page 15 > 2 min 1.5 ft-lb 2 Nm E N G L I S H F R A N A I S E S P A Ñ O L Press the Select button to turn the Appuyez sur le bouton de sélec- Presione el botón Seleccionar faucet on.
- Page 16 100°F 38° C E N G L I S H F R A N A I S E S P A Ñ O L Turn the water on. Ouvrez l’eau. Abra el suministro de agua. Turn the cartridge stem until the Tournez la tige de la cartouche Gire el vástago del cartucho hasta output temperature is a comfort-...
- Page 17 S E T H OT WAT ER LIMI TE R / P O SITI ONNER LE LIMIT EUR DE TEMP ÉR ATUR E / AJ U STAR TOP E **107°F (42°C) for example par exemple por ejemplo 0.6 ft-lb 0.8 Nm...
- Page 18 100°F 38° C...
- Page 19 R E P L A C E M E N T P A R T S / P I È C E S D É T A C H É E S / R E P U E S T O S AXOR Uno...
- Page 20 U S E R I N S T R U C T I O N S / I N S T R U C T I O N S D E S E R V I C E / M A N E J O ouvert fermé...
- Page 21 C L E A N I N G R E C O M M E N D AT I O N F O R H A N S G R O H E P R O D U C T S Modern bathroom faucets, kitchen faucets and shower products are made from different materials to comply with the needs of the market with regard to design and functionality.
- Page 22 I MP O RTA N T ⁄ Les residus de produits pour le corps comme les savons liquides, shampooings, gels de douche, teintures pour cheveux, parfums, apres-rasage et vernis a ongles peuvent causer des deteriorations. Rincez le produit avec de l’eau propre après chaque utilisation.
-
Page 23: What We Will Do
Hansgrohe, Inc. (ii) a limited warranty on our hansgrohe and AXOR branded products. any hansgrohe or AXOR product sold for display purposes or (iii) hans- ® ® grohe or AXOR products purchased from unauthorized sellers. - Page 24 Limited Warranty, please also have other rights which vary from state to state. write us or call us toll-free at 800 -334- 0455. AXOR ⁄ Hansgrohe, Inc. 1490 Bluegrass Lakes Parkway Alpharetta, GA 30004 Tel.