Table of Contents
Advertisement
Advertisement
Table of Contents
Troubleshooting

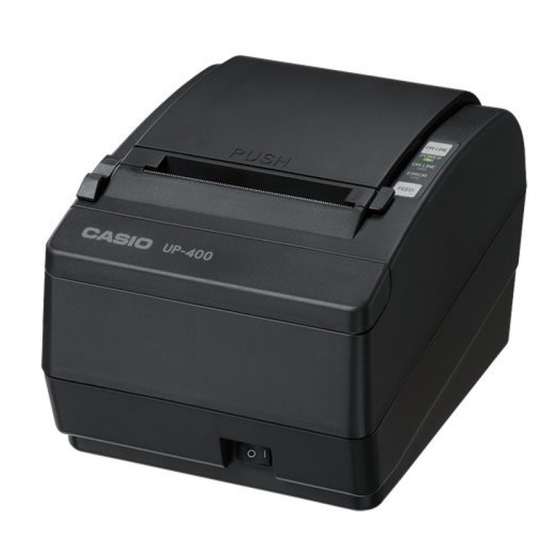
Related Manuals for Casio UP-400


Summary of Contents for Casio UP-400
- Page 1 SERVICE MANUAL UP-400 NOV. 2008 INDEX...
-
Page 2: Table Of Contents
CONTENTS UP-400 PAGE 1. SPECIFICATIONS 1-1. PRINTING SPECIFICATION ................1 1-2. PAPER SPECIFICATION ...................1 1-3. INTERFACE SPECIFICATION ................2 2. DISASSEMBLY .....................4 3. CIRCUITRY 3-1. POWER SUPPLY CIRCUIT ................7 4. MAINTERNANCE & TROUBLESHOOTING 4-1. INSTALLING OR REPLACING PAPER ROLL ..........8 4-2. -
Page 3: Specifications
1. SPECIFICATIONS 1-1. PRINTING SPECIFICATION Printing method: Direct Line Thermal Dot pitch: 8 dot / mm Printing speed: 210 mm per second (Max.) Printing width: 72mm / 576 dots Character structure: 8 x 16 (font B) 12 x 24 (font A) Printing columns: 64 columns / line 44 columns / line... -
Page 4: Interface Specification
1-3. INTERFACE SPECIFICATION 1-3-1. RS-232C SPECIFI CATION Data transmission: Serial. EIA RS232C compliant Synchronization: Asynchronous Handshaking: DTR/DSR or XON/XOFF control (*) Signal levels: MARK = -3 to -15V: Logic “1”/OFF SPACE = +3 to +15V: Logic “0”/ON Baud rate: 4800, 9600, 19200, 38400 bps (*) Data word length: 8 bits, 7 bits (*) Parity Settings:... - Page 5 1-3-5. DRAWER KICK-OUT CONNECTOR The pulse specified by ESC p or DLE DC4 is output to this connector. The HOST can confirm the status of the input signal by using the DLE EOT, GS a, or GS r commands. DESCIPTION Frame ground Output Drawer kick-out drive signal 1...
-
Page 6: Disassembly
2. DISASSEMBLY 1. Remove four screws at the bottom of the printer unit. Screws 2. Remove five connectors (CN1, CN2, CN3, CN5, CN6) and the FFC (J1). – 4 –... - Page 7 4. Remove two screws. 5. Remove the upper cover while the printer cover is open. Screws Precaution when assembling: Precaution when assembling: Let the connector through the hole. Slide the lever of the cover to “close” and then fit the upper cover into the printer.
- Page 8 8. Remove the two screws and then the paper guide and the cutter. Screws 9. Remove the power switch. 10. Remove the four screws and then the printer unit. Screws Screws 11. Loosen the two screws and then remove the end sensor unit. Precaution when assembling: Loosen Precaution when assembling...
-
Page 9: Circuitry
3. CIRCUITRY 3-1. POWER SUPPLY CIRCUIT The power supply source is a DC 24V. LED DS1 VCC3 BUFFER U3. 21 VCC3 DRIVER PRINTER LATCH VCC3 MOTOR PRINTER HEAD VCC3 OTHER IC DRIVER AUTO CUTTER VCC(+5V) VCC3 (+3.3V) POWER SW REGULATOR REGULATOR VP(+24V) DC24V... -
Page 10: Mainternance & Troubleshooting
4. MAINTERNANCE & TROUBLESHOOTING 4-1. INSTALLING OR REPLACING PAPER ROLL CAUTION: Make sure that paper rolls meets printer’s specifi cation. Do not use paper rolls that have one end glued to the core. This causes excessive load on the paper feed. 1: Make sure that the printer is not printing or receiving data, and open the printer cover by sliding the cover open knob. -
Page 11: Paper Jam
4-3. PAPER JAM CAUTION : Do not touch the printer head because they are very hot after continuous printing. Do not attempt to clear a paper jam until the printer cools down. 1: Turn the printer off and slide the cover open knob. 2: Remove the jammed paper and replace the paper roll. -
Page 12: Troubleshooting
4-4. TROUBLESHOOTING Error Contents Causes / Points to check Solutions Can’t turn the printer ON Is the power switch turned ON? Turn the power switch ON Is the connector on the power Connect the connector firmly adapter properly connected? Does the printer reset when you turn If it does, something is wrong with the the power switch ON? operation Panel. -
Page 13: Self Test
4-5. SELF TEST Use the self test to check that your printer is operating properly. It checks the control circuits, printer mechanisms, print quality, and displays the firmware version and DIP switch settings. 1: Make sure that the printer cover is closed properly and turn the power off. 2: While holding down the FEED button, turn the printer on and continue holding down the FEED button until the self test starts. -
Page 14: Setting & Checking The Dip Switches
5. SETTING & CHECKING THE DIP SWITCHES 5-1. Dip switch 1 setting CONTENTS STATUS STATUS Reset By Dtr Signals Invalid Valid Reserved Fixed to Off Protocol XON/XOFF DTR/DSR Baud Rate Refer to the table “a” below Parity Refer to the table “b” below Busy status Buffer full Buffer full + OFFLINE... - Page 15 For changing DIP switch setting 1: Make sure that Power of the printer is turned off. 2: Loose the screw and remove the metal plate at the bottom of the printer. 3: Change the status of DIP switch by using something with a point. 4: Replace the metal cover and fasten the screw.
-
Page 16: Circuit Diagrams
SN74LVC1G32DCK R VCC3 DSRRST# C15 0.1uF CN10 * marks are unm ounted parts. TX25-40P -LT-H1E ON CHIP DEBUG EMULATOR VCC3 SN74LV541APWR Model PWB No. PWB Name SW DIP-10 CASIO COMPUTER CO.,LTD. UP-400 EBL-0950B Main Board Circuit (1/3) – 14 –... - Page 17 3.3K HVCCSW# H e a d Resistance 100pF VCC3 Receipt Near End Sensor * marks are unm ounted parts. RNEND# R182 B2B-EH 0.1uF Model PWB No. PWB Name CASIO COMPUTER CO.,LTD. UP-400 EBL-0950B Main Board Circuit (2/3) – 15 –...
- Page 18 LM2672MX-5.0 EC31QS06 + EC3 0.1uF 0.1uF 100uF /16V R193 100uF /50V TCS7960- 5 320177 BLM31PG330SN1 R101 1000pF * marks are unm ounted parts. Model PWB No. PWB Name CASIO COMPUTER CO.,LTD. UP-400 EBL-0950B Main Board Circuit (3/3) – 16 –...
- Page 19 0.1uF 0.1uF 10uF 0.1uF 0.1uF FB200 BLM31PG500SN1L VCC18 L205 MPZ2012S300A C226 C211 C227 C228 C229 0.1uF 10uF 0.1uF 0.1uF 0.1uF * PARTS NO USE Model PWB No. PWB Name CASIO COMPUTER CO.,LTD. UP-400 EAL-0951 Sub(LAN) Board Circuit – 17 –...
-
Page 20: Parts List
2. As for spare parts order and supply, refer to the “GUIDEBOOK for Spare Parts Supply”, published separately. 3. The numbers in item column corespond to the same numbers in drawing. 4. CASIO does not supply the spare parts without parts code. 5. Remarks Q'ty :... - Page 21 To MAIN PWB CN5 To MAIN To MAIN PWB CN2 PWB CN3 To A To A To A To MAIN PWB CN1 To PRINTER To MAIN PWB J1 To MAIN PWB – 19 –...
- Page 22 UP-400 Price Item Code No. Specification Q'ty Rank Parts Name Code 1. MAIN BOARD UNIT 10328145 PWB/MAIN 20-010667-01 2. CONTROL PANEL UNIT 10328146 ASSY/CONTROL PANEL 20-080050-05 ASSY/HARNESS 03-47411126LF 3. I/F LAN PWB UNIT 10328147 LAN BOARD UNIT 20-010669-01 PLATE/LAN 03-45430600LF 4.
- Page 23 UP-400 Price Item Code No. Specification Q'ty Rank Parts Name Code SCREW 03-55100128LF SCREW 03-55100010LF SCREW 03-55191250LF SCREW 03-55190710LF SCREW 03-55101260BLF SCREW 03-55104020LF SCREW 03-55100440LF SCREW 03-55180045LF SCREW 03-55100420LF SCREW 03-55100121LF SCREW 03-55100430LF SCREW SCREW 03-55100150LF 10328160 ADAPTOR 02-22620150LF – 21 –...
- Page 24 CASIO COMPUTER CO.,LTD. Overseas Service Division 6-2, Hon-machi 1-Chome Shibuya-ku, Tokyo 151-8543, Japan...