
Related Manuals for Casio KL-G2


Summary of Contents for Casio KL-G2
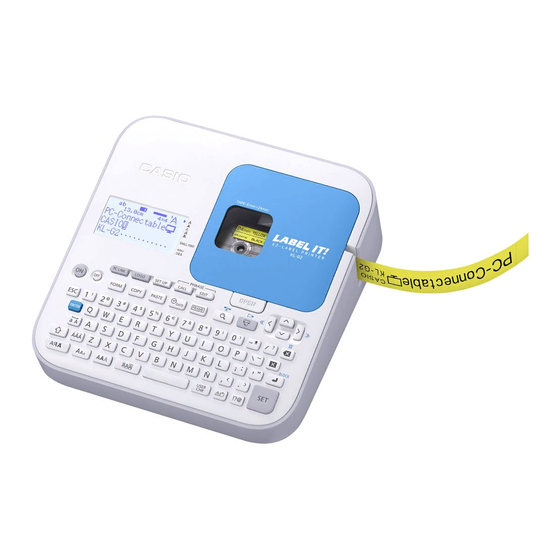
- Page 1 KL-G2 User’s Guide Supported Tape Widths RJA532734-001V02...
- Page 2 Important! Be sure to keep all user documentation handy for future reference.
- Page 3 • CASIO COMPUTER CO., LTD. shall not be held liable for any loss or claims by you or any other person or entity that may arise through the use of this Except as required for proper use or for creating backup copies, any printer.
-
Page 4: Table Of Contents
Creating an Index Label ..............25 Contents Creating a Large Label by Combining Smaller Parts (Large Label) ..................27 Safety Precautions ................4 Precautions during Use ..............7 Part 4 - Free Design Label ............28 Check to make sure that everything has been included with Creating a Free Design Label with Text You Input ......28 the printer. - Page 5 Saving and Recalling Frequently Used Expressions (Phrase Memory) ................46 Inserting the Current Date and/or Time into Text ......47 Copying and Pasting Input Text ...........48 Creating a User Character ............48 Part 9 - Printer Settings ..............51 Confi guring Printer Settings ............51 Setting Items ...................51 Part 10 - Reference ................52 Power Requirements ..............52...
-
Page 6: Safety Precautions
Safety Precautions Warning Smoke, abnormal odor, overheating, and other Thank you for purchasing this CASIO product. Before using it, be sure to read the following Safety Precautions. Keep the abnormalities manual in a convenient location for future reference when necessary. - Page 7 Warning Warning AC Adaptor Disassembly and Modifi cation Before going out, be sure to unplug the power cord/AC adaptor Never try to take this product apart or modify it in any way. from the power outlet and put it in a place away from objects Doing so creates the risk of electric shock, burn injury, and used by animals and pets.
- Page 8 Caution Caution AC Adaptor/USB Cable Batteries Misuse of the AC adaptor/USB cable creates the risk of fi re Misuse of batteries can cause them to leak, resulting in and electric shock. Make sure you observe the points below. damage to nearby objects, or to explode, creating the risk of •...
-
Page 9: Precautions During Use
Precautions during Use Caution Unstable Locations Observe the following precautions to ensure that the printer provides you with Never place the product on an unstable surface, on a high the years of trouble-free operation for which it is designed. • Avoid using the printer in areas exposed to direct sunlight, and in areas shelf, etc. -
Page 10: Check To Make Sure That Everything Has Been Included With The Printer
Check to make sure that everything has been Read this before using the printer! included with the printer. About the printer Label printer This printer can be used to print labels using either of the two methods below. ① Stand-alone printing with the printer only. •... -
Page 11: About The Supplied Cd-Rom
Printer User Documentation About the supplied CD-ROM This section explains the user documentation required for using this printer. • KL-G2 User's Guide (This Manual) Computer Operating Environment (for included • Label Printing Software FA-3000 User's Guide PC Link Software) The Label Printing Software FA-3000 User's Guide is in a PDF fi le on the Operating System: Microsoft Windows 8, Windows 7, Windows Vista, CD-ROM that comes with the printer. -
Page 12: Installing The Software
Select the installation language and then click OK. Installing the Software • This starts the installation process. Follow the instructions that appear on the display. Important! • If your computer is running Windows 8, Windows 7, or Windows Vista, • Be sure to install the software on your computer before connecting the the message shown below will appear during installation. -
Page 13: Uninstalling The Software
• USB driver: On your Windows Start menu, right-click Computer and then select Properties on the menu that appears. On the left side of the screen, click Device Manager. If the USB driver is installed, you will see CASIO NAMELAND KL16H Device in Universal Serial Bus Controllers. Uninstalling the software On the Windows Control Panel–Add or Remove Programs screen, remove... -
Page 14: Part 1 - Getting Ready
Part 1 - Getting Ready Names of Parts and Their Functions USB port Recessed handle Display* AC adaptor connection terminal Battery cover Keyboard ■ If the tape compartment cover comes off Re-attach the cover as shown in the illustration. • Take care when handling and re-attaching the cover. Trying to force it into place can break it. -
Page 15: Power Requirements
■ Disconnecting the AC Adaptor Power Requirements Important! • Do not disconnect the AC adaptor from the printer while printing is in Your printer can be powered using the specifi ed AC adaptor or by commercially available alkaline batteries. progress. Doing so can lead to malfunction. •... -
Page 16: Connecting The Printer To A Computer
The message READY TO TRANSFER DATA will appear on the printer Connecting the Printer to a Computer display after USB driver installation is complete. Important! Important! Be sure to install the printer software on your computer before connecting To print computer data with the printer, fi rst press PC LINK on the printer to the printer to it. -
Page 17: Turning Power On And Off
Creating Text for Printing Turning Power On and Off There are three ways that you can create text for printing. • Create new text → Select NEW and then select the type of label you want ■ To turn power on to create. -
Page 18: Loading And Removing A Tape Cartridge
Check the condition of the tape and the ink ribbon. Loading and Removing a Tape Cartridge • Make sure the leading end of the tape is not bent. If it is, use scissors to trim off the bent part. A tape cartridge is required when printing tape labels. You should use only the •... -
Page 19: Main Key Functions
Set the tape cartridge in place. Main Key Functions • Taking care not to pull on the ink ribbon, pass the tape and ink ribbon between the print head and the rubber roller (illustration below). Press ① ②③④ ⑤⑥ ⑦ ⑧ ⑨ ⑩ ⑪ ⑫ ⑬... -
Page 20: Display Indicators
Part 2 - Performing a Test Print Display Indicators • For information about how to adjust the display contrast and to change the backlight setting, see page 51. Printing a Label ① ② ③ ④ ⑤ ⑥ ⑦ Sample Print ⑧... - Page 21 ■ Printing a Label Input text. • Here, we will input "Business Report". A simple operation prints a label you have created. You can specify the • For information about how to input text, see number of copies and print multiple labels with a single operation. You also page 41.
-
Page 22: Feeding Tape
Important! Press the arrow key. Do not try to affi x a label to the objects or in the locations described below. Specify a cut mode. • On a surface exposed to direct sunlight or rain • Cut modes are explained in the table below. •... -
Page 23: Printing Precautions
Exiting Text Creation and Tape Printing Cut Modes (Auto Cutter) When printing multiple labels during a single print operation, you can confi gure printer settings that control whether or not there should be an automatic cut between each of them. Depending on the type of tape you are printing, use of the cutter can cause cutter wear and malfunction. - Page 24 ■ Four cut modes ■ FULL CUT • FULL CUT performs a full cut at the end of each label. The printer has four cut modes. • To specify a cut mode, perform step 5 under "Printing a Label" (page 20). •...
-
Page 25: Part 3 - Creating A Label
Part 3 - Creating a Label Creating Labels that Include an Automatically Incremented Number (Numbered Label) Label Creation Basics You can use the procedure in this section to create labels with an automatically incremented number as a page number, etc. You can use your printer to create the types of labels described below. - Page 26 Important! Specify a cut mode (page 21) and then press SET. • The number following 99999 is 00000. Numbered label printing continues for the specifi ed number of copies. To avoid running out of tape during a print operation, check before hand to ensure that the tape cartridge being used has suffi...
-
Page 27: Creating An Index Label
Creating an Index Label with Text You Input Creating an Index Label Enter any text you want to include in your index label. You can create and print up to six different index labels at one time. Index labels come in handy when managing fi les, etc. You can also use any of the canned phrases that are built-into printer memory. - Page 28 Creating an Index Label Using Canned Phrases Index Label Canned Phrase List You can use the canned phrases built into printer memory to create an index label. Category Printed Maximum Content Number Perform steps 1 through 2 of the procedure of Copies on page 25.
-
Page 29: Creating A Large Label By Combining Smaller Parts (Large Label)
"2 PIECES" means "printing is divided between two parts". Printing can be Creating a Large Label by Combining Smaller divided among up to four parts. Parts (Large Label) Select PRINT and then press SET. • A preview image (page 19) of the parts You can print multiple parts and then assemble them into a large, multi-part that make up a large label cannot be label. -
Page 30: Part 4 - Free Design Label
Part 4 - Free Design Label Input the second line of text. Created Label Character size adjusted Layout (Imager) according to number of lines. Creating a Free Design Label with Text You Input On the main menu, select NEW and then press SET. Line break symbol Select FREE DESIGN and then press SET. -
Page 31: Specifying The Label Print Format
Input the text for the fi rst block. Specifying the Label Print Format Press FUNCTION and then press • This makes the input text a block. You should change the print format in accordance with the label length, character spacing, text alignment, etc. You can change the format of each block and for the overall label. - Page 32 Setting Item Description Setting Item Description Enables/disables mirror image printing. Select DIRECTION Specifi es either vertical or horizontal text. NORMAL to print normal (not mirror image) text. • Select mirror image text when printing with an Specifi es alignment (LEFT, EQUAL, CENTER, ALIGN RIGHT) of the text within a block.
-
Page 33: Specifying The Label Length
Setting Item Description Specifying the Label Length Specifi es the label overall block alignment. → page 33 Use the procedure in this section to specify the label length manually. • This setting is valid only when FIX is selected for BLOCK-ALIGN Either of two methods can be used to specify the label length. - Page 34 Specifying the Overall Label Length (Fixed Tape Specify the length of the block and then press SET. • Direct input of values is also supported. Length) • The length of each block and the number of input characters affects how the label is printed. You can check the status of the printout by looking at whether the displayed block length is enclosed in brackets as Input text.
-
Page 35: Specifying Text Alignment
Select FIX and then press the Specifying Text Alignment arrow key. This highlights the value. Specifying Text Alignment within a Block Use the procedure below to specify text alignment within a block. Fixed block length Specify a value that is greater than the original value and then press SET. •... -
Page 36: Specifying Character Size
Important! Specifying Character Size Note that the block alignment specifi cation is valid only when FIX is selected for the TAPE LENGTH setting. You can use the procedures in this section to manually specify character size. • If you don't specify character size manually, the size is adjusted Input text and divide it into blocks (page 28). - Page 37 Specifying the Character Size for a Specifi c Line Move the cursor to the fi rst character of the text whose size you want to change and then press SET. of Text Move the cursor to the last character of the text whose size you want to You can use the formats in the table below to specify the character size for a change and then press SET.
-
Page 38: Small Font
Selected format Select the format you want to use 24mm (1"), Number 12mm ( ") 9mm ( ") and then press SET. Format 18mm ( ") of Lines wide wide wide 1×1 1×1 1×1 1×1 1×1 2×2* Important! 1×1 Either of the events below will cause a line character size setting to be 2×2* cancelled automatically. -
Page 39: Adding A Frame To A Label
Select the frame you want to use and then press SET. Select PRINT and then press SET. Bar Code Types KL-G2 (Printer) FA-3000 Important! EAN-13 If you print with a frame when have a tape length (page 32) specifi ed, the EAN-8 printed label may be longer than the specifi... -
Page 40: Sample Print
Important! Input comment text (0 to 60 characters) and then press SET. • Be sure to use a 12mm ( • Without inputting any comment text, press SET. ") wide or wider tape cartridge for bar code label printing. Input data and then press SET. •... - Page 41 The check digit is automatically calculated in accordance with input data. Bar Code Specifi cations For EAN-13, EAN-8, and UPC-A, and when using a check digit with ITF, Number of the check digit is appended at the end of the printed digits. When using a auto appended check digit with CODE39 or CODABAR, the check digit is appended one Number...
-
Page 42: Part 6 - Storing And Recalling Label Data
Part 6 - Storing and Recalling Part 7 - Using a Built-in Logo Label Data Inserting a Built-in Logo into a Label Storing Label Data The printer has a number of built-in labels that include logos and text for retail and offi... -
Page 43: Part 8 - Inputting And Editing Text
Part 8 - Inputting and Editing Select the print size, enable or disable mirror image printing, and then press SET. • You can also print multiple tapes and later Text assemble them into a large label. For information about print sizes, see page 41. This section explains basic text input and editing operations. -
Page 44: Inputting Illustrations
Inputting Accent Symbols Inputting Illustrations The printer has a collection of built-in illustrations divided between two Press groups. For information about available illustrations and their groups, see the Press the key of the character that illustrations table (page APP-4). you want to accent. •... -
Page 45: Editing And Deleting Text
Editing Input Text Editing and Deleting Text The method for editing text depends on whether you are using the INSERT mode or OVERWRITE mode. For information about switching between Deleting a Single Character INSERT and OVERWRITE, see "Confi guring Printer Settings" (page 51). ■... -
Page 46: Changing The Font
Move the cursor to the last Font indicator Changing the Font character of the text whose font you want to change and Your printer supports the fonts below. then press SET. • The font of the text being Font Example Font Example input is shown in the upper... -
Page 47: Using Text Effects
Select the range of text where you want to apply the character style Using Text Effects setting and then press SET. • If ALL is selected for the Free Design Label setting of the selected Use the procedures in this section with a free design label to shade or range of text, simply press SET. -
Page 48: Saving And Recalling Frequently Used Expressions (Phrase Memory)
Removing a Text Effect Saving and Recalling Frequently Used Expressions (Phrase Memory) Press Select CANCEL and then press SET. You can save frequently used terms and expressions in printer memory for • If you want to remove a single text effect from text where multiple text later recall when you need them. -
Page 49: Inserting The Current Date And/Or Time Into Text
Creating, Editing, or Deleting a Phrase Memory Inserting the Current Date and/or Time into Text Record Press DATE. Press EDIT. • This displays the current date and time (page 51), and then displays a Select MAKE and then press SET. screen for specifying the date and time input format. -
Page 50: Copying And Pasting Input Text
Copying and Pasting Input Text Creating a User Character You can create user characters that are not included with the printer's normal Copying Text character and symbol set. While inputting text, press COPY. • You can have up to four user characters stored in printer memory. •... - Page 51 Cursor Create a user character. After creating a user character, press SET. Scale Scale Select the location where you want to save the user character and then ↓ ↓ press SET. • If the location already contains a user character, the above step will delete the existing character and replace it with the new one.
- Page 52 Editing an Existing User Character Deleting a User Character from Memory Press USER CHR. Press USER CHR. Select EDIT and then press SET. Select DELETE and then press SET. Select the user character you want to edit and then press SET. Select the user character you want to delete and then press SET.
-
Page 53: Part 9 - Printer Settings
Setting Items Part 9 - Printer Settings Setting Item Description This section explains how to confi gure text input mode, screen brightness, DEFAULT FONT Specifi es the initial default font setting for input. and other printer settings. INPUT Specifi es the text input mode (INSERT or OVERWRITE). BACKLIGHT Enables or disables the screen backlight. -
Page 54: Part 10 - Reference
Part 10 - Reference Close the battery cover. Power Requirements Your printer can be powered using the specifi ed AC adaptor or by commercially available alkaline batteries. • Before using the printer, be sure to read the information under "Safety Precautions"... -
Page 55: User Maintenance
If, for any reason, you cannot fi nd required. the solution to your problem here, contact your original retailer or authorized CASIO service center. Important! • Nothing appears on the display when I press ON. - Page 56 • The printer doesn't print. • Ink ribbon is coming out of the tape outlet along with the tape. • Power turned off during printing. • The tape cartridge was loaded while there was slack in the ink • Batteries are dead or you are using the wrong type of batteries. ribbon.
-
Page 57: Error Messages
• NOW PRINTING (Appears when a print operation stops.) Error Messages • The printer has become overheated due to successive print operations. • ILLEGAL CHARACTERS! → Please wait without doing anything • You are attempting to input and print characters that are not allowed Printing will resume when the printer returns to normal temperature. - Page 58 • THIS IS THE WRONG TYPE OF TAPE CARTRIDGE! • TOO MANY LINES! • The tape compartment cover is not closed securely. • The label you are trying to print contains more than the allowable number of lines for the tape width you are using. →...
- Page 59 Tape Width, Number of Lines, Size Factor List Built-in Logo List • PRICE The maximum number of printable lines and maximum vertical size factor depend on the tape width and format being used. 12mm 18mm User's ") ") ") ") Guide 24mm Page...
- Page 60 • WORK • ATTENTION...
-
Page 61: Specifi Cations
Specifi cations Model: KL-G2 INPUT Keyboard Layout: Typewriter (QWERTY) Character Types Alpha: 52 (A to Z, a to z); 179 (Á, ß, Ç, etc.) Numbers: 10 Greek: 48 Russian: 66 Symbols: 283 Illustrations: 245 Display Type: Liquid crystal display LCD: 128 × 64 dots + symbols (16 characters x 4 lines) - Page 62 Number of printable lines: 1 to 2 for 6mm ( ") wide tape 1 to 3 for 9mm ( ") wide tape 1 to 5 for 12mm ( ") wide tape 1 to 8 for 18mm ( ") and 24mm (1") wide tape Built-in Memory Text memory: Approximately 2,000 characters...
-
Page 63: Appendix
Appendix Accented Characters APP-1... - Page 64 APP-2...
- Page 65 ● GREEK, RUSSIAN Symbols ● SYMBOL ● DINGBAT ● SUPER/SUB ● NUMBER APP-3...
- Page 66 ● ILLUST 2 Illustrations ● ILLUST 1 APP-4...
- Page 67 Frames APP-5...
- Page 68 APP-6...
- Page 69 Manufacturer: CASIO COMPUTER CO., LTD. 6-2, Hon-machi 1-chome, Shibuya-ku, Tokyo 151-8543, Japan Responsible within the European Union: Casio Europe GmbH Casio-Platz 1, 22848 Norderstedt, Germany www.casio-europe.com...
- Page 70 CASIO COMPUTER CO., LTD. 6-2, Hon-machi 1-chome Shibuya-ku, Tokyo 151-8543, Japan MO1504-B Printed in China/Imprimé en Chine © 2015 CASIO COMPUTER CO., LTD.