Table of Contents
Advertisement
Advertisement
Table of Contents

Related Manuals for Airlink101 AIC250


Summary of Contents for Airlink101 AIC250
- Page 1 SkyIPCam 250 Network Camera Model # AIC250 User’s Manual Ver. 1B...
-
Page 2: Table Of Contents
1. Introduction... 4 2. Getting Started ... 5 3. Installing the Setup Wizard... 6 4. Gathering Information ... 8 5. Using the Setup Wizard ... 9 6. Viewing Images ... 14 7. Web Configuration Utility ... 16 7.1.1 Management – System... 17 7.1.2 Management –... - Page 3 9.4.9 Schedule-Recording Configuration ... 56 9.4.10 Others... 58 9.4.11 Log List... 59 9.4.12 Account ... 60 9.4.13 About... 61 10. Xplug Control ... 62 10.1 Installing Xplug Control ... 62 10.2 Enabling ActiveX... 63 Appendix... 66 Sending Images via Web Browser... 66 Technical Support ...
-
Page 4: Introduction
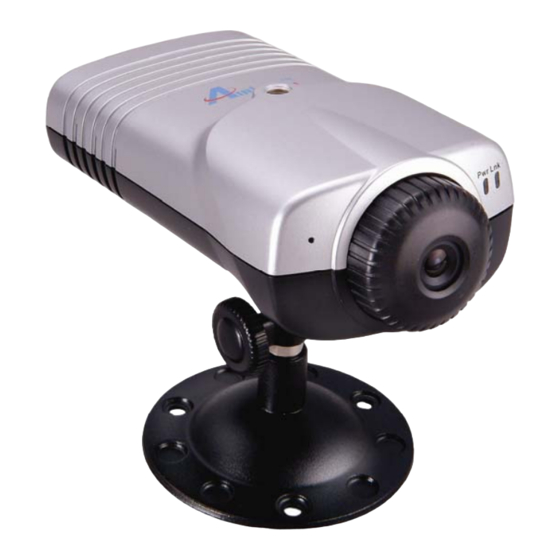
1. Introduction Congratulations on your purchase of this SkyIPCam 250. The IP Camera allows you to view images and live videos from internal and external networks. With a built-in CPU and Web Configuration Utility, the IP Camera is a standalone network device that delivers high quality videos at a low cost of ownership. -
Page 5: Getting Started
2. Getting Started Note: Before using the IP Camera, you’ll need to perform the following tasks: 1. Connect the IP Camera to your network. 2. Install the Setup Wizard. 3. Gather information about your local network address. 4. Configure the IP Camera using the Setup Wizard. Please follow the steps in this Manual carefully to ensure proper setup of the IP Camera. -
Page 6: Installing The Setup Wizard
3. Installing the Setup Wizard Step 1 Insert the provided CD and wait for the autorun screen to appear. Step 2 Click on Install Wizard. Note: If the autorun screen does not appear automatically, go to Start, Run, type D:\autorun.exe (where D is the letter of your CD drive) and click OK. Step 3 Click Next. - Page 7 Step 4 Click Yes to accept the License Agreement. Step 5 Click Next to accept the default Destination Folder. Step 6 Click Finish to complete the installation.
-
Page 8: Gathering Information
4. Gathering Information Note: Before using the Setup Wizard, you’ll need to take note of your local network address. Step 1 Click on Start, Run, and type command (for Windows 95/98/ME) or cmd (for Windows 2000/XP) and click OK. The command prompt will appear. Step 2 At the command prompt, type ipconfig and press Enter. -
Page 9: Using The Setup Wizard
5. Using the Setup Wizard Step 1 Go to Start > (All) Programs > AirLink101 IP Camera Setup Wizard. Step 2 Select the IP Camera you want to configure from the list and click on the Wizard button. - Page 10 Step 3 If the Camera’s default IP Address is on a different subnet, the following message will appear. Click Yes to continue. Note: If you do not receive this message, skip to Step 4 Enter admin for both the Admin ID and Password and click OK. Step 5 In the IP Address field, change the first three numbers to match your local network address.
- Page 11 Step 6 Enter the Subnet Mask and Gateway fields with exactly the same values as you got from running ipconfig. Click OK to continue. Step 7 After the Camera has restarted, click the Exit button to close the Setup Wizard. Step 8 Start the Setup Wizard again and make sure the Current IP Address field displays the new IP Address.
- Page 12 Step 9 The Setup Wizard appears asking you to change the Admin ID and Password. The default Admin ID and Password is admin. Step 10 Enter admin for both the Admin ID and Password field, click on the Change checkboxes and enter the New ID and New Password and click Next.
- Page 13 Step 11 If you need to change the Camera’s IP Address because another network device is already using the same address, you can assign a new address here and click Next. Step 12 Verify all the fields are correct and click Restart to save the settings and reboot the Camera.
-
Page 14: Viewing Images
6. Viewing Images Note: The following steps describe how to view images from within the same local area network as the IP Camera. To view images from an external network such as the Internet, please refer to Section 8 of this manual for further instructions. Step 1 At the Setup Wizard, select the desired camera from the list and click on the Web Config button. - Page 15 Step 3 Turn the Camera’s lens clockwise or counter-clockwise to focus. Note: ActiveX and/or Java Applet must be installed and enabled on your Web Browser (Internet Explorer or Netscape) before you can view the live videos. Step 4 If you need to install Java Virtual Machine on your computer, do not follow the on-screen XP instructions.
-
Page 16: Web Configuration Utility
7. Web Configuration Utility The built-in Web Configuration Utility allows you to remotely manage the IP Camera with the ease and convenience of your Web Browser (Internet Explorer or Netscape). Step 1 Open your Web Browser (Internet Explorer or Netscape), enter the default IP Address of the Camera 192.168.1.240 in the Address Bar and press Enter. -
Page 17: Management - System
The Management page appears by default. You can select different pages at the Top Menu Bar, while Sub-menus for each page are available at the left-hand side. 7.1.1 Management – System The Management – System page displays the Device and Ethernet Status of the Camera. -
Page 18: Management - Video
7.1.2 Management – Video The Management – Video page displays the Video Status of the Camera. You can click on Refresh to update the page. 7.1.3 Management – Network The Management – Network page displays the Network Status of the Camera. You can click on Refresh to update the page. -
Page 19: Management - User
7.1.4 Management – User The Management – User page displays all the Active Users who are currently connected to the Camera. You can click on Refresh to update the page. 7.2.1 Configuration – System The Configuration – System page allows you to configure the System Settings of the Camera. -
Page 20: Configuration - Video
7.2.2 Configuration – Video The Configuration – Video page allows you to configure the Video Settings of the Camera. Video Resolution: Select the desired video resolution. Compression Rate: Select the desired video compression rate. Higher compression rate yields smaller file size but with less video quality and vice versa. Frame Rate: Select the desired frame rate. -
Page 21: Configuration - Network
7.2.3 Configuration – Network The Configuration – Network page allows you to configure the Network (TCP/IP) Settings of the Camera. IP Address Mode: Fixed IP: Assign a static IP Address for the Camera (recommended) Dynamic IP: Receives a dynamically assigned IP Address from the router of DHCP server. -
Page 22: Configuration - User
DNS IP Address: Enter your ISP’s DNS IP Address here if you want to host videos over the Internet. Dynamic DNS: Select to enable or disable Dynamic DNS (DDNS). You must register with one of the Service Providers listed in the drop-down menu first then enter your account information in the applicable fields. -
Page 23: Configuration - Date & Time
7.2.5 Configuration – Date & Time The Configuration – Date Time page allows you to configure the Date & Time Settings of the Camera. Synchronized with Time Server: The date and time will be synchronized with the Time Server you’ve specified. IP Address: Enter the IP Address of the Time Server Protocol: Select either NTP or Time as your protocol TimeZone: Select your time zone based on the GMT setting. -
Page 24: Configuration - Upload
7.2.6 Configuration – Upload The Configuration – Upload page allows you to configure the Upload Settings of the Camera. FTP Server: Enter the information for the FTP server that you want to upload the images to. Time Schedule: You can setup a time schedule to always upload or periodically upload images to the designated FTP server. -
Page 25: Configuration - E-Mail
7.2.7 Configuration – E-mail The Configuration – E-mail page allows you to configure the E-mail Settings of the Camera. E-mail Account: Enter the information for your SMTP E-mail account that you want to e-mail the images to. Time Schedule: You can setup a time schedule to always e-mail or periodically e-mail images to the designated e-mail account. -
Page 26: Tools - Ftp Server Test
7.3.1 Tools – FTP Server Test The Tools – FTP Server Test page allows you to test the FTP Server Settings of the Camera. Click on Test to perform the test. A jpeg file will be uploaded to the FTP server you specified. -
Page 27: Tools - Reset
7.3.3 Tools – Reset The Tools – Reset page allows you to Reset the Camera. Click on Yes to perform the reset. 7.3.4 Tools – Factory Reset The Tools – Factory Reset page allows you to perform a Factory Reset on the Camera. Click on Yes to reset the Camera and return all the settings to the factory default. -
Page 28: Tools - Firmware Upgrade
7.3.5 Tools – Firmware Upgrade The Tools – Firmware Upgrade page allows you to upgrade the Camera firmware. You can check our website at available for download. Step 1 Download the new firmware from our web site at Step 2 Unzip the new firmware. -
Page 29: Tools - Backup
7.3.6 Tools – Backup The Tools – Backup page allows you to Backup and Restore the Camera’s settings. To backup the Camera’s settings to your computer, click on the Backup button. A window will appear asking for the save location. The settings will be saved as Config.bin To restore the saved settings, click on the Browse button, browse to the saved file, and click on the Restore button. -
Page 30: Viewing Videos From External Networks
8. Viewing Videos from External Networks If you want to access the Camera from an external network such as the Internet, please read the following example carefully and follow the steps. Before you begin, you’ll need to know your Internet IP Address (WAN IP) assigned by your Internet Service Provider (ISP) and at least one of your ISP’s DNS IP Address. - Page 31 Step 3 Enter admin for both the User name and Password or enter the new User name and Password that you have previously specified and click OK. Step 4 Click on Configuration then Network.
- Page 32 Step 5 Enter your ISP’s DNS IP Address at the DNS IP Address field. Step 6 Select Enable for the Second HTTP Port and enter a Port Number for the Camera (default is 81). Important: You must assign a port number that’s not in use by any other application on your network.
-
Page 33: Ipview Pro
9. IPView Pro The bundled IPView Pro software features a user-friendly interface that allows you to manage, view, and configure multiple IP Cameras on your network. Follow the steps below if you wish to install and use this software. 9.1 Installing IPView Pro Step 1 Insert the provided CD and wait for the autorun screen to appear. - Page 34 Step 4 Click Yes to accept the License Agreement. Step 5 Click Next to accept the default Destination Folder. Step 6 Click Finish to complete the installation.
-
Page 35: Starting Ipview Pro
9.2 Starting IPView Pro To start IPView Pro, go to Start > (All) Programs > Airink101 IPView Pro > Airlink101 IPView Pro The main screen will appear as below:... -
Page 36: Adding Camera Using The Search Method
9.2.1 Adding Camera using the Search Method Before you can do anything, the camera must be added to the Camera List first. If you have more than one camera, you’ll need to add the additional cameras to the list as well. The Search Method is the easiest way to add your local cameras to the list. - Page 37 Step 3 Verify your camera is connected to your network and is powered on. Click on the Search button. Step 4 Select your camera from the Add Camera list and click on Add Camera.
- Page 38 Step 5 Enter the User Name and Password for the camera. (Default is admin for both). Step 6 You should see your camera added to the Camera List. Step 7 Click Save to apply the changes.
- Page 39 Step 8 Click on the System Configuration button to close the System Configuration Window. You should now see live images from the camera. Note: If you want to add a camera located on a remote network (through the Internet), you must add the camera using the Input IP method described below.
-
Page 40: Adding Camera Using The Input Ip Method
9.2.2 Adding Camera using the Input IP Method An alternative way to add your local camera to the Camera List is to use the Input Method. If you want to add a camera located on a remote network (through the Internet), you must use this method as well. - Page 41 Step 2b For remote camera, enter the Internet IP Address (WAN IP) of the remote router and the port number of the Second HTTP Port of the remote camera and click Add Camera. Step 3 Enter the User Name and Password for the camera. (Default is admin for both). Step 4 You should see your camera added to the Camera List.
-
Page 42: Using Ipview Pro
9.3 Using IPView Pro This section describes the various features of IPView Pro. -
Page 43: Status Mode Window
9.3.1 Status Mode Window The Status Mode Window displays a list of cameras that are added to IPView Pro as well as the status of each selected camera. Select the desired camera from the list then click on the Change Status Mode button to view the status of the camera. - Page 44 Use the Camera Buttons to control the camera’s various functions. From left to right: Connect/Disconnect: Connects or disconnects the video signals from the selected camera. Rotate Image Angle: Rotates the angle of the video. Snapshot: Takes a snapshot image of the current video. When you click on this button, a window will appear asking you to specify the image name and the save location.
-
Page 45: View Window And View Mode Buttons
9.3.2 View Window and View Mode Buttons The View Window displays video from the currently selected camera. Use the View Mode Buttons to select the desired viewing mode. From left to right: Up/Down Arrows: If you have more than one camera in your network, you can use the Up/Down Arrow Buttons to view the videos from each camera. -
Page 46: Control Panel
9.3.3 Control Panel The Control Panel contains essential buttons for operating IPView Pro. Key Lock: The Key Lock button locks all the buttons on the IPView Pro for security purposes. If you have enabled a password login for IPView Pro, you’ll need to input the same password to unlock the key lock. - Page 47 Play: Click on the Play button to playback the recorded videos from your hard drive. A window will appear asking you for the location of the recorded video. Select the desired video and click OK to begin playback. System Configuration: Click on the System Configuration Button to open the System Configuration Window.
-
Page 48: System Configuration
9.4 System Configuration The System Configuration Window is where you configure the settings of IPView Pro and all the cameras that are added to the Camera List. 9.4.1 Camera Configuration The Camera Configuration page allows you to add the cameras in your network to IPView Pro’s Camera List. -
Page 49: Web Configuration
9.4.2 Web Configuration The Web Configuration page allows you to access the Web Configuration Utility of the selected camera. Use the drop-down menu to select the desired camera and click on System Administration to enter the camera’s Web Configuration Utility. -
Page 50: Motion Configuration-1
9.4.3 Motion Configuration-1 The Motion Configuration-1 page allows you to set the Motion Detection settings. Select the desired camera from the drop-down menu. Detect Region: When you select Full picture, the camera will monitor the entire screen. Sensitivity Level: Adjust the slide bar to set the sensitivity level of the motion detection. Once motion is detected, recording will begin if you have enabled Motion Record from the Record Button. -
Page 51: Motion Configuration-2
9.4.4 Motion Configuration-2 The Motion Configuration-2 page allows you to set the desired action when motion is detected. Select the desired camera from the drop-down menu. Motion Options: Check on each box to enable the desired action when motion is detected. Invoke Alarm: A notice will appear in the Status Mode Window when motion is detected. -
Page 52: Tools
9.4.5 Tools The Tools page allows you to perform various administrative functions on the selected camera. Select the desired camera from the drop-down menu. Reset: Click on the Reset button to reset the selected camera. Factory Reset: Click on the Factory Reset button to reset the camera and return all of the camera’s settings to factory default. -
Page 53: Mail Configuration
9.4.6 Mail Configuration The Mail Configuration page allows you to specify the recipient of the E-mail alert when motion is detected and the Send e-Mail option is selected. Mail Server: Enter the IP Address of the Mail Server that is used to send your e-mail. Mail From: Enter the sender’s e-mail address. -
Page 54: Proxy Server
9.4.7 Proxy Server The Proxy Server page allows you to specify the use of a proxy server. Proxy Server: Check on this box to enable the use of a proxy server. Address: Enter the IP Address of the desired proxy server. Port: Enter the port number for the proxy server. -
Page 55: Recording Configuration
9.4.8 Recording Configuration The Recording Configuration page allows you to set the recording’s storage settings. Reserved HDD Space for MS-Windows OS: Use this drop-down menu to select the size of the hard drive space you want to reserve for your Windows operating system. (500 MB –... -
Page 56: Schedule-Recording Configuration
9.4.9 Schedule-Recording Configuration The Schedule-Recording Configuration page allows you to setup automated recording at the scheduled time. Date Mode Select the desired camera from the drop-down menu. Specify the Start Date/Time and the Stop Date/Time and click Add. Click Save to apply the changes. At the Record Button, select Schedule Record. - Page 57 Week Mode Select the desired camera from the drop-down menu. Specify the Start and Stop time for each week and click on the Days of the week that you want to record and click Add. Click Save to apply the changes. At the Record Button, select Schedule Record.
-
Page 58: Others
9.4.10 Others The Others page allows you to set the time interval to scan through each camera in your network. Use the drop-down menu to select the time interval (in seconds) for each scan. Click Save to apply the changes. Click on the Scan Mode button to begin scanning. -
Page 59: Log List
9.4.11 Log List The Log List page displays the log of the selected camera. Select the desired camera from the drop-down menu to display its log. -
Page 60: Account
9.4.12 Account The Account page allows you to setup a user name and password to log in to IPView Pro. Enter the desired Admin ID and Password. Login password check: Check this box to enable the login prompt when you start IPView Pro and when you unlock the Key Lock button. -
Page 61: About
9.4.13 About The About page provides the version number of IPView Pro. -
Page 62: Xplug Control
10. Xplug Control If you need to install/enable ActiveX for your web browser (Internet Explorer), please follow the steps below. 10.1 Installing Xplug Control Step 1 At the Web Configuration screen, click on View Video – ActiveX Mode. Note: If you are able to see the video, you already have ActiveX installed and enabled. If you do not see the video, continue with the rest of the steps. -
Page 63: Enabling Activex
10.2 Enabling ActiveX Follow the steps below to enable ActiveX on your Internet Explorer. Step 1 Click on Tools > Internet Options. Step 2 Select the Security tab and click on Custom Level. - Page 64 Step 3 Verify the following settings are enabled. Click OK when done: • Automatic prompting for ActiveX controls: Enable • Download signed ActiveX controls: Prompt • Run ActiveX controls and plug-ins: Enable Step 4 At the Web Configuration screen click on View Video – ActiveX Mode.
- Page 65 Step 5 The video should appear now.
-
Page 66: Appendix
Appendix Sending Images via Web Browser If you want to send images to an FTP server or an e-mail account through the web browser, follow the steps below. Step 1 Go to the Camera’s Web Configuration page and click on System Administration. - Page 67 Step 3 Go to Configuration – Network and enter the IP Address of your Default Gateway and DNS Server. Click Save to apply the changes. Step 4 Go to Configuration – User and enable the User Access Control and create a user account.
- Page 68 Step 5 Verify that the new user account is listed in the User List. Step 6 Go to Configuration – Upload and enter your FTP Server information in the applicable fields.
- Page 69 Step 7 At the bottom of the page, check on the Enable upload video to FTP server check box and click Save to apply the changes. Step 8 Go to Configuration – E-mail and enter your E-mail settings in the applicable fields.
- Page 70 Step 10 Close the Web Browser and re-enter the Camera’s Web Configuration Utility. Step 11 You can now click on the ON buttons to send images to your FTP server and e- mail account.
-
Page 71: Technical Support
Technical Support E-mail: support@airlink101.com Toll Free: 1-888-746-3238 Web Site: www.airlink101.com Copyright © 2005 AirLink101. All rights reserved. AirLink101, the stylized AirLink101 logo, specific product designations, and all other words and logos that are identified as trademarks and/or service marks are, unless noted otherwise, the trademarks and service marks of AirLink101.