Vaillant timeSWITCH 150 Operating And Installation Instructions
Hide thumbs
Also See for timeSWITCH 150:
- Operating and installation manual (25 pages) ,
- Operating and installation manual (64 pages)
Table of Contents
Advertisement
Quick Links
Advertisement
Chapters
Table of Contents

Related Manuals for Vaillant timeSWITCH 150


Summary of Contents for Vaillant timeSWITCH 150
- Page 1 Operating and installation instructions timeSWITCH 150 0020116882 GB, IE...
-
Page 2: Table Of Contents
4.3 Setting slides......12 Notes on the 4.4 Setting the heating program ..12 documentation ....7 4.5 Weekend mode ......12 timeSWITCH 150 24-hour timer Operating and installation instructions... - Page 3 ......18 6.1 Guarantee ........18 6.2 Customer service ....... 18 timeSWITCH 150 24-hour timer Operating and installation instructions...
-
Page 4: Safety
Intended use tem approval In the event of inappropriate or improper – compliance with all inspection and use, damage to the product and other maintenance conditions listed in the property may arise. instructions. timeSWITCH 150 24-hour timer Operating and installation instructions... - Page 5 This timer is not suitable for and user maintenance work must not be being used together with an carried out by children unless they are external anti-freeze thermostat. supervised. Caution. Improper use of any kind is prohibited. timeSWITCH 150 24-hour timer Operating and installation instructions...
-
Page 6: 1.3 General Safety Information
The competent person must be approved damage. at the time by the “Health and Safety • Carefully read the enclosed instructions Executive”. and all other applicable documents, timeSWITCH 150 24-hour timer Operating and installation instructions... -
Page 7: Regulations (Directives, Laws, Standards)
Storing documents • The competent person must observe the national regulations, standards, The operator must keep this manual and directives, ordinances and laws. all other applicable documents safe for future use. timeSWITCH 150 24-hour timer Operating and installation instructions... -
Page 8: Validity Of The Instructions
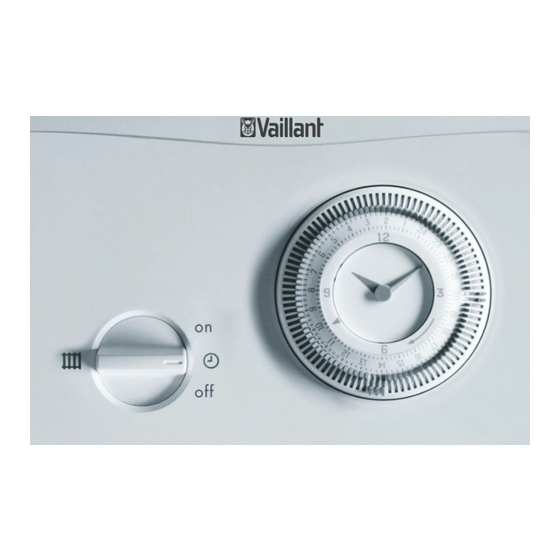
These instructions apply only to: Product design timeSWITCH 150 0020116882 1 Minute hand 2 Time mark 3a Slide pushed in (boiler on) 3b Slide pulled out (boiler off) 4 Time of day 5 Operating mode switch timeSWITCH 150 24-hour timer Operating and installation instructions... -
Page 9: Main Functions
Slide pulled out (3b) The boiler is switched off by a pulled out slide and remains off until the timer arrives at a pushed in slide. timeSWITCH 150 24-hour timer Operating and installation instructions... -
Page 10: Ce Marking
150 Product designation viewed at the manufacturer’s site. Power consumption Data Plate Read the instructions The data plate is located inside the con- trol on the rear of the timer’s electronics (PCB). timeSWITCH 150 24-hour timer Operating and installation instructions... -
Page 11: Operation
(4) is set to the slide settings if set to “ ”. on the time mark (2) and the hand of the clock indicates the desired time. timeSWITCH 150 24-hour timer Operating and installation instructions... -
Page 12: Setting Slides
• Set the slides as desired and set the operating mode switch (5) to the auto- • Set the operating mode switch to “off” matic heating program “ ”. to permanently switch off the boiler. timeSWITCH 150 24-hour timer Operating and installation instructions... -
Page 13: Power Failure
After a power failure you must The competent person who installed check the time of day and your product is responsible for the dis- adjust it if necessary (refer to posal of the packaging. Section 4.2)! timeSWITCH 150 24-hour timer Operating and installation instructions... -
Page 14: Installation
• Undo the cover from the switch box. the boiler in the process. • Check which type of electronics box the boiler has: If there are vertical plug connections with pins on the electronics box: timeSWITCH 150 24-hour timer Operating and installation instructions... - Page 15 • Insert the short ends of the 4-pin head- er connector (2) included with the timer into the four horizontal openings on the PCB for the timer (1). timeSWITCH 150 24-hour timer Operating and installation instructions...
-
Page 16: Start-Up
Draw special attention to the safety instructions, which the owner must follow. Tell the owner to keep the manu- als near the boiler together with the timer. timeSWITCH 150 24-hour timer Operating and installation instructions... -
Page 17: Decommissioning
• Instead, hand in the product to a col- • Secure the cover plate on the electron- lection centre for waste electrical or ics box. electronic equipment. timeSWITCH 150 24-hour timer Operating and installation instructions... -
Page 18: Guarantee And Customer Service
Vaillant instructions. The system owner will be granted a warranty in accordance with the Vaillant terms and conditions. All requests for work during the guarantee period must be made to Vaillant Service Solutions. timeSWITCH 150 24-hour timer Operating and installation instructions... - Page 19 Maximum permitted environ- 0 ... 60 °C mental temperature Current room air hum. 35 ... 95 % Mode of operation Type 1 Height 97 mm Width 146,5 mm Depth 17,5 mm timeSWITCH 150 24-hour timer Operating and installation instructions...
- Page 20 Supplier Manufacturer...