
Related Manuals for MD SPORTS Lancaster TTT415 207P


Summary of Contents for MD SPORTS Lancaster TTT415 207P
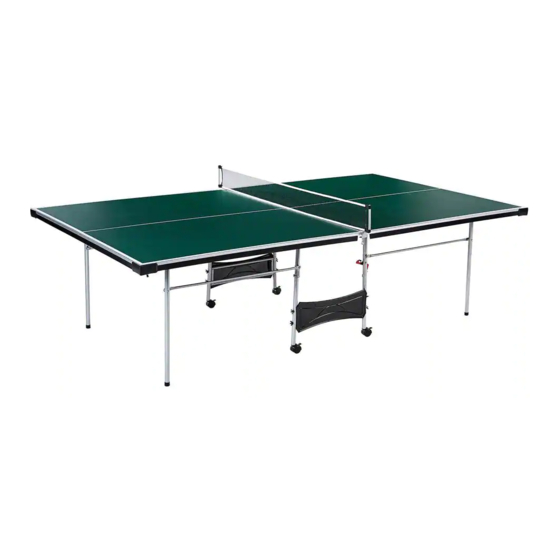
- Page 1 MODEL: TTT415_207P VM Innovations ASSEMBLY INSTRUCTIONS ATTENTION DO NOT RETURN TO THE STORE Contact MD Sports Customer Service * For additional resources and Frequently Asked Questions, please visit us at themdsports.com...
- Page 2 LIMITED 90 DAYS WARRANTY This product is covered by a limited warranty that is effective for 90 days from the date of purchase. If, during the limited warranty period, a part is found to be defective or breaks, we will offer replacement parts at no cost to you, the customer. The only exceptions to the warranty include mainframes, table tops, playing surfaces, batteries or tools.
-
Page 3: Tools Required
TOOLS REQUIRED Phillips Screwdriver - Not Included Power Tools Standard (Flat Head Screwdriver) - Not Included - Set Low Torque Wrench - Included Allen Key - Included High Torque over tightened CAUTION! Electric Screwdrivers may be helpful during assembly; however, please set a low torque and use extreme caution. - Page 4 TTT415_207P PARTS LIST FOR FIG. 4 FOR FIG. 4 FOR FIG. 1 FOR FIG. 1 Curved Outer Leg Curved Inner Leg Table Surface - 1 Table Surface - 2 with Cap with Cap FOR FIG. 6 FOR FIG. 6 FOR FIG. 7 FOR FIG.
- Page 5 TTT415_207P PRE-INSTALLED PARTS FOR FIG. 4 FOR FIG. 4 Outer Leg Cap Inner Leg Cap ASSEMBLY INSTRUCTIONS: 1. Find a clean, level place to begin the assembly of your Product. 2. Remove all the parts from the box and verify that you have all of the listed parts as shown on the Parts list pages. Carefully cut or tear the four corners of the box so that the bottom of the box can be used as your work surface.
- Page 6 FIG. 2 X 24 FIG. 2A Note: Align the inside seams of each sections so that pre-drilled holes line up across from each other. FIG. 3 FIG. 3B FIG. 3A TTT415_207P (Continued on the next page.) www.themdsports.com...
- Page 7 FIG. 4A FIG. 4 Note: Make sure that the oval cut-out in the Leg Bracket are facing the center of the table for proper installation. X 48 4 Holes FIG. 4B 4 Holes FIG. 5 X 16 FIG. 5A TTT415_207P (Continued on the next page.) www.themdsports.com...
- Page 8 Note: Be careful of the assembly direction FIG. 6 on pictures when you assemble the Linkage Tube (#5) in order to fit the folding function. X 16 FIG. 6A FIG. 6C FIG. 6D FIG. 6B TTT415_207P (Continued on the next page.) www.themdsports.com...
- Page 9 FIG. 7 FIG. 7A X 44 Note: Make sure all Aprons are inside the Plastic Corners. TTT415_207P (Continued on the next page.) www.themdsports.com...
- Page 10 FIG. 8 FIG. 8B Note: Do not overtighten the Butterfly Bolt (#A3) FIG. 8A at this time. ATTENTION!!! Please follow the drawing to assemble the Plastic Panel with Frame (#13). Note: Gently apply OUTWARD pressure to the Leg Frame while flipping the table over. This will prevent the Legs from folding up during flipping.
- Page 11 Warning FIG. 9 FIG. 9B FIG. 9A NOTE: Lift off of the floor and turn in the air. At least two adults. FIG. 9C FIG. 9D NOTE: Place on all 2 wheels at once. DO NOT lean the table on it's legs! FIG.
- Page 12 FIG. 10 FIG. 10A Note: For the assembly, at least three adults are required. Note: Keep gentle inward pressure on each end of the table until both halves have been bolted together with Inner Leg. TTT415_207P www.themdsports.com (Continued on the next page.)
- Page 13 FIG. 11 FIG. 11B FIG. 11A Note: Note the position of the Gravity Lock. (See inset for details). TTT415_207P www.themdsports.com (Continued on the next page.)
- Page 14 FIG. 12 Note: Slide the Net (#9) onto the Net Post (#16). FIG. 12B FIG. 12A Note: Now go back and tighten all the connections. / Nota: Ahora vuelva y aprieta todas las conexiones. TTT415_207P www.themdsports.com (Continued on the next page.)
- Page 15 FIG. 13 FIG. 13A FIG. 13B Note: Please make sure the gravity lock is locked when folded. Gravity Lock FIG. 13D FIG. 13C Safety Straps FIG.13 3. Engage the Wheels Lock. 4. Folding the table - First fold the side of the table without the Net Post. Hold the end securely and lift the table. Make sure the Gravity Lock (#18) is locked.