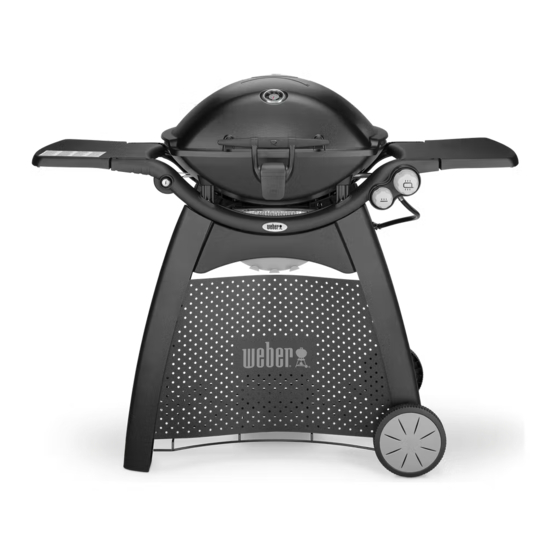
Weber Q3200 Owner's Manual
Hide thumbs
Also See for Q3200:
- Owner's manual (76 pages) ,
- Manual (24 pages) ,
- Owner's manual (40 pages)
Table of Contents
Advertisement
Quick Links
REGISTER
YOUR GRILL
Thank you for purchasing
a Weber
grill. Take a
®
few minutes to protect
your investment by
registering your grill
online at www.weber.com.
Reference the serial
number on the front cover
of this owner's guide.
GRILL OWNER'S GUIDE
YOU MUST READ THIS OWNER'S GUIDE
BEFORE OPERATING YOUR GAS GRILL.
m DANGER
If you smell gas:
1) Shut off gas to the
appliance.
2) Extinguish any open
flames.
3) Open lid.
4) If odor continues, keep
away from the appliance
and immediately call your
gas supplier or your fire
department.
m WARNING
1) Do not store or use
gasoline or other
flammable liquids or
vapors in the vicinity of this
or any other appliance.
2) An LP tank not connected
for use shall not be stored
in the vicinity of this or any
other appliance.
Leaking gas may cause a fire
or explosion which can cause
serious bodily injury, death, or
damage to property.
Carefully follow all leak-check
procedures in this Owner's
Guide prior to grill operation.
Dothis even if the grill was
dealer-assembled.
Do not ignite this appliance
without first reading the burner
ignition sections of this manual.
THIS GAS APPLIANCE IS
DESIGNED FOR OUTDOOR
USEONLY.
NOTICE TO INSTALLER: These
instructions must be left with
the owner, who should keep
them for future use.
LP
37
57
48613
US - ENGLISH
07/01/14
Advertisement
Table of Contents

Related Manuals for Weber Q3200


Summary of Contents for Weber Q3200
- Page 1 Do not ignite this appliance registering your grill gas supplier or your fire without first reading the burner online at www.weber.com. department. ignition sections of this manual. Reference the serial THIS GAS APPLIANCE IS m WARNING...
-
Page 2: Warnings
® for gas leaks and burner obstructions before use. See instructions in this Owner’s Guide for correct procedures. m Do not operate the Weber gas grill if ® there is a gas leak present. m Do not use a flame to check for gas leaks. -
Page 3: Table Of Contents
DISCLAIMERS STORAGE AND/OR NONUSE ............... 21 the case of a gift or promotional situation, the person for whom it was purchased as a gift or promotional item), that the WEBER ® APART FROM THE WARRANTY AND DISCLAIMERS AS DESCRIBED US INSTALLATION CODES ................21... -
Page 4: Weber ® Q ® 3200 Exploded View
WEBER 3200 EXPLODED VIEW · DIAGRAMA DE DESPIECE · VUE ECLATEE ® ® Q3200_US_LP_070114 WWW.WEBER.COM ®... - Page 5 WEBER 3200 EXPLODED VIEW · DIAGRAMA DE DESPIECE · VUE ECLATEE ® ® Fold-Down Table Mesa plegable Plan de travail repliable Thermometer Assembly Conjunto del termómetro Thermomètre Grill Out Handle Light Assembly Ensemble de poignée et lumière «Grill ® Conjunto de la agarradera Grill Out ®...
-
Page 6: Parts List
...............1 ..................1 .........1 ........1 ........1 ................2 ..........1 ............1 ........1 ........2 ..........2 ......2 ........1 ..............1 ....................1 ......12 ................1 .......4 ........1 ..................1 ......2 ..............1 ........1 ........1 ......2 ....1 ........2 ..............1 ....1 ......1 WWW.WEBER.COM ®... -
Page 7: Assembly
ASSEMBLY · ENSAMBLAJE · ASSEMBLAGE TOOLS NEEDED: HERRAMIENTAS REQUERIDAS: OUTILS NECESSAIRES: WWW.WEBER.COM ®... - Page 8 ASSEMBLY · ENSAMBLAJE · ASSEMBLAGE WWW.WEBER.COM ®...
- Page 9 El bastidor de la rueda va a la derecha. La etiqueta de instrucciones de encendido ve hacia adelante. m Le cadre des roues se place à droite. L’autocollant pour les instructions d’allumage est orienté vers l’avant. WWW.WEBER.COM ®...
- Page 10 ASSEMBLY · ENSAMBLAJE · ASSEMBLAGE WWW.WEBER.COM ®...
- Page 11 ASSEMBLY · ENSAMBLAJE · ASSEMBLAGE WWW.WEBER.COM ®...
- Page 12 ASSEMBLY · ENSAMBLAJE · ASSEMBLAGE WWW.WEBER.COM ®...
- Page 13 ASSEMBLY · ENSAMBLAJE · ASSEMBLAGE WWW.WEBER.COM ®...
- Page 14 ASSEMBLY · ENSAMBLAJE · ASSEMBLAGE A) Uncoil the hose and regulator of the Weber 3200. ® ® B) Remove leg screw then secure hose and retention clip (1) to cart leg. m WARNING: The hose must be secured to the cart leg by the hose retention clip.
- Page 15 ASSEMBLY · ENSAMBLAJE · ASSEMBLAGE WWW.WEBER.COM ®...
- Page 16 ASSEMBLY · ENSAMBLAJE · ASSEMBLAGE WWW.WEBER.COM ®...
- Page 17 You may hear a rattle in lightpod. This is normal. Podría escuchar un traqueteo en la lámpara. Esto es normal. Vous entendrez peut-être un bruit à l’intérieur de la douille de la lampe. C’est tout à fait normal. WWW.WEBER.COM ®...
- Page 18 : Couvercle levé - MARCHE / Couvercle fermé - ARRÊTE. Le bouton de mise sous tension (1) active ou désactive le “détecteur d’inclinaison.” Pour une utilisation en pleine journée, désactivez le détecteur en appuyant sur le bouton de mise sous tension. WWW.WEBER.COM ®...
- Page 19 ASSEMBLY · ENSAMBLAJE · ASSEMBLAGE WWW.WEBER.COM ®...
-
Page 20: Storage Features
STORAGE FEATURES· CARACTERÍSTICAS DE ALMACENAMIENTO· FONCTIONS DE STOCKAGE WWW.WEBER.COM ®... -
Page 21: Important Information About Lp Gas
Do not store a disconnected LP tank in a building, garage, or any other enclosed area. • If you do not disconnect the LP tank from the Weber ® gas grill, be sure to keep both the grill and the tank outdoors in a well-ventilated area. -
Page 22: Important Information About Lp Gas Connections
NOTE: Gas will not flow from the tank unless the Type 1 coupling is fully engaged. released from the LP tank. • The pressure regulator supplied with the Weber ® grill must be used. This regulator is set for 11 inches of water column pressure. -
Page 23: Lp Tank Installation And Removal
INSTALLING THE LP TANK Removal of the LP Tank The LP tank is installed under the grill, on the tank rest. Weber recommends LP tanks with a 47.6lb water A) Close tank valve (turn clockwise) (4). capacity. B) Unscrew regulator coupling by turning counterclockwise, by hand only (5). -
Page 24: Preparing Touse Your Grill
As a safety precaution, however, you should check all ® fi ttings for leaks before using your Weber gas grill. Shipping and handling may loosen or damage a gas fi tting. -
Page 25: Safety Checks Before Usingyour Grill
It’s a good idea to get in the funnels grease away from food and into a removable catch pan. For your convenience, you can also line the habit of performing a few removable catch pan with a Weber disposable drip pan, ® safety checks before grilling. -
Page 26: Burner Ignition & Usage
Push each burner control knob in and turn it clockwise to This plastic must be removed the off ( ) position. Turn gas supply off at the source. before you attempt to ignite your grill. Do not confuse this plastic with the battery label. WWW.WEBER.COM ®... -
Page 27: Burner Ignition Lighting With A Match
( ) position (6). The inside burner will then be ignited by the outside burner. TO EXTINGUISH BURNER Push each burner control knob in and turn it clockwise to the off ( ) position. Turn gas supply off at the source. WWW.WEBER.COM ®... -
Page 28: Grilling Tips & Helpful Hints
• Grilling conditions may require for easy cleaning. • If an unwanted flare-up adjustment of the burner For more grilling tips and recipes, visit www.weber.com. should occur, turn burner(s) control knobs to attain the off and move food to another correct cooking temperatures. -
Page 29: Cooking Methods
DIRECT LOW sear steaks, set both burners to HI, then to complete cooking, set both burners to LOW. For great grilling Chicken pieces, sausage inspiration, visit www.weber.com/recipes. SEARING Steak and items that need searing Start by searing thick steaks over direct high heat... -
Page 30: Troubleshooting
THIS IS NOT A DEFECT. Clean thoroughly. Refer to “CLEANING THE INSIDE OF THE GRILL.” If problems cannot be corrected by using these methods, please contact the Customer Service Representative in your area using the contact information on our web site. Log onto www.weber.com. GRILL OUT HANDLE LIGHT TROUBLESHOOTING ®... -
Page 31: Annual Maintenance
DANGER BURNER FLAME PATTERN Failure to correct any problems described on this page may result in a fire, which can The burner tube(s) in your Weber gas grill was/were ® cause serious bodily injury or death, and factory set for the correct air and gas mixture. The correct flame pattern is shown in illustration and described cause damage to property. -
Page 32: Burner Tube Cleaning Or Replacement
C) Repeat this procedure for the inside burner tube (3). m CAUTION: Care must be taken when removing or reinstalling burner tubes. Do not force or bend the gas lines that connect the control valves to the burner tubes (4). WWW.WEBER.COM ®... - Page 33 CAUTION: The burner tube openings (12) must be positioned properly over the valve orifices (13). m WARNING: You should check for gas leaks every time you disconnect and reconnect a gas fitting. Refer to “CHECKING FOR GAS LEAKS.” D) Replace cookbox components. WWW.WEBER.COM ®...
-
Page 34: Routine Maintenance
Cookbox To obtain replacement disposable drip pans and cooking Wash inside of cookbox with warm, soapy water; then rinse with water. grates,contact thelocal retailerin your areaor log onto www.weber.com. If you need furtherassistance, contact your Customer Service Representative. WWW.WEBER.COM ®... -
Page 35: Ignition System Operations
If the electronic ignition system still fails to ignite, contact the Customer Service Representative in your area using the contact information on our web site. Log onto www.weber.com. MAINTAINING THE GRILL OUT ® HANDLELIGHT •... - Page 36 MEMO WWW.WEBER.COM ®...
- Page 37 Keeping the lid down prevents heat from escaping. Only lift the grill lid when it's time to turn the food to ensure your meal will come out perfect every time. For more information, visit www .weber.com or call Customer Service: U.S.
- Page 38 ■ ■■■ GRILLING GUIDE For great grilling inspiration, visit www weber.com/recipes following cuts, thicknesses, weights, and grilling times are meant to be guidelines. Factors such as altitude. wind. and outside temperature can affect cooking times. Two rules of thumb: Grill steaks, fish fillets, boneless chicken...