Advertisement
Quick Links
Drive Kit Installation Manual
PYRO 1394 Drive Kit • PYRO 1394b Drive Kit
USB 2.0 Drive Kit • Dual-Link Drive Kit
Third Edition
PYRO 1394 Drive Kit: API-800
PYRO 1394b Drive Kit: API-814
USB 2.0 Drive Kit: USBX-804
Dual-Link Drive Kit: DLX-185
If you have any problems or questions on this product, please call :
Technical Support 562.926.4338
North America Support Hours:
M-F : 7 am - 6 pm, PST
Email : support@adstech.com
Tech
website : www.adstech.com
European Technical Support: +353.61.702042
Advertisement

Related Manuals for ADS Technologies API-814


Summary of Contents for ADS Technologies API-814
-
Page 1: Technical Support
USB 2.0 Drive Kit • Dual-Link Drive Kit Third Edition PYRO 1394 Drive Kit: API-800 PYRO 1394b Drive Kit: API-814 USB 2.0 Drive Kit: USBX-804 Dual-Link Drive Kit: DLX-185 If you have any problems or questions on this product, please call : Technical Support 562.926.4338... - Page 3 IBM is a registered trademark of the International Business Machines, Inc. ADS is a registered trademark of ADS Technologies Inc. ADS Technologies (ADS) makes no warranty of any kind with regard to this material, including but not limited to, the implied warranties of merchantability and fitness for a particular purpose. The information furnished within this written document is for information purposes only and is subject to change without notice.
-
Page 4: Drive Installation
Drive Installation Installation manual for the PYRO 1394/1394b Drive Kit, USB 2.0 Drive Kit & Dual-Link Drive Kit: * Caution: Sharp metal parts inside. Care must be taken to prevent injury. STEP 1: Remove the black/grey plastic shell from the Drive Kit case by pulling it away from the front of the drive case. - Page 5 STEP 5: Connect the flat ribbon cable to the drive. NOTE: The red line on the ribbon must be facing toward the power connector of the drive and for the end connected to the drive kit, the red line must be on the side closest to the outside casing of the drive kit.
-
Page 6: Software Installation
Software Installation USB 2.0 Driver Installation: For USB 2.0 Drive Kit (Part# USBX-804) and Dual-Link Drive Kit (Part# DLX-185) USB 2.0 allows a maximum speed of up to 480 Megabits per second – or 60 Megabytes per second. To run at USB 2.0 Speeds, the host Computer needs to be USB 2.0 Enabled. Most PC’s sold since early 2003 have USB 2.0 built-in. - Page 7 Windows XP. FireWire 800/1394b Driver Installation: For PYRO 1394b Drive Kit (Part# API-814) The latest version of FireWire, IEEE1394b or otherwise known as FireWire 800, runs at a maximum speed of 800 Megabits per second or 100 Megabytes per second. MAC OS 10.2.6 or higher provides native support for FireWire 800.
- Page 8 Turn the Drive Kit on: Once the software has been properly installed, turn on your drive kit (switch on the back), plug one end of the USB 2.0 or 1394 cable into the Drive case. With the computer already turned on, plug the remaining end of the cable into your computer’s available FireWire or USB ports.
- Page 9 • If prompted to initialize your drive, go ahead and do so if it is a brand new Hard Drive. For older hard disk drives that already have data in them, initializing erases the data on that drive. The FireWire or USB 2.0 drive that you just initialized will now be listed in the drives section of the lower right side of the window.
- Page 10 • Click on “DISK DRIVES” • Double click on the drive that you just plugged in (for example: if you plugged in a MAXTOR, you should click on the MAXTOR) • Click on the “SETTINGS” tab Drive Kit Installation Manual...
- Page 11 • Check the REMOVABLE box • Assign a DRIVE LETTER. Make sure you assign a drive letter that is not in use. The START and ENDING DRIVE LETTERS should be the same letter also. If the drive letter M was selected for example as the starting drive letter, letter M should also be the ending drive letter.
- Page 12 Drive Installation - French Installation de l’équipement du PYRO 1394/1394b Drive Kit, USB 2.0 Drive Kit et du Dual-Link Drive Kit: * Caution: Sharp metal parts inside. Care must be taken to prevent injury. ETAPE 1: Retirer d’abord les deux vis du côté gauche et droit à...
- Page 13 ETAPE 5: Brancher le câble d’alimentation sur le disque dur ou le CD-ROM que vous installez. ETAPE 6: Avec les vis fournies, mettre en place le disque dur ou le CD-ROM. Pour un disque dur, ceci se fait par le dessous du module du Drive Kit.
- Page 14 Drive Installation - German Installation des PYRO 1394/1394b Drive Kit, USB 2.0 Drive Kit und Dual-Link Drive Kit: * Caution: Sharp metal parts inside. Care must be taken to prevent injury. SCHRITT 1: Entfernen Sie das Gehäuse des Drive Kits, indem Sie das Gehäuse und das interne Modul auseinanderziehen.
- Page 15 SCHRITT 5: Mit den beiliegenden Schrauben befestigen Sie die Festplatte oder CD-ROM an der richtigen Stelle. Für die Festplatte wäre das vom Drive Kit Modul unten. Für CD-ROMs führen Sie dies auf der linken Seite des Drive Kit Moduls aus, wobei die Vorderseite des Drive Kit Moduls nach vorn zeige muss.
- Page 16 Drive Installation - Spanish Instalación del PYRO1394/1394b Drive Kit, USB 2.0 Drive Kit y Dual-Link Drive Kit: * Caution: Sharp metal parts inside. Care must be taken to prevent injury. PASO 1: Primero quite la carcasa plástica negra/gris del Drive Kit jalando el módulo interno de la caja.
- Page 17 PASO 5: Conecte el cable de cinta plano. Nota: La línea roja en la cinta debe estar en la dirección del conector de la energía. La línea roja debe estar en el lado más cercano a la cubierta exterior del Drive Kit. PASO 6: Con los tornillos que le fueran proporcionados, coloque el Disco duro o CD-ROM en lugar.
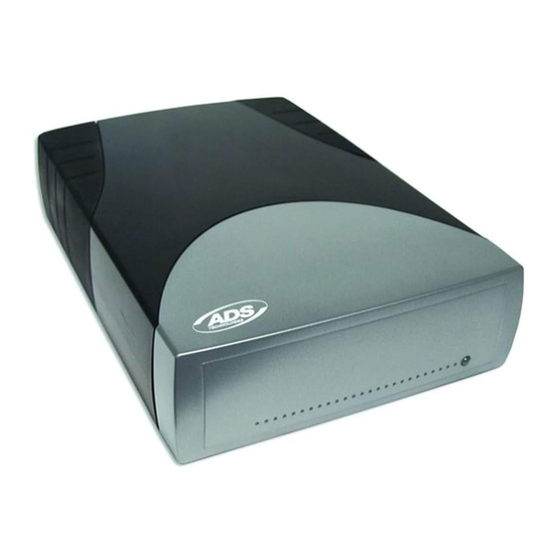
- Page 18 Includes The PYRO 1394 Drive Kit includes: • PYRO 1394 Drive Enclosure • 2 meter - 6 pin to 6 pin 1394 cable • Flat ribbon cable (ATA-100) • Screw kit for installing hard drive or CD drives • Removable bezel cover for hard drive installations •...
- Page 19 UNDER NO CIRCUMSTANCES will ADS Technologies, Inc. be liable for consequential damages, including but not limited to any lost savings, lost profits, or any other damages, caused by the use of any ADS Technologies, Inc. product or inability to use the product, even if the dealer or ADS Technologies, Inc.
- Page 20 M-F : 7 am - 6 pm, PST Email : support@adstech.com website : www.adstech.com European Technical Support: +353.61.702042 Tech www.adstech.com ADS Technologies North American Office 12627 Hidden Creek Way Cerritos, CA, 90703 Phone: 562.926.1928 Technical Support: 562.926.4338 Technical Support Hours: M-F 8am-5pm PST Fax: 562.926.0518...
- Page 21 Drive Kit Installation Manual...