Table of Contents
Advertisement
Available languages
Available languages
Quick Links
Advertisement
Table of Contents

Related Manuals for Rotel U4473CH


Summary of Contents for Rotel U4473CH
- Page 1 KITCHENMACHINE4473CH U4473CH • GEBRAUCHSANWEISUNG MODE D’EMPLOI • ISTRUZIONI PER L’USO • INSTRUCTIONS FOR USE • Gebrauchsanweisung ○ Mode d’emploi ○ Istruzioni per l’uso ○ Instructions for use _dw.docx U4473CH_BED_ DFIE_Rev01_2017-08-22...
- Page 2 SCHEMATISCHE DARSTELLUNG Représentation schématique • Rappresentazione schematica • Schematic representation • Deutsch Français Italiano English 1. Anschluss für 1. Sortie moteur 1. Presa per accesso- 1. Power outlet for Fleischwolf* pour accessoire ri (sminuzzatore)* mincer attach- (hachoir)* ment* 2. Zugschalter* 2. Interrupteur à 2. Interruttore 2. Pull switch* tirette * estraibile* 3. Antriebsabde- 3. Cache amovible 3. Vano amovibile 3.
- Page 3 9. Impuls-Taste 9. Touche impulsion 9. Pulsante a impulsi 9. Pulse button 10. Taste für schnelles 10. Chauffage rapide 10. Riscaldamento 10. Rapid heating Aufheizen rapido button 11. Maschinenkopf- 11. Levier de déver- 11. Leva di sblocco 11. Head-lift lever Entriegelung rouillage 12. Geschwindigkeits- 12. Sélecteur de vi- 12. Manopola di sele- 12. Speed control/ regler/OFF tesse/Arrêt (OFF) zione accensione/ OFF knob arresto (OFF) 13.
- Page 4 TECHNISCHE DATEN Caractéristiques techniques • Specifiche tecniche • Technical specifications • 220-240 V Nennspannung Tension nominale Tensione nominale Rated voltage Nennfrequenz 50/60 Hz Fréquence nominale Frequenza nominale Rated frequency 1000/1200 W Nenneingangsleistung Puissance d’entrée nominale Potenza nominale Rated input power Gebrauchsanweisung ○ Mode d’emploi ○ Istruzioni per l’uso ○ Instructions for use...
-
Page 5: Table Of Contents
Inhaltsverzeichnis / Table des matières / Indice / Table of contents Deutsch ............................... 8 Sicherheitshinweise ........................ 8 • LCD-Bildschirm .......................... 1 2 • Vor dem ersten Gebrauch ...................... 1 3 • Zusammensetzung der Küchenmaschine .................. 1 3 • Deckel der Schüssel ........................ 1 3 Schüssel ............................ 1 4 Handhabung der Küchenmaschine .................... 1 4 • Anbringen und Verwendung der Zubehörteile ................ 1 4 Betriebsarten .......................... 1 6 •... - Page 6 Suggestions ........................... 3 4 • Nettoyage et stockage ........................ 3 5 • Dépannage ............................ 3 5 • Élimination ............................ 3 6 • Italiano .............................. 3 7 Avvertenze di sicurezza ......................... 3 7 • Schermo digitale ........................... 4 1 • Prima della messa in servizio ...................... 4 2 • Assemblaggio dell’elettrodomestico ..................... 4 2 • Montare il coperchio ........................ 4 2 Inserire il boccale di mixaggio ....................... 4 3 Utilizzazione dell’apparecchio .
- Page 7 Mode 1: mixing mode ........................ 5 9 Mode 2: heating mode ........................ 6 0 Mode 3: heating & stirring mode .................... 6 1 Suggestions ........................... 6 3 • Cleaning and storage ........................ 6 4 • Troubleshooting .......................... 6 4 • Disposal ............................ 6 5 • D / F / I / E ............................ 6 6 Garantie / Garantie / Garanzia / Warranty ................... 6 6 • Gebrauchsanweisung ○ Mode d’emploi ○ Istruzioni per l’uso ○ Instructions for use...
-
Page 8: Deutsch
Deutsch • SICHERHEITSHINWEISE Lesen Sie erst alle Hinweise, bevor Sie das Gerät in Be- trieb nehmen. o Dieses Gerät kann von Personen mit eingeschränk- ten physischen, sensorischen oder geistigen Fähig- keiten oder einem Mangel an Erfahrung und/oder Wissen verwendet werden, wenn sie beaufsichtigt werden oder bezüglich des sicheren Gebrauchs des Geräts unterwiesen wurden und die daraus resul- tierenden Gefahren verstanden haben. o Dieses Gerät darf nicht von Kindern benutzt wer- den. Das Gerät und seine Anschlussleitung sind von Kindern fernzuhalten. o Kinder dürfen nicht mit dem Gerät spielen. o Das Gerät ist bei nicht vorhandener Aufsicht und vor dem Zusammenbau, dem Auseinandernehmen oder Reinigen stets vom Netz zu trennen. Das Ge- rät von der Stromversorgung trennen indem am... - Page 9 o Bevor das Gerät angeschlossen wird, muss die Übereinstimmung der Netzspannung mit der Kennzeichnung auf dem Typenschild überprüft werden. o Das Gerät darf nicht mit einem beschädigten Kabel oder Stecker, nach einer Fehlfunktion, oder falls es in irgendeiner Weise beschädigt wurde, betrieben werden. Es soll zur Überprüfung, Reparatur oder Neueinstellung an die nächste autorisierte Service- stelle gesendet werden. o Ein Reparaturversuch, unsachgemässe Installation oder Demontage, sowie die Verwendung von Zu- behör, welches nicht vom Hersteller empfohlen oder verkauft wurde, kann zu Brandgefahr, Strom-...
- Page 10 o Das Gerät nicht in der Nähe von Spülbecken, sons- tigen mit Wasser gefüllten Behältern und/oder mit nassen Händen verwenden. o Wasserspritzer auf den Kontaktstiften können das Gerät beschädigen. o ACHTUNG - HEISS: Allfälliger Kontakt zu den heis- sen Oberflächen des Geräts können zu Verbren- nungen führen, auch wenn die Schüssel aus der Basiseinheit entfernt wurde. o Die maximale Füllmenge der Schüssel nicht über- schreiten, um Verbrühungsgefahr durch Heraus- spritzen von heissem Gut zu vermeiden. Bei der Verarbeitung von warmen Speisen Geschwindig- keitseinstellung niemals sprunghaft erhöhen.
- Page 11 o In Anbetracht des direkten Lebensmittelkontaktes, muss dieses Gerät stets sauber gehalten werden. o Das Gerät ist nur für den Kurzzeitbetrieb vorgese- hen. Bei voller Leistung beträgt die maximale Be- triebsdauer fünf (5) Minuten pro Anwendung. Vor weiterer Verwendung muss das Gerät auf Raum- temperatur abgekühlt werden, um die Gebrauchs- fähigkeit zu verlängern. o Dieses Gerät ist dazu bestimmt, im Haushalt und ähnlichem verwendet zu werden, wie beispielswei- se: §...
-
Page 12: Lcd-Bildschirm
• LCD-BILDSCHIRM A. Temperatur-Symbol B. Temperatur-Anzeige (Temperaturbereich zwischen 20 Grad und 140 Grad) o Taste + (H) oder - (G) drücken, um die auf dem Bildschirm angezeigte Tempe- ratur zu erhöhen oder zu verringern, in 1-Grad-Schritten. o Hinweis: Das Display zeigt "0°C", wenn die Temperatur des Geräts unter 40 Grad liegt, ohne Kocheinstellung. C. Zeit-Anzeige (Zeitspanne zwischen 1 Minute und 3 Stunden) o Das Display zeigt „00:00“, für Stunden und Minuten. Die maximale Zeiteinstel- lung beträgt 3 Stunden. D. Geschwindigkeit (Stufen von 1 bis 8) E. Geschwindigkeits-Anzeige F. Umschalttaste: Temperatureinstellung ⇌ Zeiteinstellung o Gerät an eine Steckdose anschliessen und Geschwindigkeitsregler auf „OFF“ drehen. -
Page 13: Vor Dem Ersten Gebrauch
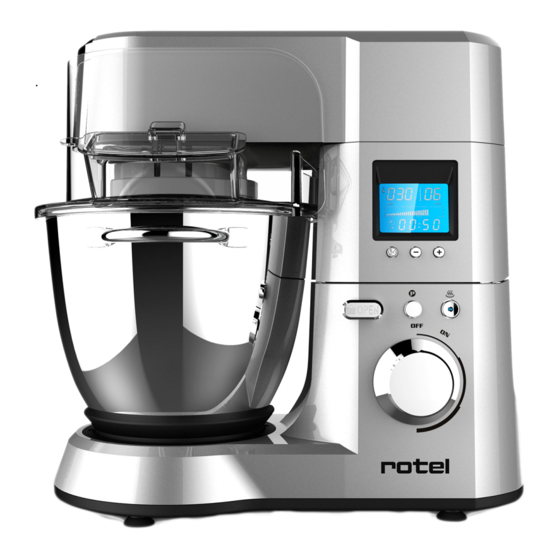
• VOR DEM ERSTEN GEBRAUCH Dieses elegante Gerät ist eine vielseitige und leistungsstarke Küchenmaschine mit drei Be- triebsarten, einer Zeitschaltuhr und Kochfunktion Vor der ersten Benutzung das gesamte Verpackungsmaterial und alle Werbeaufkle- ber entfernen. Prüfen, ob alle aufgeführten Zubehörteile vorhanden sind. Sollte etwas fehlen, wenden Sie sich an den Kundendienst. Alle Teile mit einem feuchten Tuch waschen. Niemals Scheuermittel verwenden. DIE MOTORBASIS NIEMALS INS WASSER TAUCHEN. Die Küchenmaschine auf eine stabile und ebene Arbeitsfläche stellen, und einen minimalen Abstand von 10 Zentimeter um das Gerät beachten. Das Netzkabel vollständig abwickeln und kontrollieren, dass es keine Schäden auf- weist. • ZUSAMMENSETZUNG DER KÜCHENMASCHINE Deckel der Schüssel Den Schüsseldeckel samt Einfüllöffnungselement zusammensetzen, gemäss Abbil- dungen 1 und 2. -
Page 14: Schüssel
Schüssel o Die Maschinenkopf-Entriegelung nach oben drücken und den Maschinenkopf bis zum Anschlag anheben. o Die Edelstahl-Schüssel auf den Sockel setzen (siehe Abbildungen unten). Die Schüssel im Uhrzeigersinn drehen, bis sie einrastet. Beide „Verriegelungszeichen“ sollten übereinanderstehen (Abb. 3). • HANDHABUNG DER KÜCHENMASCHINE Vorsicht: o Die maximale Füllmenge der Edelstahl-Schüssel beträgt 3 Liter. Nicht überschreiten! o Heisse Flüssigkeiten können herausspritzen und zu viel Teig die Küchenmaschine überbelasten: Verletzungsgefahr oder Beschädigung des Gerätes. Anbringen und Verwendung der Zubehörteile o Die Maschinenkopf-Entriegelung nach oben drücken und den Maschinenkopf bis zum Anschlag anheben, Schüssel auf den Sockel setzen und durch drehen einrasten (1). Die Zutaten oder Flüssigkeiten zum Verarbeiten in die Edelstahl-Schüssel geben. - Page 15 o Der Rührhaken ist nur für den Gebrauch in Kombination mit dem Modus 3, „Aufhei- zen und Rühren“ vorgesehen. Jegliche Fehlanwendung des Zubehörs kann das Gerät oder den Rührhaken selbst beschädigen. Gebrauchsanweisung ○ Mode d’emploi ○ Istruzioni per l’uso ○ Instructions for use...
-
Page 16: Betriebsarten
• BETRIEBSARTEN Vorsicht: o Wenn die Schüssel mit der maximalen Füllmenge von 3 Liter verwendet wird, ist es empfehlenswert die Geschwindigkeitsstufe 1 nicht zu überschreiten, ungeachtet der verwendeten Betriebsart. o Im Standby-Modus die Taste "Temperatureinstellung ⇌ Zeiteinstellung“ (F) einige Sekunden drücken, um alle Einstellungen zurückzusetzen. Das Display zeigt folgen- des an: Modus 1: Mischen o Das passende Zubehör (Rührbesen, Knethaken oder Schneebesen) einsetzen, Schüs- sel auf den Sockel setzen und den Maschinenkopf in die Arbeitsposition bringen (sie- he Absatz „Anbringen und Verwendung der Zubehörteile“). Gerät an eine Steckdose anschliessen und Geschwindigkeitsregler auf „OFF“ drehen, damit die LCD-Kontrollleuchte nicht mehr blinkt. o Taste "Temperatureinstellung ⇌ Zeiteinstellung“ (F) drücken, um die Zeitschaltuhr zu programmieren (zwischen 1 Minute und 3 Stunden). 3 Sekunden nach der Zeiteinstel- lung erlischt die LCD-Kontrollleuchte. o Den Geschwindigkeitsregler bis zur gewünschten Einstellung drehen (zwischen 1 und 8). o Das Gerät wird in Betrieb genommen und die Zeitschaltuhr zählt rückwärts. Um die Küchenmaschine und die Zeiteinstellung anzuhalten, Geschwindigkeitsregler auf „OFF“ drehen. Der Vorgang wird fortgesetzt, wenn erneut eine Geschwindigkeitsstu- fe eingestellt wird. -
Page 17: Modus 2: Aufheizen
o Die Impuls-Taste drücken, damit das Gerät das Tempo auf Geschwindigkeit 8 erhöht. Diese Funktion kann verwendet werden, um gewisse Zutaten besser zu vermengen, schlagen oder zu einer Emulsion verbinden. Impuls-Taste loslassen, um den Vorgang mit der voreingestellten Geschwindigkeit fortzusetzen. o In diesem Modus wird die Geschwindigkeit anhand der Temperatur der Schüssel au- tomatisch reguliert: o Wenn die Temperatur in der Schüssel unter 60 Grad liegt - Die Geschwindigkeit kann zwischen 1 und 8 eingestellt werden. - Impuls-Taste drücken und halten, damit das Gerät das Tempo auf Geschwin- digkeit 8 erhöht. Impuls-Taste loslassen, um den Vorgang mit der voreinge- stellten Geschwindigkeit fortzusetzen. - Während die Küchenmaschine mit Geschwindigkeit 1 bis 7 betrieben wird, stellt die wiederholte Impulsfunktion die Arbeitsintervalle auf Geschwindig- keit 8. -
Page 18: Modus 3: Aufheizen Und Rühren
o Für eine manuelle Zeiteinstellung (zwischen 1 Minute und 3 Stunden), Schalttaste "Temperatureinstellung ⇌ Zeiteinstellung“ (F) drücken. Die LCD-Kontrollleuchte blinkt nach 3 Sekunden nicht mehr. Ohne Zeiteinstellung zeigt der Bildschirm die ak- tuelle Laufzeit (1.2.3.4…). Das Gerät stoppt den Betrieb automatisch nach 3 Stunden. o Gewünschte Temperatur einstellen (von 20 Grad bis 140 Grad), um die Zutaten zu erwärmen. 3 Sekunden nach der Temperatureinstellung erlischt die entsprechende LCD-Kontrollleuchte. - Page 19 o Gewünschte Temperatur einstellen (von 20 Grad bis 140 Grad), um die Zutaten zu erwärmen. 3 Sekunden nach der Temperatureinstellung blinkt die entsprechende LCD-Kontrollleuchte nicht mehr. o Das Gerät wird in Betrieb genommen und die Zeitschaltuhr zählt rückwärts. Ohne Zeiteinstellung zeigt der Bildschirm die aktuelle Laufzeit (1.2.3.4…). Das Gerät stoppt den Betrieb automatisch nach 3 Stunden. o Am Ende der eingestellten Zeit ist ein akustisches Signal zu hören und die LCD- Kontrollleuchte blinkt.
-
Page 20: Rezeptvorschläge
• REZEPTVORSCHLÄGE Max. Rezept Zubehör Zutaten Zubereitung Menge zu Schnee Mit einer Prise Salz auf Ge- geschlagenes Schwingbesen Eiweiss schwindigkeit 8 steif schlagen. Eiweiss 1350 g Das Gerät 2 Minuten auf Ge- Mehl schwindigkeitsstufe 1 betreiben Hefe 15 g und auf Stufe 2 erhöhen, bis der Zucker 5 g Teig glatt und elastisch ist. Teig Brot Knethaken 675 g eine Stunde in der Schüssel auf- Wasser (43°C) gehen lassen. Nochmals wäh- Butter 25 g rend 2 Minuten bei Geschwin- digkeit 1 verarbeiten. Salz 15 g Alle Zutaten in 2 cm-Stücke Rinderrücken 500 g schneiden. Temperatur auf 120 Kartoffeln... -
Page 21: Reinigung Und Verstauung
• REINIGUNG UND VERSTAUUNG o Vor der Reinigung das Gerät ausschalten und den Stecker aus der Steckdose ziehen. o Alle Teile, die mit Lebensmitteln in Kontakt kommen, sofort nach Gebrauch reinigen und gründlich trocknen. o Die Kontaktstifte an der Unterseite der Schüssel immer sauber und trocken halten. Gegebenenfalls nur mit einem feuchten Tuch abwischen! o Die Motoreneinheit darf nur mit einem feuchten Lappen abgewischt werden. Nie- mals ins Wasser tauchen oder unter fliessendem Wasser abspülen. o Keine scharfen Reinigungsmittel oder metallischen Reinigungsgeräte verwenden, die die Oberflächen des Gerätes und des Zubehörs beschädigen könnten. o Wenn nötig, warmes Wasser und ein paar Tropfen mildes Reinigungsmittel in die Schüssel füllen und auf Geschwindigkeit 1 ein paar Minuten betreiben, um die Schüs- sel gründlich zu reinigen. -
Page 22: Entsorgung
• ENTSORGUNG Zur ordnungsgemässen Entsorgung geben Sie das Gerät bitte an einen Händler, den Kundendienst oder Rotel AG zurück. Die Richtlinie 2012/19/EU über Elektro- und Elektronik-Altgeräte (WEEE) legt fest, dass Haushaltsgeräte nicht mit dem normalen Hausmüll entsorgt werden dürfen. Altgeräte sind getrennt zu sammeln, um einerseits Wiederverwertung und Recycling zu optimieren und andererseits potenzielle Gesundheits- und Umweltgefahren zu verhindern. Die durchgestrichene Mülltonne erscheint auf allen Produkten, um die Besitzer an ihre Verpflichtung zur Mülltrennung zu erinnern. Für weitere Informati- onen zur fachgerechten Entsorgung von Haushaltsgeräten setzen Sie sich bitte mit ihren lokalen Behörden oder dem Händler in Verbindung. Dieses Gerät entspricht den folgenden EU-Richtlinien: 2014/35/EU (Niederspannungsrichtlinie) 2014/30/EU (Richtlinie über die elektromagnetische Verträglichkeit) -
Page 23: Français
Français • CONSIGNES DE SÉCURITÉ Veuillez lire toutes les instructions avant la mise en ser- vice de l’appareil et les conserver pour toute utilisation ultérieure. o Cet appareil peut être utilisé par des personnes aux capacités physiques, sensorielles ou intellec- tuelles limitées ou manquant d’expérience ou de connaissances si elles sont sous surveillance ou ont été instruites sur l’utilisation sûre de l’appareil et si elles ont compris les risques pouvant en résulter. o Cet appareil ne doit pas être utilisé par des en- fants. L’appareil et son cordon d’alimentation doi- vent être tenus hors de leur portée. - Page 24 o L’appareil ne doit être raccordé à une prise élec- trique qu’après vérification de la concordance entre la tension de secteur et celle indiquée sur la plaque signalétique de l’appareil. o Cet appareil ne doit en aucun cas être utilisé avec un cordon endommagé, à la suite d’un dysfonc- tionnement, ou s’il a été détérioré de quelque ma- nière que ce soit. Dans ce cas, il faut le retourner au service après-vente agréé le plus proche pour vérification, réparation ou réglage.
- Page 25 o Cet appareil ne doit pas être manipulé avec les mains mouillées, ni à proximité d’un lavabo ou de tout autre récipient contenant de l’eau. o Toute projection d’eau sur les fiches de contact est susceptible d’endommager l’appareil. ATTENTION - SURFACES CHAUDES : les parties chaudes de l’appareil peuvent occasionner des brûlures, même après que le bol de mixage ait été ôté de son support. o La capacité maximale de remplissage du bol de mixage ne doit pas être dépassée afin d’éviter éclaboussures ou brûlures. Le réglage de la vitesse ne doit pas être augmenté de manière abrupte lors du traitement d’aliments chauds.
- Page 26 o Compte tenu du contact alimentaire direct, la pro- preté de l’appareil doit être maintenue en tout temps. o Cet appareil n’est pas destiné à un usage sans in- terruption Une utilisation en continu à puissance maximale ne doit pas excéder cinq (5) minutes. o Entre chaque utilisation, l’appareil doit refroidir jusqu’à température ambiante afin de prolonger sa durée de vie. o Cet appareil est destiné à un usage domestique ou des applications similaires dans : §...
-
Page 27: Écran Digital
• ÉCRAN DIGITAL I. Icône « Thermomètre » J. Affichage de la température (plage de température comprise entre 20 °C et 140 °C) o Appuyer sur le bouton + (H) ou - (G) afin d’augmenter ou de diminuer la tem- pérature affichée à l’écran, par paliers d’un degré. o Remarque : l’affichage indique « 0 °C » si la température du bol n’excède pas 40 °C avec un mode sans chauffage. K. Affichage de la minuterie (valeur réglable entre 1 minute et 3 heures) o L’écran affiche « 00:00 », pour heures et minutes. o Le réglage maximal est de 3 heures. L. Affichage numérique de la vitesse (plage de vitesse de 1 à 8) M. Représentation de la vitesse N. Bouton de changement de fonction : Réglage température ⇌ Réglage minuterie o Brancher l’appareil et mettre le sélecteur de vitesse sur « OFF ». o Appuyer une fois sur le bouton afin d’afficher la température (l’affichage de la température clignote). o Régler ensuite la température requise au moyen des touches + ou -. o Appuyer à nouveau sur le bouton de changement de fonction afin de régler la minuterie. o Le premier « 00 » de l’affichage digital clignote. o Régler le temps de fonctionnement requis (en heure) au moyen des touches + ou -. o Appuyer ensuite sur le bouton F pour régler le temps en minutes, dès que l’affichage clignote au niveau du second « 00 ». -
Page 28: Avant La Première Utilisation
• AVANT LA PREMIÈRE UTILISATION Cet élégant robot ménager aux multiples fonctions dispose de trois modes de travail, avec cuisson et minuterie. o Retirer tous les emballages ou les autocollants de la surface de l’appareil. o Vérifier que tous les accessoires indiqués dans la présente notice sont bien présents. Dans le cas contraire, contacter le service après-vente. o Nettoyer toutes les pièces l’aide d’un chiffon humide. Ne jamais utiliser de produits de nettoyage abrasifs ou corrosifs. NE JAMAIS IMMERGER LE BLOC MOTEUR DANS L’EAU. o Installer le robot ménager sur une surface de travail propre, plane et dure en conser- vant un espace minimum de 10 centimètres tout autour de l’appareil. o Dérouler entièrement le cordon d’alimentation et vérifier son bon état général. • ASSEMBLAGE DU ROBOT MÉNAGER Montage du couvercle o Assembler le couvercle avec l’ouverture de remplissage conformément aux illustra- tions 1 et 2. -
Page 29: Utilisation Du Robot Ménager
• UTILISATION DU ROBOT MÉNAGER Prudence: o Le bol de mixage en acier inoxydable dispose d’une capacité maximale de 3 litres. Ne pas le remplir au-delà de cette limite ! o Des brûlures peuvent résulter d’éclaboussures de liquides chauds et une trop grande quantité de pâte travaillée peut entraîner une surchauffe du moteur et des dom- mages à l’appareil. Assemblage et utilisation des accessoires o Relever le levier de déverrouillage de la tête et soulever la tête du robot jusqu’à ce qu’elle s’enclenche en position relevée, installer le bol sur le socle de l’appareil puis le faire pivoter tourner pour le verrouiller (1). o Placer les ingrédients ou le liquide à l’intérieur du bol de mixage en acier inoxydable. o Enclencher le couvercle du bol de mixage sur la tête relevée du robot ménager (2). o Placer l’accessoire requis (batteur, fouet, etc.) sur l’axe d’entraînement de la tête, pousser vers le haut puis le tourner pour le verrouiller sur la goupille de l’axe (3). -
Page 30: Modes
• MODES Mode 1 : mixer o Fixer l’outil nécessaire (batteur, fouet ou crochet de pétrissage), remplir le bol de mixage et verrouiller la tête du robot en position de travail (voir paragraphe « As- semblage et utilisation des accessoires »). o Brancher l’appareil puis tourner le sélecteur de vitesse en position « OFF » faute de quoi l’affichage digital ne cessera de clignoter. o Appuyer sur le bouton de changement de fonction « Réglage température ⇌ Réglage minuterie » (F) afin de régler un temps de travail (entre 1 minute et 3 heures). L’affichage de la minuterie cesse de clignoter environ 3 secondes après le réglage. -
Page 31: Mode 2 : Réchauffer
o Si la température est supérieure à 60 °C – La vitesse est limitée au niveau 1. Quel que soit le paramétrage initialement réalisé, l’appareil revient automatiquement à la vitesse 1. Un autre réglage de la vitesse est désormais impossible. – Dès que la température du bol descend en-dessous de 60 °C, il est possible de positionner le sélecteur de vitesse sur « OFF » avant de choisir une autre vitesse. Mode 2 : réchauffer o Remplir le bol de mixage, l’installer sur le socle de l’appareil (1), assembler le couvercle sur la tête du robot ménager (2) puis verrouiller celle-ci en position de travail (3). o Brancher l’appareil puis tourner le sé- lecteur de vitesse en position « OFF », faute de quoi l’affichage digital ne ces- sera de clignoter. -
Page 32: Mode 3 : Chauffer & Mélanger
o Placer le sélecteur en position « OFF » puis procéder dans l’ordre inverse de l’assemblage pour retirer le bol du socle. Prudence: o Dans ce mode, l’icône « Thermomètre » clignote de manière continue, indiquant que la fonction « Chauffage » est activée. o Se tenir hors de portée des émissions de vapeur bouillante ou des gouttes d’eau chaude, danger de brûlures. o Ne jamais dépasser la capacité de remplissage maximale du bol et ne pas utiliser cette fonction sans le couvercle de l’appareil. - Page 33 Remarques: o Faire pivoter le sélecteur sur « OFF » afin d’arrêter l’appareil ou de mettre en pause le décompte. Pour reprendre le décompte, mettre le sélecteur sur la vitesse requise. o Dans ce mode de fonctionnement, le robot adapte automatiquement la vitesse à la température des liquides ou des aliments à l’intérieur du bol de mixage : o Si la température est inférieure à 60 °C - La vitesse peut être sélectionnée entre 1 et 8. - Appuyer et maintenir enfoncée la touche « impulsion » permet de faire fonctionner le robot à vitesse maximale (8) par intermittence. Lâcher la touche permet de revenir à la vitesse initialement sélectionnée. - Si la vitesse programmée est comprise entre 1 et 7, la touche augmente ré- gulièrement la vitesse de l’appareil jusqu’à la vitesse 8. o Si la température est supérieure à 60 °C - La vitesse est limitée au niveau 1. Quel que soit le paramétrage initialement réalisé, l’appareil revient automatiquement à la vitesse 1. Un autre réglage de la vitesse est désormais impossible. - Dès que la température du bol descend en-dessous de 60 °C, il est possible de positionner le sélecteur de vitesse sur « OFF » avant de sélectionner une autre vitesse. Prudence: o Dans ce mode, l’icône « Thermomètre » clignote de manière continue, indiquant que la fonction « chauffage » est activée. o Se tenir hors de portée des émissions de vapeur bouillante ou des gouttes d’eau chaude, danger de brûlures.
-
Page 34: Suggestions
• SUGGESTIONS Quantité Recette Accessoire Ingrédients Préparation max. Blancs Blancs d’oeuf en Fouet 12 Battre à vitesse 8 avec une pincée de sel. d’oeufs neige Farine 1350 g Programmer le robot à vitesse 1 pendant Levure 15 g 2 minutes puis augmenter la vitesse au Sucre 5 g Crochet de niveau 2 pour rendre la pâte souple et Pain 675 g pétrissage Eau homogène. Laisser reposer la pâte pen- (43 °C) dant 1 heure dans le bol. Travailler à nou- Beurre 25 g veau à vitesse 1 pendant 2 minutes. Sel 15 g Viande de bœuf (sur- 500 g longe, aloyau) -
Page 35: Nettoyage Et Stockage
• NETTOYAGE ET STOCKAGE o Toujours éteindre et débrancher l’appareil avant de le nettoyer. o Laver tous les éléments au contact alimentaire avec de l’eau chaude et un produit détergent neutre immédiatement après usage et les sécher soigneusement. o Veiller à ce que les fiches de contact situées à la base du bol restent propres et sèches. Les essuyer seulement avec un chiffon humide ! o Nettoyer la surface du bloc moteur à l’aide d’un chiffon humide. Ne pas l’immerger ou le passer sous l’eau afin de le rincer. -
Page 36: Élimination
• ÉLIMINATION Pour une élimination dans les règles de l’art, veuillez remettre l’appareil à un re- vendeur, un responsable du service après-vente ou Rotel SA. Selon la directive européenne 2012/19/UE relative aux déchets d’équipements élec- triques et électroniques (DEEE), les appareils électroménagers ne doivent pas être éliminés avec les déchets solides urbains normaux. Les appareils hors d’usage doi- vent être collectés séparément pour optimiser le coût de réutilisation et de recy- clage des matériaux contenus dans la machine tout en évitant les risques potentiels pour la santé publique et l’environnement. Le symbole de poubelle barrée figure sur tous les produits pour rappeler à leur propriétaire les obligations de tri sélectif... -
Page 37: Italiano
Italiano • AVVERTENZE DI SICUREZZA Prima dell’uso leggere attentamente tutte le istruzioni. Conservare il libretto di istruzioni per consultarlo ulte- riormente. o Questo apparecchio può essere usato da persone con ridotte capacità fisiche, sensoriali o mentali, o con insufficiente esperienza e conoscenza, a condi- zione che siano sotto sorveglianza o che abbiano ricevuto istruzioni sull’uso sicuro dell’apparecchio e siano consapevoli dei rischi connessi. o Questo apparecchio non deve essere utilizzato dai bambini. L’apparecchio e il cavo di alimentazione devono essere tenuti fuori dalla loro portata. - Page 38 o In nessun caso l’apparecchio può essere usato con un cavo d’alimentazione danneggiato, una spina di- fettosa, in seguito ad un mal funzionamento o in seguito ad alcun tipo di danno. In tal caso l’apparecchio deve essere riportato al servizio di assistenza tecnica più vicino, per essere riparato o regolato. o Ogni tentativo di riparazione, montaggio o smon- taggio non conforme, così come l’uso di accessori non raccomandati o forniti dal fabbricante stesso, possono causare surriscaldamento e incendio, scosse elettriche letali o ferite; tali casi sono esclusi...
- Page 39 o Eventuali schizzi d’acqua sui morsetti di contatto possono danneggiare l’apparecchio. ATTENZIONE - SUPERFICI CALDE: le parti calde dell’apparecchio possono causare ustioni, anche do- po che il boccale di mixaggio è stato staccato dal suo supporto. o Per evitare schizzi e ustioni, non superare la tacca del livello massimo di riempimento del boccale di mixaggio. Selezionare e aumentare la velocità gra- dualmente, evitando aumenti bruschi in fase di ri- scaldamento. o CAUTELA: un uso improprio dell’apparecchio può causare lesioni.
- Page 40 o Tra ogni utilizzo, lasciare raffreddare l’apparecchio a temperature ambiente; il vostro elettrodomesti- co avrà una maggiore durata di vita. o Questo apparecchio è destinato unicamente all’uso domestico, o a impieghi tipo: § Angoli cucina riservati al personale di ne- gozi, uffici e altri ambienti professionali. § fattorie; § alberghi, motel e altri tipi di residenze, quando messo a disposizione della clien- tela; § camere d’albergo; §...
-
Page 41: Schermo Digitale
• SCHERMO DIGITALE Q. Icona “Termometro” R. Indicazione della temperatura (temperatura variabile da 20 °C a 140 °C) o Premere il pulsante + (H) o - (G) per aumentare o rispettivamente diminuire la temperatura indicata sullo schermo; variazioni di un’unità (un grado). o Nota bene: allo schermo appare “0 °C” quando la temperatura del boccale non supera i 40 °C in funzione senza riscaldamento. S. Indicazione della minuteria (regolabile da 1 minuto a 3 ore) o Allo schermo appare “00:00”, per regolare le ore e i minuti. o Il tempo massimo selezionabile è di 3 ore. T. Indicazione numerica della velocità (velocità variabile da 1 a 8) U. Raffigurazione della velocità V. Pulsante per selezionare la funzione: Selezionare la temperatura ⇌ Selezionare la minuteria. o Collegare l’apparecchio alla rete e selezionare la velocità “OFF”. o Premere una volta sul pulsante per fare apparire la temperatura (l’indicazione luminosa lampeggia). -
Page 42: Prima Della Messa In Servizio
• PRIMA DELLA MESSA IN SERVIZIO Questo elegante elettrodomestico dalle multiple funzioni presenta tre modi di lavoro con cottura e minuteria. o Eliminare tutti gli elementi d’imballaggio, adesivi ed etichette dalle superfici dell’apparecchio. Verificare che tutti gli accessori indicati nel presente libretto d’istruzioni siano forniti con l’apparecchio. In caso contrario, prendere contatto con il servizio di assistenza tecnica più vicino. -
Page 43: Inserire Il Boccale Di Mixaggio
Inserire il boccale di mixaggio o Premere sulla leva di sblocco e sollevare il capo dell’elettrodomestico per bloccarlo in posizione rialzata. o Posizionare il boccale di mixaggio di acciaio inossidabile sullo zoccolo (vedi illustra- zioni qui sotto). o Farlo ruotare in senso orario per incastralo. o Le due icone indicanti “Chiusura” devono essere allineate (Fig. 3). • UTILIZZAZIONE DELL’APPARECCHIO Cautela: Il boccale di mixaggio di acciaio inossidabile offre una capacità di riempimento mas- sima di 3 litri. Non riempire oltre questo limite! Riempire eccessivamente il boccale può causare schizzi di liquidi caldi e quindi c’è pericolo di ustioni; un impasto troppo voluminoso rischia di surriscaldare il motore dell’apparecchio e quindi di danneggiar- Montare e usare gli accessori o Alzare la leva di sblocco del capo dell’apparecchio e alzare il capo fino a raggiungere la posizione sollevata, posizionare il boccale sullo zoccolo dell’apparecchio, poi farlo ruotare in senso orario fino al punto d’incastro. (1). o Mettere gli ingredienti o liquidi nel boccale di mixaggio di acciaio inossidabile. o Fissare il coperchio sul boccale di mixaggio, sul capo rialzato del robot domestico. (2). o Inserire l’accessorio richiesto (frullatore, frustino, ecc.) nell’asse di direzione del capo, fare pressione spingendo l’accessorio verso l’alto, poi rotearlo per incastrarlo al per- no dell’asse di direzione (3). -
Page 44: Funzioni
Cautela: o Per fermare l’apparecchio, selezionare la velocità “OFF”. o Il frustino per mescolare va usato solo con la funzione “cuocere a fuoco lento”. Non utilizzare questo tipo di frustino per altri programmi, c’è il rischio di danneggiare l’apparecchio! • FUNZIONI Modo 1: mixare o Fissare l’accessorio necessario (frustino per mescolare, frullino o gancio per impasta- trice), riempire il boccale di mixaggio e fissare il capo del robot in posizione di lavoro (vedi paragrafi “Assemblaggio montaggio e utilizzo degli accessori”). o Inserire la spina e selezionare la velocità su posizione “OFF” per evitare che lo scher- mo lampeggi ininterrottamente. o Premere il pulsante di selezione di funzione “Selezionare la temperatura ⇌ Selezio- nare la minuteria” (F) per selezionare il tempo di lavoro (tra 1 minuto e 3 ore). Il tempo apparso smette di lampeggiare 3 secondi dopo che un tempo è stato selezio- nato. - Page 45 o Posizionare la manopola di selezione su “OFF” per fermare l’apparecchio o fare una pausa nel conteggio del tempo; selezionare la velocità desiderata. o Un segnale sonoro indica che il tempo selezionato è trascorso, sullo schermo lam- peggia l’indicazione del tempo selezionato. o Selezionare “OFF” e attendere che l’apparecchio sia completamente fermo prima di smontarlo seguendo l’ordine inverso rispetto all’assemblaggio; togliere il boccale dal- lo zoccolo e togliere tutti gli accessori usati. Nota bene: o Se la minuteria non è selezionata, il conteggio del tempo avviene comunque (1.2.3.4…) e il robot s’interromperà dopo 3 ore di lavoro. o Premendo e mantenendo schiacciato il pulsante «impulsione» si può usare l’apparecchio a velocità massima (8) in maniera intermittente.
-
Page 46: Modo 2: Riscaldare
Modo 2: riscaldare o Riempire il boccale di mixaggio, instal- larlo sullo zoccolo dell’apparecchio (1), sistemare il coperchio sul capo del robot (2) poi fissare quest’ultimo in posizione di lavoro (3). o Inserire la spina dell’apparecchio, posi- zionare il selettore di velocità su “OFF”, così che l’indicazione sullo schermo digi- tale smetta di lampeggiare. o Premere il pulsante “riscaldamento ra- pido” (9) così che l’apparecchio porti gli alimenti o i liquidi contenuti nel boccale a una temperatura di 100 °C, in seguito saranno mantenuti a una temperatura costante di 70 °C. -
Page 47: Modo 3: Riscaldare & Mescolare
Cautela: o In questa funzione, l’icona “Termometro” lampeggia in maniera continua per indicare che la funzione “Riscaldamento” è attivata. o Rischio di ustione: stare lontani dalle emissioni di vapore bollente e da eventuali schizzi di acqua calda. o Non superare mai la capacità massima di riempimento del boccale e non usare que- sto modo di cottura senza il coperchio apposito. o Afferrare il boccale di mixaggio unicamente per il suo manico isolante e evitare ogni contatto con le pareti calde. Nota bene: o Si può selezionare un’altra temperatura quando l’apparecchio si trova in modo “ri- scaldamento”. Quando una temperatura è stata selezionata, l’apparecchio si riscalda gradualmente per poi mantenere costante la temperatura. - Page 48 Nota bene: o Fare roteare il selettore su “OFF” per spegnere l’apparecchio o fare una pausa nel conteggio del tempo rimanente. Per riprendere il conteggio, selezionare la velocità desiderata. o In questa funzione, il robot adatta automaticamente la velocità alla temperatura de- gli alimenti o dei liquidi all’interno del boccale di mixaggio: o Se la temperatura è inferiore a 60 °C - Può essere selezionata una velocità tra 1 e 8. - Premere e mantenere premuto il pulsante “Impulsi” per fare funzionare l’apparecchio a velocità massima (8) e a intermittenza. Smettendo di premere il pulsante si torna alla velocità inizialmente selezionata. - Se la velocità selezionata è compresa tra 1 e 7, la velocità dell’apparecchio aumenterà regolarmente fino a raggiungere la velocità massima 8. o Se la temperatura è superiore a 60 °C - La velocità resta limitata al livello 1. Indipendentemente dalla selezione e parametragli iniziale, l’apparecchio si reinstalla automaticamente sul livello di velocità 1. Sarà impossibile selezionare un altro livello di velocità.
-
Page 49: Suggerimenti
• SUGGERIMENTI Quantità Ricette Accessori Ingredienti Procedimento massima Albumi Montare a velocità 8 con un pizzico di montati a Frustino Albumi 12 sale neve Farina 1350 g Selezionare la velocità 1 per 2 minuti e Lievito 15 g portare gradualmente la velocità al li- Zucchero 5 g Gancio pe vello 2 per rendere l’impasto elastico e Pane 675 g impastare Acqua omogeneo. Lasciare riposare 1 ora nel (43 °C) boccale. Lavorare di nuovo per 2 minuti Burro 25 g a velocità 1. Sale 15 g Polpa di manzo (pezzi vari 500 g Tagliare tutti gli ingredienti a dadini di... -
Page 50: Pulizia E Cura
• PULIZIA E CURA o Spegnere l’apparecchio e staccare la spina prima di pulirlo. o Immediatamente dopo l’uso, lavare accuratamente tutti gli elementi e accessori che sono in contatto con gli alimenti; usare acqua calda e un detergente neutro. Asciuga- re con cura. o Sorvegliare che i morsetti di contatto alla base del boccale restino puliti e asciutti. Pu- lirli unicamente con un panno umido! o Pulire la superfice del blocco motore con un panno umido. Non immergerlo mai e non metterlo sotto l’acqua corrente per sciacquarlo. o Evitare di usare prodotti e attrezzi abrasivi che danneggerebbero le superfici dell’apparecchio e gli accessori. o In caso di sporcizia tenace, riempire il boccale con un po’ di acqua e qualche goccia di sapone liquido per stoviglie, poi selezionare per qualche minuto la velocità 1. -
Page 51: Smaltimento
• SMALTIMENTO Per lo smaltimento corretto, la macchina deve essere restituita al rivenditore spe- cializzato, al servizio di assistenza o alla ditta Rotel AG. La Direttiva UE 2012/19/CE sui rifiuti di apparecchiature elettriche ed elettroniche (WEEE) sancisce che gli elettrodomestici non possono essere smaltiti usando il nor- male ciclo di rifiuti solidi urbani. Le apparecchiature dismesse vanno invece raccolte separatamente al fine di ottimizzare il costo di riutilizzo e dei materiali di riciclo che compongono la macchina, escludendo così un danno potenziale alla salute pubblica e all’ambiente. Il simbolo del bidone su ruote barrato appare su tutti i prodotti per ricordare ai proprietari le obbligazioni inerenti la raccolta differenziata. I proprietari dovrebbero rivolgersi alle autorità locali o al rivenditore delle apparecchiature per raccogliere ulteriori informazioni in merito al corretto smaltimento delle apparec- chiature stesse. Questo apparecchio è conforme con le seguenti Direttive UE: 2014/35/UE (Direttiva sulla Bassa Tensione) 2014/30/UE (Direttiva sulla Compatibilità Elettromagnetica) Gebrauchsanweisung ○ Mode d’emploi ○ Istruzioni per l’uso ○ Instructions for use... -
Page 52: English
English • SAFETY INSTRUCTIONS Please read all instructions carefully before using the device and keep these for future reference. o This appliance may be used by persons with lim- ited physical, sensory or mental abilities or lack of experience and/or knowledge, if they are super- vised by persons responsible for their security or if they have been instructed about the safe use of the appliance and therefore fully understand the hazards involved. - Page 53 o It shall be ensured that the mains voltage matches the voltage specified on the rating plate of the ap- pliance before plugging it in. o The appliance shall not be operated with a dam- aged supply cord or plug, or after the appliance malfunctions, or has been damaged in any manner. It shall be returned to the nearest authorized ser- vice facility for examination, repair or adjustment. o Incorrect repair attempt, assembly, or use of any accessory attachment not recommended or sold by the manufacturer may cause a fire, electric shock or personal injury and will void the manufac- turer’s warranty.
- Page 54 o CAUTION - HOT: Burns may occur by touching the hot surfaces of the appliance, even after the bowl has been removed from its stand. o The maximum filling capacity of the bowl shall not be exceeded to avoid splashing or scalding. When processing hot food, the speed setting must never be abruptly increased. o CAUTION: misuse of the appliance may cause inju- ry. o The appliance shall not be left unattended while operating. o Contact with the shaft, any moving parts and fitted attachments shall be avoided until the appliance completely stops running. o Considering the direct food contact, this appliance must be kept clean at all times.
- Page 55 o The appliance is intended to be used in household and similar applications such as: o staff kitchen areas in shops, offices and other working environments; o farm houses; o by clients in hotels, motels and other residen- tial type environments; o bed and breakfast type environments; § catering and similar non-retail applications. o The appliance shall not be used outdoors. Gebrauchsanweisung ○ Mode d’emploi ○ Istruzioni per l’uso ○ Instructions for use...
-
Page 56: Lcd-Display
• LCD-DISPLAY Y. Temperature icon Z. Temperature display (Temperature range from 20℃ to 140℃) o Press button + (H) or – (G) to increase or decrease the temperature shows on LCD in increments of 1 degree. o Note: the display shows “0℃” if the temperature of the appliance is lower than 40℃, in a non-heating mode. AA. Time display (Time range from 1 minute to 3 hours) o The display shows “00:00”, for hours and minutes. The maximal setting time is 3 hours. BB. Working speed (Speed range from 1 to 8) CC. Speed display Switch button: Temperature setting mode ⇌ Time setting mode o Plug in and rotate the speed control knob to OFF position. o Press the switch button once for the temperature to be displayed (the display will flash accordingly). Then press either the + or – button to set the tempera- ture. -
Page 57: Before First Use
• BEFORE FIRST USE This elegant appliance is a versatile and multifunctional kitchen machine with three working modes, a timer and cooking function. Remove all packaging materials and any stickers from the appliance. Check that all listed parts are included. If anything is missing, please contact the af- ter-sales service. Wipe off all removable parts with a damp cloth. Never use abrasive products. DO NOT IMMERSE THE MOTOR BASE IN WATER. Place the device on a flat stable surface and ensure a minimum of 10 centimetres clearance around the device. Fully unwind the power cord and check for any signs of damage. • ASSEMBLING THE KITCHEN MACHINE Assemble the bowl cover Assemble the bowl cover included filling aperture according to figures 1 and 2. Assemble the bowl to the appliance Push up the head-lift lever and lift the mixer head until it locks in the raised posi- tion. Fit the stainless-steel bowl on the base of the appliance (See figures below). Rotate the bowl clockwise to secure it in position. Both “lock” icons should be aligned (Fig. 3). -
Page 58: Using The Kitchen Machine
• USING THE KITCHEN MACHINE Caution: o The stainless-steel mixing bowl has a maximum filling capacity of 3 litres. Do not ex- ceed! o Hot liquids may splash and too much dough would overload the kitchen machine, causing either injuries or damages to the appliance. Assemble and use the tools o Push up the head-lift lever and lift the mixer head until it locks in the raised position, fit the bowl on the base of the appliance and rotate to lock (1). Place the ingredients or liquids to process into the stainless-steel bowl. o Put the bowl cover onto the head of the appliance (2). Assemble the required tool (beater, hook or whisk) by lining it up on the shaft of the head and rotating it to se- cure (3). -
Page 59: Working Modes
• WORKING MODES Caution: o If the mixing bowl is to be used to its maximum filling capacity of 3 litres, we recom- mend not to exceed the running speed 1 under any of the working modes. o In a standby mode, press the “Temperature⇌Time” - button (F) for a few seconds to reset all settings. The display shows: Mode 1: mixing mode o Attach the required tool (beater, whisk or kneading hook), fill up the bowl and lock the mixer head in its working position (see section “Assemble and use the tools”). Plug in the appliance and rotate the knob to the “OFF” – position, otherwise, the LCD indicator light will keep flashing. o Press the “Temperature⇌Time” - button (F) to set a working time (from 1 minute to 3 hours). The LCD indicator light will stop flashing 3 seconds after the time setting. o Rotate the knob to set a working speed (from 1 to 8). o The appliance will start processing and count down the scheduled timing. Rotate the knob to the “OFF” - position to stop the appliance and pause the countdown. Resume the operation by turning the knob again to a working speed. -
Page 60: Mode 2: Heating Mode
o In this mode, the appliance will regulate the speed according to the temperature of the food inside the bowl: o If the bowl temperature stays below 60°C - The speed can be selected from 1 to 8. - Press and hold the “pulse” - button for the appliance to run up to speed 8. Release the pulse button to switch back to the selected speed. - While the appliance is running under speed 1 to 7, the “pulse” button will repeatedly increase the speed of the appliance to speed 8. o If the bowl temperature exceeds 60°C - The speed is limited at speed 1. Regardless of the speed selection that was initially done, the appliance switch automatically to speed 1. Any speed se- lecting function is now invalid. - Once the temperature inside the bowl decreases under 60°C, rotate the knob back to the “OFF” – position to select another running speed. Mode 2: heating mode o Fill up the stainless-steel bowl, fit it onto the base (1), assemble the bowl cover (2), push up on the head-lift lev-... -
Page 61: Mode 3: Heating & Stirring Mode
o A sound signal indicates when the working time is over and the LCD indicator light keeps flashing. o Rotate the knob back to the “OFF” - position and proceed in the reverse order of the assembly to empty the bowl. Caution: o The temperature icon blinks constantly under this mode, indicating that the heating function is activated. o Beware of escaping steam and drips from hot condensation water: there is a danger of scalding. o Do not exceed the effective filling capacity and do not use without the bowl cover. o Avoid touching the bowl and only use the insulating handles to remove it from the base of the appliance. Notes: o A temperature reset is possible while the appliance is running. With a set temperature, the appliance will heat up and keep the food to the target temperature. Without a set temperature, the appliance will heat up to 100℃, and keep the temperature constant at 70℃ for the remaining set time (Same function than with the “Rapid heating button”). - Page 62 Notes: o Rotating the knob to the “OFF” - position will stop the appliance and pause the countdown. Resume the operation by turning the knob again. In this mode, the appliance will regulate the speed according to the temperature of the food inside the bowl: o If the bowl temperature stays below 60°C - The speed can be selected from 1 to 8. - Press and hold the “pulse” button for the appliance to run up to speed 8. Re- lease the pulse button to switch back to the selected speed. - While the appliance is running under speed 1 to7, the “pulse” button will re- peatedly increase the speed of the appliance to speed 8. o If the bowl temperature exceeds 60°C - The speed is limited at speed 1. Regardless of the speed selection that was initially done, the appliance switch automatically to speed 1. Any speed se- lecting function is now invalid.
-
Page 63: Suggestions
• SUGGESTIONS Amount Recipe Accessory Ingredients Preparation max. Egg Whisk at speed 8 with a salt pinch. whites Whisk Egg whites 12 pcs Flour 1350g Operate the appliance at speed 1 for Yeast 15g 2 minutes and step up to speed 2 until the Sugar Kneading dough is smooth and elastic. Leave the Bread 675g hook dough to rise for 1 hour inside the bowl. Water (43°C) Process once again at speed 1 for Butter 25g 2 minutes. Salt 15g Sirloin 500g Potato 100g Cut all ingredients into 2cm-pieces. Set the Tomato 100g temperature to 120°C. Start the appliance... -
Page 64: Cleaning And Storage
• CLEANING AND STORAGE o Always unplug the appliance before cleaning. o Clean the parts that had direct food contact in hot water with mild detergent imme- diately after use dry them thoroughly. o Always keep the contact pins at the bottom of the bowl clean and dry. Only wipe the contact pins with a wet cloth! o Clean the base of the appliance with a damp soft cloth. Do not immerse the motor base in water and do not rinse it either. o Do not use anything harsh or abrasive cleaners or tools that may scratch or damage the surfaces of the appliance or its accessories. o If the bowl is hard to clean, pour some hot soapy water into the bowl and run the appliance at speed 1 for few minutes. o Store the appliance in a dry place, out of the reach of children and preferably in its original box. • TROUBLESHOOTING Code Explanation Remarks... -
Page 65: Disposal
• DISPOSAL For proper disposal, please return the device to a retailer, a service agent or Ro- tel AG. European Directive 2012/19/EC concerning Waste Electrical and Electronic Equip- ment (WEEE) states that household appliances should not be disposed of using the normal solid urban waste cycle. Exhausted appliances should be collected separate- ly to optimise the cost of re-using and recycling materials comprising the machine while preventing potential damage to public health and the environment. The crossed-out wheeled bin symbol appears on all products to remind owners of the obligations regarding separate waste collection. Owners should contact their local authorities or appliance dealers for further information concerning the correct dis-... -
Page 66: D / F / I
Eliminiamo tutti i difetti causati da difetti del materiale o di fabbrica. La prestazione di garanzia avviene con il ripristino o la sostituzione di pezzi difettosi a nostra discrezione. Una prestazione di garanzia decade nel caso di danni a pezzi soggetti a usura, di danni e difetti dovuti a trattamento o a manutenzione non corretti (in particolare calcificazione e utilizzo industriale). Viene concessa solo se la cartolina di garanzia munita della data d’acquisto, del timbro del rivenditore e della fir- ma o la ricevuta d’acquisto e l’apparecchio vengono inviati al rispettivo servizio di assistenza (vedi indirizzo in basso). L’invio deve avvenire nell’imballaggio originale. Le spese di trasporto sono a carico dell’acquirente. Non dimenticatevi p.f. di allegare all’invio il vostro indirizzo e, qualora il difetto non fosse chiaro, anche una spiegazione. Warranty commitment We commit ourselves to repair this device free of charge, should a failure occur within the period of warranty despite proper handling. We repair all defects caused by material or manufacturing faults. The guarantee will be fulfilled either by repairing the device or replacing the defective parts, according to our judgement. A warranty does not cover damages due to wearing parts, damages and defects caused by improper handling or maintenance (such as limescale and commercial use). It will only be granted if either the warranty card stating date of purchase, dealer’s stamp and signature, or the purchase receipt is sent with the device to the relevant after-sales service (see address below). Devices shall be returned in their original packaging. Transport costs are to be borne by the purchaser. Remember to specify your address to your sending, as well as a short decla- ration about the failure, shall the defect not be obvious. Servicestation/ Service après-vente / Servizio Assistenza / After-sales service: Rotel AG E-mail: office@rotel.ch Parkstrasse 43, 5012 Schönenwerd Telefon: 062 787 77 00 Gebrauchsanweisung ○ Mode d’emploi ○ Istruzioni per l’uso ○ Instructions for use...