Table of Contents
Advertisement
REMANUFACTURING INSTRUCTIONS
SSS
1127
™
V 5.6: 09-14
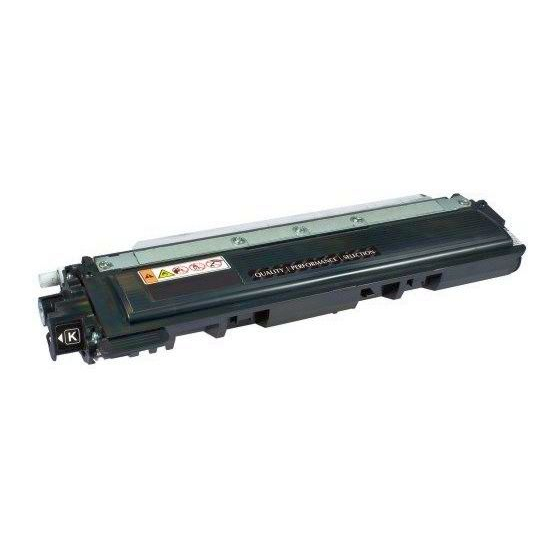
Brother
HL-3040CN Cartridge
®
HL-3070/MFC-9010CN/9120CN/9320CN
TN-210 & DR-210
CONTENTS
Tools & Supplies ..................................... 2
Wirelines .............................................. 3
Toner and Drum Unit Differences ............... 4
Check the Alignment of the Boss ............... 5
Disassembling the Cartridge ..................... 6
Assembling the Cartridge ....................... 10
Resetting the Flag Gear ......................... 13
Disassembling the Drum Unit .................. 14
Assembling the Drum Unit ...................... 16
Drum Reset Instructions .......................... 19
Color Calibration Process ...................... 20
About Static Control .............................. 21
Advertisement
Table of Contents

Related Manuals for Brother TN-210 Series


Summary of Contents for Brother TN-210 Series
-
Page 1: Table Of Contents
REMANUFACTURING INSTRUCTIONS 1127 ™ V 5.6: 09-14 Brother HL-3040CN Cartridge ® HL-3070/MFC-9010CN/9120CN/9320CN TN-210 & DR-210 CONTENTS Tools & Supplies ........2 Wirelines ..........3 Toner and Drum Unit Differences ....4 Check the Alignment of the Boss ....5 Separating the Drum Unit & Toner Hopper .. 5 Disassembling the Cartridge ..... -
Page 2: Tools & Supplies
TOOLS & SUPPLIES 1127 ™ • Doctor Blade Cover (B3040DBCOVER) • Toner Pour Spout (TPS) • Toner Vacuum (3M) (TONERVAC115 or TONERVAC220) Doctor Blade Cover Toner Pour Spout • Toner Cloth (TCCLOTH) • Lint-Free Foam Swab (LFSWAB) • Lint-Free Cleaning Cloth (LFCCLOTH) •... -
Page 3: Wirelines
WIRELINES 1127 ™ hL-3040 C rother ® artridge ssemBLy Developer Roller Developer Roller Support Bearing Spring Support Bearing Developer Roller Drive Side End Plate Drive Side Support Bearing Doctor Blade Doctor Blade End Felt Developer Roller Stabilizer Locking Tab Doctor Blade Developer End Felt Roller End Felt... -
Page 4: Toner And Drum Unit Differences
1127 BROTHER HL-3040 TONER AND DRUM UNIT DIFFERENCES ™ ® BLACK TONER CARTRIDGE c-clip (P lastic Keying Feature (Axle Locking Mechanism) Corona Assembly (Narrow) CYAN, MAGENTA and YELLOW (COLOR) TONER CARTRIDGES e-clip (M etal (Axle Locking Mechanism) Keying Feature Corona Assembly (Wide) Visit Static Control on the web @ www.scc-inc.com... -
Page 5: Check The Alignment Of The Boss
NOT Uniform FIGURE 1.3 Warning: While remanufacturing the Brother HL-3040 toner cartridge, you will need to check the cartridge drive gear boss for ® proper alignment or warping (Figure 1.3). IF THE BOSS IS WARPED OR MISSHAPEN, THE CARTRIDGE CANNOT BE REMANUFACTURED. -
Page 6: Disassembling The Cartridge
DISASSEMBLING THE CARTRIDGE 1127 ™ STEP 2.1 STEP 2.2 Locking Tab Small Slotted Screwdriver Phillips Screwdriver Screws FIGURE 2.1 FIGURE 2.2 On the drive side end plate, remove the two screws as shown Use a small slotted screwdriver to release the locking tab on in Figure 2.1. - Page 7 DISASSEMBLING THE CARTRIDGE 1127 ™ STEP 2.7 Note: Insert a small slotted screwdriver under the contact Contact Side side support bearing, then lift up and out to Developer Roller free the developer roller support bearing from Support Bearing the cartridge. Remove the spring. &...
- Page 8 DISASSEMBLING THE CARTRIDGE 1127 ™ STEP 2.12 Doctor Blade Cover FIGURE 2.12A FIGURE 2.12B Inspect the doctor blade cover. If wrinkled or damaged, remove Use a lint-free cleaning cloth dampened with 91-99% isopropyl the blade cover from the doctor blade (Figure 2.12A). alcohol to clean any adhesive residue from the doctor blade’s metal stamping (Figure 2.12B).
- Page 9 DISASSEMBLING THE CARTRIDGE 1127 ™ STEP 2.16 STEP 2.17 Small Slotted Compressed Air Pry At Top Screwdriver Doctor Blade Sealing Felts Hopper Cap FIGURE 2.16 FIGURE 2.17 Note: Blow the doctor blade felts with dry, filtered, ionized Using a small slotted screwdriver, pry the hopper cap from the top as shown in Figure 2.17.
-
Page 10: Assembling The Cartridge
ASSEMBLING THE CARTRIDGE 1127 ™ STEP 3.1 STEP 3.2 Phillips Screws Screwdriver FIGURE 3.1 FIGURE 3.2 Place the doctor blade onto the cartridge (Figure 3.1). Secure the doctor blade into the cartridge with three screws shown in Figure 3.2. STEP 3.3 STEP 3.4 Blade Cover FIGURE 3.3... - Page 11 ASSEMBLING THE CARTRIDGE 1127 ™ STEP 3.7 Screw Contact Side End FIGURE 3.7A FIGURE 3.7B Place the contact side end cap and secure with a screw (Figures 3.7A and 3.7B). STEP 3.8 Note: Reference Figures 4.1A and 4.1B on page 13 Contact Side under the “Resetting the Flag Gear”...
- Page 12 ASSEMBLING THE CARTRIDGE 1127 ™ STEP 3.11 STEP 3.12 Toner Phillips Screwdriver Screws FIGURE 3.11 FIGURE 3.12 Secure the drive side end plate with two screws as shown in Fill the cartridge using the approved toner (Figure 3.12). Figure 3.11. STEP 3.13 Hopper Cap FIGURE 3.13...
-
Page 13: Resetting The Flag Gear
RESETTING THE FLAG GEAR 1127 ™ STEP 4.1 Flag Gear Tab Reset Position Flag Gear Tab Spent Position FIGURE 4.1A FIGURE 4.1B Note: Reference Figures 4.1A and 4.1B to ensure the flag gear tab is in the reset location. Print error failures could result if the gear is not set properly. -
Page 14: Disassembling The Drum Unit
DISASSEMBLING THE DRUM UNIT 1127 ™ STEP 5.1 Note: For instruction purposes, the DR-210CL-K unit Screws is shown. FIGURE 5.1 Remove the two screws securing the corona assembly on the drum unit (Figure 5.1). STEP 5.2 Corona Assembly FIGURE 5.2A FIGURE 5.2B Slide the green corona cleaning tab to the unlock position to release the corona as shown in Figure 5.2A. - Page 15 DISASSEMBLING THE DRUM UNIT 1127 ™ STEP 5.4 CONTACT SIDE CONTACT SIDE Locking Bearing Tab on Locking Bearing Needle Small Nose Slotted Pliers Screwdriver FIGURE 5.4A FIGURE 5.4B Use a small, slotted screwdriver to press the tab on the locking bearing (Figure 5.4A) and remove the bearing using needle nose pliers (Figure 5.4B).
-
Page 16: Assembling The Drum Unit
ASSEMBLING THE DRUM UNIT 1127 ™ STEP 6.1 DRIVE SIDE DRIVE SIDE orrect osition Stabilizer ncorrect Ring Stabilizer Ring osition FIGURE 6.1A FIGURE 6.1B Before installing the drum, ensure the stabilizer ring Note: Incorrect position of the drum stabilizer will is positioned correctly on the drive side (Figure 6.1A). - Page 17 ASSEMBLING THE DRUM UNIT 1127 ™ STEP 6.5 C-Clip Drum Axle Drum Drum Stabilzer Drum Axle Ring Stabilzer Ring FIGURE 6.5A FIGURE 6.5B Place the drum stabilizer ring onto the drum axle (Figure 6.5A) and then snap the locking retainer onto the drum axle (Figure 6.5B). STEP 6.6 Corona Assembly ligned...
- Page 18 ASSEMBLING THE DRUM UNIT 1127 ™ STEP 6.8 STEP 6.9 Green Tab Green Tab FIGURE 6.8 FIGURE 6.9 Slide the green corona cleaning tab back and forth twice to Return the corona wire cleaning tab to the locked position by ensure the corona wire is clean (Figure 6.8).
-
Page 19: Drum Reset Instructions
OPTIONAL Drum Reset Instructions: For Multi-Function Copiers (MFC) and Note: Always reset the drum counter on a Brother HL-3040/3075CN printer after Digital Copier Printers (DCP) replacement. However, this reset may be performed at any time. There are four drum cartridges in a printer: black, cyan, For MFC 9010CN and DCP 9010CN: magenta and yellow. -
Page 20: Color Calibration Process
COLOR CALIBRATION PROCESS 1127 ™ OPTIONAL The Color Calibration Process is recommended when replacing toner cartridges: Perform the calibration from the control panel of the printer: 1. Press + or - to choose COLOR CORRECTION. Press OK. 2. Press + or - to choose COLOR CALIBRATION. Press OK. 3. -
Page 21: About Static Control
DEDICATION TO TRAINING In order to produce consistent high quality prints that are virtually indistinguishable from the OEM, it is essential to follow Static Control’s remanufacturing instructions exactly as directed. Static Control is dedicated to informing customers of the latest innovations in training and knowledge. Access to these instructions, our technical support staff and View on Demand Webinars is available to all customers in good standing.