
Related Manuals for IVT C6


Summary of Contents for IVT C6
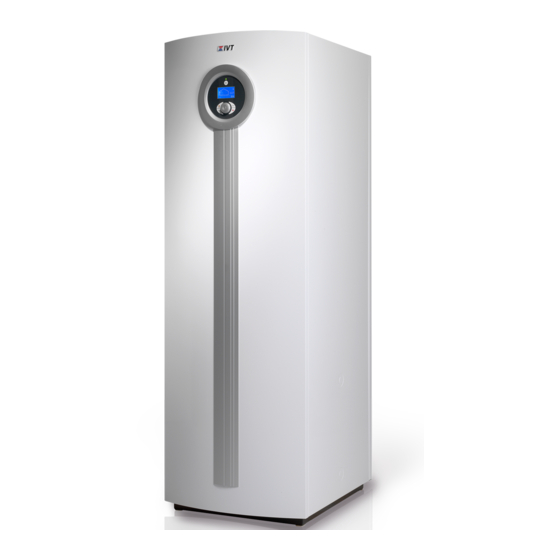
- Page 1 Greenline HE C6-C11 E6-E17 6 720 641 855-01.1I Installer Guide Art. no.: 6720643409; Version 2010/03...
-
Page 2: Table Of Contents
11.5 Menu button and menu dial ... 46 C6 - C11 ......11 11.6 Return button . - Page 3 Table of Contents 15 Settings ....... 56 15.1 Room temperature ....56 15.2 Hot water .
-
Page 4: Explanation Of Symbols And Safety Information
Explanation of symbols and safety information Explanation of symbols and safety information Explanation of symbols Safety precautions Warning symbols General B Read the guide carefully and keep it to hand for future Safety instructions in this document are use. framed and identified by a warning triangle which is printed on a grey background. -
Page 5: Included In The Delivery
Fig. 1 Heat pump Flow sensor Adjustable feet Outdoor sensor Document set Particle filter (R 3/4 inner thread) for heating system (C6 - 11) Drain plug Ball valve Safety valve Expansion tank Filling kit E6 - 11, C6 - 11... -
Page 6: General
Information about the heat pump B Make sure there is a floor drain in the room where the C6 - 11 are ground source heat pumps with integrated heat pump is installed. hot water heaters. -
Page 7: Can-Bus
General CAN-BUS CAUTION: Do not mix up the 12V and CAN- The various circuit boards in the heat pump are joined by BUS connections! a communications cable, CAN-BUS. CAN (Controller The processors are destroyed if 12V is Area Network) is a two-wire system for communication connected to the CAN-BUS. -
Page 8: Handling Circuit Boards
General 3.10 Handling circuit boards A condition for good ESD protection is a ground- connected bracelet when handling electronics. This Circuit boards with control electronics are sensitive to bracelet must be put on before opening the screened discharges of static electricity (ESD – ElectroStatic metal bag/packaging or before exposing an installed Discharge) when handled. -
Page 9: Heating In General
XB2 based accessory, the same time as the heat pump to meet the demand, such as IVT PKS 1000. when the heat pump cannot meet it itself. Alarm mode, Extra hot water and Hot water peak, and if the... -
Page 10: Energy Metering
Energy metering Energy metering Energy metering in the heat pump is an approximation based on the sum of the nominal emitted output during the relevant metering period. The calculation requires for example that the heat pump is correctly installed, and that the flow and Δ temperatures on the hot and cold sides are adjusted as recommended. -
Page 11: Dimensions And Clearance
Dimensions and clearance Dimensions and clearance C6 - C11 126 100 166 ≥100 ≥100 6 720 641 855-32.1I Fig. 6 All dimensions are stated in mm.: HTF (coll) in HTF (coll) out Cold water in Electrical connections 6 720 641 570-10.1I... - Page 12 Dimensions and clearance E6 - E11 ≥100 ≥100 6 720 641 855-15.1I Fig. 8 All dimensions are stated in mm.: Electrical connections HTF (coll) out HTF (coll) in Return, hot water heater 6 720 641 855-03.1I Flow, hot water heater Fig.
- Page 13 Dimensions and clearance E14 - E17 ≥100 ≥100 6 720 641 855-31.1I Fig. 10 All dimensions are stated in mm.: Electrical connections HTF (coll) out HTF (coll) in 6 720 641 855-03.1I Return, hot water heater Flow, hot water heater Fig.
-
Page 14: Technical Information
Electric box Particle filter for the heating system Reset button for overheat protection on the electric 3-way valve additional heat C6-C11 E14-E17 Double shelled hot water heater Heat transfer fluid pump Drain tap under the hot water heater Evaporator (concealed) -
Page 15: System Solutions
Technical information System solutions Detailed system solutions can be found in E21.T11 Sensor Collector circuit out the product's planning documentation. E21.V101 Filter Tab. 6 7.2.1 System solution explanations Heat pump E10.T2 Outdoor sensor E22.E2 Electric add. heat Tab. 3 E22.G2 Heat carrier pump E22.G3 Heat transfer fluid pump... - Page 16 Technical information 7.2.2 C6 - C11 6 720 641 855-10.1I Fig. 13 Non-shunted heating circuit with buffer tank When installing to underfloor heating systems with For explanations for the system solutions individual room control, a system solution with a buffer 7.2.1).
- Page 17 For circuit E12 bypass solution and by 40% of the nominal flow of the heat pump. Ensure accessory IVT mixing valve module 1000 is that the larger section of the thermostat valves is fully required open.
- Page 18 Technical information 7.2.3 E6 - E17 6 720 641 855-12.1I Fig. 15 Non-shunted heating circuit with buffer tank and external hot water heating When installing to underfloor heating systems with individual room control, a system solution with a buffer tank (E11.C111) is a requirement so that flow over the heat pump is guaranteed.
- Page 19 Fig. 16 Two heat pumps (cascade connection), non-shunted and shunted heating circuit with buffer tank and external hot water heating For explanations for the system solutions For circuit E12 the accessory IVT mixing 7.2.1). valve module 1000 is required 6 720 643 409 (2010/03)
- Page 20 (E11.C111) is a requirement so that flow over the conversion kit manual for the combi heater. heat pump is guaranteed. For circuit E12 the accessory IVT mixing For explanations for the system solutions valve module 1000 is required 7.2.1).
-
Page 21: Technical Information
600 x 645 x 1800 Weight (copper/stainless steel hot water heater) 230/200 231/201 240/210 (stainless steel) Tab. 10 Technical data 1) According to EN 14511 2) No soft starter in C6 3) According to EN ISO 11203 6 720 643 409 (2010/03) - Page 22 Technical information 7.3.2 Diagram circulation pumps C6-C11 Heat transfer fluid (coll.) pump C6-C7 Heat transfer fluid (coll.) pump C9 H[kPa] H[m] H[kPa] H[m] Q[m³/h] Q[l/s] Q[m³/h] 6 720 641 855-36. 1I Q[l/s] 6 720 641 855-35. 1I Tab. 11 Heat transfer fluid (coll.) pump C11...
- Page 23 Sound pressure level Dimensions (height x depth x 600 x 645 x 1520 width) Weight Tab. 13 Technical information 1) According to EN 14511 2) No soft starter in C6 3) According to EN ISO 11203 6 720 643 409 (2010/03)
- Page 24 Technical information 7.3.4 Diagram circulation pumps E6-E17 Collector circuit pump E6 - E17 Collector circuit pump E9 H[kPa] H[m] H[kPa] H[m] Q[m³/h] Q[l/s] Q[m³/h] 6 720 641 855-36. 1I Q[l/s] 6 720 641 855-35. 1I Tab. 14 Collector circuit pump E11-E17 Heat carrier pump E6-E11 H[m] H[kPa]...
- Page 25 Technical information Heat carrier pump E14-E17 H[kPa] H[m] U = 10,00V (4850 rpm) U = 9,09V (4400 rpm) U = 8,28V (4000 rpm) U = 7,46V (3600 rpm) U = 6,65V (3200 rpm) U = 5,84V (2800 rpm) U = 5,03V (2400 rpm) U = 4,22V (2000 rpm) U = 3,41V (1600 rpm) U = 3,00V (1400 rpm)
- Page 26 Technical information 7.3.5 Collector pressure loss 7.3.6 Measurement values for temperature sensors When calculating pressure loss, the °C Ω °C Ω °C Ω °C Ω T... T... T... T... concentration of antifreeze (propylene –40 154300 –5 19770 3790 glycol) should be taken into consideration. –35 111700 15280...
-
Page 27: Regulations
Regulations Regulations The following regulations and requirements must be observed: • The responsible power supply company's local regulations and requirements, including any corresponding special rules • National building regulations • EN 60335 (Safety of electric and similar household appliances) part 1 (General requirements) Part 2-40 (Particular requirements for electrical heat pumps, air-conditioners and dehumidifiers) •... -
Page 28: Installation
Only qualified installers may carry out the Select membrane expansion vessel according to: installation. The installer must follow applicable rules and regulations and Model Volume recommendations from the supplier. E6-E11, C6-C11 12 litres Collector system E14 - E17 18 litres Tab. 18 Installation and filling... -
Page 29: Heating System
A particle filter for the heating system is included in the thermostat is connected to the external input ( delivery of C6 - 11 and should be installed on the Image 48) for the circuit and Block heatingset to connection for the heating system's return line. -
Page 30: Siting The Appliance
Installation Siting the appliance Heat insulation Sound propagation must be taken into consideration All heat transfer and collection lines must have suitable when choosing a position for the heat pump heat and condensation insulation according to Chapter. 7.3). applicable norms. Pipework preparations Removing the front panel B Connection pipes for the collector system, heating... -
Page 31: Installing Soft Starter (Accessory)
( Chapter 3.10). 9.9.1 C6 - C11 6 720 641 855-17.1I Fig. 23 Soft starter C6-C11 6 720 641 855-24.1I Fig. 25 Soft starter installed 6 720 641 855-23.1I Fig. 24 6 720 643 409 (2010/03) - Page 32 Installation 9.9.2 E6 - E11 6 720 641 855-20.1I 6 720 641 855-17.1I Fig. 28 Soft starter installed Fig. 26 Soft starter E6-E11 9.9.3 E14 - E17 6 720 641 855-18.1I Fig. 27 Replace the contactor 6 720 641 855-19.1I B Replace the contactor with the soft starter.
-
Page 33: Switching Electric Element
Installation B Connect the cables to the EMC filter to the same connection numbers as the previous terminal blocks were mounted. The cables were connected to the EMC filter load side marked Load out. B Install the incoming power supply for the heat pump on the EMC filter side marked Line in. -
Page 34: Temperature Sensor Installation
The sensor must not be installed directly beneath the roof. 9.11.3 Hot water sensor T3 C6 - 11: The sensor is pre-installed in the hot water 0,3 m heater. E6 - 17: The sensor must be installed when the external hot water heater is used. -
Page 35: Filling The Heating System
B Turn the valves on the filling unit so that they are in filling position ( Figure 36). Fig. 33 Påfyllnadssats E6 - E11, C6 - C11 Fig. 36 Filling units in filling position 6 720 643 409 (2010/03) - Page 36 Installation B Turn the valves on the filling station so that they are B The circuit must be pressurized when venting is in mixing position ( Figure 37). complete. Turn the valves on the filling unit to pressure increase position and pressurize the circuit to 2.5 to 3 bar ( Figure 39).
-
Page 37: Electrical Connections
Electrical connections Electrical connections 10.1 Connecting the heat pump DANGER: Risk of electric shock! B Switch off the main power supply before CAUTION: Never grasp a circuit board starting work on the electrical part. without wearing a ground-connected bracelet ( Chapter 3.10). -
Page 38: Electrical Connection Wiring Diagram
Electrical connections 10.4 Electrical connection wiring diagram 10.4.1 Overview of circuit board C6-C11 C6-C11 E6-E11 E14-E17 6 720 641 855-25.1I Fig. 41 Overview of circuit board With soft starter (accessory) Terminal block Phase meter BAS Circuit board Miniature circuit-breaker heat pump... - Page 39 Electrical connections 10.4.2 CANbus overview C6-C11 E6-E11 E14-E17 6 720 641 855-26.1I Fig. 42 CANbus overview 6 720 643 409 (2010/03)
- Page 40 Electrical connections 10.4.3 Circuit board wiring 6 720 641 570-02.1I Fig. 43 Circuit board wiring 6 720 643 409 (2010/03)
- Page 41 Electrical connections 10.4.4 Internal wiring diagram C6-C11 E6-E11 6 720 641 855-27.1I Fig. 44 Internal wiring diagram Phase guard Protective anode card Compressor PSU Circuit board Electric add. heat Contactor compressor Automatic fuse electric additional heat Contactor electric element Miniature circuit-breaker heat pump...
- Page 42 Electrical connections 10.4.5 Internal wiring diagram E14-E17 6 720 641 855-28.1I Fig. 45 Internal wiring diagram Phase guard Terminal block Compressor PSU Circuit board Electric add. heat AHB Circuit board Automatic fuse electric additional heat Miniature circuit-breaker heat pump Motor cut-out compressor Overheat protection electric additional heat Contactor compressor Soft starter (accessory)
- Page 43 Electrical connections 10.4.6 Complete wiring diagram connections C6-C11 E6-E11 6 720 641 855-29.1I Fig. 46 Complete wiring diagram connections Solid line = factory connected E11.TT.T5 Room sensor, circuit 1 Dotted line = connect during installation: External input 2 E11.TT.P1 LED room sensor...
- Page 44 Electrical connections 10.4.7 Complete wiring diagram connections E14-E17 6 720 641 855-30.1I Fig. 47 Complete wiring diagram connections Solid line = factory connected External input 2 Dotted line = connect during installation: E11.TT.P1 LED room sensor External input 1 High pressure switch E41.F31 Alarm protective anode Motor cut-out compressor...
-
Page 45: External Connections
Electrical connections 10.5 External connections B Use the following cable area when extending the temperature sensor cable: All external connections are made on terminal card PXB: – Up to 20 m long cable: 0.75 to 1,50 mm B High and low current cables should be routed separately in order to avoid interference on the –... -
Page 46: Control Panel
Control panel Control panel 11.4 Menu display Settings for the control of the heat pump are made with the control unit's control panel, which also provides Use the menu display in order to: information about current status. • See information from the heat pump. •... -
Page 47: Start Up
Start up Start up The first time the heat pump is started, a number of – Type of heating system settings are displayed automatically so as to facilitate – Mixing valve running time putting it in operation. B Select option in Protective anode installed ( Chapter 15.2). -
Page 48: Installer Menus
Installer menus Installer menus 13.1 Access to the functions on Installer Hot water (if hot water production) level E41.T3 Room, circuit 1 (option, CANbus sensor) A four digit access code is required to switch from E11.TT.T5 Customer level to Installer level in the menus. The Hot gas access code is the present date given as two digits for E21.T6... -
Page 49: Menu Overview
Menu overview Menu overview The top menu level for installers is: • Additional heat • Safety functions • Room temperature • General • Hot water • Alarms • Holiday • Access level • Energy measurements • Return to factory settings •... - Page 50 Menu overview Access Room temperature level Circuit 2, Mixing valve mode 3...(optional) Type of heating system Highest permitted flow temperature T1 Lowest permitted flow temperature T1 Heat curve Room sensor As Circuit 1 Heating 0, 1 Room temperature program As Circuit 1 Heatingminus Copy to all heating 0, 1 circuits Regulator settings...
- Page 51 Menu overview Holiday Access level Circuit 1 and hot water Activate holiday function Start date Stop date Room temperature Copy to all heating circuits Block hot water production Circuit 2, 3...(optional) Activate holiday function Start date Stop date Room temperature Tab.
- Page 52 Menu overview Access Timers level Shut down protection during change over from hot water to heating Heating start delay Heating stop delay Tab. 28 Timers Access External control level External input 1, 2 Block compressor Block additional heat Block heating at tripped underfloor temperature limiter Block heating Room temperature Block hot water production...
- Page 53 Menu overview Access Installer level Inputs Shows the status of all connected inputs (pressostats, motor cut-out, external inputs, etc.) Outputs Manual operation of and status of constituent components (pumps, valves, additional heater, alarm indication etc.) Circulation pumps Operation alternative heating circuit pump Operation alternative heat carrier pump G2 Heat carrier pump G2 speed Operation alternative collector circuit pump...
- Page 54 Menu overview Access Additional heat level Electric additional heat Electric heater connection Connected electric heaters Connect heater 1 to heat pump Connection capacity per el. heater Output per heater Output limitation in compressor mode Output limitation when additional heat only Output limitation in hot water mode Regulator settings P constant...
- Page 55 Menu overview Alarms Access level Information log Delete information log Alarm log Delete alarm log Alarm history Alarm indication Alarm buzzer signal Interval Blocking time Alarm indication control unit Block alarm buzzer Alarm indication room sensor Block alarm buzzer Block alarm indicator lamp General alarm level Alarms and warnings Tab.
-
Page 56: Settings
Settings Settings 15.1 Room temperature >>> Direct start limit for winter operation Press the button in the standard display to open the Factory setting 13 °C main menu. Select Room temperature to adjust the heating. Lowest value 5 °C The following options are available under Room Highest value 17 °C temperature:... - Page 57 Settings >> Minimum outdoor temperature >> Highest permitted flow temperature T1 F value -35,0 °C Factory setting 80.0 °C Lowest value -35,0 °C Lowest value Highest value -10,0 °C Highest value 100.0 °C Tab. 44 Lowest outdoor temperature Tab. 47 Radiator B Set the minimum outdoor temperature for the heat Factory setting 45.0 °C...
- Page 58 Settings Each circuit is controlled by its own heat curve. The (the value at outdoor temperature 20 °C, factory value installer sets the type of heating for each circuit, that is 22.0 °C) as well as right-hand points (the value at Radiatoror Underfloor.
- Page 59 Settings Recommendations: B Increase the value of the right point if it feels too cold at low outdoor temperatures. B Increase the value of curve at 0 °C if it feels a little cold at outdoor temperatures around 0. B Increase or decrease the value of the 6 720 614 789-23.3I curve equally at the right and left points Fig.
- Page 60 Settings Example >>> Acknowledge room sensor With the factory settings, hysteresis is changed, as Factory setting Yes (if correctly installed) follows: Alternative Yes/No Time Hysteresis Tab. 57 Acknowledge room sensor At start/stop for B Indicate No only if the room sensor, even if it is heating demand installed, should not be used.
- Page 61 Settings B Press the menu dial to mark the value to be changed. >>> Room temperature exception Factory setting 17.0 °C Lowest value 10.0 °C Highest value 30.0 °C Tab. 61 Room temperature, exception B Set the temperature that should apply as exceptional 6 720 643 415-14.1I temperature in the program.
- Page 62 Settings B Use this function to simply increase or decrease the >>> Room temperature influence heat when there are no room sensors. Setting is carried out in the same way as in the menu – – gives approx. 1 °C lower room temperature. Room sensor –...
- Page 63 Settings >> Regulator settings The right point of the curve (-35 °C) can be The mixing valve is controlled with PID regulator in order changed in Minimum outdoor to reach the flow set point value when there is a need. temperature( Chapter 15.1).
- Page 64 Settings B Set the run time that is indicated on the mixing valve The set point value is normally based on: and indicate value in number of seconds. • Current curve value (the flow temperature at the current outdoor temperature according to the If there is no time indication on the mixing applicable heat curve).
-
Page 65: Hot Water
Settings 15.2 Hot water > Heat curve hysteresis heat pump x Under Hot water, there are functions to: >> Maximum • Acknowledge hot water sensor T3 Factory setting 16.0K • Extra hot water Lowest value The value in Minimum • Hot water peak •... - Page 66 Settings > Hot water peak >> Maximum time Hot water peak means a temporary increase in the hot Factory setting 3.0h water temperature to approx. 65 °C for thermal elimination of bacteria. Lowest value 1.0h For the hot water temperature increase, the compressor Highest value 5.0h is used first;...
- Page 67 Settings B Select hot water mode. >> Stop temperature T8 comfort mode Economy means that the hot water is permitted to cool slightly before hot water production starts F value 64 °C compared to Comfort. Heating stops at a slightly Lowest value 20 °C lower temperature.
-
Page 68: Holiday
Settings B Go back to the previous field by using Factory setting 17 °C B Press the menu dial in the last setting field to save Lowest value 10 °C settings Hot water circulation takes place every day during the Highest value 35 °C set periods. -
Page 69: Timers
Settings 15.5 Timers The control unit shows the timers that are in operation. installer, whereas others have a set factory value which There are a number of timers for, e.g., delays of different cannot be changed. Level shows at what level the setting types, but also for extra hot water, hot water peak, etc. -
Page 70: External Control
Settings 15.6 External control >> Block hot water production When an external input is connected, the control unit Factory setting performs functions which are set to Yes or is separated from 0 (Room temperature). When the external input is Alternative No/Yes no longer connected, the control unit returns to normal Tab. -
Page 71: Installer
Settings 15.7 Installer >> Highest permitted flow temperature T1 This section includes: F value 80,0 °C • General Lowest value 10,0 °C • Heat pump x capacity Highest value 100,0 °C • Connected I/O boards • Compressor working area Tab. 125Radiator •... - Page 72 Settings B Indicate the delay that is required until the compressor stops. T2 must rise a few degrees and the groundwater circuit circulates. The compressor timer temporary stop must count down before should not start before this has taken place. compressor may start.
- Page 73 Settings T2 Outdoor, display T2 correction Use the manual operation function on commissioning in order to check if the Temperatures heat T1 Start/stop limits installed components work. pump x compressor Manual operation is possible for the following T6,T8,T9,T10,T11 display, components (only the ones that are installed are correction displayed): T3 hot water start...
- Page 74 Settings >> Operation alternative heat carrier pump G2 It is possible to cancel a running program. On completion of the program, the heat pump returns to normal operation. Factory setting Automatic >> Activate Alternative Continuous/Automatic Tab. 137G2 Factory setting B Select if heat carrier pump G2 should run Alternative Yes/No continuously or start automatically when the...
-
Page 75: Additional Heat
Settings >>> Flow temperature decrease per cooling step >> Allow additional heat timer during energy supply cut-off Factory setting 5.0K Factory setting Economy Lowest value 1.0K Alternative Economy/Comfort Highest value 10.0K Tab. 149Allow additional heat timer during energy supply Tab. 146Temperature decrease per cooling step cut-off >>>... - Page 76 Settings >> Maximum outdoor temperature for additional heat B Set the actual output of the input electric heater. Factory setting 10 °C The heat pump’s integrated electric heater is 6kW or 9 kW. Lowest value -30 °C Highest value 40 °C >>>...
-
Page 77: Safety Functions
Settings >>> D constant If T2 is under set Outdoor temperature limit for deactivation of time control or if Additional heat program is deactivated the additional heat should be not Factory setting blocked by time control. Lowest value Highest value 10.0 15.9 Safety functions Tab. -
Page 78: General
Settings 15.10 General • Alarm indication Among other things, settings for date and time are > Information log available here. The information log displays information from the heat > Set date pump. The control panel output mode displays the symbol for information log when the active information Factory setting is available. -
Page 79: Access Level
Settings 15.13 Return to factory settings B Indicate the times between which the alarm buzzer may not give out a sound. B Select Return to factory settings and Yes to reset all All alarm buzzers are silent during a set interval. settings to the factory settings. -
Page 80: Alarms
Alarms Alarms 16.1 Alarms 16.4 Alarm buzzer at alarm This section includes: When there is an alarm, the alarm buzzer on the heat pump and the CANbus-connected room sensor sounds • Information log ( Chapter 15.11) for a second per set alarm interval. The alarm buzzer can •... -
Page 81: Alarm Categories
Alarms 16.7 Alarm categories The alarms are divided into different categories Alarm category is displayed in the alarm window, alarm depending on the type and seriousness of the fault. log and alarm history. Categories A-H are alarms, categories I-J are warnings/information, categories K-M are warnings, category Z is information. -
Page 82: Alarm Functions
Alarms 16.9 Alarm functions 16.9.4 Low pressure collector circuit Function: If Alarm at low pressure in collector circuit is The alarm text is indicated in the heading. selected and the external input closes, this alarm is 16.9.1 High hot gas temperature E2x.T6 triggered. - Page 83 Alarms 16.9.7 Motor cut-out 1 E2x.F11, Compressor 16.9.10 Failure on sensor E2x.T6 hot gas Function: Activated when the compressor's motor cut- Function: The compressor stops because the hot gas out has tripped because of high current or lost current cut-out cannot be guaranteed. Activated when the phase resulting in undue strain on the compressor.
- Page 84 Alarms 16.9.13 Faulty electric heater E21.E2 16.9.17 Short circuit on sensor E31.T32 anti-freeze cooling Function: The electric heater is turned off. Activated by triggered overheat protection on the electric add. heat, Function: Activated when the sensor's value indicates a high flow temperature or too high temperature in the temperature higher than 30 °C.
- Page 85 Alarms 16.9.20 Failure on sensor E11.T1 flow 16.9.24 Failure on sensor T2 outdoor Function: The alarm is activated when the sensor's value Function: The alarm is activated when the sensor's value indicates a temperature lower than 0 °C. The flow line indicates a temperature lower than -50 °C.
- Page 86 Alarms 16.9.28 Failure on sensor E1x.TT.T5 room 16.9.32 Failure on sensor E2x.T8 heat transfer fluid out Function: The alarm is activated when the sensor's value Function: Activated when the sensor's value indicates a indicates a temperature lower than -1 °C. In the event of temperature lower than 0 °C.
- Page 87 Alarms 16.9.35 Short circuit on sensor E2x.T9 heat transfer 16.9.38 Failure on sensor E2x.T11 fluid in Function: Activated when the sensor's value indicates a Function: Activated when the sensor's value indicates a temperature lower than -50 °C. In the event of a failure, temperature higher than 110 °C.
- Page 88 Alarms 16.9.41 Electric additional heat shut down due to high 16.9.44 Screed drying set point value for heating not temperature E2x.T8 reached Function: The electric heater is turned off. The warning Function: Activated when the set point value for a drying is activated in additional heat mode if the sensor T8 step has not been reached.
-
Page 89: Alarm Log
Alarms 16.10 Alarm log Information Comment/Value The alarm log shows the alarms, warnings and other Room Current value if room sensor information that has come up. Alarm category ( does not exist/is used Chapter 16.7) is displayed in the top left corner of the G1 Heat carrier pump Off/On display and if the alarm is active, the alarm symbol is... -
Page 90: Information Log
Alarms 16.12 Information log 16.12.5 Low temperature collector circuit out E2x.T11 Function: The information is given if the temperature of The information log displays information from the heat the collector circuit out is too low. First, a information is pump. given. -
Page 91: Factory Settings
Factory settings Factory settings 17.1 Return to factory settings function is used on installer level. Customer level settings are not affected. The function exists on both customer and installer level. All settings available to the customer are restored on 17.2 Factory values customer level. - Page 92 Factory settings Access Room temperature F value level Circuit 2, Mixing valve mode 3...(optional) Type of heating system Underfloor Highest permitted flow temperature T1 Radiator/Underfloor 80/45 °C Lowest permitted flow temperature T1 10 °C Heat curve Room sensor As Circuit 1 Heating 0, 1 Room temperature program As Circuit 1 Heatingminus Copy to all heating...
- Page 93 Factory settings Access Installer F value level General Anti-seizure mode Day of the week Wednesday Start time 12:00 Highest permitted flow temperature T1 Radiator/Underfloor 80/45 °C Operating mode Groundwater Groundwater Compressor start delay groundwater Time for reset of access level 180 min Heat pump x capacity Select...
- Page 94 Factory settings Access Additional heat F value level Electric additional Electric heater connection Connected electric heaters heat Connect heater 1 to heat pump Connection capacity per el. heater Output per heater Output limitation in compressor 4.5kW mode Output limitation when additional heat only Output limitation in hot water mode...
-
Page 95: Function Check
Function check Function check 18.1 Refrigerant circuit 18.3 Setting heating system operating pressure The refrigerant circuit may only be opened by authorised service engineers with CAUTION: The heat pump can be damaged. refrigeration authorisation. B Fill with hot water only when the heat pump is cold. -
Page 96: Operating Temperatures
Function check 18.4 Operating temperatures Check the temperatures in the heat carrier and collector circuit after 10 minutes of operation: • Temperature difference between heating forward flow and return approx. 7 ... 10 K. • Temperature difference between collector circuit in and out approx. -
Page 97: Environmental Protection
Environmental protection Environmental protection Environmental protection is a fundamental corporate strategy of the Bosch Group. The quality of our products, their economy and environmental safety are all of equal importance to us and all environmental protection legislation and regulations are strictly observed. We use the best possible technology and materials for protecting the environment taking account of economic considerations. -
Page 98: Maintenance
Maintenance Maintenance B Pull the filter out and clean it, if necessary, under DANGER: Risk of electric shock! running water. B Switch off the main power supply before starting work on the electrical part. We recommend that a function check be performed regularly by an authorised installer. -
Page 99: Commissioning Protocol Greenline He
Commissioning protocol Greenline HE Commissioning protocol Greenline HE Customer/responsible for installation: Installer of installation: Heat pump type: Serial number: Commissioning date: Date of manufacture: Type of collector: Total length of collector: Other components in the installation: Additional heat Room sensor T5 Water heater Exhaust air collector 3-way valve... - Page 100 Ice Energy Unit 2, Oakfield House Oakfield Industrial Estate Eynsham, Oxon OX29 4 , United Kingdom www.iceenergy.co.uk | mailroom@iceenergy.co.uk...