Table of Contents
Advertisement
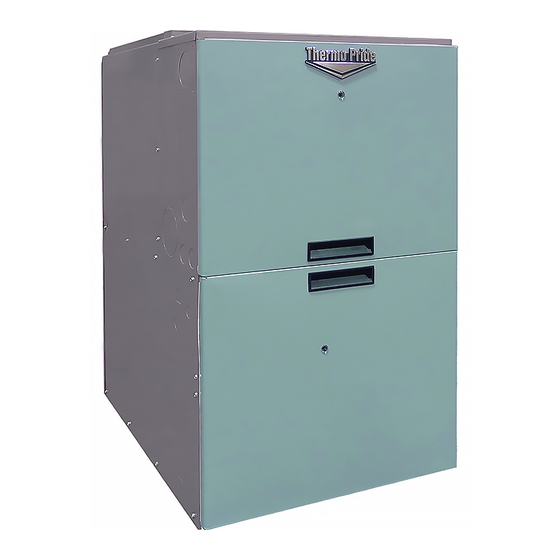
CONDENSING GAS QUADPOISE FURNACE
INSTALLATION AND OPERATION MANUAL
PLEASE READ THESE INSTRUCTIONS PRIOR TO INSTALLATION, INITIAL FIRING, AND
BEFORE PERFORMING ANY SERVICE OR MAINTENANCE. THESE INSTRUCTIONS MUST
BE LEFT WITH THE HOMEOWNER AND SHOULD BE RETAINED FOR FUTURE REFERENCE
BY QUALIFIED SERVICE PERSONNEL.
MG-1052
ECN 5580-MA 190515
SINGLE STAGE
CLQS1-050T36N
CLQS1-075T42N
CLQS1-100T48N
CLQS1-125T60N
THERMO PRODUCTS, LLC.
P.O. BOX 237
DENTON, NC 27239
MADE IN USA
Advertisement
Table of Contents

Related Manuals for Thermo Pride CLQS1-050T36N


Summary of Contents for Thermo Pride CLQS1-050T36N
- Page 1 CONDENSING GAS QUADPOISE FURNACE INSTALLATION AND OPERATION MANUAL SINGLE STAGE CLQS1-050T36N CLQS1-075T42N CLQS1-100T48N CLQS1-125T60N PLEASE READ THESE INSTRUCTIONS PRIOR TO INSTALLATION, INITIAL FIRING, AND BEFORE PERFORMING ANY SERVICE OR MAINTENANCE. THESE INSTRUCTIONS MUST BE LEFT WITH THE HOMEOWNER AND SHOULD BE RETAINED FOR FUTURE REFERENCE BY QUALIFIED SERVICE PERSONNEL.
- Page 3 All installations and services must be performed by qualified service personnel. INDEX SECTION BEGINNING PAGE SAFETY INFORMATION FURNACE SPECIFICATIONS A. CLQS1 SERIES (SINGLE STAGE, CONSTANT TORQUE MOTOR) 8 B. INSTALLATION PARTS PACKAGES - CLQS1 III. GENERAL INSTALLATION A. CODES AND CLEARANCES B.
-
Page 5: Safety Information
I. SAFETY INFORMATION This and the following page contain reproductions of the various warning and instruction labels placed on the Thermo Pride Condensing Gas Furnaces. Please read and comply with the contents of these labels. THIS FURNACE MUST BE INSTALLED SO THERE ARE PROVISIONS FOR VENTILATING AIR. - Page 6 All installations and services must be performed by qualified service personnel. This and the previous page contain reproductions of the various warning and instruction labels placed on the Thermo Pride Condensing Gas Furnaces. Please read and comply with the contents of these labels. FOR YOUR SAFETY...
- Page 7 All installations and services must be performed by qualified service personnel. This and the previous page contain reproductions of the various warning and instruction labels placed on the Thermo Pride Condensing Gas Furnaces. Please read and comply with the contents of these labels. WARNING:...
- Page 8 All installations and services must be performed by qualified service personnel. The following safety information should be read, understood, and followed by the installer. 1. Use only with type of gas approved for this furnace. Refer to furnace rating plate. 2.
- Page 9 All installations and services must be performed by qualified service personnel. 3. The furnace remain running at conditions 1&2 for 30 minutes or until odor has dissipated : These furnace models are a sealed combustion design, which does not require an air shutter adjustment (air shutters are not used) for proper flame characteristics.
-
Page 10: Furnace Specifications
All installations and services must be performed by qualified service personnel. II. FURNACE SPECIFICATIONS A. CLQS1 SERIES (Single Stage, Constant Torque Blower Motor) MODEL NO. CLQS1-050T CLQS1-075T CLQS1-100T CLQS1-125T BTU/Hr INPUT 50,000 75,000 100,000 125,000 BTU/Hr OUTPUT 48,000 73,000 96,000 120,000 HT. - Page 11 All installations and services must be performed by qualified service personnel. B. INSTALLATION PARTS PACKAGES - CLQS1 PARTS PACKAGE #S00S4566/4567/ DESCRIPTION PART # QUANTITY 4568/4569 #10-32 x ½ green ground screw 300109 #10-32 hex nut 300110 Wire nut 300132 #8 x ½ TEK screws for mounting J-box 300208 3/16”...
-
Page 12: General Installation
Station Carbon Monoxide Alarms, UL 2034, or the CSA International Standard, Residential Carbon Monoxide Alarming Devises, CSA 6.19. NOTICE: The Thermo Pride emblem is shipped loose with the Installation and Operation manual. The installer should affix the emblem to the burner door as shown in Figure-101. -
Page 13: Minimum Clearances To Combustible Materials
All installations and services must be performed by qualified service personnel. 2. The BTU output capacity of the furnace proposed for installation should be based on a heat loss calculation made according to the manuals provided by the Air Conditioning Contractors of America (ACCA) or ASHRAE. -
Page 14: Furnace Location
All installations and services must be performed by qualified service personnel. B. FURNACE LOCATION : These high efficiency condensing furnaces are not certified for and shall not be vented into a standard or any type of chimney. The following shall be considered for locating the furnace: 1. -
Page 15: Horizontal Left
All installations and services must be performed by qualified service personnel. b. Dual pressure switch assembly MUST be relocated to the blower deck using screws/holes provided. c. If furnace is installed on a combustible floor, a non-combustible base must be used. d. - Page 16 All installations and services must be performed by qualified service personnel. Installation shall, at least, conform to the following requirements. 1. The exhaust vent / combustion air intake terminations specified by Thermo Products, in this manual, shall be used. Both exhaust vent / combustion air intake are to be taken from out of doors.
- Page 17 All installations and services must be performed by qualified service personnel. Venting Thru Side Wall Flue Flue Concentric Terminated Terminated Side Wall Cap Vent w/Elbow w/Tee CLQS1-050T36N CLQS1-075T42N CLQS1-100T48N CLQS1-125T60N Venting Thru Roof Flue Flue Concentric Terminated - Terminated Side Wall Cap...
- Page 18 All installations and services must be performed by qualified service personnel. Seal the vent installation by caulking the gap around the two (2) holes where the thermoplastic pipes pass through the wall. NOTICE: Use silicone caulk to seal the Combustion Air pipe as it passes through the 2” Intake Air Flange.
-
Page 19: Sidewall Venting
All installations and services must be performed by qualified service personnel. F. SIDEWALL VENTING NOTICE: If the furnace has an overall equivalent vent length of 50 feet or less, it may use the sidewall termination described in Section 1. If the vent length is greater than 50 feet, up to the max length allowed, these units should use the termination described in Section 5 for a sidewall termination. - Page 20 All installations and services must be performed by qualified service personnel. d. The vent and intake systems should utilize the same numbers of elbows and approximately the same length of straight pipe to reach the outside termination. Figure 2: Typical Relative Locations of Direct Vent Terminations When Sidewall Venting 3.
- Page 21 All installations and services must be performed by qualified service personnel. Figure 3: NFGC Minimum Clearances Between the Vent Terminal and Various Building Features...
- Page 22 All installations and services must be performed by qualified service personnel. 4. Vent Terminal Location Guidelines : Bushes, shrubs, or any vegetation that may restrict the flow of flue products must be kept away from vent and air intake terminations. Terminations must also be kept clear of any leaves, weeds, combustible materials, snow, and ice build-up.
-
Page 23: Side Wall Vent Kit
All installations and services must be performed by qualified service personnel. If the exhaust vent is to be installed in a location which may be exposed to winds blowing directly at the vent termination, this alternate configuration should be used. All previous venting instructions still apply, with the exception that the elbow on the exhaust vent termination is replaced with a straight tee. - Page 24 All installations and services must be performed by qualified service personnel. Install these optional kits according to the instructions provided with each kit. In horizontal or side wall installations. The location and clearance requirements are identical to those of the standard vent terminations described in this manual.
- Page 25 All installations and services must be performed by qualified service personnel. NOTICE: When the vent termination is installed correctly, a draft should NOT be present in the system during the furnace off-cycle. Figure 6: Typical Rooftop Vent and Air Intake Termination Construction Details H.
- Page 26 All installations and services must be performed by qualified service personnel. Figure 7A: Upflow – Vent & Air Inlet Options...
- Page 27 All installations and services must be performed by qualified service personnel. Figure 7B: Downflow – Vent & Air Inlet Options Figure 7C: Horizontal Left – Vent & Air Inlet Options Figure 7D: Horizontal Right– Vent & Air Inlet Options...
- Page 28 All installations and services must be performed by qualified service personnel. 2. Connecting The Exhaust Vent To The Inducer a. The Exhaust Vent piping may exit the furnace thru either of several locations as depicted in Figures 7A-D. Upon selection of the location to exit the furnace, cut out the appropriate knock-out and install the rubber grommet provided.
- Page 29 All installations and services must be performed by qualified service personnel. Should acidic compounds form in the furnace they may significantly reduce the useful life of the furnace. a. The Combustion Air Intake piping may enter the furnace thru either the top, left or right side as depicted in Figure 7A-D.
- Page 30 All installations and services must be performed by qualified service personnel. Figure 8B Figure 8A Figure 8D Figure 8C Upflow– Condensate Trap Options...
- Page 31 All installations and services must be performed by qualified service personnel. Figure 8E: Downflow– Condensate Trap Options Figure 8F: Horizontal Left– Figure 8G: Horizontal Right- Condensate Trap Options Condensate Trap Options...
- Page 32 “A” should be installed on the coil outlet and the other end should be horizontal. On CLQS1- 100T48N & CLQS1-050T36N models, trim tube “A” so that approximately 1” of tubing extends thru the cabinet. Attach the barb elbow to end of tube “A” and attach a piece of clear flexible tubing to the barb, leading to the drain trap.
- Page 33 On CLQS1-075T42N & CLQS1-050T36N models, trim tube “C” so that approximately 1” of tubing extends thru the cabinet. Attach the barb elbow to the end of the tube “C” and attach a piece of clear flexible tubing to the barb, leading to the drain trap.
- Page 34 All installations and services must be performed by qualified service personnel. the cabinet. Attach the barb elbow to end of tube “A” and attach a piece of clear flexible tubing to the barb, leading to the drain trap. c. Attach clear flexible tubing from rubber drain at the exit of the inducer thru the cabinet to the drain trap.
-
Page 35: General Gas Piping
All installations and services must be performed by qualified service personnel. Flue gas condensate is slightly acidic with a pH of about 3.5. (A pH level of 7.0 is considered neutral. Carbonated cola drinks with a pH of 3.1 are actually slightly more acidic than condensate.) If local codes require an acid neutralizing kit, a kit is available from Thermo Products under part no. - Page 36 All installations and services must be performed by qualified service personnel. Figure 10A: Upflow– Gas Piping Options Figure 10B: Downflow– Gas Piping Options...
- Page 37 All installations and services must be performed by qualified service personnel. Figure 10C: Horizontal Left– Figure 10D: Horizontal Right- Gas Piping Options Gas Piping Options 2. A drip leg must be used on both LP and natural gas installations prior to the furnace in order to trap oil, condensate and other impurities which might otherwise lodge in the gas valve or plug the burner orifice.
-
Page 38: Requirements And Sizing Of Duct Work
All installations and services must be performed by qualified service personnel. : Care must be taken not to wet electronic components during leak test. Wetting the electronic components may damage their circuitry and cause a hazardous situation. Dry moisture from all leads and terminals if wetting occurs. Wait at least 24 hours for the circuit to fully dry before energizing the burner circuit. - Page 39 1 side and the bottom, be used. This furnace has been factory supplied with a high quality re-usable filter rated for air velocities up to 600 ft/min. An optional Thermo Pride filter rack assembly (part no. AOPS7547 for -050, -075 & -100 and AOPS7375 for -125) is available which is sized for the filter provided.
- Page 40 Replace the completely dry filter in the rack. If an optional Thermo Pride filter rack is used with the furnace, it will serve as a template to scribe a mark for the return air opening on the casing. Place the filter rack on the casing 1 inch up from the bottom of the furnace on either the Left or Right side of the cabinet.
- Page 41 FILTER TABLE 3 * The Thermo Pride supplied filter can be cut to size to fit other filter retention systems as long as the minimum size requirement is met. NOTICE: Any internal stiffeners used in the filter must not be removed, although they can be cut to size as needed.
- Page 42 All installations and services must be performed by qualified service personnel. M. WIRING All wiring shall be performed by a qualified electrician or service person. The wiring must comply with local codes, the instructions in this manual, and in the absence of codes with the National Electrical Code (ANSI/NFPA-70 or latest edition).
- Page 43 All installations and services must be performed by qualified service personnel. The proper thermostat heat anticipator setting is 0.4 Amps for furnace operation only. To increase length of cycle, increase setting of heat scale; to decrease length of cycle, decrease setting of heat scale. Anticipators for the cooling operation are generally pre-set by the thermostat manufacturer and require no adjustment.
-
Page 44: Auxiliary Limit
All installations and services must be performed by qualified service personnel. In Downflow and Horizontal configurations, setups with restricted airflow may not adequately cool the heat exchanger, This results in the auxiliary limit opening, but it may be prevented by increasing the blower off delay. - Page 45 All installations and services must be performed by qualified service personnel. O. TWINNING When twinned, the circulating blower speeds are synchronized between the furnaces. If either furnace has a need to run the blower, both furnaces will run the blower on the same speed. The cooling speed has highest priority, followed by heating speed and fan speed.
-
Page 46: Starting The Unit
All installations and services must be performed by qualified service personnel. IV. STARTING THE UNIT A. SEQUENCE OF OPERATIONS... - Page 47 All installations and services must be performed by qualified service personnel.
-
Page 48: Initial Start-Up
All installations and services must be performed by qualified service personnel. B. INITIAL START UP This furnace does not have a pilot. It is equipped with a hot surface igniter, which automatically lights the burner. Do not attempt to light the burner by hand. Check the following items before the initial start-up. 1. - Page 49 All installations and services must be performed by qualified service personnel. less, no reduction in input is required. If installed above 2,000 feet, the furnace installer should contact Thermo-Products for replacement orifices. To check the input of your natural gas furnace, allow the unit to operate for 10 to 15 minutes and proceed as follows: a.
- Page 50 All installations and services must be performed by qualified service personnel. GAS PRESSURE CHART FOR ALL CLQS1 MODEL FURNACES Fuel Gas Type Propane Natural Operating Mode and High Fire High Fire Model Series Normal Manifold 10.0 ± 0.3 3.5 + 0.0 / -0.5 Pressure (in.
-
Page 51: Burner Adjustment
All installations and services must be performed by qualified service personnel. D. BURNER ADJUSTMENT This unit is designed to require no burner adjustment. Flames should be visually examined at the start of the heating season and monthly during the heating season. The flames should be checked by looking through the sight glass in the combustion door and observing the flames inside the burner box. -
Page 52: Installer's Instructions To User
All installations and services must be performed by qualified service personnel. 2. Make certain thermostat will automatically start and stop furnace. 3. Block the PVC flue outlet gradually with a flat piece of metal, until the pressure switch functions shutting off the main burners. 4. -
Page 53: Troubleshooting
All installations and services must be performed by qualified service personnel. VI. TROUBLESHOOTING NOTICE: Before troubleshooting, familiarize yourself with the startup and checkout procedures. To assist you in troubleshooting this furnace, it is equipped with an integrated ignition control with diagnostics. - Page 54 All installations and services must be performed by qualified service personnel. TROUBLESHOOTING GUIDE THE SYSTEM IS STARTED BY SETTING THE THERMOSTAT TO CALL FOR HEAT. THE FOLLOWING SHOULD HELP ESTABLISH THE TYPE OF MALFUNCTION OR DEVIATION FROM THE NORMAL OPERATION. TO USE THIS DIAGRAM, YOU JUST NEED TO FOLLOW THE INSTRUCTIONS IN THE BOXES.
- Page 55 All installations and services must be performed by qualified service personnel.
- Page 56 All installations and services must be performed by qualified service personnel.
- Page 57 All installations and services must be performed by qualified service personnel.
-
Page 58: Appendix -A Replacement Parts List
All installations and services must be performed by qualified service personnel. Appendix –A Replacement Parts List``... - Page 59 All installations and services must be performed by qualified service personnel.
- Page 60 All installations and services must be performed by qualified service personnel.
-
Page 61: Appendix - B Wiring Diagrams
All installations and services must be performed by qualified service personnel. Appendix – B Wiring Diagrams 1. CLQS1-050, -075, -100 and -125 with Constant Torque Blower Motor... -
Page 62: Appendix C - Speed Specifications
All installations and services must be performed by qualified service personnel. Appendix C – Speed Specifications CLQS1-050T (Single Stage with Constant Torque blower motor) Alterations Req'd For A/C @ Design External Static Pressure Cooling Unit HTG Speed Recommended CLG Speed 18,000 Med Low (Purple) Med Low (Purple) - Page 63 All installations and services must be performed by qualified service personnel. CLQS1-075T (Single Stage with Constant Torque blower motor) Alterations Req'd For A/C @ Design External Static Pressure Cooling Unit HTG Speed Recommended CLG Speed 24,000 Med Low (Purple) Low (Red) 30,000 Med Low (Purple) Med Blue)
- Page 64 All installations and services must be performed by qualified service personnel. CLQS1-100T (Single Stage with Constant Torque blower motor) Alterations Req'd For A/C @ Design External Static Pressure Cooling Unit HTG Speed Recommended CLG Speed 30,000 Med (Blue) Low (Red) 36,000 Med (Blue) Med Low (Purple)
- Page 65 All installations and services must be performed by qualified service personnel. CLQS1-125T (Single Stage with Constant Torque blower motor) Alterations Req'd For A/C @ Design External Static Pressure Cooling Unit HTG Speed Recommended CLG Speed 36,000 Med High (Yellow) Low (Red) 42,000 Med High (Yellow) Med Low (Purple)