Toro Greensmaster eTriFlex 3360 Operator's Manual
Traction unit
Hide thumbs
Also See for Greensmaster eTriFlex 3360:
- Service manual (331 pages) ,
- Service manual (366 pages)

Related Manuals for Toro Greensmaster eTriFlex 3360


Summary of Contents for Toro Greensmaster eTriFlex 3360
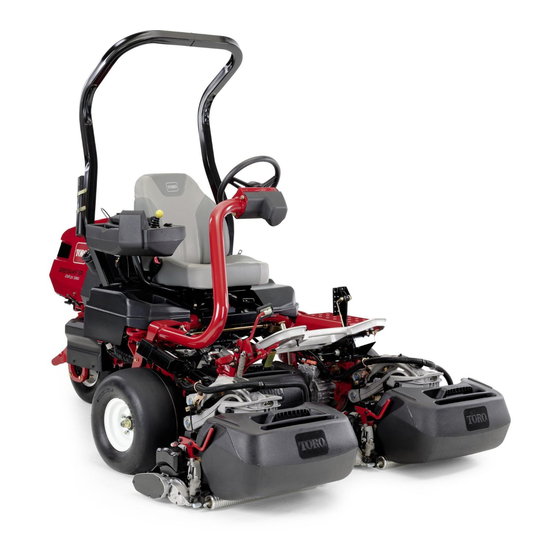
- Page 1 Form No. 3433-113 Rev C Greensmaster ® eTriFlex 3360 Traction Unit Model No. 04580—Serial No. 400000000 and Up *3433-113* C Register at www.Toro.com. Original Instructions (EN)
-
Page 2: Figure 1
Section 4442 or 4443 to use or operate the engine on help finding a dealer, or to register your product. any forest-covered, brush-covered, or grass-covered Whenever you need service, genuine Toro parts, or land unless the engine is equipped with a spark additional information, contact an authorized Toro... -
Page 3: Table Of Contents
After Operation ............ 31 After Operation Safety ........31 Inspecting and Cleaning after Mowing ....32 g000502 Hauling the Machine ......... 32 Figure 2 Towing the Machine .......... 33 Safety-alert symbol Driving the Machine Without Engine Power............34 Maintenance ............35 Maintenance Safety.......... -
Page 4: Safety
Safety and Instructional Safety Decals This machine has been designed in accordance with EN ISO 5395 and ANSI B71.4-2017 and meets these Safety decals and instructions are standards when you complete the setup procedures. easily visible to the operator and are located near any area of potential danger. - Page 5 decal137-8127 137-8127 1. Attention—do not spray with high-pressure water. decal133-0098 133-0098 1. Traction speed—transport 8. Lower and engage the reels. 2. Traction speed—mow 9. Raise and disengage the reels. 3. Traction speed—neutral 10. Choke 4. Reel—transport 11. Engine—start 5. Reel—mow 12.
- Page 6 decal139-8320 139-8320 1. Warning—all operators 4. Warning; tipping should read the Operator’s hazard—drive slowly Manual and be trained when turning; do not turn before operating the sharply while traveling machine. fast. 2. Thrown object 5. Warning—engage the hazard—keep bystanders parking brake, shut off away.
-
Page 7: Setup
Screw (M5) Connect the 12 V battery. Nut (M5) Grass-basket hook Install the grass-basket hooks. Flange bolts Cutting unit (order separately; contact your authorized Toro distributor) Grass basket Install the cutting units. Electric counterweight Capscrew O-ring – No parts required Adjust the machine settings. -
Page 8: Installing The Seat
Installing the Seat Parts needed for this procedure: Seat Kit (order separately; contact your authorized Toro distributor) Procedure Acquire the Seat Kit (contact your authorized Toro distributor) and refer to the kit Installation Instructions to install the seat. g277097 Figure 5 Standard Seat (Model No. -
Page 9: Installing The Steering Wheel
Installing the Steering Wheel Parts needed for this procedure: Steering wheel Washer Locknut g288301 Figure 7 Procedure 1. Steering wheel 2. Steering shaft Apply anti-seize compound to the steering shaft. Install the wheel to the steering shaft (Figure Install the wheel to the steering shaft using the washer and locknut (Figure g288302... -
Page 10: Connecting The 12 V Battery
Torque the screws and nuts on the terminals to 3 to 4 N∙m (34 to 37 in-lbs). Apply battery terminal protector (Toro Part No. 107-0392) or a light layer of grease to Connecting the 12 V Battery the battery terminals and cable connectors to reduce corrosion. -
Page 11: Installing The Cutting Units
Installing the Cutting Units Parts needed for this procedure: Cutting unit (order separately; contact your authorized Toro distributor) Grass basket Electric counterweight Capscrew O-ring g036342 Figure 12 1. Capscrew 3. Existing counterweight Procedure 2. Electrical counterweight Prepare the cutting units for installation; refer to your cutting unit Operator’s Manual. -
Page 12: Installing The Ce Decals
Installing the CE Decals If Required (CE-Compliant Countries) g235881 Figure 14 Parts needed for this procedure: 1. CE warning decal Production year decal CE warning decal (Part No. 139-8321) CE mark decal (Part No. 93-7252) Procedure Reducing the Tire Pressure If you use this machine in a country that complies to CE standards, install the following decals: •... -
Page 13: Product Overview
Controls Product Overview g236362 Figure 16 Console 1. Choke lever 4. InfoCenter g268171 Figure 15 2. Function-control switch 5. Key switch 3. Lift/lower joystick 1. Engine 6. Traction pedal 2. Roll bar 7. Brake pedal 3. Control panel 8. Footrest Key Switch 4. - Page 14 Choke Lever operation to lower the cutting units and start the reels. Pull back on the joystick to stop the reels To start a cold engine, close the carburetor choke and raise the cutting units. by pushing the choke lever forward (Figure 16) to To stop the reels without raising the cutting units,...
-
Page 15: Infocenter
InfoCenter Using the InfoCenter LCD Display The InfoCenter LCD display shows information about your machine, such as the operating status, various diagnostics, and other information about the machine (Figure 25). There is a splash screen, main information screen, cutting unit (CU) motor information screen, and traction information screen. - Page 16 InfoCenter Icon Description SERVICE DUE Indicates when scheduled service should be performed Engine rpm/status—indicates the engine speed (rpm) Hour meter g292769 Figure 24 1. Amperage—Front, left 3. Amperage—Center Info icon traction motor traction motor 2. Amperage—Front, right 4. Steering angle Function-control switch is in the traction motor position.
- Page 17 AULTS AULTS Return to previous screen a list of the recent machine faults. Refer to the Service Manual or your authorized Toro distributor for more Item not selected/active information on the F AULTS menu. Item selected/active The S...
- Page 18 Service Settings (cont'd.) Menu Item Description Lists the total number of hours OURS Sets the maximum machine that the key, engine, reels, and speed while mowing. backlap have been on, as well as the next service due. Sets the maximum machine RANSPORT speed while transporting.
- Page 19 0000 or 1234. authorized Toro distributor. If you changed the PIN code and forgot the code, contact your authorized Toro distributor for assistance. Understanding the Fault-Log Indicator From the M , use the center button to...
-
Page 20: Specifications
Main-Power Connectors Fuel-Shutoff Valve Before working on the machine or installing, removing, Use the fuel-shutoff valve to control the fuel flow to the or working on the cutting units, disconnect the engine. The valve is located under the hood, adjacent machine from the power supply by separating the to the carbon canister. -
Page 21: Attachments/Accessories
Contact your Authorized Service Dealer or authorized Toro distributor or go to www.Toro.com or a list of all approved attachments and accessories. To ensure optimum performance and continued safety certification of the machine, use only genuine Toro replacement parts and accessories. -
Page 22: Before Operation
Fuel Specification Operation Fuel tank capacity: 18.5 L (4.9 US gallons) Before Operation Recommended Fuel: Unleaded gasoline with an octane rating of 87 or higher ((R+M)/2 rating method) Before Operation Safety Ethanol: Gasoline with up to 10% ethanol (gasohol) or 15% MTBE (methyl tertiary butyl ether) by volume is acceptable. -
Page 23: Filling The Fuel Tank
Filling the Fuel Tank Identifying the Cutting Units Engage the parking brake, shut off the engine, remove the key, and wait for all movement to stop. The InfoCenter uses the numbers 1, 2, and 3 to identify each cutting unit (e.g., CU1, CU2, and CU3 Clean around the fuel-tank cap and remove it in the A menu). -
Page 24: Using The Infocenter To Adjust The Machine Settings
Using the InfoCenter Tap-Off Delay Options (cont'd.) to Adjust the Machine Settings 0.250 0.300 You can use the InfoCenter to adjust the following machine settings: 0.350 • Tap-off delay; refer to Adjusting the Tap-Off Delay 0.400 (page 24). 0.450 • Reel speed while mowing;... - Page 25 Adjusting the Height of Cut (HOC) Backlap Reel Speed Options (cont'd.) Navigate to the H (HOC) option to adjust EIGHT OF the height of cut. The clip control feature must be set to O to use this feature; refer to Setting the Clip-Control Feature (page 25).
-
Page 26: Understanding The Infocenter Dialog Messages
the machine speed while you turn the machine for Dialog Messages (cont'd.) another cutting pass on the green. Note: The factory default setting is O Manually center rear wheel. Continue? Disabling an Equipped Steer rear wheel max left. Continue? 3-Wheel-Drive Kit Steer rear wheel max right. -
Page 27: Performing Daily Maintenance
Tilt the steering wheel to a comfortable position. and ensure that the grass baskets are installed on the machine. Tighten the bolts (Figure 31) to secure the steering-wheel assembly in your adjusted • Operate the machine only in good visibility to avoid position. -
Page 28: Breaking In The Machine
Slope Safety Since the first hours of operation are critical to future dependability of the machine, monitor its functions and • Slopes are a major factor related to loss of control performance closely so that minor difficulties, which and rollover accidents, which can result in severe could lead to major problems, are noted and can be injury or death. -
Page 29: Understanding The Safety-Interlock System
Rotate the key to the O position to shut off the The machine should not move, as the parking engine. brake is engaged. This indicates that the interlock system is operating correctly. Correct the problem Remove the key. if it is not operating properly. •... -
Page 30: Mowing The Green
Mowing the Green rearward and hold it until all the cutting units have risen. This stops the reels and lifts the Before mowing greens, find a clear area and practice cutting units. performing basic machine functions (e.g., starting and Important: Time this step correctly so that stopping the machine, raising and lowering the cutting you do not cut into the fringe area, yet cut as... -
Page 31: After Operation
Note: Heavy wet clippings cause strain on the baskets, suspensions, and actuators. This adds unnecessary weight to the machine, which decreases energy efficiency. After Operation After Operation Safety General Safety • Engage the parking brake, shut off the engine, remove the key, and wait for all movement to stop before you leave the operator’s position. -
Page 32: Inspecting And Cleaning After Mowing
Inspecting and Cleaning Hauling the Machine after Mowing • Use care when loading or unloading the machine into a trailer or a truck. After mowing, thoroughly wash the machine with a • Use a full-width ramp for loading the machine into garden hose without a nozzle so that excessive water a trailer or a truck. -
Page 33: Towing The Machine
Towing the Machine DANGER When the actuator is released from the Note: Refer to Figure 35 for this procedure. brake, the machine is able to free wheel. A free-wheeling machine can cause serious injury to bystanders. If the machine is not being towed, engage the parking brake. -
Page 34: Driving The Machine Without Engine Power
After you have towed the machine to your intended destination, perform the following steps: Engage the parking brake. Remove the tow strap from the castor fork. Prepare for operation by tightening the eyebolt nut so that the spring length is 11.4 cm (4.5 inches) when installed (Figure 35). -
Page 35: Maintenance
– Engage the parking brake. • To ensure safe, optimal performance of the – Shut off the engine and remove the key. machine, use only genuine Toro replacement – Wait for all movement to stop. parts. Replacement parts made by other •... -
Page 36: Daily Maintenance Checklist
Daily Maintenance Checklist Duplicate this page for routine use. Maintenance Check Item For the week of: Mon. Tues. Wed. Thurs. Fri. Sat. Sun. Check the safety-interlock operation. Check the instrument operation. Check the brake operation. Check the engine-oil level. Check the fuel level. Clean the engine, air-cooling fins. -
Page 37: Pre-Maintenance Procedures
Pre-Maintenance Procedures Raising the Machine DANGER Mechanical or hydraulic jacks may fail to support the machine and cause a serious injury. • Use jack stands to support the raised machine. • Use only mechanical or hydraulic jacks to lift the machine. Position a jack at the desired jacking point (Figure 37):... -
Page 38: Raising The Hood
g288413 Figure 38 1. Battery trays 2. Cutting-unit pivot mounts Engine Maintenance Raising the Hood Release the straps from each side of the hood Engine Safety (Figure 39). • Shut off the engine before checking the oil or adding oil to the crankcase. •... -
Page 39: Servicing The Engine Oil
Loosen the hose clamp and remove the Carefully slide the foam element onto the paper air-cleaner assembly (Figure 40). element (Figure 40). Carefully pull the foam element off the paper Place the air-cleaner assembly onto the element (Figure 40). air-cleaner base or hose and secure it (Figure 40). - Page 40 Changing the Engine Oil and Filter Service Interval: After the first 8 hours Every 100 hours CAUTION g247478 Engines can become extremely hot during normal operation. Allow the engine to cool before you change the oil or oil filter, or perform any engine maintenance.
-
Page 41: Servicing The Spark Plug
Servicing the Spark Plug Service Interval: Every 100 hours—Replace or clean and gap the spark plug. CAUTION Engines can become extremely hot during g247489 normal operation. Allow the engine to cool before you service the spark plug or perform any engine maintenance. -
Page 42: Fuel System Maintenance
Checking and Cleaning the Spark Fuel System Plug Maintenance Important: Always replace the spark plug(s) when it has a black coating, worn electrodes, an Replacing the Fuel Filter oily film, or cracks. Clean the spark plug with a wire brush to remove Service Interval: Every 1,000 hours (sooner if the any carbon deposits. -
Page 43: Inspecting The Fuel Lines And Connections
Electrical System Install the new filter with the arrow on the filter body pointing away from the fuel tank. Maintenance Ensure the hoses and hose clamps are secure to the filter. Open the fuel-shutoff valve and fill the tank. Electrical System Safety Inspect the fuel lines for any leaks or loose connections. -
Page 44: Understanding The 48 V Battery System
Understanding the 48 V Battery System Important: Charging the 48 V battery system is not recommended. The 48-V battery system consists of 4 12-V AGM batteries. 2 batteries are located on both sides of the machine (4 total); refer to Figure 49. -
Page 45: Locating The Fuses
Locating the Fuses Refer to Figure 52 for a description of each fuse on the fuse blocks: Locating the 48-V-System Fuses The fuses in the 48 V electrical system are located under the seat (Figure 50). g279711 Figure 52 1. Parking brake/key 5. - Page 46 Locating the Reel-Drive Circuit Locating the Generator, Wheel Fuses Motor, and Electrical System Fuses The fuses for the reel-drive circuit are located under the cover on the left side of the machine. Access the • The fuses for the generator (100 A) and the right fuse block by removing the left-side cover and the wheel motor (60 A) are located under the seat fuse-block cover...
-
Page 47: Drive System Maintenance
Drive System Maintenance Checking the Tire Pressure Service Interval: Before each use or daily Vary the tire pressure for all 3 wheels, depending upon your turf conditions, from a minimum of 83 to a maximum of 110 kPa (12 psi to 16 psi). Important: Ensure that the tire pressure for each wheel is identical. - Page 48 Fluid specification: SAE 80W90 Gearbox oil capacity: approximately 384 ml (13 fl oz) Raise the machine; refer to Raising the Machine (page 37). Important: The machine must be level so that the correct amount of fluid can be added to the gearbox. Ensure that the machine is level on the jack stands.
-
Page 49: Brake Maintenance
Brake Maintenance Adjusting the Brakes If the brake fails to hold the machine while parked, you can adjust the brakes; contact your authorized Toro distributor or refer to the Service Manual for more information. g278149 Figure 61 1. Vent hose and fitting 2. -
Page 50: Cutting Unit Maintenance
Installing the Cutting Units Cutting Unit Maintenance CAUTION Blade Safety Contact with a hot engine or muffler can cause severe burns. A worn or damaged blade or bedknife can break, and a piece could be thrown toward you or bystanders, Wait for a hot engine or muffler to cool before resulting in serious personal injury or death. - Page 51 Close the latches down and around the cutting-unit bar and lock them in place (Figure 64). Note: You can hear a click and feel when the latches are properly locked in place. Coat the spline shaft of the cutting unit motor with clean grease (Figure 66).
-
Page 52: Checking The Reel-To-Bedknife Contact
Removing the Cutting Units CAUTION Contact with a hot engine or muffler can cause severe burns. Wait for a hot engine or muffler to cool before installing the cutting units. g036124 Figure 68 Park the machine on a clean, level surface, set the function-control switch to the N EUTRAL position and use the lift/lower joystick to lower... -
Page 53: Backlapping The Cutting Units
Backlapping the Cutting position to return the machine to forward cutting operation. Units Wash all lapping compound off of the cutting units. Adjust the cutting unit reel to bedknife as WARNING needed. Move the cutting-unit reel speed control to the desired mowing position. Contact with the bedknives, reel blades, or other moving parts can result in personal Important:... -
Page 54: Storage
Storage If you wish to store the machine for a long period of time, perform the steps listed in Preparing the Machine for Storage (page 54). Storage Safety • Shut off the machine, remove the key, and wait for all movement to stop before you leave the operator’s position. - Page 55 Notes:...
- Page 56 Notes:...
- Page 57 Notes:...
- Page 58 The Toro Company (“Toro”) respects your privacy. When you purchase our products, we may collect certain personal information about you, either directly from you or through your local Toro company or dealer. Toro uses this information to fulfil contractual obligations - such as to register your warranty, process your warranty claim or to contact you in the event of a product recall - and for legitimate business purposes - such as to gauge customer satisfaction, improve our products or provide you with product information which may be of interest.
- Page 59 Countries Other than the United States or Canada Customers who have purchased Toro products exported from the United States or Canada should contact their Toro Distributor (Dealer) to obtain guarantee policies for your country, province, or state. If for any reason you are dissatisfied with your Distributor's service or have difficulty obtaining guarantee information, contact your Authorized Toro Service Center.
- Page 60 While the exposure from Toro products may be negligible or well within the “no significant risk” range, out of an abundance of caution, Toro has elected to provide the Prop 65 warnings. Moreover, if Toro does not provide these warnings, it could be sued by the State of California or by private parties seeking to enforce Prop 65 and subject to substantial penalties.