Table of Contents
Advertisement
Available languages
Available languages
Booster
Arrancador
Aide de démarrage
OWNERS MANUAL / MANUAL DEL USUARIO /
MANUEL D'UTILISATION
FOR MODEL / PARA MODELO / POUR LE MODÈLE
DSR104
PLEASE SAVE THIS OWNER'S MANUAL AND READ BEFORE EACH USE.
This manual will explain how to use the booster and charger safely and effectively.
Please read and follow these instructions and precautions carefully.
POR FAVOR GUARDE ESTE MANUAL DEL PROPIETARIO Y LEER ANTES DE
CADA USO. En este manual se explica cómo utilizar el arrancador y cargador con
seguridad y eficacia. Por favor, lea y siga las siguientes instrucciones y precauciones.
VEILLEZ A CONSERVER CES INSTRUCTIONS ET LES LIRE AVANT CHAQUE
UTILISATION. Ce guide vous montrera comment utiliser le booster efficacement et
en toute sécurité. Veuillez lire et suivre ces instructions et précautions.
0099001651E-05
Advertisement
Table of Contents

Related Manuals for Schumacher Electric DSR104


Summary of Contents for Schumacher Electric DSR104
- Page 1 OWNERS MANUAL / MANUAL DEL USUARIO / MANUEL D’UTILISATION FOR MODEL / PARA MODELO / POUR LE MODÈLE DSR104 PLEASE SAVE THIS OWNER’S MANUAL AND READ BEFORE EACH USE. This manual will explain how to use the booster and charger safely and effectively.
-
Page 2: Table Of Contents
CONTENTS IMPORTANT SAFETY INSTRUCTIONS ....................5 PERSONAL PRECAUTIONS ........................5 PREPARING TO USE THE BOOSTER ......................6 BOOSTER LOCATION ..........................6 INSTALLATION INSTRUCTIONS .......................6 FEATURES ..............................6 CHARGING THE INTERNAL BATTERY OF THE BOOSTER ..............7 OPERATING INSTRUCTIONS ........................8 MAINTENANCE INSTRUCTIONS ......................11 MOVING AND STORAGE INSTRUCTIONS .....................11 REPLACEMENT PARTS ...........................11 TROUBLESHOOTING ..........................12 BEFORE RETURNING FOR REPAIRS ....................13... - Page 3 CONTENIDOS INSTRUCCIONES DE SEGURIDAD IMPORTANTES ................16 PRECAUCIONES PERSONALES ......................16 PREPARACIÓN PARA UTILIZAR EL ARRANCADOR ................17 UBICACIÓN DEL ARRANCADOR ......................17 INSTRUCCIONES PARA LA INSTALACIÓN ....................17 CARACTERÍSTICAS ..........................18 CARGA DE LA BATERÍA INTERNA DEL ARRANCADOR ................18 INSTRUCCIONES DE OPERACIÓN ......................20 INSTRUCCIONES DE MANTENIMIENTO ....................23 INSTRUCCIONES PARA EL MANEJO Y ALMACENAMIENTO ...............23 REPUESTOS ............................23 LOCALIZACIÓN Y SOLUCIÓN DE PROBLEMAS ...................24...
- Page 4 TABLE DES MATIÈRES IMPORTANTES DIRECTIVES DE SÉCURITÉ ..................28 PRÉCAUTIONS PERSONNELLES ......................28 PRÉPARATION À L’UTILISATION DU BOOSTER ...................29 EMPLACEMENT DU BOOSTER ......................29 INSTRUCTIONS POUR L’INSTALLATION ....................29 CARACTÉRISTIQUES ..........................30 CHARGE DE LA BATTERIE INTERNE DU BOOSTER ................30 CONSIGNES D’UTILISATION ........................32 INSTRUCTIONS D’ENTRETIEN ......................35 INSTRUCTIONS DE STOCKAGE ET EMPLACEMENT ................35 PIECES DE RECHANGE ..........................35 DÉPANNAGE ............................36...
-
Page 5: Important Safety Instructions
Booster FOR MODEL DSR104 OWNERS MANUAL PLEASE SAVE THIS OWNERS MANUAL AND READ BEFORE EACH USE. This manual will explain how to use the booster and charger safely and effectively. Please read and follow these instructions and precautions carefully. CONTAINS SEALED, NON-SPILLABLE LEAD-ACID BATTERY. MUST BE DISPOSED OF PROPERLY. -
Page 6: Preparing To Use The Booster
Do not expose a booster to fire or excessive temperature. Exposure to fire or temperature above 265°F 2.10 (130°C) may cause explosion. Have servicing performed by a qualified repair person using only identical replacement parts. This will 2.11 ensure that the safety of the product is maintained. Attach output cables to a battery and chassis as indicated below. -
Page 7: Charging The Internal Battery Of The Booster
CHARGER Start/Stop Button Press to immediately begin charging your properly connected battery. If the button is not pressed, charging should begin in ten minutes. LED Indicators POWER (green) LED lit: The charger is connected to AC power. BAD BATTERY (red) LED: The charger has detected a problem with the battery. See Troubleshooting for more information. -
Page 8: Operating Instructions
Charger Modes Automatic charging mode When an automatic charge is performed, the charger switches to maintain mode automatically after the battery is charged. Aborted Charge If charging cannot be completed normally, charging will abort. When charging aborts, the charger’s output is shut off. The Bad Battery (red) LED will light, and the Charging (yellow/orange) LED will flash. Do not continue attempting to charge this battery. - Page 9 Jump Starting a Vehicle Engine IMPORTANT: Using the booster without a battery installed in the vehicle will damage the vehicle’s electrical system. IMPORTANT: Do not use the booster while charging its internal battery. WARNING! A SPARK NEAR THE BATTERY MAY CAUSE A BATTERY EXPLOSION. TO REDUCE THE RISK OF A SPARK NEAR THE BATTERY: 1.
- Page 10 Indication of polarity inversion If the polarity is incorrect, the alarm will sound: • If the remaining voltage in the batteries of the vehicle is at least 4 volts • If the output voltage selector is not connected Internal fuse replacement The booster is equipped with an internal fuse.
-
Page 11: Maintenance Instructions
IMPORTANT: • Never connect the booster to a battery or starter which is in short-circuit. The internal fuse will blow. • Make sure the connectors are connected correctly. • Never disconnect the booster while engine running when there is no battery in the vehicle or when the vehicle’s battery is at 0 volt. -
Page 12: Troubleshooting
12. TROUBLESHOOTING Booster PROBLEM REASON SOLUTION The booster does not The AC outlet is dead. Check for open fuse or circuit breaker recharge. supplying AC outlet. Poor electrical connection. Check power cord and extension cord for a loose fitting plug. The booster is not connected correctly. -
Page 13: Before Returning For Repairs
For information about troubleshooting, contact customer service for assistance: services@schumacherelectric.com | www.batterychargers.com | or call 1-800-621-5485 For REPAIR OR RETURN, contact Customer Service at 1-800-621-5485. DO NOT SHIP UNIT until you receive a RETURN MERCHANDISE AUTHORIZATION (RMA) number from Customer Service at Schumacher Electric Corporation. • 13 •... -
Page 14: Limited Warranty
Manufacturer does not provide any warranty for any accessories used with this product that are not manufactured by Schumacher Electric Corporation and approved for use with this product. This Limited Warranty is void if the product is misused, subjected to careless handling, repaired, or modified by anyone other than Manufacturer or if this unit is resold through an unauthorized retailer. -
Page 15: Warranty Card
ORIGINAL receipt because it will be required for any warranty claims. This warranty is not transferable. Send warranty card only. DO NOT SEND UNIT TO THIS ADDRESS FOR REPAIR. Mail this card to: Schumacher Electric Corporation 801 Business Center Drive Mount Prospect, IL 60056-2179 Name ______________________________________________________________... -
Page 16: Instrucciones De Seguridad Importantes
PARA MODELO MANUAL DEL USUARIO DSR104 POR FAVOR CONSERVE ESTE MANUAL DEL USUARIO Y LEALO ANTES DE CADA USO. En este manual se explica cómo utilizar el arrancador y cargador con seguridad y eficacia. Por favor, lea y siga las siguientes instrucciones y precauciones. -
Page 17: Preparación Para Utilizar El Arrancador
Si el ácido de la batería entra en contacto con la piel o la ropa, lave de inmediato con agua y jabón. Si le entra ácido a los ojos, enjuáguese de inmediato con agua corriente fría durante al menos 10 minutos y reciba atención médica de inmediato. -
Page 18: Características
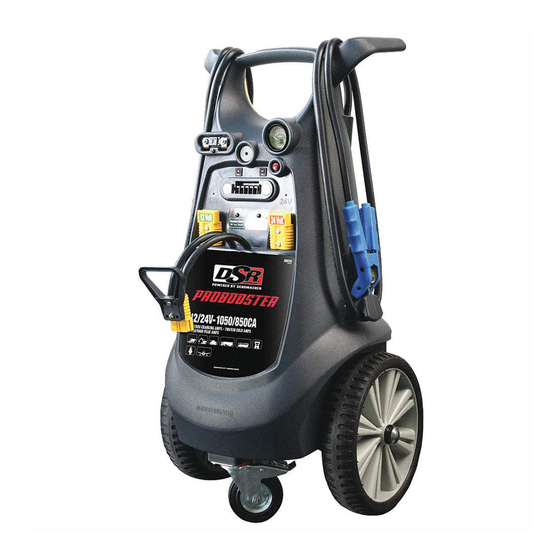
CARACTERÍSTICAS 1. Selector de voltaje 11. Puerto de cable auxiliar de salida (en el lado; no se muestra) 2. Conectores de voltaje 12. Cargador de salida 13. LED de encendido 3. LED de selección 14. Botón de inicio/parada de voltaje 15. - Page 19 PELIGRO. Nunca altere el cable o enchufe de C.A. suministrado, si no se ajusta al tomacorriente, haga instalar un tomacorriente adecuado con descarga a tierra por medio de un electricista capacitado. Una conexión inadecuada puede provocar un riesgo de descarga eléctrica o electrocución. El uso de una extensión no se recomienda.
-
Page 20: Instrucciones De Operación
INSTRUCCIONES DE OPERACIÓN IMPORTANTE: LEA LAS INSTRUCCIONES ANTES DE CONECTAR EL SELECTOR DE VOLTAJE DE SALIDA. Sistema de detección de voltaje Su arrancador de batería está equipado con un sistema de detección de voltaje. Después de la conexión de las abrazaderas en los terminales de la batería del vehículo, los led indicarán su voltaje, de la siguiente manera: •... - Page 21 En un vehículo con descarga a tierra por borne positivo, conecte el gancho NEGATIVO (AZUL) de la energía portátil de batería al borne NEGATIVO (NEG, N, -) sin descarga a tierra de la batería. Conecte el gancho POSITIVO (ROJO) al chasis del vehículo o al bloque motor alejado de la batería. No conecte al carburador, líneas de combustible o cuerpos metálicos.
- Page 22 Uso de cables auxiliares de corriente continua El arrancador de batería de batería está equipado con una conexión de cable de CC auxiliar. Esta conexión solo debe utilizarse con cables de CC auxiliares DSR. IMPORTANTE: El uso del arrancador sin una batería instalada en el vehículo puede dañar el sistema eléctrico del vehículo.
-
Page 23: Instrucciones De Mantenimiento
INSTRUCCIONES DE MANTENIMIENTO Después de usar y antes de realizar mantenimiento, desenchufe y desconecte el arrancador. Utilice un paño seco para limpiar la corrosión de toda la batería y otra suciedad o aceite de los terminales, cables y carcasa del arrancador. Asegúrese de que todas las piezas del arrancador están bien instaladas y en buenas condiciones para su función, incluyendo los protectores de plástico de las pinzas de la batería. -
Page 24: Localización Y Solución De Problemas
12. LOCALIZACIÓN Y SOLUCIÓN DE PROBLEMAS Arrancador PROBLEMA CAUSA POSIBLE SOLUCIÓN Si el arrancador no Tomacorriente de C.A. fuera de Controle la posible presencia de recarga. funcionamiento. fusibles abiertos o disyuntores que suministren energía al tomacorriente de CA. Conexión eléctrica deficiente. Controle la posible périda del enchufe perteneciente a los cables de alimentación o al alargador. -
Page 25: Antes De Devolver A Reparaciones
| www.batterychargers.com | o llame 1-800-621-5485 Para REPARACIÓN O DEVOLUCIÓN, comuníquese con Servicios al Cliente al 1-800-621-5485. NO ENVÍE LA UNIDAD hasta que usted reciba AUTORIZACIÓN DE DEVOLUCIÓN DE MERCANCÍA (RMA) de Servicios al Cliente de Schumacher Electric Corporation. • 25 •... -
Page 26: Garantía Limitada
El Fabricante no presta garantía por lo accesorios utilizados con este producto que no sean los fabricados por Schumacher Electric Corporation y que no estén aprobados para su uso con este producto. La presente Garantía Limitada será nula si el producto se utiliza en forma errónea, se trata de manera inadecuada, es reparado o modificado por personas que nos sean el Fabricante o si esta unidad es revendida a través de un vendedor minorista no autorizado. -
Page 27: Tarjeta De Garantía
Esta garantía no es transferible. Envie tarjeta de garantía solamente. NO ENVÍE LA UNIDAD A ESTA DIRECCIÓN PARA SU REPARACIÓN. Enviar esta tarjeta a: Schumacher Electric Corporation 801 Business Center Drive Mount Prospect, IL 60056-2179 Nombre ____________________________________________________________ Dirección ___________________________________________________________... -
Page 28: Importantes Directives De Sécurité
Aide de Démarrage POUR LE MODÈLE MANUEL D’UTILISATION DSR104 VEILLEZ A CONSERVER CES INSTRUCTIONS ET LES LIRE AVANT CHAQUE UTILISATION. Ce guide vous montrera comment utiliser le booster efficacement et en toute sécurité. Veuillez lire et suivre ces instructions et précautions. -
Page 29: Préparation À L'utilisation Du Booster
Si de l’acide de l’accumulateur vient en contact avec la peau ou les vêtements, lavez sur le champ avec de l’eau savonneuse. Si de l’acide atteint les yeux, rincez à l’eau courante (froide) durant au moins dix minutes et obtenez une attention médicale immédiate. Ne JAMAIS fumer ou laisser d’étincelles se produire ou de flamme se trouver à... -
Page 30: Caractéristiques
CARACTÉRISTIQUES 1. Sélecteur de tension 10. Pinces de la batterie de sortie 11. Port de câble 2. Connecteurs de tension (sur le côté, non montré) de sortie 12. Chargeur 3. Voyants LED 13. Voyant d’alimentation LED de sélection de tension 14. - Page 31 AVERTISSEMENT! RISQUE DE CHOC ÉLECTRIQUE OU D’INCENDIE. Ce chargeur de batterie est conçu pour les circuits à tension nominale de 120 V. La fiche doit être branchée dans une prise correctement installée et conforme à tous les codes et règlements locaux. Les broches de la fiche doivent tenir le réceptacle (la sortie).
-
Page 32: Consignes D'utilisation
Maintien de la charge d’une batterie Le chargeur permet de maintenir les batteries 12V à pleine charge. REMARQUE : la technologie du mode maintien vous permet de maintenir votre batterie à pleine charge tout en la gardant en bon état de fonctionnement pour de longues périodes de temps. Cependant, des problèmes de batterie, des connexions inadéquates ou autres conditions imprévues peuvent causer d’importantes pertes de charge. - Page 33 Pour les véhicules mis à la masse négative, connectez la pince POSITIVE (ROUGE) de l’unité à la borne de la batterie POSITIVE (POS, P, +), non mise à la masse. Connectez la pince NÉGATIVE (BLEUE) au châssis du véhicule ou au bloc moteur à l’écart de la batterie. Ne connectez pas la pince au carburateur, à...
- Page 34 4. Serrer les boulons pour fixer le fusible. 5. L’appareil est maintenant prêt à être utilisé. Utilisation des câbles CC auxiliaires Le booster est équipé d’une connexion de câble CC auxiliaire. Cette connexion ne peut être utilisée qu’avec des câbles CC auxiliaires DSR. IMPORTANT : l’utilisation du booster sans batterie installée dans le véhicule peut causer des dommages au système électronique du véhicule.
-
Page 35: Instructions D'entretien
INSTRUCTIONS D’ENTRETIEN Après avoir utilisé l’unité et avant une opération d’entretien, débranchez et déconnectez l’unité. Utilisez un chiffon sec pour nettoyer toute corrosion de la batterie ainsi que la saleté ou l’huile sur les broches, les câbles et le boîtier de l’unité. Assurez-vous que tous les composants de l’unité... -
Page 36: Dépannage
12. DÉPANNAGE Booster PROBLÈME CAUSE POSSIBLE SOLUTION Vérifiez la présence d’un fusible ou Le booster n’arrive pas à se Il n’y a pas de courant dans la prise CA. recharger. d’un disjoncteur ouvert dans le circuit d’alimentation de la prise CA. La connexion électrique est faible. -
Page 37: Avant De Retourner Pour Les Réparations
| www.batterychargers.com | ou composez le 1-800-621-5485 Pour RÉPARATION OU RETOUR, contactez le service téchnique au 1-800-621-5485. NE PAS ENVOYER L’UNITÉ jusqu’à ce que vous receviez une AUTORISATION DE RETOUR DE MARCHANDISE (RMA) auprès du service clientèle au Schumacher Electric Corporation. • 37 •... -
Page 38: Garantie Limitée
CETTE GARANTIE LIMITÉE N’EST PAS TRANSFÉRABLES NI CESSIBLES. Schumacher Electric Corporation (le « Fabricant ») garantit ce booster et son chargeur pour un (1) an à compter de la date d’achat au détail contre les défauts de matériaux ou de fabrication qui peuvent survenir dans des conditions normales d’utilisation et d’entretien. -
Page 39: Carte De Garantie
éventuelle réclamation au titre de la garantie. Cette garantie n’est pas transférable. Envoyer la carte de garantie seulement. NE PAS ENVOYER L’UNITÉ À CETTE ADRESSE POUR RÉPARATION. Envoyer cette carte à : Schumacher Electric Corporation 801 Business Center Drive Mount Prospect, IL 60056-2179 (É.-U ) Nom _______________________________________________________________...