Advertisement
Available languages
Available languages
Quick Links
Fig. 1
Fig. 4
Fig. 7
Fig. 10
Fig. 13
INSTRUCTION FOR USE
CAUTION: CAREFULLY READ THE INSTRUCTION MANUAL BEFORE USE. Keep these
instructions in a safe place so that you can refer to them if needed.
GB
TO INSTALL OR REPLACE BATTERIES
Your new lantern operates on 4 "D/LR20" cell batteries. For longest life, use alkaline batteries.
Caution: Do not mix old and new batteries. Do not mix alkaline, standard (carbon-zinc), or
rechargeable batteries. Result could lead to over-heated circuit and damage to the lantern.
1. With lantern off, turn upside down and remove the bottom cap by sliding the tab. (Fig. 1)
2. Install 4 batteries in the correct orientation as shown on the battery housing. Always be careful
that all 4 batteries are installed correctly. (Fig. 2)
3. Replace the bottom cap by sliding the tab. Check that cap is securely installed in closed position.
(Fig. 3).
TO OPERATE IN LANTERN MODE
1. To turn lantern "ON", press switch on top of lantern (Fig. 4). All two Removable Area Lights and
base lights will turn on for 360° of area lighting.
2. Base Lights can be used as independent light sources when Removable Area Lights are
removed from "Docking Station". To turn Base lights "ON", press switch on top of lantern (Fig. 5).
All Base Lights will turn on.
NOTE: If one Removable Area Light is removed, the remaining Removable Area Light(s) will
work with Base Light(s) together.
3. To cycle between modes (low, high, off) or to turn the lantern off, press switch until desired mode
is reached.
TO OPERATE REMOVABLE AREA LIGHT(S)
One or more Removable Area Lights can be used as independent light sources when removed from
"Docking Station", and then be returned to the lantern "Docking Station" for full 360° area lighting
and/or recharging.
1. Grip both sides of the Removable Area Light to release from locked/charging position. (Fig. 6)
2. Lift out Removable Area Light. (Fig. 7)
NOTE: If the Lantern Mode is "ON", the remaining Removable Area Lights will remain lit.
3. Push switch on front of Removable Area Light to turn "LOW", "HIGH", "SPOT" or "OFF". (Fig. 8)
NOTE: When reattached to the lantern "Docking Station", the Removable Area Lights will be
recharged by the batteries located in the lantern base.
4. The Removable Area Lights are designed to be used as a flashlight by taking their handle in spot
mode, or stood on a flat surface by adjusting their handle properly. (Fig. 9 & 10).
TO RETURN REMOVABLE AREA LIGHT(S)
Return Removable Area Light to "Docking Station" on lantern by the strength of the magnet. (Fig.11)
NOTE: Please make sure the connectors of the Removable Area Lights are slid down to engage the
springs on the bottom of the "Docking Station", otherwise, the Removable Area Lights will not be lit
and charged correctly. Once the Removable Area Light is in the "Docking Station", the Lantern Mode
Switch over-rides the Removable Area Light Switch.
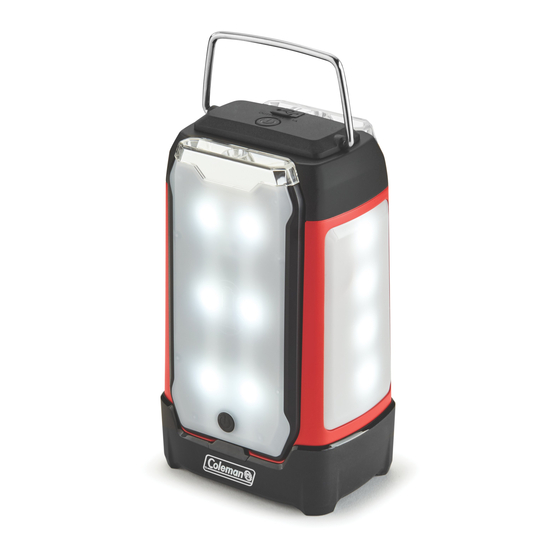
How to Use and Enjoy Your Coleman
2 Panel lantern
Fig. 2
Fig. 5
Fig. 8
Fig. 11
WARNING:
LED risk group 1 - EN 62471
Do not look at the beam.
Children should be supervised to ensure that they do not play with the appliance.
ATTENTION:
LED risque groupe 1 – EN 62471
Ne pas regarder le faisceau.
Il convient de surveiller les enfants pour s'assurer qu'ils ne jouent pas avec l'appareil.
4010063410 (ECN20066673-A)
®
Fig. 3
Fig. 6
Fig. 9
Fig. 12
Advertisement

Related Manuals for Coleman 2000032683


Summary of Contents for Coleman 2000032683
- Page 1 4010063410 (ECN20066673-A) How to Use and Enjoy Your Coleman ® 2 Panel lantern Fig. 1 Fig. 2 Fig. 3 Fig. 4 Fig. 5 Fig. 6 Fig. 7 Fig. 8 Fig. 9 Fig. 10 Fig. 11 Fig. 12 Fig. 13 WARNING: LED risk group 1 - EN 62471 Do not look at the beam.
- Page 2 TO CHARGE OTHER DEVICES With batteries installed, this lantern has an additional USB Port (Fig. 12) for charging small electronic devices like cell phones or MP3 players. NOTE: Output charge rate supports up to 5V/1A. Not all devices can be charged with this USB port. THINGS YOU SHOULD KNOW 1.