Nortel T7406 Manual
Mobility solution for norstar and business communications manager
Hide thumbs
Also See for T7406:
- Installation manual (56 pages) ,
- User's card (2 pages) ,
- Installation manual (46 pages)
Table of Contents
Advertisement
Quick Links
Nortel Networks Business Series
Nortel Networks Business Series
T7406 Cordless
T7406 Cordless
Mobility Solution for Norstar and
Mobility Solution for Norstar and
Business Communications
Business Communications
Manager
Manager
Technical Information Session
Technical Information Session
Vance
Letcher
Vance
Letcher
–
May 17/01
–
May 17/01
Advertisement
Table of Contents

Related Manuals for Nortel T7406


Summary of Contents for Nortel T7406
- Page 1 Nortel Networks Business Series Nortel Networks Business Series T7406 Cordless T7406 Cordless Mobility Solution for Norstar and Mobility Solution for Norstar and Business Communications Business Communications Manager Manager Technical Information Session Technical Information Session Vance Letcher – May 17/01 Vance Letcher –...
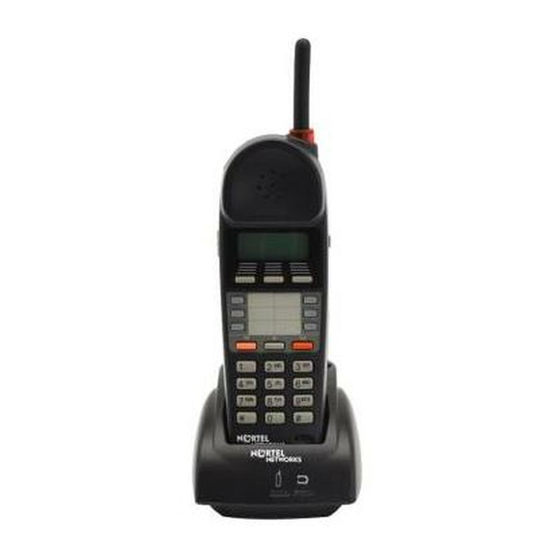
- Page 2 T7406 Cordless Telephone The T7406 is a multiple handset, single base cordless telephone system with full mobility integration into your Norstar key system. The T7406 offers the following features; Range The effective operating radio range depends on the building construction and internal layout of the facility.
- Page 3 915MHz) or upper half (915.1- 928Mhz). Each base must use a separate half of the ISM band. If other devices operating on the ISM band interfere with the T7406 base, the other half of the band may be used to minimize interference.
- Page 4 Standby Mode: up to 72 hours Charge Time: Approximately 3 hours to charge standard 1,200 mAh battery pack. It takes approximately 12 hours to trickle charge the spare battery in the charging cradle. Nortel Networks Confidential T7406 – Technical Session May 17-01 4...
-
Page 5: Installation
Installation The following in an example of an installation of the T7406 solution. There are 3 TCM loops going to each Base. The bases should be a minimum of 20 feet apart as well as 8 feet off the ground for improved performance. The T7406 solution will operate on any Norstar KSU including the BCM. - Page 6 Installation Before beginning installation, make sure that each T7406 set has one fully charged battery to operate. Begin the installation by locating an area where your radio will have optimal performance. The base should not be installed where radio waves are blocked or reflected, such as next to a filing cabinet.
-
Page 7: Setting The Dip Switches
Down-Up-Down. On the second Base, set the dip switches to operate in the lower half of the ISM band. From left to right the dip switch settings are Down-Down-Up. Nortel Networks Confidential T7406 – Technical Session May 17-01 7... -
Page 8: Handset Setup
MUST make sure that the ports that these sets will occupy has “Handsfree” set to “Auto”, this is so that there will be 2 Intercom Keys on the T7406 set. maximum of 3 lines can be programmed for the T7406. - Page 9 Press NEXT until display shows 3. Handset ID Press SHOW Press 1, 2, or 3 Press OK to accept the handset configuration Press the Options button. The display show Time and Date from the KSU. Nortel Networks Confidential T7406 – Technical Session May 17-01 9...
- Page 10 (be sure that the Set identification has not been assigned to another set). Press OK to accept the handset configuration. Press the Options button. The display show Time and Date from the KSU. Nortel Networks Confidential T7406 – Technical Session May 17-01 10...
-
Page 11: Ring Selection
Allow calls is OFF. Note: Press ON to allow calls to ring at the handset. Press the Options button. The display changes to show the Time and Date from the KSU. Nortel Networks Confidential T7406 – Technical Session May 17-01 11... -
Page 12: Ringer Volume
Press OK to accept the ringer volume. Press the Options button. Press the Options button. The display shows Time and Date from the KSU. The display shows Time and Date from the KSU. Nortel Networks Confidential T7406 – Technical Session May 17-01 12... -
Page 13: Button Mapping
Button Mapping Diagram of Button Mapping needs to be updated. Nortel Networks Confidential T7406 – Technical Session May 17-01 13... -
Page 14: Handset Power
To recharge the battery pack, put the handset in the charger. Be sure that the handset and the charger contacts touch. To fully charge the battery pack, leave the handset in the charger until indicator turns green. Nortel Networks Confidential T7406 – Technical Session May 17-01 14... -
Page 15: Battery Indicator Lights
45 seconds. Incoming calls automatically wake up the handset from the sleep mode. Pressing any button on the dial pad also wakes up the handset. Nortel Networks Confidential T7406 – Technical Session May 17-01 15... -
Page 16: Handset Signal Detection
If you go completely out of range during an active call, the call is immediately placed on hold. To retrieve it once you move back into range, select the flashing red line button. Nortel Networks Confidential T7406 – Technical Session May 17-01 16... - Page 17 A complete installation guide is packaged with all shipped units. These include the Base Station with Handset/Charger and the individual Handset/Charger units. The documentation package is also found on the ITAS Web Page at http://www97.nortelnetworks.com/itas. Nortel Networks Confidential T7406 – Technical Session May 17-01 17...
- Page 18 Station uses by manipulating the dip switches on the back. TCM loops need to be centrally located. •Handset/Charger !Smaller footprint to the desktop. Requires only power to the charger, no TCM loops set. Nortel Networks Confidential T7406 – Technical Session May 17-01 18...
- Page 19 Radio Base Station Handset and charger Telephony Requirements BIC’s tool for punching down TCM loops • Software T7406 operates on any existing Norstar KSU and any release of the Business Communications Manager. Nortel Networks Confidential T7406 – Technical Session May 17-01 19...
- Page 20 Installation and Upgrade - Safety Considerations • Electric Shock – do not place base station, charger, or handset in a location that could be susceptible to moisture/water Nortel Networks Confidential T7406 – Technical Session May 17-01 20...
- Page 21 Mail In (standard process): In the Mail In process, an RMA number is not required. The customer returns the failed unit, including Purchase order and packing list to the NORTEL Service Selection Centre. The packing slip should include the following information: Customer ship to address, Quantity and Ordering code of items being returned, Purchase Order number, Contact Name and Phone Number A replacement is sent to the customer when the defective hardware is received at the NORTEL Service Selection Centre.
- Page 22 Weston, Ontario, Canada M9L 2X6 SERVICE LEVELS FOR CANADA: Mail In : Repair turnaround time is 15 working days from receipt of equipment at the NORTEL Service Selection Centre warehouse. Advanced Replacement: Lead time varies for different service levels: 1. Emergency: lead time for shipment is 24 hours, subject to C$250 surcharge, Meridian 1 Portfolio only.
- Page 23 24 hours. 3. Customer returns failed units to Nortel Repair and Distribution Centre within 30 calendar days to avoid being invoiced for Material on Loan (MOL) at a non-return billing price. The RMA number must appear on the outside of the defective return packaging. Repair Tags must be attached to the returned equipment. All shipments must include a packing slip with the following information: Customer address, RMA number, Quantity and Ordering code of items being returned, Purchase Order number, Contact Name and Phone #.
- Page 24 37210 SERVICE LEVELS FOR US: Mail In : Repair turnaround time is 10 working days from receipt of equipment at the NORTEL Service Selection Centre warehouse. Mail In Emergency (surcharge for this service level) : Repair turnaround time is 2 working days from receipt of equipment at the NORTEL Repair and Distribution Center warehouse.
- Page 25 Thank You! Nortel Networks Confidential T7406 – Technical Session May 17-01 25...