Table of Contents
Advertisement
Available languages
Available languages
Quick Links
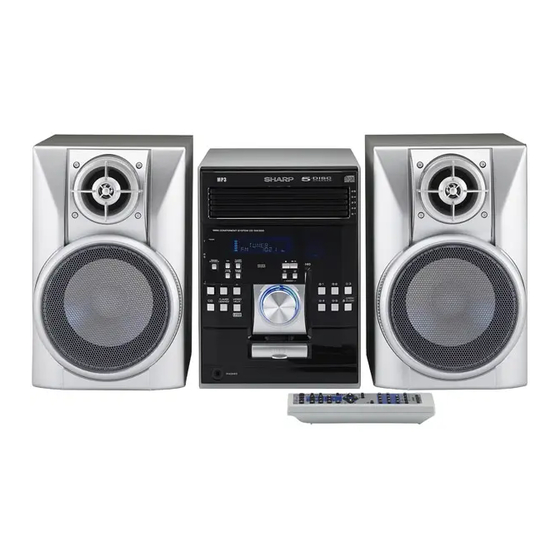
MICRO COMPONENT SYSTEM
SISTEMA MICRO COMPONENTE
MODEL
MODELO
XL-UH240W
OPERATION MANUAL
MANUAL DE MANEJO
Note:
This product is not compatible with MTP and AAC file systems.
Nota :
Este producto no es compatible con sistemas de archivos MTP y AAC.
XL-UH240W Micro Component System consisting of XL-UH240W (main
unit) and CP-UH240W (speaker system).
Sistema micro componente XL-UH240W que consta de XL-UH240W
(aparato principal) y CP-UH240W (sistema de altavoces).
ENGLISH
Please refer to pages E-1 to E-34.
Consulte las páginas S-1 a S-34.
ESPAÑOL
SHARP CORPORATION
Advertisement
Chapters
Table of Contents

Related Manuals for Sharp XL-UH240W


Summary of Contents for Sharp XL-UH240W
- Page 1 XL-UH240W Micro Component System consisting of XL-UH240W (main unit) and CP-UH240W (speaker system). Sistema micro componente XL-UH240W que consta de XL-UH240W (aparato principal) y CP-UH240W (sistema de altavoces). MICRO COMPONENT SYSTEM SISTEMA MICRO COMPONENTE MODEL MODELO XL-UH240W OPERATION MANUAL MANUAL DE MANEJO ENGLISH Please refer to pages E-1 to E-34.
- Page 2 Consult the dealer or an experienced radio/TV technician for help. WARNING FCC Regulations state that any unauthorised changes or modifications to this equipment not expressly approved by the manufacturer could void the user's authority to operate this equipment. 03/12/17 XL-UH240W _1-7.fm...
-
Page 3: Table Of Contents
Contents XL-UH240W ENGLISH Page Thank you for purchasing this SHARP product. To obtain the best performance from this product, please read this manual carefully. It General Information will guide you in operating your SHARP product. Precautions ......... 3 Controls and indicators . -
Page 4: Precautions
SHARP will not be held responsible for any dam- age resulting from use of this unit with a voltage other than that which In case of an electrical storm, unplug the is specified. -
Page 5: Controls And Indicators
13. Disc Number Select Buttons ......14 14. Disc Tray Open/Close Button ..... . . 14 03/12/17 XL-UH240W _1-7.fm... - Page 6 11. Subwoofer Pre-output Socket ..... . . 31 Speaker system 1.Tweeter 2.Woofer 3.Bass Reflex Duct 4.Speaker Wire 5.Speaker Light-up Wire 03/12/17 XL-UH240W _1-7.fm...
- Page 7 24. Folder Button ....... . . 19, 21 25. Clock/Timer Button ......13, 26, 29 03/12/17 XL-UH240W _1-7.fm...
-
Page 8: System Connections
Right speaker Left speaker Speaker light-up wire Speaker light-up wire Speaker light-up wire Speaker light-up wire Speaker connection (see page 8) AC power connection (see page 9) Speaker connection (see page 8) AC power connection (see page 9) 03/12/17 XL-UH240W _1-7.fm... - Page 9 XL-UH240W ENGLISH Aerial connection Speaker connection Supplied FM aerial: Connect the black wire to the minus (-) terminal, and the red wire to the plus (+) terminal. Connect the FM aerial wire to the FM 75 OHMS socket and position...
- Page 10 System connections (continued) XL-UH240W ENGLISH Setting the AC voltage selector Check the setting of the AC voltage selector located on the rear panel before plugging the unit into the wall socket. If necessary, adjust the selector to correspond to the AC power voltage used in your area.
- Page 11 XL-UH240W ENGLISH Setting the FM/AM span selector Demonstration mode The first time the unit is plugged in, the unit will enter the demonstration mode. You will see words scroll. To cancel the demonstration mode: When the unit is in the power stand- by mode (demonstration mode), press the X-BASS/DEMO button.
-
Page 12: Remote Control
Remote control XL-UH240W ENGLISH Battery installation Notes concerning use: Replace the batteries if the operating distance is reduced or if the Use 2 "AA" size batteries (UM/SUM-3, R6, HP-7 or similar). operation becomes erratic. Periodically clean the transmitter on the remote control and the Batteries are not included. -
Page 13: General Control
General control XL-UH240W ENGLISH Volume control Main unit operation: STAND-BY When the VOLUME control is turned clockwise, the volume will increase. When it is turned anti-clockwise, the volume will decrease. Remote control operation: Press the VOLUME (+ or -) button to increase or decrease the volume. -
Page 14: Setting The Clock (Remote Control Only)
Setting the clock (Remote Control only) XL-UH240W ENGLISH Press the button to adjust the hour and then press the MEMORY button. Press the button once to advance the time by 1 hour. Hold it down to advance continuously. Press the button to adjust the minutes and then press the MEMORY button. -
Page 15: Listening To A Cd Or Mp3/Wma Disc
Listening to a CD or MP3/WMA disc XL-UH240W ENGLISH This system can play back a standard CD, CD-R/RW in the CD format and CD-R/RW with MP3 or WMA files, but cannot record on them. Some audio CD-R and CD-RW discs may not be playable due to the state of the disc or the device that was used for recording. - Page 16 Listening to a CD or MP3/WMA disc (continued) XL-UH240W ENGLISH Playback will begin from track 1 on DISC 1. After that disc Press the ON/STAND-BY button to turn the power on. finishes playing, the next disc will automatically play. After the last track on the fifth disc is played, the unit will stop Press the CD button.
-
Page 17: Advanced Cd Or Mp3/Wma Disc Playback
Advanced CD or MP3/WMA disc XL-UH240W playback ENGLISH Various disc functions Function Main unit Remote Operation Direct track search control By using the direct search buttons, the desired tracks on the current Play Press in the stop mode. disc can be played. - Page 18 Press the button again until " " disappear. (You cannot select the order of the tracks.) Caution: After performing repeat or random play, be sure to press the ) button. Otherwise, the disc(s) will play continuously. E-17 03/12/17 XL-UH240W 17-25.fm...
-
Page 19: Advanced Cd Playback
During the programme operation, random play is not possible. If you make a mistake, the programmed tracks can be cleared by pressing the CLEAR/DIMMER button. Press the (CD ) button. The total number in memory will ap- pear. Press the button to start playback. E-18 03/12/17 XL-UH240W 17-25.fm... -
Page 20: Mp3/Wma Folder Mode (Only For Mp3/Wma Files)
FILE 4 unit will playback the files not according to our expected playback (FOLDER 4) FILE 5 order. FILE 6 FOLDER E FILE 7 (FOLDER 5) FILE 8 FOLDER B FILE 9 (FOLDER 6) FILE 10 E-19 03/12/17 XL-UH240W 17-25.fm... - Page 21 1) MP3 ID3-Tag only support version 1.x. 2) Only appears when clock is already set. Note: If "NO SUPPORT" is displayed, it means "Copyright protected WMA file" or "Not supported playback file" is selected. E-20 03/12/17 XL-UH240W 17-25.fm...
-
Page 22: Listening To Usb Mass Storage Device / Mp3 Player
This product is not compatible with MTP and AAC file systems. To start playback with folder mode on, go to step 5. To change the playback folder, press the TUNING ( button to select another folder. E-21 03/12/17 XL-UH240W 17-25.fm... -
Page 23: To Remove Usb Memory Device
TITLE-1 Indicator File Name Display Title Display Notes: SHARP will not be held liable for the loss of data whilst the USB TITLE-2 Indicator Function Display Artist Display memory device is connected to the audio system. Files compressed in MP3 and / or WMA format can be played when connected to the USB terminal. -
Page 24: Advanced Usb Playback
In random play, the unit will select and play tracks automatically. (You cannot select the order of the tracks.) Caution: After performing repeat, be sure to press the (USB ) button. Otherwise, it will play continuously. E-23 03/12/17 XL-UH240W 17-25.fm... -
Page 25: Listening To The Radio
TUNER (BAND) button (main unit and remote control): The unit turns on and the "TUNER" function is activated. button on the main unit: The unit turns on and playback of the last function starts (CD,TUNER,VIDEO/AUX/USB). FM stereo receiving indicator E-24 03/12/17 XL-UH240W 17-25.fm... - Page 26 When a new station is stored in memory, the station previously memorised for that preset channel number will be erased. Note: The backup function protects the memorised stations for a few hours should there be a power failure or the AC power lead become disconnected. E-25 03/12/17 XL-UH240W 17-25.fm...
-
Page 27: Timer And Sleep Operation (Remote Control Only)
When set times for the daily timer and once timer overlap, the once timer takes priority. Allow an interval of at least 1 minute between operations. Set the clock to the correct time if "ONCE" or "DAILY" does not appear. Continued to the next page E-26 03/12/17 XL-UH240W 26-34.fm... - Page 28 MEMORY button. The "TIMER" indicator lights up and the unit is ready for timer playback. Set the time to finish as in steps 5 and 6 above. Continued to the next page E-27 03/12/17 XL-UH240W 26-34.fm...
- Page 29 "ONCE" or "DAILY", and press the MEMORY button. 3 Within 10 seconds, press the button to select "ONCE ON" or "DAILY ON", and press the MEMORY button. 4 Press the ON/STAND-BY button to enter the power stand-by mode. E-28 03/12/17 XL-UH240W 26-34.fm...
- Page 30 "X : XX" is sleep remaining time. The remaining sleep time is displayed for about 10 seconds. You can change the remaining sleep time whilst it is displayed by pressing the MEMORY button (steps 4 - 5). E-29 03/12/17 XL-UH240W 26-34.fm...
-
Page 31: Enhancing Your System
VIDEO/AUX/USB button (main unit and remote control): The unit turns on and the "USB" or "AUX" function is activated. button on the main unit: The unit turns on and playback of the last function starts (CD,TUNER,VIDEO/AUX/USB). E-30 03/12/17 XL-UH240W 26-34.fm... - Page 32 If something is wrong with this product, check the following before connected to this unit, you can enjoy sound with emphasised bass. calling your authorised SHARP dealer or service centre. Connect an RCA lead from a commercially available speaker with a built-in amplifier to the SUBWOOFER PRE-OUT socket.
- Page 33 Condensation can cause the unit to malfunction. If this happens, leave the power on with no disc in the unit until normal playback is possible (about 1 hour). Wipe off any condensation on the transmitter with a soft cloth before operating the unit. E-32 03/12/17 XL-UH240W 26-34.fm...
-
Page 34: Troubleshooting Chart
Always hold the CDs by the edges. Fingerprints, dirt, or water on the CDs can cause noise or mistracking. If a CD is dirty or does not play properly, clean it with a soft, dry cloth, wiping straight out from the centre, along the radius. Correct E-33 03/12/17 XL-UH240W 26-34.fm... -
Page 35: Specifications
Specifications XL-UH240W ENGLISH CD player As part of our policy of continuous improvement, SHARP reserves the right to make design and specification changes for product improvement without prior notice. The performance specification Type 5-disc multi-play compact disc player figures indicated are nominal values of production units. There may... - Page 36 ADVERTENCIA Las regulaciones de FCC declaran que cualquier cambio o modificación no autorizados en este equipo que no estén expresamente aprobados por el fabricante, puede anular la autoridad del usuario para la operación de este equipo. 03/12/17 XL-UH240W LS _1-7.fm...
- Page 37 Introducción Índice XL-UH240W ESPAÑOL Muchas gracias por haber adquirido este producto SHARP. Lea at- Página entamente este manual para conseguir el mejor rendimiento del Información general aparato. Le servirá también como guía operativa de este producto Precauciones ........3 SHARP.
-
Page 38: Precauciones
Si su sistema no funciona correctamente, desconecte el cable de daños. SHARP no asumirá responsabilidad alguna por cualquier alimentación de CA de la toma de CA. Enchufe otra vez el cable daño de este aparato que resulte del uso de una tensión distinta a la... -
Page 39: Controles E Indicadores
13. Botones selectores del número de disco....14 14. Botón de abertura/cierre de la bandeja de discos..14 03/12/17 XL-UH240W LS _1-7.fm... - Page 40 11. Pre-toma de salida de subwoofer ....31 Sistema de altavoces 1.Altavoz de agudos 2.Altavoz de graves 3.Conducto de reflejo de bajo 4.Cable del altavoz 5.Cable de encendido del altavoz 03/12/17 XL-UH240W LS _1-7.fm...
- Page 41 24. Botón de carpeta ......19, 21 25. Botón del reloj/temporizador ....13, 26, 29 03/12/17 XL-UH240W LS _1-7.fm...
-
Page 42: Conexiones Del Sistema
Antena de FM Antena de cuadro de AM Altavoz derecho Altavoz izquierdo Cable de encendido del altavoz Cable de encendido del altavoz Conexión de los altavoces Conexión de CA (vea la página 9) (vea la página 8) 03/12/17 XL-UH240W LS _1-7.fm... - Page 43 <Fijación a la pared> ALTAVOZ DERECHO ALTAVOZ IZQUIERDO Pared Tornillos (no suministra dos) Nota: Colocando el cable de encendido del altavoz derecho en el enchufe RIGHT (derecho) y el cable de encendido del altavoz izquierdo en el enchufe LEFT (izquierdo). XL-UH240W LS_8-16.fm...
- Page 44 Ventilador de enfriamiento: Esta unidad principal incluye un ventilador refrigeración en su parte trasera para mejorar la refrigeración. No cubra la abertura del ven- tilador con ningún tipo de obstáculo, para no bloquear la salida, y lograr una ventilación adecuada. XL-UH240W LS_8-16.fm...
- Page 45 Cuando se utilice una antena de FM exterior, desconecte el cable Esta operación borrará todos los datos almacenados en la memoria de la antena de FM suministrada. incluyendo reloj, ajustes temporizador, sintonizador predeterminado, y el programa de CD. S-10 XL-UH240W LS_8-16.fm...
-
Page 46: Controlador Remoto
No emplee baterías recargables (batería de níquel-cadmio, etc.). La inserción de las pilas en la dirección opuesta puede ocasionar un mal funcionamiento del aparato. Retiro de la batería: Abra la tapa de la batería y saque la batería. S-11 XL-UH240W LS_8-16.fm... -
Page 47: Control General
2 segundos o más. JAZZ Para jazz. Volumen automático (fade-in) Si usted apaga y enciende la unidad principal con el volumen ajus- tado a 27 o más alto, el volumen comenzará en 16 hasta llegar al último volumen ajustado. S-12 XL-UH240W LS_8-16.fm... -
Page 48: Ajuste Del Reloj (Sólo Mando A Distancia)
Aparecerá el visualizador de 12 horas. 1 Borre todo el contenido programado. [Para más detalles, consulte (AM 0:00 - PM 11:59) "Borrado de toda la memoria (reposición)" de la página 32.] 2 Efectúe "Ajuste del reloj" desde el paso 1. S-13 XL-UH240W LS_8-16.fm... -
Page 49: Audición De Un Disco Cd O Mp3/Wma
últimas funciones (CD,TUNER,VIDEO/AUX/USB). Función de apagado automático: En el modo de parada de funcionamiento de CD, MP3 o WMA, la unidad principal entra en el modo de reserva (stand-by) después de 15 minutos de inactividad. S-14 XL-UH240W LS_8-16.fm... - Page 50 CD, coloque el aparato alejado de la televisión o de la radio. No ponga dos discos en una misma bandeja de disco. Indicador de Si un disco está dañado, sucio, o cargado al revés, será expulsa- reproducción de discos S-15 XL-UH240W LS_8-16.fm...
-
Page 51: Reproducción Avanzada De Discos Cd O Mp3/Wma
Los discos de sesión múltiple regrabables, cuya grabación no ha sido Para detener la reproducción: terminada, pueden ser reproducidos de todas maneras. Pulse el botón (CD ). S-16 XL-UH240W LS_8-16.fm... - Page 52 (No podrá seleccionar el orden de las pistas.) Precaución: Después de utilizar la repetición de reproducción o la reproducción aleatoria, asegúrese de pulsar el botón (CD ). De lo contrario, el disco compacto (los discos compactos) reproducirá continuamente. S-17 06/4/5 XL-UH240W LS 17-25.fm...
-
Page 53: Reproducción De Cd Avanzada
Si se ha cometido un error, se pueden borrar las pistas progra- madas pulsando el botón CLEAR/DIMMER. Pulse el botón (CD ). Aparecerá el número total de me- moria. Pulse el botón para iniciar la reproducción. S-18 06/4/5 XL-UH240W LS 17-25.fm... -
Page 54: Modo De Carpeta Mp3/Wma (Sólo Para Archivos Mp3/Wma)
* El orden de información de las carpetas y archivos es guardado en FOLDER B FILE 9 el disco según el software de escritura. Existe la posibilidad de que (FOLDER 6) FILE 10 la unidad no reproduzca los archivos según nuestro orden de reproducción esperado. S-19 06/4/5 XL-UH240W LS 17-25.fm... - Page 55 2) Sólo aparece cuando el reloj ya se encuentra programado. Nota: Si aparece "NO SUPPORT" en pantalla, quiere decir que se se- leccionó "Archivo WMA con derechos de autor protegidos" o "Ar- S-20 chivo de reproducción no admitida". 06/4/5 XL-UH240W LS 17-25.fm...
-
Page 56: Para Escuchar El Dispositivo De Almacenamiento Masivo Usb / Reproductor Mp3
Para comenzar la reproducción con el modo de carpeta encen- Nota: dida, vaya al paso 5. Este producto no es compatible con sistemas de archivos MTP y Para cambiar la carpeta de reproducción, pulse TUNING ( AAC. ) para seleccionar otra carpeta. S-21 06/4/5 XL-UH240W LS 17-25.fm... -
Page 57: Para Quitar El Dispositivo De Memoria Usb
Indicador del TÍTULO 2 Visualización de la función Notas: del artista SHARP no se responsabiliza de la pérdida de datos mientras el dispositivo de memoria USB esté conectado al sistema de audio. Los archivos comprimidos en formatos MP3 y /o WMA pueden Visualización... -
Page 58: Reproducción De Usb Avanzada
álbum que son grabados en archivos WMA. orden de las pistas.) Los archivos WMA con derechos de autor protegidos no pueden Precaución: ser reproducidos. Después de realizar la repetición, asegúrese de presionar el botón (USB ). S-23 De lo contrario, reproducirá continuamente. 06/4/5 XL-UH240W LS 17-25.fm... -
Page 59: Audición De La Radio
"TUNER". Botón en la unidad principal: Se conecta la alimentación del aparato y se inicia la reproducción de la última función utilizada Indicador de recepción de FM en estéreo (CD, TUNER,VIDEO/AUX/USB). S-24 06/4/5 XL-UH240W LS 17-25.fm... - Page 60 Nota: La función de seguridad protege todas las emisoras memorizadas durante algunas horas en el caso de una falla de alimentación o de la desconexión del cable de alimentación de CA. S-25 06/4/5 XL-UH240W LS 17-25.fm...
-
Page 61: Operación Del Temporizador Y De Desconexión Automática (Sólo Mando A Distancia)
Ponga el reloj en la hora correcta si "ONCE" o "DAILY" no vez tiene prioridad. Deje por lo menos un intervalo de un minuto aparece. entre operaciones. Continúa en la página siguiente S-26 03/12/17 XL-UH240W LS 26-34.fm... - Page 62 MEMORY. El indicador de "TIMER" se enciende y la unidad está lista para la reproducción de temporizador. Ajuste el tiempo de finalización como en los pasos 5 y 6 anteriores. Continúa en la página siguiente S-27 03/12/17 XL-UH240W LS 26-34.fm...
- Page 63 3 Antes de que transcurran 10 segundos, pulse el botón para seleccionar "ONCE ON" o "DAILY ON", y pulse el botón MEMORY. 4 Pulse el botón ON/STAND-BY para entrar en el modo de reserva de alimentación. S-28 03/12/17 XL-UH240W LS 26-34.fm...
- Page 64 "X : XX" es el tiempo permanente de sueño. Se visualiza el tiempo restante de desconexión automática durante unos 10 segundos. Podrá cambiar el tiempo remanente para la desconexión automática mientras se esté visualizado pulsando el botón MEMORY (pasos 4 - 5). S-29 03/12/17 XL-UH240W LS 26-34.fm...
-
Page 65: Mejoramiento De Su Sistema
Botón VIDEO/AUX/USB (unidad principal y controlador remoto): Se conecta la alimentación del aparato y se activa la función "USB" o "AUX" . Botón en la unidad principal: La unidad se enciende y comienza la reproducción de las últimas funciones (CD, TUNER,VIDEO/AUX/USB). S-30 03/12/17 XL-UH240W LS 26-34.fm... - Page 66 Si parece que falla algo en este producto, compruebe la tabla Conexión de subwoofer siguiente antes de llamar a su concensionario SHARP autorizado o Cuando un subwoofer disponible comercialmente con un amplifica- a un centro de reparaciones.
- Page 67 (aproximadamente 1 hora). Frote la humedad condensada en el transmisor con un paño suave antes de poner el aparato en funcionamiento. S-32 03/12/17 XL-UH240W LS 26-34.fm...
-
Page 68: Cuadro Para Localización De Averías
Si un disco compacto está sucio o no se reproduce adecuadamente, límpielo con un paño seco y suave, pasándolo en dirección del centro hacia afuera a lo largo del radio. SÍ Correcto S-33 03/12/17 XL-UH240W LS 26-34.fm... -
Page 69: Especificaciones Técnicas
Especificaciones técnicas XL-UH240W ESPAÑOL Como parte de la política de mejoras continuas, SHARP se reserva Reproductor de CD el derecho de realizar cambios en el diseño y especificaciones para Tipo Reproductor de discos compactos con re- la mejora del producto sin previo aviso. Las figuras indicadas que es- pecifican el rendimiento son valores nominales de los aparatos de... - Page 70 Downloaded from: http://www.usersmanualguide.com/...
- Page 71 Downloaded from: http://www.usersmanualguide.com/...
- Page 72 Product, and shall constitute full satisfaction of all claims, whether based on contract, negligence, strict liability or otherwise. In no event shall Sharp be liable, or in any way responsible, for any damages or defects in the Product which were caused by repairs or attempted repairs performed by anyone other than an authorized servicer.
- Page 73 This file has been downloaded from: www.UsersManualGuide.com User Manual and User Guide for many equipments like mobile phones, photo cameras, monther board, monitors, software, tv, dvd, and othes.. Manual users, user manuals, user guide manual, owners manual, instruction manual, manual owner, manual owner's, manual guide, manual operation, operating manual, user's manual, operating instructions, manual operators, manual operator, manual product, documentation manual, user maintenance, brochure, user reference, pdf manual Downloaded from:...