Table of Contents
Advertisement
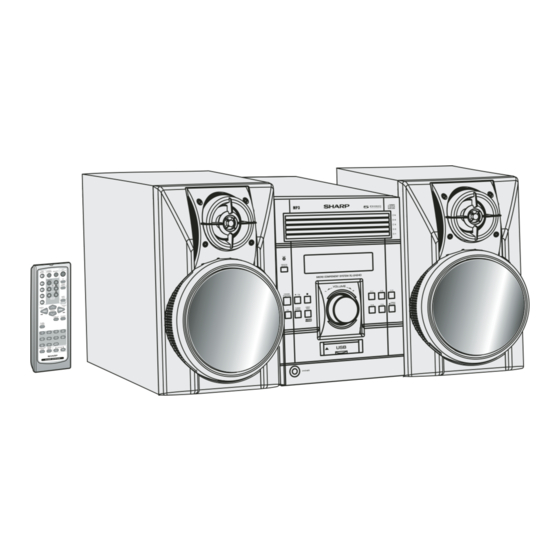
XL-MP130
MICRO COMPONENT SYSTEM
MODEL
XL-UH240
OPERATION MANUAL
Note:
This product is not compatible with MTP and AAC file systems.
Thank you for purchasing this SHARP product.
To obtain the best performance from this product, please read this
manual carefully. It will guide you in operating your SHARP product.
XL-UH240 Micro Component System consisting of XL-UH240 (main unit)
and CP-UH240 (speaker system).
Accessories
Please confirm that the following accessories are included.
Remote control
1
AM loop antenna
(RRMCGA081AWSA)
(QANTL0010AWZZ)
Note:
Only the above accessories are included.
1
FM antenna
1
(92LFANT1535A)
Advertisement
Table of Contents

Related Manuals for Sharp XL-UH240


Summary of Contents for Sharp XL-UH240
-
Page 1: Micro Component System
Thank you for purchasing this SHARP product. To obtain the best performance from this product, please read this manual carefully. It will guide you in operating your SHARP product. XL-UH240 Micro Component System consisting of XL-UH240 (main unit) and CP-UH240 (speaker system). -
Page 2: Special Notes
SPECIAL NOTES XL-UH240 CAUTION: TO REDUCE THE RISK OF ELECTRIC SHOCK, DO NOT REMOVE COVER (OR BACK). NO USER-SERVICEABLE PARTS INSIDE. REFER SERVIC- ING TO QUALIFIED SERVICE PERSONNEL. Explanation of Graphical Symbols: The lightning flash with arrowhead symbol, within an equilateral triangle, is intended to alert the user to the presence of uninsulated “dangerous voltage”... -
Page 3: Important Safety Instructions
Instruction Manual for replacement or resetting of protective device. If replacement of the plug is required, be sure the service technician has used a replacement plug specified by the manufacturer that has the same overload protection as the original plug. XL-UH240... - Page 4 IMPORTANT SAFETY INSTRUCTIONS (continued) XL-UH240 Outdoor Antenna Grounding - If an outside antenna or cable system is connected to the product, be sure the antenna or cable system is grounded so as to provide some protection against voltage surges and built-up static charges.
-
Page 5: Table Of Contents
Specifications ........37 CONSUMER LIMITED WARRANTY ....Back cover XL-UH240 Page... -
Page 6: Precautions
SHARP will not be held responsible for any dam- age resulting from use of this unit with a voltage other than that which is specified. -
Page 7: Controls And Indicators
13. Disc Number Select Buttons ......16 14. Disc Tray Open/Close Button ..... . . 16 XL-UH240 Reference page... -
Page 8: Speaker System
Controls and indicators (continued) XL-UH240 SPEAKERS RATED SPEAKER IMPEDANCE: 6 OHMS MIN. AC INPUT RIGHT LEFT Display 1. Disc Number Indicators ......21 2. - Page 9 24. Folder Button ....... . . 23, 24 25. Clock/Timer Button ......15, 29, 32 XL-UH240 Reference page...
-
Page 10: System Connections
System connections XL-UH240 Make sure to unplug the AC power cord before any connections. Right speaker Speaker light-up wire Speaker connection (see page 11) Antenna connection (see page 11) FM antenna AM loop antenna ANTENNA 75 OHMS VIDEO/AUX IN RIGHT... -
Page 11: Speaker Terminals
Note: Placing the right speaker light-up wire to the RIGHT jack and the left speaker light-up wire to the LEFT jack. SPEAKERS RATED SPEAKER IMPEDANCE: 6 OHMS MIN. ANTENNA 75 OHMS VIDEO/AUX IN RIGHT LEFT RIGHT LEFT Black Incorrect XL-UH240... -
Page 12: Ac Power Cord
System connections (continued) XL-UH240 AC power connection After checking all the connections have been made correctly, plug the AC power cord of this unit into the AC outlet. If you plug in the unit first, the unit will enter the demonstration mode. -
Page 13: Remote Control
10 - 12). Point the remote control directly at the remote sensor on the unit. The remote control can be used within the range shown below: Press the ON/STAND-BY button. Does the power turn on? Now, you can enjoy music. XL-UH240... -
Page 14: General Control
General control XL-UH240 POWER ON/STANDBY To turn the power on Press the ON/STAND-BY button to turn the power on. After use: Press the ON/STAND-BY button to enter the power stand-by mode. Illumination light control When the power is turned on, ring around the volume control light up. -
Page 15: Setting The Clock (Remote Control Only)
(reset)" on page 35 for details.] 2 Perform "Setting the clock" from step 1. button to adjust the hour and button once to advance the time by button to adjust the minutes and button once to advance the time by button to display the XL-UH240... -
Page 16: Listening To A Cd Or Mp3/Wma Disc
Listening to a CD or MP3/WMA disc XL-UH240 This system can play back a standard CD, CD-R/RW in the CD format and CD-R/RW with MP3 or WMA files, but cannot record on them. Some audio CD-R and CD-RW discs may not be playable due to the state of the disc or the device that was used for recording. -
Page 17: Mp3 Indicator
If a disc is damaged, dirty, or loaded upside down, the disc will be skipped. 5 buttons for the stopped disc and within 5 OPEN/CLOSE button and exchange discs. 5 button and within 5 seconds, 5 buttons and within 5 seconds, press the XL-UH240... -
Page 18: Disc Or Usb Pause Indicator
Listening to a CD or MP3/WMA disc (continued) XL-UH240 Various disc functions Function Main unit Remote control Play Stop Pause Track up/ Track down Fast for- ward/Fast reverse Notes for CD or MP3/WMA disc: Track up/track down is possible only within individual discs. -
Page 19: Advanced Cd Or Mp3/Wma Disc Playback
3 Press the "3" button. 4 Press the "0" button. Notes: A track number higher than the number of tracks on the disc can- not be selected. During random play, direct search is not possible. To stop playback: Press the (CD ) button. XL-UH240... -
Page 20: 16 14. Disc Or Usb Repeat Play Indicator
Advanced CD or MP3/WMA disc playback (continued) XL-UH240 Repeat play Repeat play can play one disc, all 5 discs or a programmed sequence continuously. To repeat one disc: Press the button twice. To repeat all tracks on up to 5 discs: Press the button three times. -
Page 21: Advanced Cd Playback
When a disc with programmed tracks is ejected, the program is automatically canceled. Even if you press the ON/STAND-BY button to enter the stand-by mode or change the function from CD to another, the programmed selections will not be cleared. During the program operation, random play is not possible. XL-UH240... -
Page 22: Mp3/Wma Folder Mode (Only For Mp3/Wma Files)
MP3/WMA folder mode (only for MP3/WMA files) XL-UH240 To playback MP3/WMA (Windows Media Audio) file There are many music sites on the internet that you can download MP3/WMA (Windows Media Audio) music files. Follow the instructions from the website on how to download the music files. -
Page 23: Mp3/Wma Folder Indicator
2) Only appears when clock is already set. Note: If "NO SUPPORT" is displayed, it means "Copyright protected WMA file" or "Not supported playback file" is selected. ) button. TITLE-1 Indicator Title Display TITLE-2 Indicator Artist Display TITLE-3 Indicator Album Display XL-UH240... -
Page 24: Listening To Usb Mass Storage Device / Mp3 Player
Listening to USB mass storage device / MP3 Player XL-UH240 VIDEO /AUX Note: This product is not compatible with MTP and AAC file systems. Press the VIDEO/AUX/USB (USB/AUX) button, and push up the USB door. Connect the USB Memory device that has MP3/WMA format files on the unit. -
Page 25: To Remove Usb Memory Device
Disconnect USB memory device from the USB terminal. Title Display Notes: SHARP will not be held liable for the loss of data while the USB Artist Display memory device is connected to the audio system. This USB memory’s format supports FAT16 or FAT32. -
Page 26: Advanced Usb Playback
Advanced USB playback XL-UH240 Repeat play Repeat play can play all tracks sequence continuously. To repeat all tracks: Press the button twice. To cancel repeat play: Press the button again until " " will disappear. Random play The tracks can be played in random order automatically. -
Page 27: Listening To The Radio
" " will appear when an FM broadcast is in stereo. If the FM reception is weak, press the TUNER (BAND) button to extinguish the "ST" indicator. The reception changes to monaural, and the sound becomes clearer. FM stereo mode indicator FM stereo receiving indicator XL-UH240 ) button again. -
Page 28: Listening To The Radio
Listening to the radio (continued) XL-UH240 Memorizing a station You can store 40 AM and FM stations in memory and recall them at the push of a button. (Preset tuning) Perform steps 1 - 3 in "Tuning" on page 27. -
Page 29: Timer And Sleep Operation (Remote Control Only)
Press the CLOCK/TIMER button. Stop Within 10 seconds, press the select "ONCE" or "DAILY", and press the MEMORY button. Set the clock to the correct time if "ONCE" or "DAILY" does not appear. XL-UH240 button to Continued to the next page... -
Page 30: Timer Play Indicator
Timer and sleep operation (Remote Control only) (continued) XL-UH240 Within 10 seconds, press the select "ONCE SET" or "DAILY SET", and press the MEMORY button. Press the then press the MEMORY button. The illustrations show the timer playback setting in the daily timer mode. - Page 31 3 Within 10 seconds, press the "ONCE ON" or "DAILY ON", and press the MEMORY button. 4 Press the ON/STAND-BY button to enter the power stand-by mode. XL-UH240 button to select button to select button to select button to select...
-
Page 32: Sleep Indicator
Timer and sleep operation (Remote Control only) (continued) XL-UH240 Sleep operation The radio, compact disc and USB can all be turned off automatically. Play back the desired sound source. Press the CLOCK/TIMER button. Within 10 seconds, press the button to select "SLEEP", and press the... -
Page 33: Enhancing Your System
Before plugging in or unplugging the headphones, reduce the volume. Be sure your headphones have a 1/8" (3.5 mm) diameter plug and impedance between 16 and 50 ohms. The recommended impedance is 32 ohms. Plugging headphones disconnects automatically. Adjust the volume using the VOLUME control. XL-UH240 speakers... -
Page 34: Troubleshooting Chart
Many potential problems can be resolved by the owner without call- ing a service technician. If something is wrong with this product, check the following before calling your authorized SHARP dealer or service center. General The clock is not set to the correct time. - Page 35 2 While pressing down the 1 button and the the POWER ON/STANDBY button until "CLEAR ALL" appears. POWER ON/STANDBY Caution: This operation will erase all data stored in memory including clock, timer settings, tuner preset, and CD program. XL-UH240 5 button, press...
-
Page 36: Maintenance
Troubleshooting chart (continued) XL-UH240 Before transporting the unit Remove all CDs from the unit. Make sure there is no CD in the disc tray. Then, set the unit to the power stand-by mode. Carrying the unit with discs left inside can damage the unit. -
Page 37: Specifications
Specifications As part of our policy of continuous improvement, SHARP reserves the right to make design and specification changes for product improvement without prior notice. The performance specification figures indicated are nominal values of production units. There may be some deviations from these values in individual units. - Page 38 MEMO...
- Page 39 MEMO...
-
Page 40: Consumer Limited Warranty
Sharp. shall Sharp be liable, or in any way responsible, for any damages or defects in the Product which were caused by repairs or attempted repairs performed by anyone other than an authorized servicer. Nor shall Sharp be liable or in any way responsible for any incidental or consequential economic or property damage. Some states The warranties described herein shall be the sole and exclusive warranties granted by Sharp and shall be the sole and exclusive remedy available to the purchaser.