
Related Manuals for Axor Edge 46140001


Summary of Contents for Axor Edge 46140001
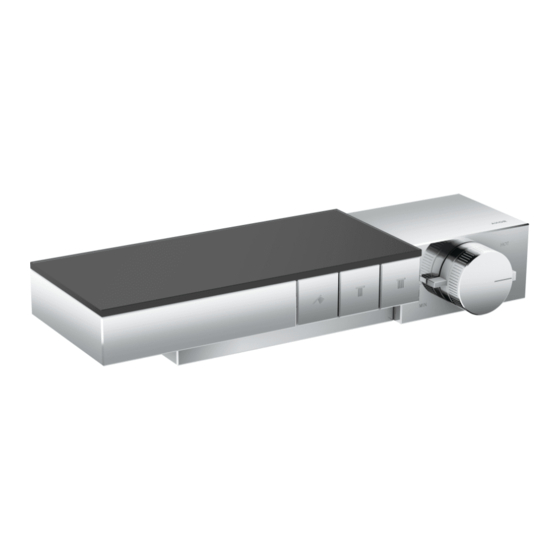
- Page 1 EN Installation / User Instructions / Warranty FR Instructions de montage / Mode d'emploi / Garantie ES Instrucciones de montaje / Manejo / Garantía AXOR Edge 46140001 ⁄ 46141001 I N S T A L L A T I O N I N S T A L L A T I O N...
-
Page 2: Technical Information
E N G L I S H T EC HN I C A L I N FO RMATIO N Water pressure Recommended 15 - 75 PSI (0.1 - 0.5 MPa) Maximum 145 PSI (1 MPa) Hot water temp. Recommended 120°-140° F (48° - 60° C)* Maximum 158°F (70°... - Page 3 F R A N A I S D ON N É E S T EC HN I Q UES Pression d’eau recommandée 15 - 75 PSI (0.1 - 0.5 MPa) maximum 145 PSI (1 MPa) Température d'eau chaude recommandée 120°-140°...
-
Page 4: Datos Tecnicos
E S P A Ñ O L DATOS TEC N ICO S Presión en servicio recomendada 15 - 75 PSI (0.1 - 0.5 MPa) max. 145 PSI (1 MPa) Temperatura del agua caliente recomendada 120°-140° F (48° - 60° C)* max. - Page 5 AXOR Edge 46140001 ⁄ 46141001 17⅛" (436 mm) 24 lb 5⅜" (136 mm) 1⅝" 1⅝" 1⅝" (41 mm) (41 mm) (41 mm) 2⅝" 11 kg (68 mm) G½ 7⅛" (181 mm) 5⅞" (150 mm) G½ 2" (50 mm) 2⅝" (68 mm) 6⅞"...
- Page 6 I N S T A L L A T I O N S U G G E S T I O N / S U G G E S T I O N D ' I N S T A L L A T I O N / S U G E R E N C I A P A R A L A I N S T A L A C I Ó N AXOR 300 2jet 35310001...
- Page 7 I N S T A L L A T I O N / I N S T A L L A T I O N / I N S T A L A C I Ó N 1 - 2 ¹...
- Page 8 E N G L I S H F R A N A I S E S P A Ñ O L Remove the noise reducers from Retirez les atténuateurs de Retire los reductores de ruido de the two connection nipples. bruit des deux raccords de los dos niples de conexión.
- Page 9 ⅝ " 1 " X + 1⅝" (X + 41 mm) E N G L I S H F R A N A I S E S P A Ñ O L Add 1⅝" (41 mm) to this Ajoutez 1 ⅝ po (41 mm) à cette Sume 1⅝”...
- Page 10 1 ⅛ " ⅝ " ¹ ⁵ ⁄ ₁ ₆ " 12 mm 27 mm X + 1⁹⁄₁₆" (X + 39 mm) 1 ⁷ ⁄ ₁ ₆ " - 1 ⅝ ± 2 " E N G L I S H F R A N ...
- Page 11 12 mm E N G L I S H F R A N A I S E S P A Ñ O L Install the nipples using a 12 mm Installez les raccords à l’aide Instale los niples con una llave Allen wrench.
- Page 12 E N G L I S H F R A N A I S E S P A Ñ O L Place the sleeves over the con- Placez les gaines sur les raccords Coloque los manguitos sobre los nection nipples/nuts. de raccordement/écrous.
- Page 13 Ø ¼ " E N G L I S H F R A N A I S E S P A Ñ O L Drill the holes using a ¼" (6 mm) Percez les trous à l’aide d’une Perfore los orificios con una bit.
- Page 14 E N G L I S H F R A N A I S E S P A Ñ O L Make sure that the frame is level. Assurez-vous que le cadre est de Asegúrese de que el marco niveau.
- Page 15 ¾" (18 mm) 5 mm 3 mm 2.2 ft-lb 3 Nm E N G L I S H F R A N A I S E S P A Ñ O L Use a 5 mm Allen wrench to Utilisez une clé...
- Page 16 5 mm 3 ft-lb 4 Nm E N G L I S H F R A N A I S E S P A Ñ O L Tighten the two large retain- Serrez les deux grandes vis de Apriete los dos tornillos de reten- ing screws using a 5 mm Allen retenue à...
- Page 17 E N G L I S H F R A N A I S E S P A Ñ O L Push the cover over the top. Poussez le couvercle sur le Coloque la tapa sobre la parte dessus. superior.
- Page 18 J U S T I F Y T H E H A N D L E / R É G L E Z L A P O I G N É E / A J U S T E L A M A N I J A 24 lb 11 kg...
- Page 19 R E P L A C E M E N T P A R T S / P I È C E S D É T A C H É E S / R E P U E S T O S...
- Page 20 U S E R I N S T R U C T I O N S / I N S T R U C T I O N S D E S E R V I C E / M A N E J O fermé...
- Page 21 C H E C K V A L V E M A I N T E N A N C E / E N T R E T I E N D E L E S C L A P E T S A N T I - R E T O U R / M A N T E N I M I E N T O D E L A S V Á...
-
Page 22: Troubleshooting
3 mm 5 mm 2.2 ft-lb 3 ft-lb 3 Nm 4 Nm T R O U B L E S H O O T I N G PRO B L EM PO SS IB L E C AU SE SOLUTION Insufficient water ⁄... -
Page 23: Localización De Fallas
L O C A L I Z A C I Ó N D E F A L L A S P RO B LEMA C AUSA SO LUC IÓN Sale poca agua ⁄ presión insuficiente ⁄ comprobar presión ⁄ filtro del termoelemento sucio ⁄... - Page 24 C L E A N I N G R E C O M M E N D A T I O N F O R H A N S G R O H E P R O D U C T S Modern bathroom faucets, kitchen faucets and shower products are made from different materials to comply with the needs of the market with regard to design and functionality.
- Page 25 IMPORTANT ⁄ Les residus de produits pour le corps comme les savons liquides, shampooings, gels de douche, teintures pour cheveux, parfums, apres-rasage et vernis a ongles peuvent causer des deteriorations. Rincez le produit avec de l’eau propre après chaque utilisation. ⁄...
-
Page 26: What We Will Do
Hansgrohe, Inc. company philosophy. We offer consumers a limited warranty on our hansgrohe and AXOR branded products. any hansgrohe or AXOR product sold for display purposes or (iii) hans- ® ® grohe or AXOR products purchased from unauthorized sellers. - Page 27 PRODUCT INSTRUCTIONS AND QUESTIONS INCLUDING THE USE OF ABRASIVE OR CAUSTIC CLEANING AGENTS OR “NO-RINSE” CLEANING PRODUCTS. Upon purchase or prior to installation, please carefully inspect your prod- NOTICE TO RESIDENTS OF THE STATE OF NEW JERSEY: The uct for any damage or visible defect. Prior to installing, always carefully provisions of this warranty, including its limitations, are intended to apply study the enclosed instructions on the proper installation and the care to the fullest extent permitted by the laws of the State of New Jersey.
- Page 28 AXOR ⁄ Hansgrohe, Inc. 1490 Bluegrass Lakes Parkway Alpharetta, GA 30004 Tel. 800-334-0455 Fax 770-889-1783 axor-design.com...