Table of Contents
Advertisement
Advertisement
Table of Contents

Related Manuals for Yamaha 2 EZ-AG


Summary of Contents for Yamaha 2 EZ-AG
- Page 1 EZ GUITAR / EZ GITARRE / EZ GUITARE / EZ GUITARRA...
-
Page 2: Special Message Section
Yamaha. This product should be used only with the components supplied or; a cart, rack, or stand that is recommended by Yamaha. If a cart, etc., is used, please observe all safety markings and instructions that accompany the accessory product. - Page 3 COPYRIGHT NOTICE This product incorporates and bundles computer programs and contents in which Yamaha owns copyrights or with respect to which it has license to use others’ copyrights. Such copyrighted materials include, without limitation, all computer software, styles files, MIDI files,...
- Page 4 • Use the specified adaptor (PA-3C or PA-3B or an equivalent recommended by Yamaha) only. Using the wrong adaptor can result in damage to the instrument or overheating. • Check the electric plug periodically and remove any dirt or dust which may have accumulated on it.
- Page 5 fluids, or chemical-impregnated wiping cloths. Yamaha cannot be held responsible for damage caused by improper use or modifications to the instrument, or data that is lost or destroyed. Always turn the power off when the instrument is not in use.
-
Page 6: Main Features
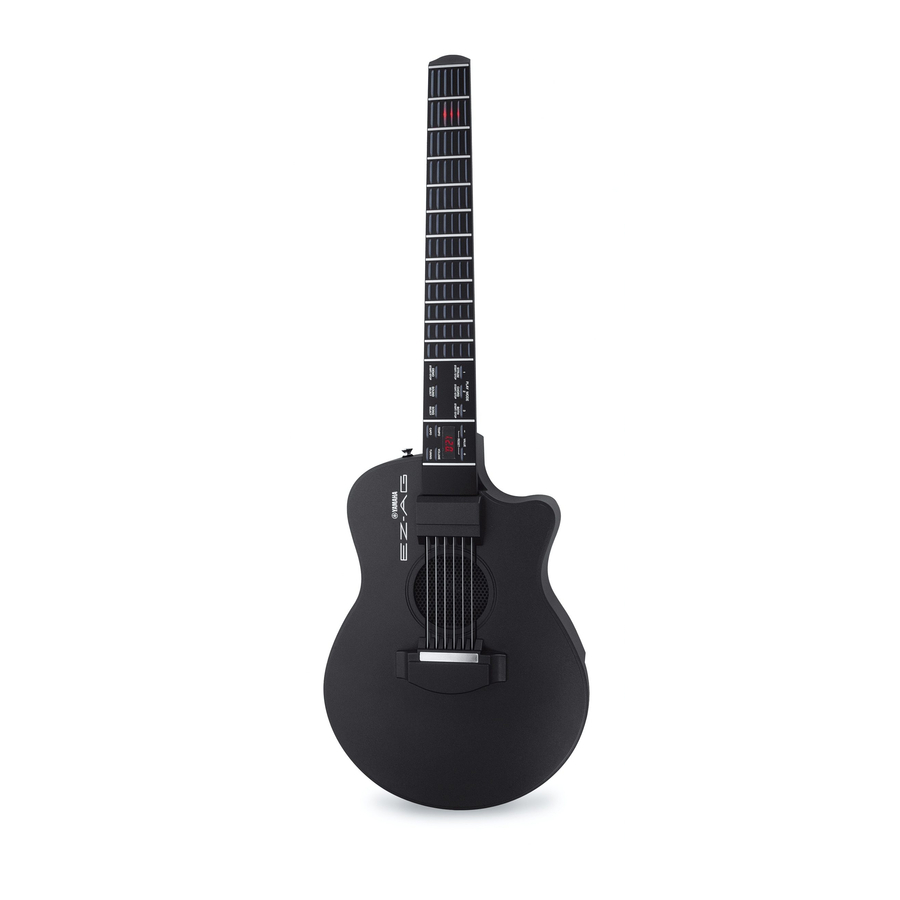
Thank you for choosing a Yamaha EZ GUITAR (EZ-AG)! please read this owner's manual carefully before using your EZ-AG. please store it in a safe place – along with the warranty card – Main Features The EZ-AG is a sophisticated yet easy-to-use instrument. Some of its main features and functions include: •... -
Page 7: Table Of Contents
Names Of the Parts, Controls, and Connectors ... 8 Setting Up... 10 • Power Requirements ...10 • Connections...11 Playing the EZ-AG ... 12 • Power On & Play ...12 • Selecting Different Sounds ...13 • Using the CAPO Function...14 • Tuning...14 Playing the Songs... -
Page 8: Names Of The Parts, Controls, And Connectors
Names Of the Parts, Controls, and Connectors I Body Bridge Plate Strings that are sounding can be muted by touching the bridge plate with side or heel of the right hand. Be sure to touch the plate on the back of the neck with your left hand while touching the bridge plate with your right hand (See Page 12.) - Page 9 r [TUNING] Button Allows overall tuning of the EZ-AG in semitone increments, as well as selection of one of the EZ- AG’s alternative tunings: in addition to standard gui- tar tuning the EZ-AG provides drop-D, open-D, open-G, and open-E tunings. t [TEMPO] Button Allows the song tempo to be set from q=32 through q=280.
-
Page 10: Setting Up
Power Requirements Although the EZ-AG will run either from an optional AC adaptor or batteries, Yamaha recommends use of an AC adaptor whenever possible. An AC adaptor is more environmentally friendly than batteries and does not deplete resources. I Using an AC Power Adaptor • • • • • • • • • • • • • • • • • • • • • • • • •... -
Page 11: Connections
Connections Refer to “Connecting To a Computer” on page 21 for connection details. Computer USB-MIDI Interface MIDI OUT Connector Connector • Make sure that power to all external devices is OFF when connecting the EZ-AG to avoid possible electric shock and damage to the equipment. Also, start with all volume controls on external devices turned down to minimum to prevent possi- ble damage to speakers and other playback equipment. -
Page 12: Playing The Ez-Ag
(Press the switch again so that it pops up.). The “YAMAHA” name will scroll across the EZ-AG frets when the power is turned on. You can stop this by simply pressing any fret. -
Page 13: Selecting Different Sounds
Selecting Different Sounds The EZ-AG includes 20 different guitar, bass, and other instrument sounds. Choose the sound that best suits the song you’re playing and your playing style. Press the [SOUND] button. PLAY MODE STRUM CHORD START/STOP START/STOP DEMO SOUND START/STOP SELECT Select a sound number. -
Page 14: Using The Capo Function
Playing the EZ-AG Using the CAPO Function The EZ-AG’s virtual capo functions in the same way as a normal guitar capo, “stopping” the strings at the spec- ified fret. The EZ-AG CAPO function can be applied up to the sixth fret. Some guitar books include capo indica- tions that can make setting this function easy. -
Page 15: Playing The Songs
Playing the Songs The EZ-AG features a range of internal songs that you can play along with. Song numbers 1 through 25 are pre-programmed into the EZ-AG. Additional songs can be downloaded from the internet using a computer and loaded into the EZ-AG for playback. Refer to the “Connecting to MIDI Devices”... -
Page 16: Listen To A Specified Song And Play Along
Playing the Songs Listen To a Specified Song and Play Along Press [SONG] and select a song. After pressing the [SONG] button, use the [+] and [-] buttons to select the number of the song you want to play. STRUM START/STOP DEMO START/STOP... -
Page 17: Adjust The Balance
Adjust the Balance This function adjusts the volume of the accompaniment playback, thus allowing you to set the ideal balance between the accompaniment and what you play on the EZ-AG strings. Press the [VOLUME] button once or twice so that “b b b b A A A A L L L L ” appears on the display. -
Page 18: Play Along With The Songs
Play Along With the Songs Try playing along with the songs using the EZ-AG’s three play modes: STRUM (right hand), CHORD (left hand), and BOTH (both hands). STRUM PLAY 1: Play using only your right hand. Great for rhythm practice. Press the [SONG] button and use the [+] and [-] buttons to select the song you want to play. -
Page 19: Play 2: Chord
CHORD PLAY 2: Play using only your left hand. Great for chord practice. Press the [SONG] button and use the [+] and [-] buttons to select the song you want to play. Press the [CHORD] button to begin playback in the PLAY 2: CHORD mode. -
Page 20: Connecting To Midi Devices
Connecting To MIDI Devices The EZ-AG features MIDI IN and OUT connectors that can be used to connect to other MIDI devices for expanded musical capabilities. It is also possible to load additional songs down- loaded from the internet (URL provided below) into the EZ-AG via these connectors. What is MIDI? MIDI (Musical Instrument Digital Interface) is an international standard system that allows electronic musical instruments and related devices to communicate with and control one another. -
Page 21: Connecting To A Computer
The EZ-AG can be connected to a computer via MIDI. G To connect the EZ-AG to a computer that is equipped with USB connec- tors use a USB-MIDI interface such as the Yamaha UX16, as shown in the diagram below. -
Page 22: Loading Song Data Into The Ez-Ag Using The Song Filer Application
Connecting To MIDI Devices Loading Song Data Into the EZ-AG Using the Song Filer Application In order to perform the operations described in this section you will need to use a computer connected to the internet to download the free Song Filer application from the URL listed below. Song data can be loaded into the EZ-AG from your computer using the Song Filer application and played in the same way as the pre-programmed songs. -
Page 23: Turning Local Control On Or Off
Turning Local Control On or Off Local Control determines whether the EZ-AG plays its own internal tone generator (Local Control = ON), or whether performance data is transmitted via the MIDI OUT connector only, without playing the internal tone generator (Local Control = OFF). G Local Control ON This is the normal setting. -
Page 24: Troubleshooting
Troubleshooting Problem No sound. The displays flicker on and off and don’t function normally. Song playback will not start. The EZ-AG is picking up noise. EZ-AG Check Are the batteries properly installed? Are they run down? Is the volume set to “0”? Is a plug plugged into the PHONES/OUTPUT jack? Speaker output is automatically cut off when a plug is inserted into the PHONES/ OUTPUT jack. - Page 25 Memo EZ-AG...
-
Page 26: Midi Implementation Chart
MIDI Implementation Chart MIDI Implementation Chart / MIDI-Implementierungstabelle / EZ-AG... - Page 27 Feuille d’implémentation MIDI / Gráfica de implementación MIDI EZ-AG...
- Page 28 MIDI Implementation Chart / MIDI-Implementierungstabelle / NOTE: *1 EZ-AG functions as a 16-channel multi-timbral tone generator, and incom- ing data does not affect the panel voices or panel settings. However, the MIDI messages listed below do affect the panel voices and songs. •...
- Page 29 Feuille d’implémentation MIDI / Gráfica de implementación MIDI REMARQUE : *1 L’EZ-AG fonctionne comme un générateur de sons multi-timbre à 16 canaux. De ce fait, la réception de données n’affecte ni les voix, ni les réglages de panneau. Cependant, les messages MIDI répertoriés ci-des- sous affectent les voix de panneau et les morceaux.
-
Page 30: Song Chord Chart
Song Chord Chart Song Chord Chart / Song-Akkordtabelle / G Reading the Chord Charts • The numbers marked at each position refer to the fingers that should be used to press the corresponding frets: q index, w middle, e ring, r little. •... - Page 31 Partition des accords de morceau / Gráfica de acordes de canciones G Lecture des partitions d’accords • Les numéros inscrits au niveau de chaque position indiquent les doigts à utiliser pour appuyer sur les frettes correspondantes : q index, w majeur, e annulaire, r auriculaire. •...
- Page 32 Song Chord Chart / Song-Akkordtabelle / Partition des accords de morceau / Gráfica de acordes de canciones EZ-AG...
-
Page 33: Commonly-Used Chords
Commonly-used Chords Commonly-used Chords / Die am häufigsten gebrauchten Akkorde / Accords généralement utilisés / Acordes más comunes bdim #dim sus4 bsus4 sus4 sus4 #sus4 sus4 bdim bsus4 sus4 sus4 #dim #sus4 sus4 bdim bsus4 EZ-AG... -
Page 34: Specifications
1.9 kg (4 lbs. 3oz.) (w/o batteries) * Specifications and descriptions in this owner’s manual are for information purposes only. Yamaha Corp. reserves the right to change or modify products or specifications at any time without prior notice. Since specifications, equipment or options may not be the same in every locale, please check with your Yamaha dealer. -
Page 35: Limited Warranty
If during the first 90 days that immediately follows the purchase date, your new Yamaha product covered by this warranty is found to have a defect in material and/or workmanship, Yamaha and/or its authorized representative will repair such defect without charge for parts or labor. - Page 36 For details of products, please contact your nearest Yamaha representative or the authorized distributor listed below. Pour plus de détails sur les produits, veuillez-vous adresser à Yamaha ou au distributeur le plus proche de vous figurant dans la liste suivante.