Table of Contents
Advertisement
Quick Links
Advertisement
Table of Contents

Related Manuals for AMT Datasouth Documax 5380


Summary of Contents for AMT Datasouth Documax 5380
- Page 1 User's Manual Documax 5380 Printer...
- Page 2 Documax 5380 User’s Manual About Trademark Corporation names and product names are the registered trademarks or commodity names of the corporation. * EPSON and ESC/PK2 are the registered trademarks of Seiko Epson Corporation. * OKI and OKI 5530SC are the registered trademarks of OKI Data Corporation.
-
Page 3: Important Safety Instructions
Documax 5380 User’s Manual Important Safety Instructions Read all of these instructions carefully and thoroughly and save them for later reference. The unauthorized operation would lead to malfunction or accident. Manufacturers have no responsibilities for the problems which are led by misoperations. - Page 4 Documax 5380 User’s Manual FCC NOTE: This equipment has been tested and found to comply with the limits for a Class B digital device, pursuant to Part 15 of the FCC Rules. These limits are designed to provide reasonable protection against harmful interference in a residential installation.
-
Page 5: Table Of Contents
Documax 5380 User’s Manual Content About Trademark ............................i Important Safety Instructions ........................ii Chapter 1 Overview ............................1 1.1 Features ..............................1 Chapter 2 Preparation ..........................3 2.1 Unpacking & Checking ........................3 2.2 Removing the Protective Materials......................3 2.3 Parts Identification..........................3 2.4 Installing the Printer ..........................4 2.5 Installing and Removing the Paper rack....................5... - Page 6 Documax 5380 User’s Manual 4.6 Explaining Menu Terms ........................37 4.7 Using the Self- Test Functions......................38 Appendix A Printer Maintenance......................40 A.1 Clean the Printer..........................40 A.2 Problems and Solutions........................41 Appendix B Specification......................... 42 B.1 General Specification........................42 B.2 Paper Specifications .........................
-
Page 7: Chapter 1 Overview
In addition, the control panel is used to access the menu setup mode with complete control over the printer’s set-up functions. Automatic Interface Switching The Documax 5380 includes a parallel interface, an Ethernet interface, an USB interface or serial - 1 -... - Page 8 Documax 5380 User’s Manual interface. (According to specific interface standards) The printer automatically detects the type of data transfer received from the computer and switches to the corresponding interface type. Compressing Printing You can set compress print proportion through modifying the Menu setup mode of the printer. (Caution: High Speed mode and Super High speed mode is invalidated while the printer in Compress printing mode.) In addition, you can set the compress printing through driver.
-
Page 9: Chapter 2 Preparation
Documax 5380 User’s Manual Chapter 2 Preparation 2.1 Unpacking & Checking Check the following items in the package, if any of these items is missing, please contact your dealer. Ribbon cartridge JMR125 Paper rack Printer Driver CD Facility user’s guide... -
Page 10: Installing The Printer
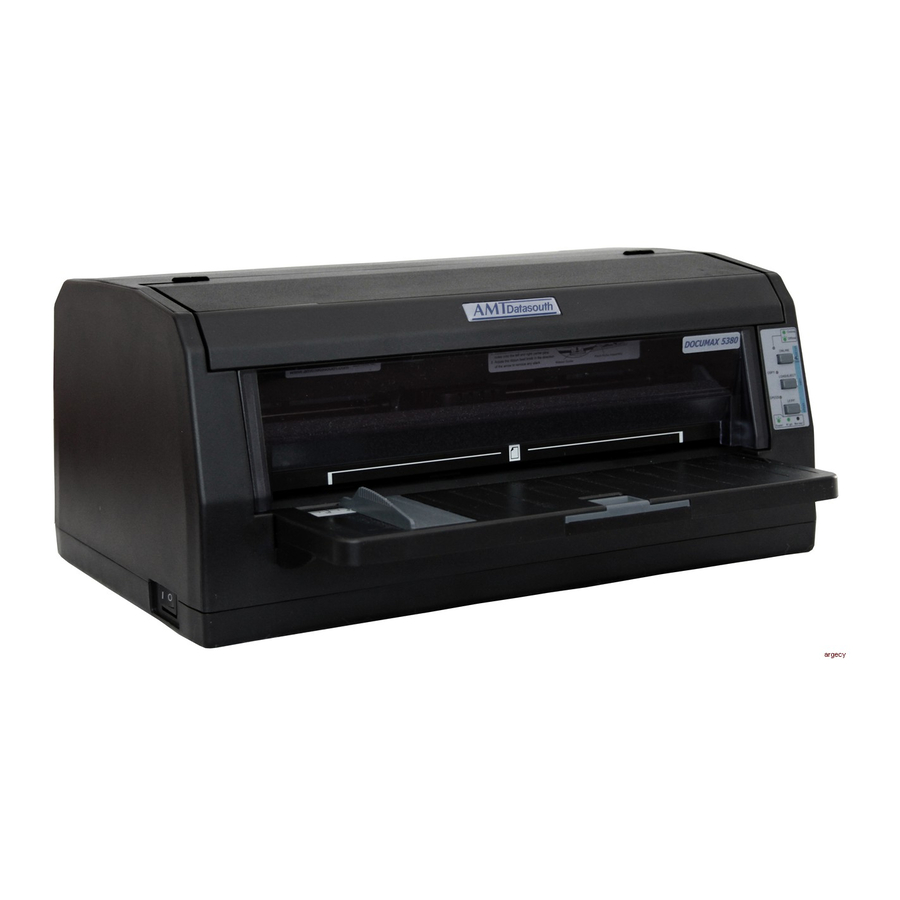
Documax 5380 User’s Manual Window Gap adjust lever Ribbon cartridge Control panel Paper guide (C) Power switch Paper rack Paper guider Print head Figure 2-3 Main parts of printer (front view) Parallel interface/ Ethernet interface USB interface Power supply inlet... -
Page 11: Installing And Removing The Paper Rack
Documax 5380 User’s Manual Placement space Appro.10cm Appro.10cm Above 60 cm Wall Floor 70cm Figure 2-5 Printer placement 2.5 Installing and Removing the Paper rack 2.5.1 Installing the Paper Rack As Figure 2-6 shown, open the window, aim the A, B, C at the printer responding A, B, C slots, and then press to fasten it. -
Page 12: Removing The Paper Rack
Documax 5380 User’s Manual 2.5.2 Removing the Paper Rack Hold both sides of the paper rack, lift it up and then take it out. 2.6 Installing the Ribbon Cartridge 1. Make sure the printer is turned off. 2. Open the printer window. -
Page 13: Connecting The Printer To Your Computer
Documax 5380 User’s Manual Ribbon cartridge Print head Ribbon mask Ribbon guide Figure 2-9 Installing ribbon cartridge 8. Insert the ribbon guide between the print head and ribbon mask. Turn the ribbon knob to help feed the ribbon into place, it should not be twisted or creased. -
Page 14: Connecting To The Ethernet Interface
Documax 5380 User’s Manual Parallel interface Wire clips Parallel cable Figure 2-10 Connecting to the Parallel interface 2.7.2 Connecting to the Ethernet Interface Plug the RJ-45 crystal plug of the Ethernet cable into the Ethernet interface of the printer, and plug the other end into the LAN. -
Page 15: Connecting To The Power Cord
Documax 5380 User’s Manual Serial interface Screw Serial cable Figure 2-13 Connecting to the serial interface 2.8 Connecting to the Power Cord 1. As Figure 2-14 shown, make sure the printer is turned off. (The pressed down side of the power switch with “O”... - Page 16 Documax 5380 User’s Manual Hand-operated installing way Note: The hand-operated installing ways of serial interface and parallel interface are the same. 1) The installing steps of parallel interface for Windows 2000/XP/Vista are as follows: 1 Click “Start” → “Settings” → “Select Printers”.
- Page 17 Documax 5380 User’s Manual 1. Click “Start” → “Settings” → “Printers”. 2. Click “Add Printer”, then a window of “Add Printer Wizard” pops up, click “Next”, then please read the select guide carefully, such as, select “Local printer” in the “Local or Network Printer” window, then click “Next”.
-
Page 18: Ethernet Settings
Documax 5380 User’s Manual “Yes”. 6. The printer driver process is installed successfully. 2.10 Ethernet Settings Caution: The network printing function needs the operation system of Windows2000 or above. 2.10.1 Connecting Printer Power on the printer, connect with the Ethernet cable which has been connected to LAN, and look into the information of Ethernet LED indicator to ensure the printer has entered into the normal connection. - Page 19 Documax 5380 User’s Manual If the printer still can not be found out when the network connection is correct in the same network, please check whether the network fire wall on the PC opens or not. If there is fire wall, please close it temporarily, open again after finishing searching and setting a printer completely.
- Page 20 Documax 5380 User’s Manual In order to search and set printer’s IP address conveniently for the first time, the factory default setting is DHCP mode which assigns IP address dynamically. If there is no DHCP server in the connected LAN and printer is set to DHCP mode as well, then it will use the internal pre-set address (IP: 10.0.0.1, Subnet Mask: 255.255.255.0) automatically.
-
Page 21: Installing Printer Network Driver
Documax 5380 User’s Manual 2.10.3 Installing Printer Network Driver The ways of installing network driver are classified into Newly-install way and Upgrade-install way according to whether the PC installs the printer driver or not. If the printer driver hasn’t been installed on the PC, adopt newly-install way whose steps are shown in “Newly-install printer network driver”. - Page 22 Documax 5380 User’s Manual 6) A window of “Additional Port Information Required” pops up, select “Custom” in the “Device Type”, then click “Settings”. 7) A window of “Port Settings” pops up. Affirm that “Port name” and “Printer name or IP address” are correct, “Protocol”...
- Page 23 1) Click “Start” → “Settings” → “Select Printers” 2) Right click Documax 5380 driver, click “Properties” on the window popping up. 3) A window of “Properties” pops up, click “Ports” and “Add Ports”. - 17 -...
- Page 24 Documax 5380 User’s Manual 4) A window of “Printer port” pops up, select “Standard TCP/IP Port”, click “New port”. 5) A window of “Add Standard TCP/IP Printer Port Wizard” pops up, click “Next”. 6) A window of “Add a port” pops up, import the IP address reported by the “Setting printer’s IP address”...
- Page 25 Documax 5380 User’s Manual 8) A window of “Port Settings” pops up. Affirm that “Port name” and “Printer name or IP address” are correct, “Protocol” is “RAW” and “Port Number” is “9100”, click “OK” - 19 -...
- Page 26 Documax 5380 User’s Manual 9) Return to “Additional Port Information Required”, click “Next”. 10) A window of “Completing the Add Standard TCP/IP Printer Port Wizard” pops up, click “Finish”. 11) Return to “Printer Ports”, click “Close”. 12) Return to “Properties”, make sure the network port is selected, click “Apply”, and then click “Close”.
- Page 27 Documax 5380 User’s Manual - 21 -...
-
Page 28: Chapter 3 Loading Paper
Documax 5380 User’s Manual Chapter 3 Loading Paper 3.1 Paper Thickness Adjustment Adjusting the gap adjust lever Before loading cut sheet or tractor paper, you have to adjust the gap adjust lever on the front right side of the printer. To feed thicker papers through the printer, you need to move the gap adjust lever from its standard position. - Page 29 Documax 5380 User’s Manual Paper guider Figure 3-3 Adjusting the paper guider Caution: Ensure the printing contents are within the printable area, or may cause the print head breaks pins. 4. Please pull out the small extension tabs if the size of paper is long and requires extra support, as shown in Figure 3-4.
-
Page 30: Using Tractor Paper
Documax 5380 User’s Manual 3.3 Using Tractor Paper This printer feeds tractor paper from the rear of the printer to the front. (As Figure 3-6 shown) Figure 3-6 Feeding direction of tractor paper 3.3.1 Loading Tractor Paper 1. Connect the power cord to the printer and electrical outlet. - Page 31 Documax 5380 User’s Manual Figure 3-9 Adjusting the tractor position 5. Move the paper guide slider to the middle of the tractor. (As Figure 3-10 shown) Paper guide slider Figure 3-10 Adjusting the paper guide slider 6. Open the sprocket covers and place the paper on the sprocket pins. (As Figure 3-11 shown)
-
Page 32: Tearing Off Tractor Paper
Documax 5380 User’s Manual Figure 3-12 Adjusting the right tractor position Note: Do not make the tractor paper too tight or too loose. 3.3.2 Tearing off Tractor Paper When the printer leaves factory, the function of feeding paper to tear off position has been opened. -
Page 33: Chapter 4 Control Panel
Documax 5380 User’s Manual Chapter 4 Control Panel 4.1 Control Panel Keys and LEDs 4.1.1 Control Panel The control panel consists of three keys and three LEDs as shown in Figure 4-1. Figure 4-1 The printer control panel 4.1.2 Indicator LEDs... -
Page 34: Top Of Form Adjustment And Black Mark Position
Documax 5380 User’s Manual In the offline mode, hold on pressing ONLINE key for 3 seconds, the printer will COPY enter quick menu setup mode. Press LOAD/EJECT key can switch the printer among the normal mode, copy 1 mode and copy 2 mode. -
Page 35: Tear-Off Adjustment Mode
NOTE To exit without saving, just turn off the printer. 4.5 Changing the Printing Settings Documax 5380 printers divide printer settings into three sections: Quick menu setting, Menu setup mode and Online-aptitude Parameter Settings. 4.5.1 Quick Menu Setting Press ONLINE key for about 3 seconds when the ONLINE LED blinks, the printer beeps once and enter into quick menu setting. -
Page 36: Using Menu Setup Mode
Documax 5380 User’s Manual normal mode, the COPY LED on denotes the Copy 1 mode, the COPY LED blinks denotes the Copy 2 mode. Facility key for speed mode: Press LF/FF key once can switch between speed modes. The SPEED LED off denotes the letter quality mode, the SPEED LED on denotes the high speed mode, the SPEED LED blinks denotes the super high speed mode. - Page 37 Documax 5380 User’s Manual Current Setting Documax 5380 VX.X XXX XXXX/XX/XX SN: XXXXXXXXXXXXXXXXXXXX MAC: XX-XX-XX-XX-XX-XX DHCP: YES IP: 10.0.0.1 Subnet: 255. 255. 255.0 gateway: 255.255.255.255 LANGUAGE CHINESE EMULATION CHAR. MODE CHINA FONT SANS SER COURIER PRESTIGE SCRIPT OCR-B OCR-A ORATOR...
- Page 38 It prints out the title and the first menu firstly (as Figure 4-3 shown). The underlined items are the default settings. The print head will stop at the default setting. Documax 5380 SETUP MENU SYSTEM Use the LOAD/EJECT key to point the print head to the desired setting.
-
Page 39: Online-Aptitude Parameter Settings
5. Turn off and restart the printer, newly settings are in operation. 4.5.3 Online-aptitude Parameter Settings Documax 5380 supports the function of online-aptitude parameter settings, which can be set in the PC with the driver installed in. The concrete setting steps are shown as follows: 1. - Page 40 Documax 5380 User’s Manual - 34 -...
- Page 41 Documax 5380 User’s Manual 6. The left side of each items is the parameter icon, the top right is the item name and the bottom right is the current setting. The current settings of the printer will be loaded automatically when opening each parameters settings window.
- Page 42 Documax 5380 User’s Manual 7. When setting the parameter, please click the parameter icon firstly to open the parameter setting window. In the parameter setting window, there are parameter options, item explanation and control buttons. After selecting the corresponding parameter, click “Set”, the printer will change the setting at the moment it receives the change command.
-
Page 43: Explaining Menu Terms
Documax 5380 User’s Manual 4.6 Explaining Menu Terms Options Description LANGUAGE Specify the printer menu language as English or Chinese. EMULATION Specify printer's control commands. Select ASCII or Chinese character mode to print when printer receives character CHAR. MODE printing task. -
Page 44: Using The Self- Test Functions
Documax 5380 User’s Manual If this function is on, printer would advance the paper one line automatically after AUTO LF receiving every carriage return instruction. Specify the wait time between cut sheet is put into the paper guide and it is fed into LOADING the printer. - Page 45 Documax 5380 User’s Manual ***** HEXADECIMAL DUMP ***** (0000) 1B 34 41 42 43 44 45 46 47 48 49 4A 4B 4C 4D 4E .4ABCDEFGHIJKLMN (0010) 4F 50 51 52 53 54 55 56 57 58 59 5A 0D 0A 1B 35 OPQRSTUVWXYZ...5...
-
Page 46: Appendix A Printer Maintenance
Documax 5380 User’s Manual Appendix A Printer Maintenance A.1 Clean the Printer Carriage shaft Paper platform Paper guide (A) Paper platform Paper feed sensor Figure A-1 Clean the printer Cleaning periodically and the cleaning tool Periodical cleaning: every six months or every 300 working hours once. -
Page 47: Problems And Solutions
Documax 5380 User’s Manual A.2 Problems and Solutions 1) Print head overheating Phenomenon: The ONLINE LED blinks, print head traverse automatically but nothing is printed. Cause: The print head is overheated. Solutions: Wait patiently, the printer would resume to work after the print head temperature decreases. -
Page 48: Appendix B Specification
Documax 5380 User’s Manual Appendix B Specification B.1 General Specification Item Description Type 24-Pin Flatbed Dot Matrix Impact Printer Print direction Bidirectional logical seeking Printing width 80 columns (10 CPI)/203.2 mm ASCII speed 10 CPI 12 CPI Print speed Normal speed... - Page 49 Documax 5380 User’s Manual Paper thickness Adjust through the gad adjust lever adjust Width: 70 ~ 257 mm Cut sheet, postcard Length: 80 ~ 536 mm Weight: 45 ~ 250 g/m Paper specification Width: 60 ~ 254 mm Tractor paper...
-
Page 50: Paper Specifications
Documax 5380 User’s Manual B.2 Paper Specifications Cut sheet, post card Width 70 ~ 257 mm Length 80 ~ 536 mm Total Thickness ≤ 0.53 mm Thickness 0.065 ~ 0.39 mm Single sheet: 45 ~ 90 g/m Weight Multilayer sheet (each sheet): 40 ~ 64 g/m... -
Page 51: Printable Area Of Tractor Paper
Figure B-2 the printable area of tractor paper B.4 Interface Specification This Documax 5380 printer can be configured with 2.0 Full-Speed USB interface, Centronics (IEEE1284 NIBBLE) parallel interface, RS-232 serial interface or 10/100Base-T Ethernet interface. You can connect the printer to computer according to your requirement. -
Page 52: Ethernet Interface
Documax 5380 User’s Manual /ACK Printer → Host BUSY Printer → Host Printer → Host —— SELECT Printer → Host —— /AUTO FEED Printer ← Host —— —— SIGNAL GND Printer ↔ Host —— CHASSIS GND Printer ↔ Host ——... -
Page 53: Serial Interface
Documax 5380 User’s Manual B.4.4 Serial Interface RS-232 serial interface’s working way is set by the toggle switch on the main board. Interface connector is DB-25 hole-type connector. Its connector pin numbers are as follow figure shown: Figure B-6 connector pin numbers... - Page 54 Documax 5380 User’s Manual RXD: The printer receives data DTR: High level denotes that the printer is ready to receive the data from the HOST; contrarily, denotes the printer is BUSY and it is forbidden to receive the data from the HOST.