
Related Manuals for Windsor NuWave NWIFE 10125340


Summary of Contents for Windsor NuWave NWIFE 10125340
- Page 1 Wide Area Vacuum Model: 10125330 NWIFE 10125340 NUWAV AU 10125360 Operating Instructions (ENG) 86011370-L 11/05/08...
-
Page 2: Machine Data Log/Overview
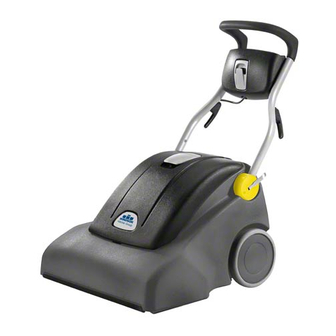
The NuWave™ is a electric motor powered, wide area vacuum intended for commercial use. The NuWave™ brushes and vacuums debris from carpeted surfaces and stores the collected debris in vacuum bags. Copyright 2006 Windsor Industries, Printed in USA OVERVIEW 86011370 NUWAVE 05/01/07... -
Page 3: Table Of Contents
Machine Data Log/Overview...2 Table of Contents...3 HOW TO USE THIS MANUAL How to use this Manual...1-1 SAFETY Important Safety Instructions ...2-1 Hazard Intensity Level...2-2 Grounding Instructions..2-3 Safety Label Location...2-4 OPERATIONS Technical Specifications...3-1 Controls & Components ...3-2 Set Up ...3-4 Operation. -
Page 4: How To Use This Manual
The HOW TO USE THIS MANUAL section will tell you how to find important information for ordering correct repair parts. Parts may be ordered from authorized Windsor dealers. When placing an order for parts, the machine model and machine serial number are important. -
Page 5: Safety
SAFETY IMPORTANT SAFETY INSTRUCTIONS When using an electrical appliance, basic precaution must always be followed, including the following: READ ALL INSTRUCTIONS BEFORE USING THIS MACHINE. To reduce the risk of fire, electric shock, or injury: Use only indoors. Do not use outdoors or expose to rain. Use only as described in this manual. -
Page 6: Hazard Intensity Level
Unless Operation Guide is Read and understood. In Flammable or Explosive areas. In areas with possible falling objects. WHEN SERVICING MACHINE: Avoid moving parts. Do not wear loose clothing; jackets, shirts, or sleeves when working on the machine. Use Windsor approved replacement parts. 86011370 NUWAVE 05/01/07... -
Page 7: Grounding Instructions
GROUNDING INSTRUCTIONS THIS PRODUCT IS FOR COMMERCIAL USE ONLY. ELECTRICAL: The amp, hertz, and voltage are listed on the data label found on each machine. Using voltages above or below those indicated on the data label will cause serious damage to the motors. EXTENSION CORDS: If an extension cord is used, the wire size must be at least one size larger than the power cord on the... -
Page 8: Safety Label Location
SAFETY SAFETY LABEL LOCATION The following WARNING LABEL(S) are found on your cleaning unit. These labels point out important Warnings and Cautions which should be followed at all times. Failure to follow warnings and cautions could result in fatality, personal injury to yourself and/or others, or property damage. Follow these instructions carefully! DO NOT remove these labels. -
Page 9: Technical Specifications
ITEM Rated Amperage (120V) Rated Amperage (230V) Brush Motor Bag Capacity Brush Brush Speed (120 V) Brush Speed (230 V) Maximum flow rate of machine Maximum suction of machine Weight Empty Tires Frame Construction WIDTH ITEM Height Length Width SPECIAL NOTES: The sound pressure level at the operator’s ear was measured to be 74dBA . - Page 10 OPERATION CONTROLS & COMPONETS Main handle Adjust for operator comfort and storage. Handle Adjustment Lever Adjusts for operator comfort and storage. Vac on/off switch. Turns on and off vac motor. Brush Motor Circuit Breaker Protects brush motor from overheating. Vac Motor Circuit Breakers Protects the vac motors from overheating.
- Page 11 Intake Filter. Filters intake air for extend vacuum motor life. Filter Bag Cover Raises to allow access to filter bag and vacuum motors. Filter Bag Basket Locates filter bag for maximum fill efficiency and easy changing. Filter Bag Lift out easily for service. Accessory Port Lift port to attach optional accessory hose.
-
Page 12: Set Up
OPERATION SET UP ADJUSTMENT LEVER FILTER BAG INSTALLED Take machine out of storage position by lowering onto all four wheels. Adjust handle to comfortable position at waist level by opening adjustment lever on left side of machine and moving handle. Lock back into position by closing adjustment lever. -
Page 13: Cleaning
CLEANING ROUTE ACCESSORY PORT CORD HOOKS HOW IT OPERATES This machine is a portable, easy to use wide area vacuum designed for use indoors, in a commercial or light industrial environment. When operating as a carpet vacuum, soil is lifted from the carpet surface by two counter-rotating brushes and carried into a removable bag by the vacuum motors. - Page 14 MAINTENANCE 1. Primary Drive Belt 2. Brush Motor Assembly 3. Belt Guard 4. Brush Deck Assembly 5. Vacuum Hose 6. Hose Clamp 7. Brush Deck Mounting Bolts 8. Drive Housing Cover Plate 9. Secondary Timing Belt 10. Drive Housing 11. Belt Tensioning Nut 12.
-
Page 15: Brush Deck
NOTE: The following service items should be per- formed by an authorized service facility or authorized service personnel. All parts referred to in these instructions can be identified by using the parts lists and illustrations on the following pages. Remove machine power cord from electrical source before making any repairs or adjustments to the machine. -
Page 16: Belt Replacement
MAINTENANCE BELT REPLACEMENT The primary drive belt and secondary belt should be replaced if they are damaged or broken. To determine if a belt is damaged or broken, there will be a noticeable drop in the performance of the machine or the brushes will not spin when the machine is turned PRIMARY DRIVE BELT REPLACEMENT The primary drive belt is removed from the under side... - Page 17 SECONDARY BELT REPLACEMENT The secondary belt can be accessed from the under side of the machine. Unplug power cord. Adjust handle into the vertical position and lock the cam lever. Tilt machine on it’s back using the handle to support it’s position.. Remove belt guard by loosening the (2) mounting screws.
-
Page 18: Vacuum Motor(S)
MAINTENANCE REMOVE VAC MOTOR AND FILTERS Unplug power cord. Open cover. Remove screws from retaining plate. Remove (8) screws from vac motor brackets, (4) each bracket. Lift vacuum motors out of machine body. VACUUM MOTOR CARBON BRUSHES REPLACEMENT Carbon Brushes vacuum motor If armature commutator is grooved, extremely pitted or... -
Page 19: Daily Maintenance
DAILY MAINTENANCE Unplug power cord. Shake down the contents of the bag daily. Check power cord for damaged or frayed insulation. Check for and remove any lint or debris around brush and brush housing. REGULAR/PERIODIC MAINTENANCE Unplug power cord. Every 4 to 6 months remove wheels, clean axles, and apply a thin coat of silicone lubricant to axles. -
Page 20: Service Schedule
MAINTENANCE SERVICE SCHEDULE MAINTENANCE Check bag and replace if necessary Check filters and replace if necessary Check hoses for wear, blockages, or damage Inspect base for clogs Check vac nozzle for clogs; remove clogs with fingers (if appropriate) Check major gaskets for leakage Check brush-should be clean with no lint or strings attached Wind cord and store in upright position... -
Page 21: Parts List
Parts List 86011370 NUWAVE 05/30/07... -
Page 22: Brush Deck
BRUSH DECK 86011370 NUWAVE 11/01/07... - Page 23 PART NO. PRV NO. 86293390 86137300 87084 86173350 87515 86290110 86218140 35366 86270830 57023 86010670 87029 86292460 OPEN 86010720 87086 86295960 86293380 86012780 86277130 70795 86293400 86293200 86215230 09161 86223520 67598 86215530 140941 86279130 87083 86215310 11056 86223310 64116 86223490 67468 86222890 620118...
-
Page 24: Brush Motor
BRUSH MOTOR 86011370 NUWAVE 10/13/07... - Page 25 PART NO. PRV NO. 86216750 20098 86293380 86222120 53274 86222150 53279 86012580 86010630 87013 86173340 87514 86293270 86223780 70896 86291150 86291380 86270830 57023 86010670 87029 86215550 140970 86222900 620120 86137280 87054 86137310 87098 86274860 70311 DESCRIPTION CLAMP, WORM GEAR 40-64MM SCR, 5/16-18 X 3/4, CARR GR 10.9 MOTOR, 115V, 0.5HP, INDUCTION MOTOR, 230V, .5HP, INDUCTION...
-
Page 26: Control Panel
CONTROL PANEL 86011370 NUWAVE 10/13/07... - Page 27 PART NO. PRV NO. 86172640 57507 86173300 87495 86224730 73939 86215410 140416 86007130 72128 86225960 89503 86005700 57104 86221820 51467 86218960 41575 86223830 70927 86217150 23733 86217160 23734 86217170 23735 86215670 140839 86215710 141046 86218290 35382 86276820 70740 86299320 86010640 87016 DESCRIPTION NUT, M8, NYLOCK, ISO7040, SST...
-
Page 28: Cover
COVER 86011370 NUWAVE 11/05/08... - Page 29 PART NO. PRV NO. 86217470 270800 86218300 36250 86173330 87513 86293360 86293390 86173350 87515 86008650 80604 86222620 66891 86216030 620119 86225080 72152 86173110 70936 86225630 75478 86218200 35372 86217880 34458 OPEN 86295530 86274340 70179 86215160 141059 86238080 36261 86238070 36260 86222640 66893 86223780...
-
Page 30: Decal
DECAL 86011370 NUWAVE 10/13/07... - Page 31 PART NO. PRV NO. 86221460 501207 86221530 501243 86221540 501244 86004970 50990 86012590 DESCRIPTION LABEL, CONTROL PANEL VACUUM LABEL, NUWAVE RT LABEL, NUWAVE LT LABEL, WINDSOR LOGO DOMED LABEL, BRUSH INSTALLATION 86011370 NUWAVE 10/13/07 DECAL SERIAL NO. NOTES: FROM 5-10...
-
Page 32: Frame
FRAME 86011370 NUWAVE 10/13/07 5-11... - Page 33 PART NO. PRV NO. 86274860 70311 86137310 87098 86137280 87054 86295660 86295780 86226050 89279 86225730 87218 86173310 87499 86293430 86219480 41567 86293440 86228840 09124 86215890 140951 86010720 87086 86259400 87205 86224690 730438 86223810 70925 86196610 94045 86216020 34461 86218430 36253 86172980 70912 86002340...
-
Page 34: Handle
HANDLE 86011370 NUWAVE 11/01/07 5-13... - Page 35 PART NO. PRV NO. 86218970 41593 86298140 86218600 38346 86293400 86215630 14878 86224540 73588 86218190 35371 86218720 38369 86218950 41574 86293410 86216460 149983 86225860 87519 86008650 80604 86216580 270159 86173020 70916 86221770 51470 86292910 86224180 730433 86294660 86216560 270158 8621570 38368 86293370 86293390...
-
Page 36: Housing
HOUSING 5-15 86011370 NUWAVE 11/01/07... - Page 37 PART NO. PRV NO. 86222230 58010 86292430 86297590 86218940 41570 86291240 86215900 140952 86137280 87054 86137310 87098 86274860 70311 86225610 75477 86295940 86223680 70700 86014530 86303870 DESCRIPTION NET, CARGO, MOLDED CLIP, TREE, FASTENER SCR, M8X25 FHCS, BLK HINGE, BODY RAIL, GLIDE, EXTRUDED BRKT, BODY/HINGE MOUNT WASHER, M8 FLAT DIN125A PLT WASHER, M8 SPLIT LOCK...
-
Page 38: Vacuum
VACUUM 86011370 NUWAVE 11/05/08 5-17... - Page 39 PART NO. PRV NO. 86225510 53817 86225520 53819 86218310 36251 86223070 62978 86293430 86173310 87499 86279070 87056 86290450 86290120 86217850 34459 86223960 739988 86234760 27674 86293390 86003780 35171 86257160 72199 86137350 87216 86173330 87513 86024750 94028 86277380 70835 86225730 87218 86010720 87086 86288450...
-
Page 40: Wiring Diagram
WIRING DIAGRAM-120V SWITCH CIRCUIT BREAKER CIRCUIT BREAKER CIRCUIT BREAKER INDICATOR LIGHT LEVER BRACKET CONTROL PANEL 5-19 ACCESSORY SWITCH POWER CORD 150 F BRUSH MOTOR 86011370 NUWAVE 110/01/07 PORT 25 F VACUUM SWITCH MACHINE MOTOR MOTOR... - Page 41 PART NO. PRV NO. 86266900 880095 86268400 88301 86218860 41579 86267290 880262 86268210 88205 86218850 41578 86295540 DESCRIPTION WIRE, 5” BLK/14 76029 X 76029 WIRE, 3” BLK/14 76029 X 76050 HARNESS, MAIN VACUUM WIRE, 14” GRN/18 76008 X 76011 WIRE, 15” GRN/18 76008 X 76008 HARNESS, SWITCH VACUUM WIRE, JUMPER, 130L X 14GA BLK 86011370 NUWAVE 11/01/07...
- Page 42 WIRING DIAGRAM-230V 5-21 86011370 NUWAVE 11/01/07...
- Page 43 PART NO. PRV NO. 86266900 880095 86268400 88301 86218860 41579 86267290 880262 86268210 88205 86218850 41578 86295540 86217770 23213 86303880 DESCRIPTION WIRE, 5” BLK/14 76029 X 76029 WIRE, 3” BLK/14 76029 X 76050 HARNESS, MAIN, VACUUM WIRE, 14” GRN.18 76008 X 76011 WIRE, 15”...
-
Page 44: Suggested Spare Parts
SUGGESTED SPARE PARTS PART NO. PRV NO. 86216120 12543 86216110 12540 86215310 11056 86291380 86215670 140839 86215710 141046 86007130 72128 86135320 140687 86215090 140949 86224630 730380 86012790 86217850 34459 86292930 86218290 35382 86238080 36261 86238070 36260 86218200 35372 86218190 35371 86003780 35171 86218310... - Page 45 OPTIONS 86011370 NUWAVE 08/11/08...
-
Page 46: Holster
HOLSTER-OPTION 86011370 NUWAVE 08/11/08... - Page 47 PART NO. PRV NO. 86308710 86141550 5045HG 86305100 86276850 70745 DESCRIPTION ASSY, HOSE EXTENSION TUBE WIRE FORM, HOLSTER SCR, #10 X 5/8 PPHST HI LO BLK 86011370 NUWAVE 09/19/08 HOLSTER - OPTION SERIAL NO. NOTES: FROM...
- Page 48 NOTES: 86011370 NUWAVE 08/11/08...