Advertisement
Quick Links
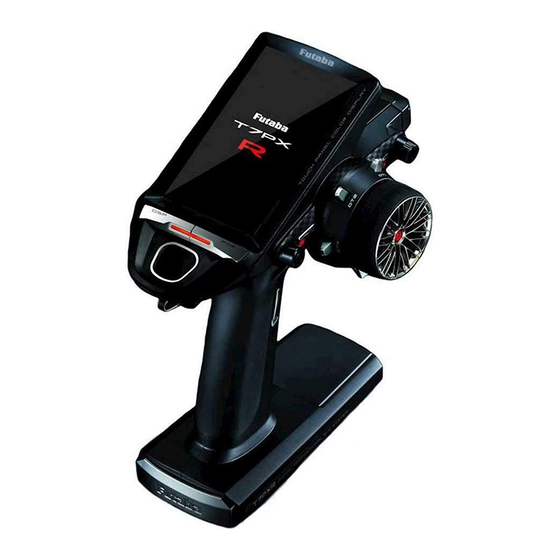
Whenever improvements and new functions are available, the software of your T7PXR/T7PX/T7XC
radio transmitter can be updated easily online free of charge. The updated software file will be
shown on our website. You can download it and make a copy on your microSD card. Below is the
procedure for the software update.
Procedure for the software update
Caution:
Before you update the software, the battery that is connected to the T7PXR/T7PX/T7XC
should be fully charged.
Note:
During the software update, the model data that is stored in the T7PXR/T7PX/T7XC
should be kept without any change. (NOT erased and NOT changed.) However, for your safety,
making a backup of your model data before the software update is highly recommended.
1.
Download the zip file of the update data
from our website.
2.
Extract the zip file on your computer.
3.
The "FUTABA" folder will be created on your
computer.
4.
Copy the "FUTABA" folder onto your
microSD card.
Note:
If the microSD card has already
had "another FUTABA" folder before you
make a copy, the "FUTABA" folder is
OVERWRITTEN.
5.
Insert the microSD card with "FUTABA"
folder that contained the update software
into the SD card slot on your T7PXR/T7PX/
T7XC radio transmitter.
6.
Turn on the transmitter power while pressing
down the "HOME" button. The update
screen appears on the LCD display of
your T7PXR/T7PX/T7XC and the software
update is started.
HOME button
T7PXR/T7XC Software Update Method
7.
When the software update is completed,
"Completed" message is shown on the LCD
display of your T7PXR/T7PX/T7XC. (See
attached picture.)
8.
Turn off the power switch of your T7PXR/
T7PX/T7XC and remove the microSD card
from the card slot.
Possible Problems
When one of the error messages shown
below appears on the LCD screen of your
T7PXR/T7PX/T7XC, the software update will
not be completed.
"Low battery."
Software update is postponed because of low
battery. Retry the software update after the
battery is recharged.
"Update file not found."
The T7PXR/T7PX/T7XC cannot find the up-
date file on the microSD card. Check to be
sure all the update files have been copied
onto the microSD card.
"Broken file."
The T7PXR/T7PX/T7XC detects the update
file error. The update file may be broken or for
another transmitter.
"Write error."
The software update procedure is stopped for
an unknown reason. Contact your local ser-
vice center when this error message appears
on the LCD screen of your T7PXR/T7PX/
T7XC.
1M23Z05402
Advertisement

Related Manuals for FUTABA T7PXR


Summary of Contents for FUTABA T7PXR
- Page 1 Procedure for the software update Caution: Before you update the software, the battery that is connected to the T7PXR/T7PX/T7XC should be fully charged. Note: During the software update, the model data that is stored in the T7PXR/T7PX/T7XC should be kept without any change.
- Page 2 Additional function / Wireless Gyro setting (Gyro Link) V7.0 The Gyro Link is a function that allows you to set the parameters of the car gyro wirelessly from the transmitter. * A gyro compatible with the wireless setting : GYD550 (As of April 2020) tion of the transmitter.
- Page 3 Example: (Writing to Gyro) Gyro reading screen Basic setting screen Execute this function to write the setting data to the Gyro. Tap the setting item [Write] on both the Basic setting screen and the Gyro data screen. After "Read Please wait" is displayed, an electronic sounds and writing ends.
- Page 4 Gyro data 1/2 2/2 The gyro data setting screen has two pages, and the page can be a switch with the page switching button on the upper right. Also, data can be set independently in each gyro operation mode (normal / AVCS). AVCS and normal mode change button The AVCS / NORMAL modes setting.
- Page 5 Futaba MC970CR or Acu- vance Xarvis, and select [XarvisXX] when using Acuvance XarvisXX. * For Futaba ESC MC960CR, MC950CR, MC851C, MC602C, MC402CR, etc., please choose Other. * MC970CR is available only in the Japanese market. (As of April 2020)
- Page 6 Additional function / Throttle rate V6.0 The throttle rate functions set on the " " screen. to the situation. function. Throttle rate adjustment (Preparation) - Display the "D/R, ATL" screen from the linkage menu or custom menu. (Function ON/OFF) Tap "Throttle rate" (ON) or (OFF) to select ON/OFF. "OFF": Throttle rate function OFF "ON": Throttle rate function ON...
- Page 7 T7PX, T7XC / Change home screen meter display V5.0 Home screen setting Home screen Menu screen Accessory menu screen How to set the home screen display (Change home screen display) Tap [Normal] or [Instrument panel] on the home screen display to select.
- Page 8 Additional function / Evo (Receiver) V4.0 How to Link Display "Receiver setting" screen from "Linkage menu" or "User menu". Set the system to "Mini-Z T-FHSS". Bring the transmitter and the receiver close to each other, within 20 inches (half meter). Turn on the receiver.
- Page 9 Additional function / Condition function update Condition function ON/OFF Display "Condition" screen from "Linkage menu" or "User menu". (Function ON/OFF) Tap mode (ON) or (OFF) to select ON / OFF. "OFF" :Function OFF "ON" :Function ON Tap the [Condition] button to change the number of available conditions. A list of condition numbers is displayed in the "Condition name"...
- Page 10 Tap the [Copy], The confirmation message “Are you sure” appears. To execute copy, tap [Yes] and to cancel copy, select [No]. When the copy destination condition name becomes the same name as the copy source, copying is complete. Condition change switch setting This function sets the switch to change the condition.
- Page 11 SR mode compatible servo addition " " Function / MC (ESC) Link (MC970CR) V3.1 Additional function / Display of the trim/dial operation V3.0 the screen. Example: The trim/dial is assigned to the gyro mixing function. The value of the gyro gain is indicated to the top of the screen for several seconds.
- Page 12 T7PX/T7XC Software Update V2.3 *Improvement in SR mode setting* Before the improvement After the improvement " " " " when you see " " play. T7PX Additional function V2.2...
- Page 13 Additional function / Wireless S.BUS servo setting V2.0 " " WARNING In the wireless setting, there is a danger that a car (boat) can become unexpectedly uncontrollable, because the servo temporarily stops working during communication. For safety, in case of electric car (boat), please set with driving wheel (boat propeller) not touching the road surface (water surface).
- Page 14 How to use wireless settings The transmitter’s power switch turns on the PWR side and outputs radio waves. Wireless setting are not be used on the DISP side. Turn on the battery switch of the receiver and confirm that the servos can operate. The S.BUS servo screen is displayed in the following way.
- Page 15 - Download the zip file of the update data from our website or your local distributor’s website. - Extract the zip file on your computer. A folder named "FUTABA" is created. - Insert the micro SD card that contains the "FUTABA" folder into the T7PX (see page 31 of the manual). Connection between T7PX and receiver...
- Page 16 Tap the "Update" button on the screen. The update will start. A progress bar will be displayed indicating the progress. The LED of the receiver turns green, and it blinks green for a moment every time it accepts data from the T7PX. - Do not turn off the power of T7PX while updating.