
Related Manuals for NEC WMK-3298T


Summary of Contents for NEC WMK-3298T
- Page 1 NEC DISPLAY SOLUTIO WMK-3298T 32" - 98" 210 lb (82 - 249 cm) (95 kg) 2019-12-18 #:126-9246-3 (2020-03-02)
- Page 2 WARNING ENG - This product is designed to be installed on wood stud, solid concrete or cinder block walls. Hardware is included for wood stud, solid concrete and cinder block installation. Before installing make sure the supporting surface will support the combined load of the equipment and hardware. Screws must be tightly secured. Do not overtighten screws or damage can occur and product may fail.
-
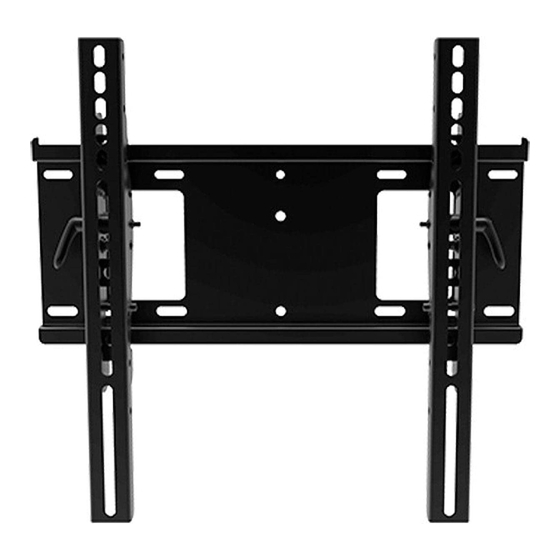
Page 3: Parts List
Parts (Before beginning, make sure you have all parts shown below). Parts List Description Part # A (1) wall plate 203-1037 left tilt bracket 203-1039 wall plate right tilt bracket 203-1038 #14 x 2.5 wood screw 5S1-015-C03 concrete anchor 590-0320 4mm allen wrench 560-9646 M6 x 12mm socket pin screw... - Page 4 Wood stud wall. Concrete/Cinder block. WARNING ENG - When installing Peerless wall mounts on a wood stud wall covered with gypsum board (drywall), verify that the wood studs are a minimum of 2" x 4" nominal size. Do not install over gypsum board thicker than 5/8". 1a-1 Use stud finder to locate and mark stud center lines.
- Page 5 1a-3 2.5" (64mm) 5/32" 5/32" (4mm) (4mm) Drill mounting holes into supporting surface (2.5" (64mm) minimum depth required). Mounting hole must center on stud. 1a-4 Level wallplate. Install using wood screws provided. 3/8" (10mm) Maximum 80 in. • lb (9 N.M.). D (4) 2019-12-18 #:126-9246-3...
- Page 6 WARNING ENG - When installing Peerless wall mounts on a concrete wall, the wall must be at least 8" thick with a minimum compressive strength of 2000 psi. When installing Peerless wall mounts on a cinder block wall, the cinder blocks must meet ASTM C-90 specifications and have a minimum nominal width of 8".
- Page 7 1b-3 Insert anchor flush to concrete. E (4) 1b-4 Level wallplate. Install using concrete anchors and wood screws provided. 3/8" (10mm) Maximum 80 in. • lb (9 N.M.). D (4) 2019-12-18 #:126-9246-3 (2020-03-02)
- Page 8 Use chart to determine orientation, vesa pattern and hardware for your display. Display Model # Orientation Vesa Mounting Hardware E327 landscape 100x100 M4 x 16 E437Q landscape 200x200 M6 x 12 E507Q landscape 400x200 M6 x 16 E557Q landscape 400x200 M6 x 16 E657Q landscape...
- Page 9 VESA 300 X 300: VESA 100 X 100: VESA 400 X 400: VESA 200 X 200: VESA 400 X 200: With extension brackets. Without extension brackets. K (8) L (2) 2019-12-18 #:126-9246-3 (2020-03-02)
- Page 10 3a-1 Center adaptor brackets vertically on back of screen. 2019-12-18 #:126-9246-3 (2020-03-02)
- Page 11 3a-2 I (4) I (4) J (4) G (4) H (4) EE437Q, IB554Q-2.1, E507Q, E557Q, E657Q IB654Q-2.1, IB754Q-2.1, C431, C501, C551, P404/ IB864Q-2.1, C651Q/V654Q, V404, P484/V484, P554/ C751Q/V754Q, C861Q/ V554, V323-3, V554Q V864Q, C981Q/V864Q I (4) J (4) G (4) C431, C501, C551, C651Q/V654Q, P404/V404, P484/...
- Page 12 Center adaptor brackets vertically on back of screen. 2019-12-18 #:126-9246-3 (2020-03-02)
- Page 13 3b-1 I (4) I (4) I (4) G (4) N (4) H (4) E507Q, E557Q, E657Q EE437Q, V323-3 E327 I (4) G (4) V323-3 2019-12-18 #:126-9246-3 (2020-03-02)
- Page 14 Tighten. 2019-12-18 #:126-9246-3 (2020-03-02)
- Page 15 Pre-set tilt positions of -5°, 0°, 5°, 10° or 15°. ENG Tighten. +15°,-5° 2019-12-18 #:126-9246-3 (2020-03-02)
- Page 16 Warranty Garantía Garantie Garantie Garantie ČEŠ Záruka Garantia TÜR Garanti̇ Garanzia Záruka www.peerless-av.com/warranty Peerless-AV Peerless-AV Europe Peerless-AV América Latina 2300 White Oak Circle Unit 3 Watford Interchange, Av. de las Industrias 413 Aurora, IL 60502 Colonial Way, Watford, Herts, Parque Industrial Escobedo Email: tech@peerlessmounts.com WD24 4WP, United Kingdom General Escobedo N.L., México 66062...