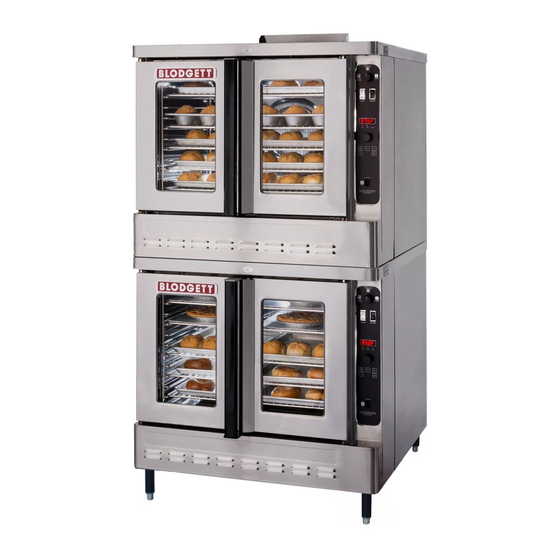
Blodgett DFG-100 XCEL Installation Manual
Hide thumbs
Also See for DFG-100 XCEL:
- Installation and operation manual (97 pages) ,
- Installation operation & maintenance (81 pages) ,
- Installation, operation and maintenance manual (77 pages)
Table of Contents
Advertisement
Available languages
Available languages
GAS CONVECTION INSTALLATION
FOURS A CONVECTION D'INSTALLATION
WARNING: IMPROPER INSTALLATION, ADJUSTMENT, ALTERATION, SERVICE OR MAINTENANCE CAN CAUSE
PROPERTY DAMAGE, INJURY OR DEATH. READ THE INSTALLATION, OPERATING AND MAINTENANCE IN-
STRUCTIONS THOROUGHLY BEFORE INSTALLING OR SERVICING THIS EQUIPMENT.
INSTRUCTIONS TO BE FOLLOWED IN THE EVENT THE USER SMELLS GAS MUST BE POSTED IN A PROMINENT
LOCATION. THIS INFORMATION MAY BE OBTAINED BY CONTACTING YOUR LOCAL GAS SUPPLIER.
FOR YOUR SAFETY Do not store or use gasoline or other flammable vapors or liquids in the vicinity of this or any other
appliance.
The information contained in this manual is important for the proper installation, use, and maintenance of this oven.
Adherence to these procedures and instructions will result in satisfactory baking results and long, trouble free service.
Please read this manual carefully and retain it for future reference.
Errors: Descriptive, typographic or pictorial errors are subject to correction. Specifications are subject to change without
notice.
AVERTISSEMENT: UNE INSTALLATION, UN AJUSTEMENT, UNE ALTERATION, UN SERVICE OU UN ENTRETIEN
NON CONFORME AUX NORMES PEUT CAUSER DES DOMMAGES A LA PROPRIETE, DES BLESSURES OU LA
MORT. LISEZ ATTENTIVEMENT LES DIRECTIVES D'INSTALLATION, D'OPERATION ET D'ENTRETIEN AVANT DE
FAIRE L'INSTALLATION OU L'ENTRETIEN DE CET EQUIPEMENT.
LES INSTRUCTIONS A RESPECTER AU CAS OU L'UTILISATEUR PERQOIT UNE ODEUR DE GAZ DOIVENT ETRE
AFFCHEES DANS UN ENDROIT BIEN VISIBLE. VOUS POUVEZ VOUS LES PROCURER AUPRES DE VOTRE
FOURNISSEUR DE GAZ LOCAL.
AVERTISSEMENT Ne pas entreposer ni utiliser de l'essence ni d'autres vapeurs ou liquides inflammables dans le voi-
sinage de cet appariel, ni de tout autre appareil.
Les informations donnees dans le present manuel sont importantes pour installer, utiliser et entretenir correctement ce
four. Le respect de ces instructions et procedures permettra d'obtenir de bons resultats de cuisson et une longue duree
de service sans problemes. Veuillez lire le present manuel et le conserver pour pouvoir vous y reporter a l'avenir.
Erreurs: Les erreurs de description, de typographie ou d'illustration font l'objet de corrections. Les caracteristiques sont
sujettes a modifications sans preavis.
44 Lakeside Avenue, Burlington, Vermont 05401 USA Telephone: (802) 658-6600 Fax: (802) 864-0183
IMPORTANT
BLODGETT OVEN COMPANY
www.blodgett.com
PN 54865 Rev D (3/14)
© 2014 - G.S. Blodgett Corporation
Advertisement
Table of Contents

Related Manuals for Blodgett DFG-100 XCEL


Summary of Contents for Blodgett DFG-100 XCEL
- Page 1 Erreurs: Les erreurs de description, de typographie ou d’illustration font l’objet de corrections. Les caracteristiques sont sujettes a modifications sans preavis. BLODGETT OVEN COMPANY www.blodgett.com 44 Lakeside Avenue, Burlington, Vermont 05401 USA Telephone: (802) 658-6600 Fax: (802) 864-0183 PN 54865 Rev D (3/14) © 2014 - G.S. Blodgett Corporation...
-
Page 2: Delivery And Location
The Blodgett Oven Company cannot assume responsibility for loss or damage suffered in transit. The carrier assumed full responsibility for delivery in good order when the shipment was accepted. We are, however, prepared to assist you if filing a claim is necessary. -
Page 3: Oven Assembly
OVEN ASSEMBLY LEG ATTACHMENT 1. Push the oven onto a lift with the bottom of the oven down. 2. Align the threaded stud in each leg with the nut located inside each bottom corner of the oven frame. Turn the legs clockwise and tighten to the nearest full turn. -
Page 4: Double Section Assembly
OVEN ASSEMBLY DOUBLE SECTION ASSEMBLY NOTE: Old style ovens refer to units with painted exposed rear angle. New style ovens refer to units with rear angle iron enclosed in steel. The following instructions apply to stacking two new style ovens. 1. - Page 5 OVEN ASSEMBLY DOUBLE SECTION ASSEMBLY - ES MODELS 1. Secure the short legs to the bottom sections as described. 2. Place the upper section in position on top of the lower oven. 3. Attach the stacking brackets using the remaining 5/16” bolts shipped with the ovens. 4.
-
Page 6: Canopy Type Exhaust Hood
VENTILATION WARNING!! Failure to properly vent the oven can be hazardous to the health of the operator and may result in opera- tional problems, unsatisfactory baking and possible damage to the equipment. Damage sustained as a direct result of improper ventilation will not be covered by the manufacturer’s warranty. CANOPY TYPE EXHAUST HOOD A mechanically driven, canopy type exhaust hood is the preferred method of ventilation. -
Page 7: Direct Flue Arrangement
VENTILATION DIRECT FLUE ARRANGEMENT When the installation of a mechanically driven exhaust hood is impractical the oven may be vented by a direct flue arrange- ment. WARNING!! It is essential that the direct flue be installed as follows. Incorrect installation will result in unsatisfactory baking and oven damage. - Page 8 UTILITY CONNECTION GAS PRESSURE REGULATION AND TESTING Each oven has been adjusted at the factory to operate with the type of gas specified on the rating plate. GAS RATINGS Natural Gas Propane Inlet Pressure W.C. 10.5 11.0 13.0 1.742 2.61 2.74 3.23 Manifold Pressure...
-
Page 9: Gas Hose Restraint
DO NOT cut or remove the grounding prong from this plug. THE BLODGETT OVEN COMPANY CANNOT ASSUME RESPONSIBILITY FOR LOSS OR DAMAGE SUFFERED AS A RESULT OF IMPROPER INSTALLATION. -
Page 10: Initial Start-Up
INITIAL STARTUP The following is a check-list to be completed by qualified personnel prior to turning on the appliance for the first time. • Open the manual shut-off valve at the rear of the oven. • Remove the control panel and combustion covers. •... -
Page 11: Livraison Et Implantation
été conservé afin d’être inspecté. La Blodgett Oven Co., n’est pas responsable des dégâts subis pendant le transport. Le transporteur est seul re- sponsable de la livraison du matériel en bon état lorsque l’expédition a été acceptée. Néanmoins, nous sommes à... -
Page 12: Montage Du Four
MONTAGE DU FOUR ASSEMBLAGE DES PIEDS 1. Pousser le four, couché sur le dos, sur un élévateur. 2. Alignez le goujon fileté du pied sur le trou de vis prévu dans le coin avant du fond de caisse. Vissez le pied, dans le sens des aiguilles d’une montre, jusqu’au dernier tour complet possible. -
Page 13: Montage De La Section Double
MONTAGE DU FOUR MONTAGE DE LA SECTION DOUBLE REMARQUE: Les vieux modèles de fours sont ceux qui ont un cadre arrière peinturé. Les nouveaux modèles de fours sont ceux avec un cadre arrière enfermé en acier. Les instructions suivantes sont applicable a l’assemblage de deux nouveaux modèles de fours.. 1. - Page 14 MONTAGE DU FOUR MONTAGE DE LA SECTION DOUBLE MISE À NIVEAU DU FOUR 1. Fixez les pieds de courte longueur au bas de la sec- 1. Après assemblage le four doit être mis à niveau et tion inférieure comme décrit. installé...
-
Page 15: Hotte D'évacuation Type Voûte
VENTILATION AVERTISSEMENT: Un mauvais système d’aération peut aboutir à un mauvais fonctionnement du four, des résultats de cuis- son peu satisfaisants; il peut également abîmer l’appareil.Les dégâts causés par une mauvaise ventilation ne sont pas couverts par la garantie du fabricant. HOTTE D’ÉVACUATION TYPE VOÛTE La méthode de ventilation la meilleure est celle qui utilise une hotte de ventilation adéquate à... -
Page 16: En Prise Directe
VENTILATION EN PRISE DIRECTE Quand l’installation d’une hotte aspirante mécanique est impossible ou peu pratique à réaliser, on peut ventiler le four au moyen d’une installation en prise directe. AVERTISSEMENT!! Quand on utilise un système à prise directe il faut absolument suivre le schéma. Une installation de ven- tilation à... - Page 17 BRANCHEMENT D’UTILITE RÉGLAGE ET TEST DE PRESSION DE GAZ Tous les fours sont réglés en usine en fonction du type de gaz spécifié sur la plaque signalétique. SPECIFICATIONS POUR GAZ Gaz Naturel Gaz Propane Pression à l’entrée W.C. 10.5 11.0 13.0 1.742 2.61...
-
Page 18: Raccordement Électrique
Ne coupez ou ne retirez en aucun cas la broche de terre de la fiche. LA SOCIÉTÉ BLODGETT NE SAURAIT ÊTRE TENUE POUR RESPONSABLE DES PERTES OU DOMMAGES SUBI PAR SUITE DE L’INSTALLATION INCORRECTE DE FOURS. -
Page 19: Mise En Marche Initiale
MISE EN MARCHE INITIALE Les points de la liste qui suit doivent être contrôlés par un personnel qualifié avant la première mise en marche de l’appareil. • Ouvrez la vanne d’arrêt manuelle combinée à l’arrière du four. • Enlevez les couvercles du tableau de commande et de combustion. •...