Table of Contents
Advertisement
Advertisement
Table of Contents

Related Manuals for NADAMOO Bur3069


Summary of Contents for NADAMOO Bur3069
- Page 1 Bur3069 Wireless Barcode Scanner User Manual V53.02...
- Page 2 If you have any question or concern about the operation of the scanner, please contact us at following Email: server@nadamoo.cn / burnfree@126.com / nadamoo@126.com You are suggested to write down the model & the specific scenario and consult the maintenance person should you find the scanner abnormal...
-
Page 3: Table Of Contents
Contents Technical Parameter Packing list Battery & Charging Set Up Step FAQs Troubleshooting Optional Function settings 1. Pairing Mode Setting 2. Upload Mode Setting 3. Scanning Mode Setting 4. End Character Setting 5. Add Character 6. Delete Character 7. Barcode Enable Setting 8. -
Page 4: Technical Parameter
Technical Parameter Mfr P/N Bur3069 Radio Frequency 433MHz Wireless Wireless Range Indoor 100m, outdoor 400m Memory 10000 barcodes Battery capacity 500mAh Polymer Battery Charging Input voltage DC 5V ± 0.25 V Power 100 mW (work); 400 mW (maximum instantaneous) Current 20 mA (work);100 mA (maximum instantaneous) -
Page 5: Packing List
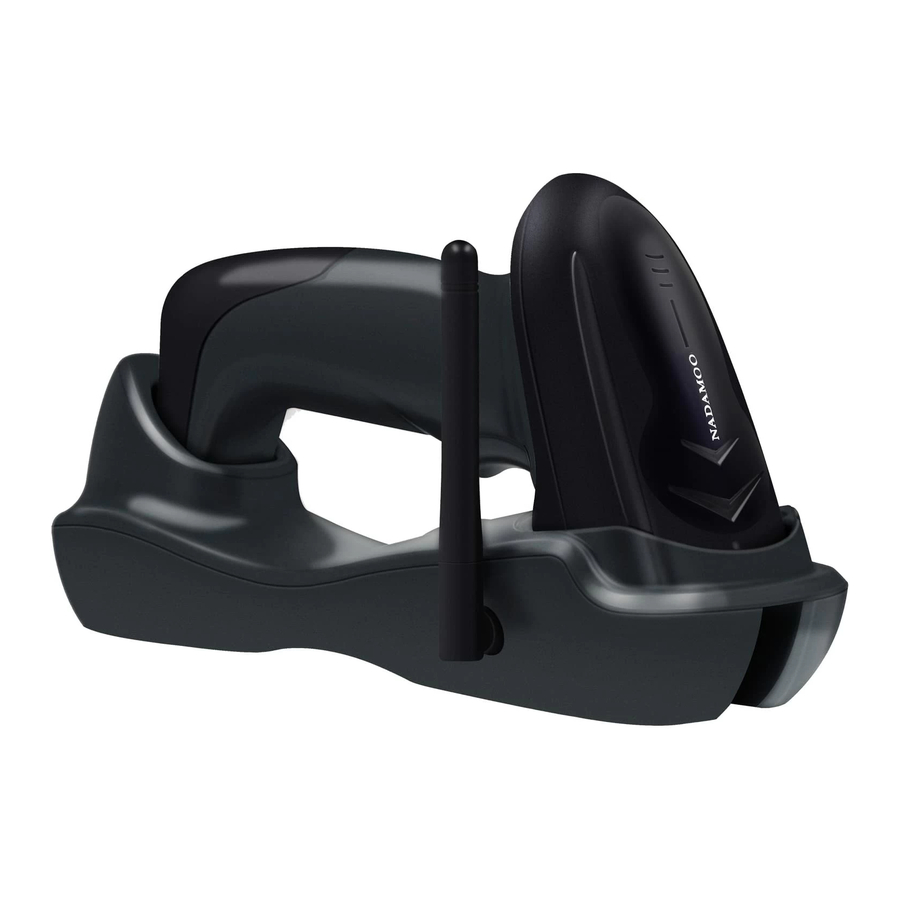
Packing List Barcode scanner *1 Cradle *1 (As charging base and barcode receiver) USB cable *1 User manual *1 Battery & Charging The scanner is powered by rechargeable polymer battery. Please ensure that the scanner has enough power before use. Battery level indication: (1) Turnning the scanner on, when the buzzer beeps and the blue indicator light is on all the time , it indicates that the battery is sufficient... -
Page 6: Set Up Step
Set Up Step (The scanner has been paired with the cradle, and set up already. ) Step 1: Plug one end of the cable into the computer usb port, plug another end into the Cradle. The blue indicator light on the cradle will turn on, after 5 second it will start flashing. -
Page 7: Faqs
Step 2. Unplug the cradle , scan code "one to one" , the scanner will go to pairing mode and beep continuously, then plug the cradle to USB port, if the scanner has one "beep"sound in 3s , that means the pairing is succeed Note: if the pairing fails, please unplug the cradle and repeat step 2. - Page 8 meaningful by either purchasing a software service that will interpret the barcode and relate it to a product, or you can use your own internal inventory system to assign the barcodes to specific products. After creating the relationship between your barcode and the corresponded information ,when you enter the barcode into the software by the scanner,your software will look up the barcode and then output the related information of your product.
- Page 9 E.g 1. When I use the scanner to read a UPCE barcode “08960007” , scanning result is 8960007. The leading digit is missing. Solution: The scanner was set to not read the leading digit of UPCE barcode by default. If you want to set the scanner to read the leading digits of UPCE , please read the following code ordrly "enter into settings">"...
-
Page 10: Troubleshooting
Troubleshooting Problem Possible Reason Solution The PC’ s usb port is out of Connect the usb receiver Insert the usb cradle into condition to another USB port the PC ‘ s usb port, the The cradle or the usb cradle ’ s light does not Contact light up cable is out of condition... -
Page 11: Optional Function Settings
Optional Function settings Settings of the barcode scanner can be changed by scanning the setup barcodes included in this manual. 1. Pair Mode Settings The scanner has three paring mode: 1.1 .One scanner to one cradle One barode scanner send barcode to one cradle Pairing operation: Scan the "One to One"... - Page 12 Several units can work independently with different computers in the same area. They won't interface with each other during work. If you want to use them on multiple computers, each with own scanner and receiver. Please follow the setps 1) Scan the code “one to one”using scanner A , and then plug the cradle A to computer’s usb port.
- Page 13 1.2. One scanner to many cradle: One barcode scanner send barcode to a number of cradle Pairing operation: 1) Scan the "One to More" barcode using scanner A, the scanner will go into pairing mode and beeps continuously. Then insert the cradle A into USB port, if the scanner has one "beep"in 3s that means the pairing is succeed.
- Page 14 1.3.More scanner to one cradle A number of barcode scanner send barcode to one receiverPairing operation: Pairing operation: 1) Scan the "More to One" barcode using scanner A, the scanner A will go into pairing mode and beeps continuously, Then insert the cradle A to USB port, if the scanner has one "beep" in 3s that means the pairing is succeed, meanwhile the light of receiver will flicker.
-
Page 15: Upload Mode Setting
2. Upload mode setting The scanner has three upload mode: 2.1. Normal mode: Scanning barcode and real-time upload the barcode.If the barcode is upload successfully, the blue LED light will flicker once, at the same time buzzer will beep. Scan the code "Normal Mode" to set the scanner to normal mode Under the normal mode,the transmission distance is over 400m where there are no obstacles. - Page 16 in batchs to your conputer when you need them. Scan the code " Check mode" to set the scanner to check mode, Scan the code " Total checking number " to show the quantity of stored barcode Scan the code " Upload checking data" to upload all the stored data Scan one of the time interval to select speed transmission of check mode Scan the code "Clear checking data"...
-
Page 17: Scanning Mode Setting
3. Scanning Mode Setting The scanner has three scanning mode: 3.1.Manual Trigger mode (default) : Press the trigger to read the bar code, please read the following codes orderly to set the scanner to Manual trigger mode . "enter into setting">"Manual trigger "> "exit settings" 3.2.Flicker scanning mode: read the bar code at a certain frequency please read the following codes orderly to set the scanner to Flicker scanning mode. - Page 18 For example,if you want to set the reading time interval out to be 1000ms,please read the following codes orderly: "Enter into setting">"Scanning interval Time"> Paremeter code "0""2">"exit settings" Attention 2: In continuous scanning mode, it is allow to continuously read the same barcode via setting the time interval of reading same barcode.
- Page 19 Paremeter code:...
-
Page 20: End Character Setting
4. End Character Setting To add terminator TAB , scan following codes orderly: "enter into settings">"TAB">"exit settings" To cancel terminator TAB , scan following codes orderly to restore the scanner to default setting. "enter into settings" >"restore factory setting" >"exit setting" The scanner add “... - Page 21 >"enter into settings">"Reveal prefix">"exit settings" To hide prefix Scan the following code orderly: "enter into settings">"Not Reveal prefix">"exit settings" To add suffix For example: Add suffix XY Please scan the following code orderly: "enter into settings">"Add suffix">parameter code"5""8""5""9">"save">"exit settings" >"enter into settings">"Reveal suffix">"exit settings" To hide suffix Scan the following code orderly:...
- Page 22 Paremeter code Attention: If error happens after reading the parameter,please read “ reset parameter”code to reset the needed parameter.
- Page 23 Parameter barcode and corresponding representing characters table...
-
Page 25: Delete Character
6. Delete Character To delete Prefix character E.g. for code 123456789, if you want to set the scanner to delete the number 1, Please scan the following code orderly: "enter into settings">"delete prefix character">"exit settings" Then the data received by the computer is 23456789. E.g. - Page 26 To undelete suffix character Please scan the codes orderly "enter into settings">"undelete suffix charactor>"exit settings" Delete prefix character Sets the number of prefix digits deleted Delete suffix charactor Sets the number of suffix digits deleted ndelete suffix charactor Undelete prefix charactor...
-
Page 27: Barcode Enable Setting
Paremeter code 7.Barcode Enable Setting If some barcode can not be read,please scan these following codes orderly to set the scanner to read all type of barcode . Note: this setting may affect the scanning speed. Please restore the factory default in case affecting the scanning speed. -
Page 28: Barcode Type Id Setting
8. Barcode Type ID Setting To show the barcode type ID,please scan these codes orderly "Enter into setting">"open the code ID before Barcode">"Exit settings" To close the barcode type ID, please scan these codes orderly "Enter into setting">"close the code ID before Barcode">"Exit settings" The first digits means the corresponding barcode type, please check sheet below:... -
Page 29: Upc/ Ean Setting
9. UPC/ EAN Setting Scanning the corresponding bar code to achieve the corresponding function For example, if you want to program the scanner to not read the check digit of EAN8, please scan the codes orderly: "enter into settings">"Hide EAN-8 check code">"exit settings" Hide EAN-8 check code Hide EAN-13 check code... - Page 30 Hide UPCA check code Hide UPCE check code Convert UPCE to UPCA Show UPCE leading digit Read extra 2 digits of UPCA Read extra 2 digits of UPCE Read extra 5 digits of UPCA Read extra 5 digits of UPCE Read extra 2 digits of EAN8 Read extra 2 digits of EAN13 Read extra 5 digits of EAN8...
-
Page 31: Code 39 Setting
10. Code 39 setting To set the scanner to transmit the start character and stop character "*"of Code39, please scan following codes orderly. “Enter setting”>”transmit code 39*”>”exit settings” To set the scanner not transmit start character and stop character "*"of Code39, please scan following codes orderly. -
Page 32: Codabar Setting
11. Codabar Setting To program the scanner to not read the check digit of Codabar, please scan the codes orderly: "enter into settings">"Hide Codabar Check code">"exit settings" Hide Codabar Check code... -
Page 33: Auto Power Off
12. Auto power off For example, if you want to set the sleep time out to be 20min, please scan following codes orderly "Openning Tine Setting">"20min". When it's idle time exceeds the time you set,the scanner will shut down automatically. The system default shut down time is 20s. -
Page 34: Language Setting
13.Language setting For example,if you want to program the languange to Italian,please scan the codes orderly s" "enter into settings">"Italian">"exit setting... -
Page 35: Voice Setting
14 .Voice setting Please scan one of the code to achieve the corresponding sound settings E,g,if you want close the voice,please read these codes orderly "enter into settings"> "Close voice">"exit settings" High Audio -High volume High Audio-medium volume High Audio-low volume Medium audio-High volume Medium audio-medium volume Medium audio-low volume...