TRENDnet TU2-ETG Installation Manual
Usb to ethernet
Hide thumbs
Also See for TU2-ETG:
- User manual (29 pages) ,
- Quick installation manual (10 pages) ,
- Specifications (2 pages)
Advertisement
Quick Links
Advertisement

Related Manuals for TRENDnet TU2-ETG


Summary of Contents for TRENDnet TU2-ETG
- Page 1 USB to Ethernet Installation Manual ...
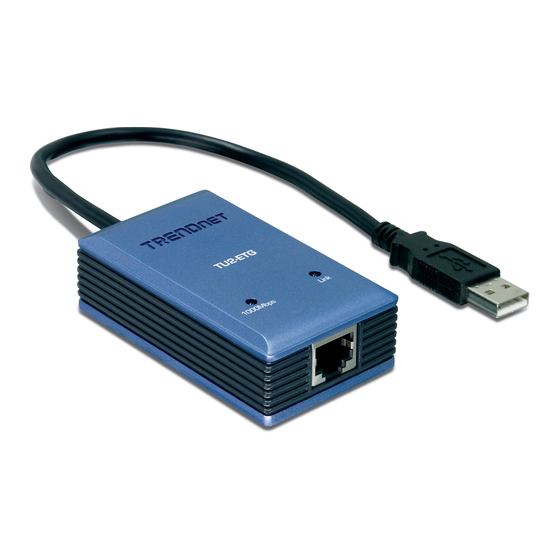
- Page 2 Plug the provided USB to Ethernet into the end user’s computer that will be scheduling the sign. Connect an Ethernet cable from the USB to Ethernet to the “LAN” port of the Power over Ethernet device for the antenna. Windows 7 usually installs the drivers automatically upon plugging the device into the computer. When complete, Windows will notify you that your ASIX AX88178 Ethernet Adapter has been installed successfully. ...
- Page 3 If the drivers do not install automatically, insert the CD that came in the USB to Ethernet package. Install the drivers for the corresponding version of Windows. ...
- Page 4 The next step is to set the IP for the USB to Ethernet. Begin by opening up Control Panel. This guide is done in “Category” view which can be selected in the top right of Control Panel. 1) Click on “Network and Internet.” 2) Click on “Network and Sharing Center.” ...
- Page 5 3) The next step varies based on your version of Windows operating system. Refer to the instruction corresponding to your version of Windows below. a) If you are operating on Windows 7: Select “Change adapter settings” on the left. b) If you are operating on Windows Vista: Select “Manage Network Connections” c) If you are operating on Windows XP: Select “Network Connections” 4) Locate the “ASIX AX88178 USB to Gigabit Ethernet” device and highlight it. ...
- Page 6 5) Right click on the ASIX AX88178 device and select “Properties.” 6) Highlight “Internet Protocol Version 4” (On some systems there are not multiple version choices and only one TCP/IP to select.) Click on “Properties” once this is highlighted. ...
- Page 7 7) Select the “Use the following IP Address:” radio button and fill in the information below: IP Address: 192.168.2.240 Subnet Mask: 255.255.255.0 Click “OK” when complete. Your USB to Ethernet is now configured. If you are planning to put this on a local business network with a different IP, please have your network administrator contact the Formetco Service Department at 1‐ 800‐204‐4386 (Toll Free). ...