Panasonic AG-AC130A Manual
Hide thumbs
Also See for AG-AC130A:
- Operating instructions manual (106 pages) ,
- Brochure (12 pages) ,
- Quick manual (1 page)

Related Manuals for Panasonic AG-AC130A


Summary of Contents for Panasonic AG-AC130A
- Page 1 Camcorder Battle Creek Area Community Television 70 West Michigan Ave., Suite 112 • Battle Creek, MI 49017 • (269) 968-3633 • http://accessvision.tv...
-
Page 3: Attaching The Battery
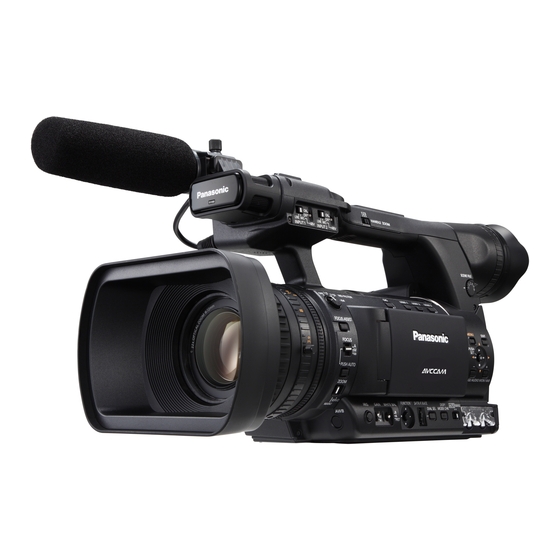
The camcorder is a Panasonic AG-AC130A. It can record in several different video formats to SD (Secure Digital) cards. The camera offers both automatic and manual adjustment features, making it both easy to use and capable of producing excellent, professional-quality results. -
Page 4: Turning On Power
Turning on power First, open the lens cap by flipping the switch on the left side of the lens hood. The turn the POWER/MODE switch up to the <ON> position while pressing the lock release button. The mode lamp <CAMERA> lights up in red and the camera goes into standby status (<CAMERA>... -
Page 5: Shooting In Auto Mode
AUTO vs. MANUAL: In most situations, while you are still learning how to use the camera, AUTO mode will get you decent-looking results most of the time. However, sometimes AUTO will produce unexpected or unacceptible results, depending on your shooting conditions. As you become more comfortable using the camera, you will find that more professional-looking results can be obtained by setting some or all of these controls manually. - Page 6 Gain and ND Filter If you’re shooting in a dark area where there is not enough light for the camera, you can increase the exposure level by raising the gain. Gain settings: • Low <L> 0 dB - this is the normal position when the gain is turned off •...
-
Page 7: Adjusting White Balance
Adjusting white balance Adjusting the white balance changes the sensitivity of the camera to different amounts of red, green and blue light to compensate for the color of ambient light. In most cases, the camera does a good job of white balance in AUTO mode, but if you need to manually adjust the white balance: 1. -
Page 8: External Microphones
External Microphones While the camcorder has a built-in microphone, using an external microphone allows you to place the mic much closer to the sound source and get better sound. The closer the microphone is to the sound source, the better the sound will be recorded. We have several types of external microphones: clip-on (lavaliere) and handheld. - Page 9 Sennheiser AVX Wireless Mics AccessVision has several digital wireless lavalier and handheld microphones. The microphones act as a transmitter, while the receiver is connected to the camera instead of an XLR cable. Any wireless lavalier or wireless handheld mic can be used with any receiver, but the receivers only pair with one transmitter at a time.
-
Page 10: Battery Life
Battery life: • Receivers last about 3-4 hours • Lavalier and handheld transmitters last about 15 hours To check remaining battery life on receiver: • Quickly press (without holding down) red power button. Battery life will be displayed in 1-4 green bars. To adjust output gain: 1. -
Page 11: Setting Up The Tripod
Setting up the tripod 1. Extend the legs as necessary. Make sure all legs are tightened. Turn knobs clockwise to tighen, counter-clockwise to loosen. Check the bubble level to ensure the tripod is straight, and adjust the appropriate legs to level. Normally, the camera should be placed at eye level with the subject. 2. - Page 12 All camera/tripod moves should be done slowly and deliberately, with a consistent speed throughout the move. Make sure the camera’s OIS (Optical Image Stabilization) button is turned off when shooting from a tripod. Zoom controller Using the remote zoom controller will make it easier to do much smoother zooms than using the camera’s zoom rockers.
- Page 13 Composition Usually, scenes should begin with a wide shot to establish the setting. Then, cut in to a medium shot, then to close-ups for details. Wide Shot Medium Shot Medium Close Up Close Up Extreme Close Up Head Room Lead Room, Nose Room, Three Shot Two Shot Look Space or Talk Space...
- Page 14 Lighting Video requires lots of light. The more light you can provide on what you’re shooting, the better it will look and the easier it will be to shoot. Three-point lighting is a basic lighting approach to illuminate subjects with a sense of depth and texture. The following are the basic lights: 1.
- Page 15 Generally, a lighting ratio of 2 to 1 is desired. In other words, the key light should be twice as strong as the fill light. However, the best guide for proper lighting is what the picture looks like in the camera. Even if it’s not practical to set up three lights, consider using at least one light and bounce it off the ceiling for a natural, diffused look.
- Page 16 Removing SD cards 1. Make sure the camera is powered off. 2. Slide the <OPEN> lever of the card slot cover down to open the cover. 3. Press the center of the SD card and pull it out. Copying footage To back up your footage, you will create a Camera Archive of the SD card and save it to a hard drive.
- Page 17 & Don’t Best Practices for Shooting Video DON’t Be creative - think visually! Don’t trust a camera’s automatic settings to always be correct. Record more footage than you need. It’s better to have too much footage than Don’t shoot from too far away - get not enough.