Table of Contents
Advertisement
T his product is eligible for the AVCCAM
3 Year Warranty Repair Program. For
details, see page 4.
1
Volume
Note that Operating Instructions Vol.1 describes basic operations of
the Memory Card Camera-Recorder.
For instructions on advanced operations of the Memory Card
Camera-Recorder, refer to Operating Instructions Vol.2 (pdf file)
contained in the supplied CD-ROM.
Before operating this product, please read the instructions carefully and save this manual for
future use.
SS0911SI0 -YI
Printed in Japan
Operating Instructions
Memory Card Camera-Recorder
AG-AC120EN
Model No.
Vol.1
ENGLISH
VQT3U84 (E)
Advertisement
Table of Contents

Related Manuals for Panasonic AG-AC120EN


Summary of Contents for Panasonic AG-AC120EN
- Page 1 T his product is eligible for the AVCCAM 3 Year Warranty Repair Program. For Operating Instructions details, see page 4. Vol.1 Memory Card Camera-Recorder AG-AC120EN Model No. Volume Note that Operating Instructions Vol.1 describes basic operations of the Memory Card Camera-Recorder. For instructions on advanced operations of the Memory Card Camera-Recorder, refer to Operating Instructions Vol.2 (pdf file) contained in the supplied CD-ROM.
-
Page 2: Read This First
Read this first! indicates safety information. WARNING: CAUTION: • To reduce the risk of fire or electric shock, do not expose Danger of explosion or fire if battery is incorrectly replaced this equipment to rain or moisture. or mistreated. • To reduce the risk of fire or electric shock hazard, keep •... - Page 3 indicates safety information. Caution for AC Mains Lead AC adaptor (Battery charger) FOR YOUR SAFETY PLEASE READ THE FOLLOWING TEXT CAREFULLY. This product is equipped with 2 types of AC mains cable, Type C and Type BF. Appropriate mains cable must be used in each local area, since the other type of mains cable is not suitable. TYPE C TYPE BF EMC NOTICE FOR THE PURCHASER/USER OF THE APPARATUS 1.
- Page 4 Details about user registration and the extended warranty: Please note, this is a site that is not maintained by Panasonic Canada Inc. The Panasonic Canada Inc. privacy policy does not apply and is not applicable in relation to any information submitted. This link is provided to you for convenience.
- Page 5 • The SDHC logo and SDXC logo are trademarks of SD-3C, LLC. • “AVCHD” and the “AVCHD” logo are trademarks of Panasonic Corporation and Sony Corporation. • The “DV” is a registered trademark. • Manufactured under license from Dolby Laboratories. Dolby and the double-D symbol are trademarks of Dolby Laboratories. • HDMI, the HDMI logo, and High-Definition Multimedia Interface are trademarks or registered trademarks of HDMI Licensing LLC. ® ® ® • Microsoft , Windows , and Windows Vista are either registered trademarks or trademarks of Microsoft Corporation in the United States and/or other countries. • Screenshots are used in accordance with Microsoft Corporation guidelines. • IBM and PC/AT are registered trademarks of International Business Machines Corporation. ® • Intel is a registered trademark or a trademark of Intel Corporation in the United States and/or other countries. ® ® ® • Apple , Macintosh , and Mac OS are trademarks or registered trademarks of Apple Inc. in the United States and/or other countries. • Other model names, company names, and product names listed in these operating instructions are trademarks or registered trademarks of their respective companies.
-
Page 6: How To Use The Camera
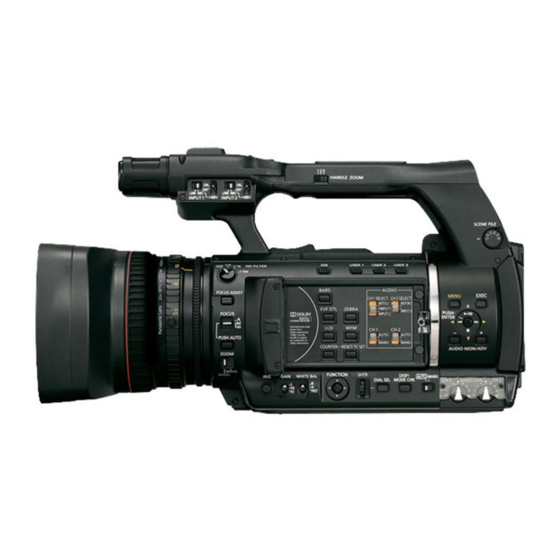
How to use the camera This camera is equipped with a 1/3, 2.2 mega pixel 3MOS sensor and an optical 22X cam-type zoom lens. It supports simultaneous and relay recording using two memory card slots. In addition, it is a hand-held camera-recorder that supports commercial HD mode (AVCHD)/SD mode (DV) recording. • In this document, “HD mode” is referred to as “AVCHD mode” and “SD mode” is referred to as “DV mode”. Video equipment/television/monitor DV tape equipment/memory card camera-recorder/computer, etc. HDMI cable (can only be used in AVCHD mode) Data can be transferred for backup/dubbing/editing. Video pin cable IEEE1394 (DV) cable (can only be used in DV mode) Computer Audio pin cable... -
Page 7: Table Of Contents
Contents Volume 1 (This Book) Menu Read this first! ..........2 How to use the camera ........6 Setup menu structure ........27 Please read before use ........9 <CAMERA> mode menu ......27 Compatible memory card for this camera ..9 Playback <PB> mode menu ......29 (SD speed class 4) ..... 10 (SD speed class 6) ..... 10 Reference Operating precautions ......... - Page 8 Volume 2 (CD) Shooting Editing Using the LCD monitor Connecting external devices Tally lamp Nonlinear editing Basic shooting operations How to handle data recorded on the Using the zoom function memory card Shooting in manual mode Dubbing Shooting in 1080i/576i progressive mode Using convenient shooting functions Displays Using special functions for recording...
-
Page 9: Please Read Before Use
Please read before use Compatible memory card for this camera „ Shooting in AVCHD mode Speed class 4 or above is required for recording in PH mode/HA mode. Speed class 2 or above is required for recording in PM mode/HE mode. It is recommended that you use the following Panasonic memory cards. (As of September, 2011) „ Shooting in DV mode Speed class 6 or above memory cards are required. It is recommended that you use the following Panasonic memory cards. (As of September, 2011) Saving/reading user Memory card Storage AVCHD files and scene files type capacity shooting/playback shooting/playback and reading metadata... -
Page 10: (Sd Speed Class 4)
(SD speed class 4) This refers to a class 4 speed standard (SD speed class) for the continuous writing of data between SD compatible devices and memory cards as designated by the SD standard. When the use of an SD speed class 4 memory card is recommended for SD-compatible products, this indicates that stable recording operation can be achieved by using memory cards of class 4 and above. (SD speed class 6) This refers to a class 6 speed standard (SD speed class) for the continuous writing of data between SD compatible devices and memory cards as designated by the SD standard. When the use of an SD speed class 6 memory card is recommended for SD-compatible products, this indicates that stable recording operation can be achieved by using memory cards of class 6 and above. UHS-I compatibility • UHS-I (Ultra High Speed I) is speed standard for SD memory card. You can use a UHS-I memory card, which performs as an SD speed class 10 memory card on this camera. Reminders for handling • Do not allow dirt, water, or other substances to come into contact with the terminal on the back of the memory card. • Do not leave the memory card in the following places: - Direct sunlight or places of high temperature, such as near heating equipment - Humid and dusty locations - Locations with high variations in temperature (where condensation occurs) - Locations that are subject to static electricity and electromagnetic waves • Store memory cards in bags or cases after use. -
Page 11: Operating Precautions
Operating precautions When using the camera in the rain, snow, or at AC adaptor (battery charger) and battery the beach, do not allow water to get into it. • If the <CHARGE> lamp continues to flash even when the battery temperature is normal, the • Doing so will cause damage to the camera and battery or AC adaptor (battery charger) might be the memory card. (This may result in irreparable damage.) damaged. Contact your dealer. • The battery takes longer to charge when it is Keep the camera away from devices (such warm. - Page 12 Make sure to remove the battery after use. Liquid crystal displays • Images or characters can linger on the screen of Completely remove the battery from the camera. the LCD if they are left displayed for a long time, (Even if you turn the camera off, leaving the but you can fix this by leaving the camera off for battery attached still consumes a small amount of electricity.) The battery will over-discharge if you several hours. leave it in the camera for long periods of time and • The LCD monitor is managed with high precision may become impossible to recharge. to ensure that 99.99% of the pixels are effective Do not remove the battery when the POWER leaving only 0.01% of pixels that are either dead switch is ON. or remain on all the time. This is normal and will Turn the POWER switch OFF and make sure that have no effect on recorded images. the mode lamp is completely off before removing • Dew may form on the LCD monitor if you use the battery. the camera in locations of intensely varying temperatures. Wipe it dry with a soft, dry cloth. Protect the battery terminals. •...
-
Page 13: Before Use
Before use Before using the camera Always take trial shots • When shooting important events (such as weddings), make sure to take trial shots to confirm that sound and image are being properly recorded before actual shooting. Be sure to check and set the calendar and time zone • These settings affect the control and playback sequence of recorded contents. Check and set the calendar and time zone before shooting. (Page 25) There are no guarantees for recorded content • In the unlikely event that content that was not recorded due to a malfunction in the camera or the memory card in use, please understand that no compensation can be provided. Copyrights • Copyright laws forbid the use of video and audio material that you recorded for any purpose other than your own personal enjoyment. - Page 14 • W hen using another device, ensure that it supports SDHC/SDXC memory cards. Compatibility of video recorded in AVCHD mode • Recorded video cannot be used with non-AVCHD-compatible equipment. • Playback may not always be possible on all AVCHD-compatible equipment. In such instances, play your video using this camera. Compatibility of video recorded in DV mode • When playing back memory cards recorded using the DV mode of the camera in Panasonic AG-HMC80 series - [ ] is displayed on the clip on the thumbnail screen. - The playback will be images only. Audio is not played back. - You cannot delete or repair a recorded clip, or add or remove a shot mark. • When playing back a memory card recorded using a camera in Panasonic AG-HMC80 series on this camera - [ ] is displayed on the clip on the thumbnail screen.
-
Page 15: Accessories
Accessories AC adaptor (Battery charger)/ AC power supply cables Microphone holder DC cord (Page 61 of Vol.2) TYPE BF TYPE C Microphone holder screws Microphone holder adaptor CD-ROM (Page 61 of Vol.2) (Page 61 of Vol.2) Length 6 mm (2 pieces) Length 12 mm (2 pieces) - Operating Instructions (PDF) - AVCCAM Restorer Software... -
Page 16: Description Of Parts
Description of parts Description of parts Left side BARS AUDIO CH1 SELECT CH2 SELECT INT(L) INT(R) EVF DTL ZEBRA INPUT1 INPUT2 INPUT2 AUTO AUTO 21 22 25 26 MANU MANU COUNTER-RESET/TC SET 1 Built-in microphone (Page 35 of Vol.2) 22 IRIS ring (Page 17 of Vol.2) 2 INPUT1 switch (MIC POWER + 48V) (Page 36 23 IRIS button (Page 17 of Vol.2) of Vol.2) -
Page 17: Top And Right Side
Top and right side 14 15 1 VIDEO OUT (TC PRESET IN/OUT) terminal (Page 64 of Vol.2) 2 AUDIO OUT CH1/CH2 terminal (Page 64 of Vol.2) 3 Mode lamp (Page 23) 4 POWER/MODE switch (Page 23) 5 Lock release button (Page 23) 6 START/STOP button (Page 9 of Vol.2) 7 Protective caps Keep protective caps fitted over connecting... -
Page 18: Front Side And Rear Side
Front side and rear side 11 12 13 1 Natural light sensor (Page 20 of Vol.2) 17 CAM REMOTE jack* FOCUS/IRIS (3.5 mm mini jack) 2 Tally lamp (front) (Page 7 of Vol.2) You can connect a remote control unit (optional) 3 Built-in speaker (Page 60 of Vol.2) to control the FOCUS and IRIS operations. -
Page 19: Recharging The Battery
• This serves only as a guide as available recording „ Charging lamp times may vary according to usage conditions. • Charging times are based on the time to charge ON: Charging batteries from an empty state. OFF: Charging complete Flashing: See below „ Remaining battery capacity display „ If the charging lamp is flashing When using Panasonic batteries that are compatible with this product, the remaining battery Confirm that there is no dirt, dust, or foreign capacity is displayed in minutes. substances attached to the connectors of the ] 1h30m battery or the AC adaptor and ensure that the The time remaining (as shown previously) is adaptor has been connected correctly. displayed after a brief pause. • If there is dirt, dust, or foreign substances on the • As battery capacity decreases, the display will connectors, disconnect the power plug from the change as follows: [ ][... -
Page 20: Power Sources
• The remaining battery capacity may not be • This is not displayed when using the AC adaptor. displayed correctly when the battery is used in • The battery and the camera itself becomes hot high or low temperatures, or when the battery while it is being used or charged. has not been used for a long period of time. To • Available recording time is reduced if you ensure that the remaining battery capacity is repeatedly start and stop recording. displayed correctly, use the battery completely • The battery takes longer to charge when it is from a fully-charged state and charge it again. warm. (Remaining battery capacity may still not be • Using the AC adaptor near radios may distort displayed correctly if the battery has been used their sound. Keep the AC adaptor 1 meter or for long periods in high or low temperatures, more away from radios. or if the battery has already been recharged • The AC adaptor may make some noise when numerous times.) in use, but this is normal. • This only serves as a guide as remaining battery • The battery cannot be recharged when a DC capacity display times may vary according to cord is connected to the AC adaptor. usage conditions. • The remaining battery capacity display will momentarily disappear when switching between modes, when conducting REC CHECK operations, or when changing the LCD brightness... -
Page 21: Using The Ac Adaptor
Using the AC adaptor Installation Removal Connect the DC cord to the AC adaptor. Turn the POWER/MODE switch <OFF> (Page 23), and confirm that the mode lamp is off. Plug the AC cord into the power outlet. Remove the DC cord’s battery connector Insert the DC cord’s battery connector until while pressing the battery release button. -
Page 22: Attaching/Removing The Lens Hood
Attaching/removing the lens hood Removing the lens hood Attaching the lens hood • Turn the lens hood counterclockwise to remove • Attach the lens hood to the camera with the lens hood guide facing up and aligned to the center of the camera. • Turn the lens hood clockwise until it clicks and locks into place. Center of the camera The side with lens hood guide Attaching/removing the lens cap Removing the lens cap • Pinch the lens cap to remove it. Attaching the lens cap •... -
Page 23: Turning The Camera On/Off
Turning the camera ON/OFF Turning on the power: Turn the POWER/MODE switch up to the <ON> position while pressing the lock release button. The mode lamp <CAMERA> lights up in red and the camera goes to recording standby status (<CAMERA> mode). • If the POWER/MODE switch is turned up to the <MODE> position, the mode lamp <PB> will light up in green and the camera goes to <PB> mode. (Page 48 of Vol.2) • Every time the switch is turned to the <MODE> position, the mode will change between Mode lamp <CAMERA> mode and <PB> mode. POWER/MODE switch Turning off the power: Turn the POWER/MODE switch up to the <OFF> position while pressing the lock release button. The mode lamp <CAMERA>/<PB> goes off. Lock release button Switching to AVCHD mode/DV mode Turn the camera’s POWER/MODE switch <ON>. -
Page 24: Setup Menu Basic Operations
Setup menu basic operations You can change camera settings using the setup Tilt the OPERATION lever in the < >< > directions to move the yellow cursor to the menu according to the shooting scene and recording details. function you wish to set. Press the OPERATION lever (or tilt it in the < > direction) to display the setting items. <MENU>... -
Page 25: Initializing The Setup Menu
To initialize user files (all items other than Repeat steps to change other items. scene files) Press the <MENU> button to complete settings By selecting [INIT] in the [LOAD/SAVE/INIT] item and return to the normal screen. of the [USER FILE] screen, you can restore the • In some menus, tilting the OPERATION current user file menu setting to its factory setting. lever in the < > direction or pushing the OPERATION lever changes the setting value To initialize scene files and returns the previous menu. Among the six scene files, select the file you wish to initialize using the <SCENE FILE> dial. Then Repeat steps to change other by selecting [INIT] in the [LOAD/SAVE/INIT] item functions. of the [SCENE FILE] screen, you can restore the Press the <MENU> button to complete settings setting value of only the selected scene file to its... - Page 26 Since pressing the OPERATION lever Repeat steps to set the remaining will display the settings screen, tilt the items. OPERATION lever in the < >< > directions to set the time difference from Greenwich Mean Time, then press the OPERATION lever again.
-
Page 27: Menu
Menu Setup menu structure <CAMERA> mode menu CAMERA MENU SCENE FILE LOAD/SAVE/INIT (Page 77 of Vol.2) SYNC SCAN TYPE SYNCHRO SCAN SW MODE FUNCTION KNOB DETAIL LEVEL (Page 80 of Vol.2) LOW GAIN V DETAIL LEVEL MID GAIN DETAIL CORING HIGH GAIN CHROMA LEVEL SUPER GAIN CHROMA PHASE COLOR TEMP Ach MF ASSIST COLOR TEMP Bch HANDLE ZOOM MASTER PED USER1 A.IRIS LEVEL USER2 USER3 DRS EFFECT WFM GAMMA KNEE FACE FRAMING MATRIX SKIN TONE DTL CARD READ CARD WRITE... - Page 28 DISPLAY SETUP ZEBRA DETECT1 (Page 87 of Vol.2) ZEBRA DETECT2 Y GET MARKER SAFETY ZONE CARD FUNCTIONS CARD FORMAT CENTER MARKER (Page 89 of Vol.2) CARD STATUS FOCUS BAR IRIS METER REC COUNTER VIDEO OUT OSD USER FILE CARD READ DATE/TIME (Page 89 of Vol.2) CARD WRITE DATE FORMAT LOAD/SAVE/INIT LEVEL METER ZOOM&FOCUS CARD&BATTERY OTHER DISPLAY LCD SET META DATA CARD READ LCD BACKLIGHT (Page 90 of Vol.2) RECORD SELF SHOOT USER CLIP NAME META DATA PROP CLIP COUNTER RST META INIT SET OTHER FUNCTIONS DV CONTROL (Page 90 of Vol.2) DV CMD SEL TALLY LAMP CLOCK SET...
-
Page 29: Playback
Playback <PB> mode menu PB MENU PLAY SETUP PB FORMAT (Page 92 of Vol.2) REPEAT PLAY RESUME PLAY THUMBNAIL THUMBNAIL MODE SKIP MODE (Page 93 of Vol.2) INDICATOR DATA DISPLAY DATE FORMAT OPERATION DELETE (Page 93 of Vol.2) INDEX CLIP PROTECT REPAIR SW MODE USER1 (Page 80 of Vol.2) USER2 USER3 AV OUT SETUP HDMI OUT SEL (Page 86 of Vol.2) DOWNCON MODE AUDIO OUT VIDEO OUT OSD DATE/TIME DATE FORMAT LEVEL METER CARD&BATTERY OTHER DISPLAY LCD SET DISPLAY SETUP LCD BACKLIGHT (Page 87 of Vol.2)Mode Menu -
Page 30: Reference
Reference Specifications General Digital zoom 2X/5X/10X * Assigned to the USER button (ratio is changed Supply voltage every time the button is pressed) DC 7.2 V (when the battery is used)/ Minimum subject illumination DC 7.3 V (when the AC adaptor is used) 0.3 lx (F1.6, gain +30 dB, shutter speed 1/25 Power consumption seconds) Recording: 11.4 W Lens hood Wide field large lens hood indicates safety items. Shutter speed Preset Ambient operating temperature 50i/50P mode: 0°C - 40°C 1/50, 1/60, 1/120, 1/250, 1/500, 1/1000, Ambient operating humidity 1/2000 seconds 10% to 80% (no condensation) 25P mode: Weight 1/25, 1/50, 1/60, 1/120, 1/250, 1/500, Approx. 2.3 kg (excluding the battery and 1/1000, 1/2000 seconds... -
Page 31: Audio Input
Audio recording playback Recording format (recording mode and resolution) PH 1080/50i „ AVCHD mode PH 1080/25P Compression formats PH 720/50P Recording/Playback: PH 720/25P Dolby Digital/2 ch PM 720/50P Sampling frequency HA 1080/50i 48 kHz HE 1080/50i Encoding Transmission rate 16 bit PH mode: Approx. 21 Mbps (VBR) Compressed bit rate PM mode: Approx. 8 Mbps (VBR) HA mode: Approx. 17 Mbps (VBR) PH mode: 384 kbps HE mode: Approx. 6 Mbps (VBR) PM/HA/HE mode: 256 kbps Interval recording „... - Page 32 Other terminals AC adaptor Camera remote terminal Power Source: 2.5 mm diameter, super mini jack x 1 (ZOOM S/S) 110 V - 240 V AC, 50 Hz/60 Hz 3.5 mm diameter, mini jack x 1 (FOCUS/IRIS) INDEX remote terminal 22 W Power Output: 2.5 mm diameter, super mini jack x 1 TC PRESET IN/OUT terminal 7.3 V DC, 1.75 A (Camera-recorder) 8.4 V DC, 1.3 A (Charge) VIDEO OUT terminal dual-purpose IN: 1.0 V - 4.0 V [p-p], 10 kΩ indicates safety items. OUT: 2.0 V±0.5 V [p-p], low impedance USB2.0 terminal Weight Memory card reader/writer function (without Approx. 140 g copyright protection) Dimensions (W x H x D) Type mini B connector (USB2.0 compliant) DV OUT terminal (DV mode only) 103 mm x 36 mm x 62 mm...