Weider PRO 125 User Manual
Weider user's manual weight bench pro 125
Hide thumbs
Also See for PRO 125:
- User manual (8 pages) ,
- Manuel de l'utilisateur (15 pages) ,
- Bedienungsanleitung (15 pages)
Table of Contents
Advertisement
Model No. 831.150462
Serial No.
Write the serial number in the space
above for reference.
Serial Number Decal (under seat)
SEARS, ROEBUCK AND CO.,
HOFFMAN ESTATES, IL
60179
PATENT PENDING
CAUTION
Read all precautions and instruc-
tions in this manual before using
this equipment. Save this manual
for future reference.
USER'S MANUAL
www.weiderfitness.com
new products, prizes,
fitness tips, and much more!
Visit our website at
Advertisement
Table of Contents

Related Manuals for Weider PRO 125


Summary of Contents for Weider PRO 125
- Page 1 Model No. 831.150462 Serial No. Write the serial number in the space above for reference. Serial Number Decal (under seat) SEARS, ROEBUCK AND CO., HOFFMAN ESTATES, IL 60179 PATENT PENDING CAUTION Read all precautions and instruc- tions in this manual before using this equipment.
-
Page 2: Table Of Contents
Table of Contents Warning Decal Placement ..............2 Important Precautions . -
Page 3: Important Precautions
Important Precautions WARNING: To reduce the risk of serious injury, read the following important precautions before using the weight bench. 1. Read all instructions in this manual before using the weight bench. 2. Use the weight bench only as described in this manual. -
Page 4: Before You Begin
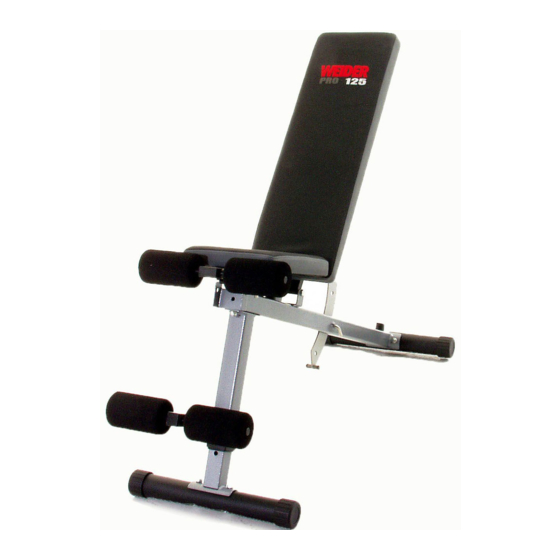
The model number is 831.150462. The serial number can be found on a decal attached to the WEIDER PRO 125 Weight Bench (see the front cover of this manual). Before reading further, please review the drawing below and familiarize yourself with the parts that are labeled. -
Page 5: Assembly
Assembly Before beginning assembly, carefully read the following information and instructions: Make Things Easier for Yourself! Everything in this manual is designed to ensure that the assembly of our products can be complet- ed successfully by anyone. However, it is impor- tant to recognize that your new equipment is a sophisticated product with many small parts and consequently, the assembly process will take time. - Page 6 2. Push two M10 x 70mm Bolts (19) through the holes in the Support Plate (27) and then through the indicated holes in the Main Frame (1). Slide the bracket on the Leg (6) onto the two M10 x 70mm Bolts (19) and secure it with two M10 Nylon Locknuts (18).
- Page 7 5. Attach a 30mm x 25mm Bumper (26) to the indicated hole in the Main Frame (1) with a Bumper Screw (25). Press a 25mm x 50mm Inner Cap (14) into the end of the Backrest Frame (4). Place the Backrest Frame (4) onto the Main Frame (1) and line up the welded tube on the Backrest Frame with the bracket on the Main Frame.
- Page 8 8. Attach a 30mm x 25mm Bumper (26) to the indicated hole in the Main Frame (1) with a Bumper Screw (25). Press a 25mm x 50mm Inner Cap (14) into each end of the Seat Frame (5). Important: The Seat Frame (5) has two welded tubes.
-
Page 9: Adjusting The Weight Bench
Adjusting the Weight Bench This section explains how to adjust the weight bench. See the EXERCISE GUIDELINES on page 10 for impor- tant information on how to get the most benefit from your exercise program. Also, refer to the accompanying exercise poster to see the correct form for each exercise. -
Page 10: Exercise Guidelines
Exercise Guidelines THE FOUR BASIC TYPES OF WORKOUTS Muscle Building The only way to increase the size and strength of your muscles is to push them close to their maximum capacity. When you progressively increase the intensi- ty of your exercise, your muscles will continually adapt and grow. -
Page 11: Muscle Chart
You should rest for a short period of time after each set. The ideal resting periods are: • Rest three minutes after each set for a muscle build- ing workout • Rest one minute after each set for a toning workout •... - Page 12 Part Identification Chart—Model No. 831.150462 R0200A M10 x 70mm Bolt (19)-2 M10 Nylon Locknut (18)-9 M10 x 72mm Carriage Bolt (21)-4 Bumper Screw (25)-2 M10 x 80mm Bolt (17)-1 M6 x 16mm Screw (15)-8 M10 x 85mm Bolt (29)-1 M10 x 95mm Bolt (20)-1...
- Page 13 Part List—Model No. 831.150462 Key No. Qty. Description Main Frame Stabilizer Plastic Spacer Backrest Frame Seat Frame Adjustment Leg Backrest Seat 60mm Round Endcap Foam Pad Long Pad Tube 19mm Round Inner Cap 25mm x 50mm Inner Cap M6 x 16mm Screw Locking Pin M10 x 80mm Bolt Note: “#”...
- Page 14 Exploded Drawing—Model No. 831.150462 R0200A...
-
Page 15: Ordering Replacement Parts
This warranty gives you specific legal rights, and you may also have other rights which vary from state to state. SEARS, ROEBUCK AND CO., DEPT. 817WA, HOFFMAN ESTATES, IL 60179 WEIDER is a registered trademark of ICON Health & Fitness, Inc. Part No. 158270 J02118-C R0200A The model number and serial number of your WEIDER Weight Bench are listed on a decal attached to the frame.