Table of Contents
Advertisement
Advertisement
Table of Contents

Related Manuals for Kurzweil MP15


Summary of Contents for Kurzweil MP15
-
Page 5: Table Of Contents
Contents ..........Chapter 1 Front Panel Chapter 9 Recording Main Buttons ......Recording a Performance ....... Chapter 2 Main Features ..... Chapter 10 Demo Songs Main Features ......Listening to Demo Songs ........Chapter 11 Pedals ....Chapter 3 Piano Assembly 1. -
Page 6: Chapter 1 Front Panel
Chapter 1 Main Buttons (1) Voice selection buttons Select among the 128 Voices and 64 Setups with the [Voices/Setup] button. Select Banks, Groups, and individual sounds with the 16 Sound Select buttons. (2) Rhythm button Select among the 60 rhythms with the [Rhythm] button. Select groups and individual rhythms with the 16 Sound Select buttons. -
Page 7: Chapter 2 Main Features
Chapter 2 Thank you for purchasing the KURZWEIL's Digital Piano. We recommend that you read this manual carefully so that you can fully take advantage of the advanced and convenient functions of the KURZWEIL's Digital Piano. Main Features ■ 88 note fully weighted hammer action keyboard ■... - Page 8 Chapter 3 Check that all of the following items are present. Part Name Q ' t y Part Name Q ' t y ① ⑥ Keyboard Screws for side panel and keyboard 1 EA ② ⑦ Side panel of stand (Left) Screws for side panel and pedal box 1 EA 4 EA...
-
Page 9: Chapter 3 Piano Assembly
Chapter 3 - Assembly should be carried out by at least two persons. - Assemble the stand on a hard and flat floor with ample space. - Be sure to use the included screws, and insert screws of the correct size in the correct hole locations. - Page 10 Insert the pedal cord plug to the pedal jack from the rear. 1. Place the keyboard on the stand and fit into the holes in the side panel brackets. 2. Fasten the keyboard to the side panel using screws 3. Fasten the keyboard to the front legs using screws 4.
- Page 11 Power 1) Connecting the power code First insert the plug of the AC power cord into the AC connector on the Adaptor, then plug the other end of the cord into the proper AC outlet on the wall. In some areas a plug ada- ptor may be provided to match the pin configuration of the AC wall outlets in your area.
-
Page 12: Chapter 4 Selecting Sounds
Chapter 4 Group Buttons Sound Buttons In addition to the wonderfully realistic piano sounds, you can select and play other instrument sounds, such as organ or string instruments. To select sounds, one of the two Bank LEDs should be lit, the Rhythm LED should NOT be lit, and the [Voices/Setup] button should not be lit. - Page 13 Group Buttons Sound Buttons Setup mode allows you to select and play setups. Setups are configurations of up to four zones, each of which may have its own sound program and controller assignments. Pressing the [Setup] button will take you into Setup mode. The button's LED will be illuminated green when you are in setup mode.
-
Page 14: Chapter 5 Layering
Layering Chapter 5 This function lets you layer and play two different sounds at the same time. You can layer voices of two different voices in the same category, and create a composite voice of greater richness and texture. First, select a sound for the Main (Primary) sound and press the [Layer] button. A message will appear on the LCD display. -
Page 15: Chapter 6 Splitting
Splitting Chapter 6 Split mode enables you to play two different voices on the keyboard - one with the left hand another with the right hand. For example, you can play a bass part using the Bass voice with the left hand and a melody voice with the right hand. First, select a main (Primary, right hand side) sound and press the [Split] button. -
Page 16: Chapter 7 Rhythm
Rhythm Chapter 7 This instrument features a variety of rhythmic backing patterns (called "rhythms") in a variety of different musical genres including pop, jazz and many others. Group Buttons Sound Buttons Pressing the [Rhythm] button performs the Rhythm function. The Rhythm LED will lit, indicating that the instrument is in Rhythm mode. - Page 17 Function s Chapter 8 1) Rhythm Tempo 2) Rhythm Volume 3) Metronome 4) Demo Repeat 5) Tune 6) Touch Sensitivity 7) FxReverb 8) Channel Enable Destination Bank Select Program Change System Exclusive ID 13) Hard Reset 14) Version Information RhyTe mp o : 120 Press the [Function] button to enter Function mode.
- Page 18 1) Press the [Function] button. 2) Press the [Func -] or [Func +] buttons to step through the parameter list. 3) You can change the parameter value when "RhyTempo:xxx" is on the LCD. 4) Pressing the [Next] or [Previous] button will select a new 'Rhythm Tempo' value. 5) Pressing both value buttons simultaneously will set this parameter to 120.
- Page 19 1) Press the [Function] button. To select the 'Demo Repeat' parameter, use the Func [+] or Func [-] button. You can change the parameter value when "Demo Repeat:xxx" is on the LCD. Pressing the [Next] or [Previous] button will select a new 'Demo Repeat' value. The default setting 'All' can be recalled by pressing both value buttons simultaneously.
- Page 20 The MIDI output velocity is directly proportional to the strike velocity. The highest possible MIDI velocity will be output from the fastest velocity that the physical keys can detect, and the lowest possible MIDI velocity will be output from the slowest velocity that the physical keys can detect.
- Page 21 For each of the 16 MIDI channels, you can set the Channel Enable parameter to either Enable or Disable. For each channel, setting this parameter to Enable enables the channel to transmit and receive MIDI messages and setting it to Disable disables such functions. 1) Press the [Function] button.
- Page 22 If you do have multiple MP15 pianos receiving SysEx messages from a single source, make sure each MP15 has a different SysEx ID. This will allow you to direct SysEx messages to the appro- priate MP15 by specifying which unit with the SysEx ID byte that's included with every SysEx.
- Page 23 C o n f i r m ? Fast Hard Reset : While holding down the [Function] button about 2 s econd, i t pe rfo rms Ha rd R e se t di rectly witho ut th e con f irmation step. 1) Press the [Function] button.
-
Page 24: Chapter 9 Recording
Recording Chapter 9 Recorded performances are saved to in the instrument. Since you can record up to two parts separately, you could record the left and right hand parts independently, or record both parts of a duet and hear how they sound when played back. You can also re-record only one part in case your performance was not satisfactory, or even change the instrument sound. -
Page 25: Chapter 10 Demo Songs
Demo Songs Chapter 10 1) Press the [Demo] button to enter the demo mode. To select a demo song, press the [Next (+)] or [Previous(-)] value button. (Refer to the demo song list on page 35) 3) Press the [Play/Stop] button to start playback. -
Page 26: Chapter 11 Pedals
Pedals Chapter 11 This piano has three foot pedals : damper pedal (right), sostenuto pedal (center) and soft pedal (left) that produce a range of expressive effects similar to those produced by the pedals on an acoustic piano. Sostenuto Sustain Soft 1) Sustain pedal The sustain pedal functions in the same way as a damper... -
Page 27: Chapter 12 Midi
MIDI data that can be transmitted or received varies depending on the type of MIDI device. Please check the "MIDI implementation chart" (See page 29) to find out what MIDI data and commands your MP15 can transmit or receive. MIDI... - Page 28 (1) as the controller or (2) be the last module in the MIDI chain. This is because MP15 does not include a Thru MIDI port, this simply means that your piano must be at the start or at the end of the MIDI chain.
- Page 29 Manufacturer: Version 1.0 MIDI...
-
Page 30: Chapter 13 Connection
Chapter 13 Connect a pair of headphones to one of the phones jacks. Two phones jacks are provided. You can connect two sets of standard stereo headphones. (If you are using one pair head- phones, you can plug them into either of these jacks). Bottom surface CAUTION Do not use headphones at a high volume... -
Page 31: Chapter 14 Sound List
Sound List Chapter 14 Name Name Group Sound Group Sound BAN K 1 B A N K 2 Standard Grand Soli d K i t Studio Grand La ti n Ki t Horowizt G rand Electric Kit Piano & Pad Br ush K i t Drum Piano... - Page 32 Setup & Rhythm List Chapter 15 Name Name Group Sound Group Sound BrightPno/Slap Comper2/SynBs BrightPno/Jaco Vibes/Up Bass JazzPno/UpBass Mbira/GlkHarp PadPno/Levin Steel/Marimba PnoStrng/Upbass CagePerc/Glck P h ode s/ E Ba ss Mbira/NatPerc S Tr amp /E Ba ss Magic/CagePerc FM EP/E Bass Silver/GlockHarp CP70/Levin WindsStr/Mini...
-
Page 33: Chapter 16 Demo Song List
Demo Song List Chapter 16 Demo Song List... -
Page 34: Chapter 17 Specifications
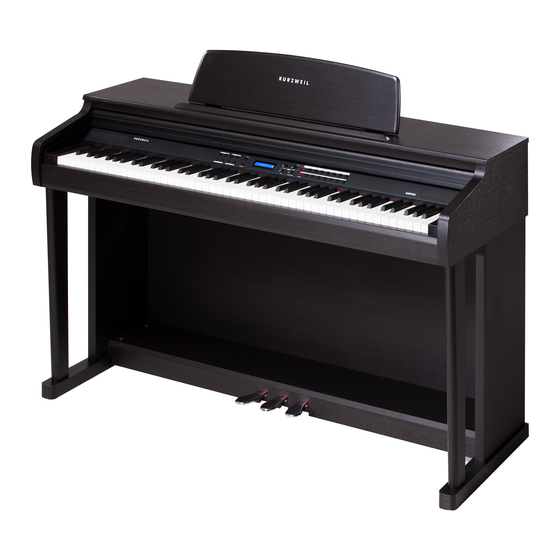
88 no te fu ll y wei gh te d h a mme r action (A0 ~ C8) Rosewood Fini sh Cabinet MDF and Metal Tone Gen. Kurzweil V.A.S.T Polyphony 64 Voices 1 2 8 Program s + 64 Set up s Voices 60 Patterns...