Table of Contents
Advertisement
Available languages
Available languages
Quick Links
Advertisement
Chapters
Table of Contents

Related Manuals for Fantec MM-HDRL


Summary of Contents for Fantec MM-HDRL
- Page 1 Multimedia Media Recorder & Player FANTEC MM-HDRL Bedienungsanleitung...
-
Page 2: Table Of Contents
Inhaltsverzeichnis 1. Einleitung ..........................4 1.1 Vorwort ......................4 1.2 mitgeliefertes Zubehör ..................5 1.3 Warnungen...................... 6 1.4 Anschluss des Gerätes ..................8 1.5 Erste Inbetriebnahme ..................13 2. Über den Player ........................14 2.1 Fernbedienung ....................14 2.2 Frontblende ....................19 2.3 Rückblende .................... - Page 3 8. Wiedergabeliste - Playlist ....................55 9. Dateien kopieren ........................56 10. NAS Function ........................58 11. Internet Radio hören ......................59 11.1 Sender auswählen ..................59 11.2 Genre ......................60 11.3 Favoriten ..................... 61 12. Firmware Updates einspielen ................... 62 13.
-
Page 4: Einleitung
1. Einleitung 1.1 Vorwort Sehr geehrter Kunde, vielen Dank für den Kauf dieses neuen Home Cinema Centers. Im digitalen Zeitalter wird Ihnen dieses Gerät ein exzellenter Partner für das Home Entertainment sein. Mit seinen herausragend gestalteten Funktionen können Sie Filme und Musik genießen, sich Fotos ansehen und ihre Lieblings-TV-Sendung oder ihren Lieblingsspielfilm aufnehmen, damit Sie diese nicht verpassen, falls Sie einmal nicht zu Hause sind. -
Page 5: Mitgeliefertes Zubehör
1.2 mitgeliefertes Zubehör Menge Player A/V Kabel Y/Pb/Pr Ausgangskabel SCART-IN Adapter USB Kabel Fernbedienung Batterien für die Fernbedienung AC/DC Netzteil Netzkabel Bedienungsanleitung Treiber CD Garantieschein Hinweis: Der aktuelle Verpackungsinhalt könnte von dieser Liste abweichen. DE 5 / 214... -
Page 6: Warnungen
1.3 Warnungen Beim Design und der Herstellung dieses Players wurde an ihre Sicherheit gedacht. Um mit dem Player sicher und effizient arbeiten zu können, lesen Sie sich bitte die folgenden Hinweise sorgsam durch, bevor Sie ihn benutzen. 1.3.1 Benutzungshinweis Sie sollten den Player nicht verändern. Wenn handelsübliche Festplatten eingesetzt werden, sollte die Umgebungstemperatur zwischen +5°... - Page 7 - Ein physischer Aufprall kann Sektoren auf der Festplatte beschädigen. Sie können CHKDSK benutzen, um dieses Problem zu beheben. - Alle Daten können durch einen physischen Aufprall, einen Stromschlag, einen Stromausfall oder durch ein Formatieren der Festplatte verloren gehen. Bitte sichern Sie deshalb ihre Daten.
-
Page 8: Anschluss Des Gerätes
1.4 Anschluss des Gerätes 1.4.1 Verbinden mit dem Computer (1) Stellen Sie sicher, dass der Player eingeschaltet ist (2) Stecken Sie den Mini-Stecker des USB-Kabels in die Buchse des Players (3) Stecken Sie den großen USB-Stecker des Kabels in den USB-Port ihres Computers 1.4.2 Verbinden von Massenspeichergeräten* ( wie z.B. - Page 9 1.4.3 Verbindung mit dem Fernsehen 1. A/V Eingang (A/V IN Aufnahme Funktion) (1) Folgen Sie der Abbildung und stecken Sie die 3 farbigen Stecker in die A/V Eingangsbuchse des Players. (2) Folgen Sie der Abbildung und stecken Sie die 3 farbigen Stecker in die A/V OUT-Buchse ihrer TV/IPTV Set-Top Box (STB)/ Satelliten Receiver, usw..
- Page 10 3. Y/Pb/Pr Komponenten Ausgang (1) Stecken Sie die 3 farbigen Stecker in Y/Pb/Pr Buchse des Players. (2) Stecken Sie die 3 farbigen Stecker in die Y/Pb/Pr Buchse am Fernseher. Audioanschluss während Sie den Y/Pb/Pr Video Ausgang verwenden: Erste Möglichkeit: Nutzen Sie den Audioausgang der A/V Ausgangsbuchse. Zweite Möglichkeit: Nutzen Sie den Audioausgang der S/PDIF Coaxial oder optischen Buchse.
- Page 11 1.4.4 Verbinden digitaler Audiogeräte (1) Folgen Sie der Abbildung und stecken Sie den RCA-Stecker ihres Koaxialkabels in die S/PDIF Koaxialbuchse des Players. Wenn Sie ein Glasfaserkabel (nicht im Lieferumfang) verwenden, stecken Sie den Toslink-Stecker ihres Glasfaserkabels in die optische Buchse des Players.
- Page 12 1.4.6 Netzwerkverbindung Sie benötigen ein CAT5-, CAT5e- oder CAT6-Kabel (nicht im Lieferumfang) um das Gehäuse mit dem Netzwerk zu verbinden. (1) Verbinden Sie einen der beiden RJ45-Stecker des Netzwerkkabels mit der RJ45 Buchse ihres Players; (2) Verbinden Sie den RJ45-Stecker des Kabels mit der Buchse ihres Routers, Switches oder einer Netzwerkdose.
-
Page 13: Erste Inbetriebnahme
1.5 Erste Inbetriebnahme 1.5.1 Formatieren der Festplatte Benutzer, die das Gerät ohne eingebaute Festplatte erworben haben und die SATA-Festplatte selber einbauen wollen, finden weitere Hinweise unter ‘Formatieren der Festplatte’ in Kapitel ‘6.5 Systemeinstellungen’. 1.5.2 Fernbedienung Erste Benutzung der Fernbedienung Setzen Sie die Batterien wie in folgender Abbildung gezeigt ein: 1.5.3 An-/Ausschalten, Spracheinstellungen 1. -
Page 14: Über Den Player
2. Über den Player 2.1 Fernbedienung Alle Funktionen, die in diesem Handbuch beschrieben sind, können mittels der Fernbedienung durchgeführt werden. Beachten Sie die nachfolgenden Abbildungen um Details über die Funktionen der Tasten zu erfahren: 1. POWER/STANDBY 2. DISPLAY 3. MENU 4. - Page 15 Taste Funktion POWER/STANDBY Taste: Dient zum Ein- und Ausschalten des Gerätes. DISPLAY Taste: Drücken um den momentan Status anzuzeigen. Drücken Sie die Taste während der Wiedergabe und Informationen über die Titelnummer und die verstrichene/verbleibende Spieldauer werden angezeigt. Drücken Sie die Taste während der Aufnahme und die Einstellungen der Aufnahmequalität sowie die bisherige Aufnahmelänge werden angezeigt.
- Page 16 Wiedergabe der ersten nicht leeren Playlist. Wiederholtes Drücken öffnet die nächste Playlist. TV SYSTEM Taste: Drücken um zwischen den Fernsehnormen NTSC, PAL, 480P, 576P, 720P, and 1080I zu wechseln. BROWSER Taste: Drücken um Musik, Video und Foto Dateien auf der Festplatte, über USB und im Netzwerk zu suchen.
- Page 17 bereits begonnene fortzusetzen. Durch wiederholtes Drücken können Sie die Länge der Aufnahme bestimmen (OTR) (30 MIN. / 60 MIN. / 90 MIN. / 120 MIN. / 180 MIN. / 240 MIN. / aus). PLAY Taste: Drücken beginnt mit dem Abspielen des gewählten Titels TIMER Taste: Drücken öffnet das Menü...
- Page 18 FAST FORWARD Taste: Drücken um die Wiedergabe vorzuspulen. Mehrmaliges Drücken ändert die Geschwindigkeit. REPEAT 1/ALL Taste: Drücken um die Wiederholungseinstellungen zu ändern.. FAST REWIND Taste: Drücken um die Wiedergabe zurückzuspulen. Mehrmaliges Drücken ändert die Geschwindigkeit. CM SKIP Taste: Drücken um bei der Wiedergabe oder Aufnahme 30Sek.vorzuspringen.
-
Page 19: Frontblende
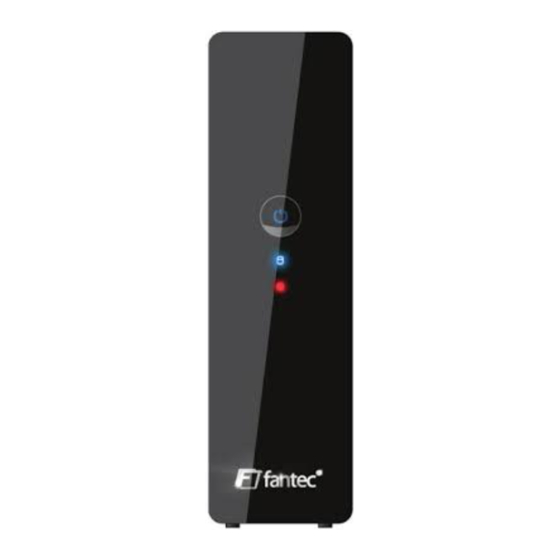
ZOOM Taste: Drücken zum Heran- oder Herauszoomen bei Videos und Bildern COPY Taste: Drücken um in das Kopiermenü zu gelangen. MUTE Taste: Drücken um den Ton auszuschalten. Nochmaliges Drücken schaltet den Ton wieder ein. SETUP Taste: Drücken um direkt in das Einstellungsmenü zu gelangen. 2.2 Frontblende 1 - Standby 2 - Festplattenstatus... -
Page 20: Rückblende
Nummer. Name Funktion Standby-Schalter Hiermit können Sie das Gerät in den Standby-Modus schalten und wieder aufwecken. Die integrierte LED zeigt den Status an. (Blau = Betrieb; Rot = Standby) Festplattenstatus LED Zeigt den Status der Festplatte an. Aufnahmestatus LED Zeigt an ob eine Aufnahme stattfindet 2.3 Rückblende 1. -
Page 21: Die Ersten Schritte
3. Die ersten Schritte Schalten Sie das System ein und nach einigen Sekunden erscheint das Hauptmenü. Um in dieses Menü zu einem späterem Zeitpunkt zurück zukehren, können Sie auch die -Taste auf der Fernbedienung drücken. Auswahl von Video IN – Live-Tv, Aufnahme & Time Shift Hier können Sie das aktuelle Videoeingangssignal sehen, welches das Gerät über den AV-Eingang empfängt. -
Page 22: Auswahl Internet Radio - Web Radio Hören
Drücken hierfür Sie die - Taste auf ihrer Fernbedienung oder Wählen Sie den Menü-Punkt Browser im Hauptmenü aus.. 3.4 Auswahl Internet Radio – Web Radio hören In diesem Menü können Sie Radiosender hören, die von ShoutCast.com frei angeboten werden. Andere Dienste als ShoutCast werden zur Zeit nicht angeboten. Wählen Sie den Menüpunkt Internet Radio im Hauptmenü, um zu dieser Funktion zu gelangen. -
Page 23: Das Titellistenmenü Für Aufgenommene Videos
4. Das Titellistenmenü für aufgenommene Videos Hier können Sie ihre aufgenommenen Titel wiedergeben. Weiterhin haben Sie hier die Möglichkeit die Titel zu zusammenzufügen, zu teilen, zu löschen, umzubenennen und zu bearbeiten. Um in den Wiedergabemodus zu gelangen drücken Sie die - Taste oder wählen Sie den Menüpunkt „Wiedergabe“... -
Page 24: Wiedergabe Von Titeln
4.2 Wiedergabe von Titeln Um einen aufgenommen Titel wiederzugeben, machen Sie bitte folgendes: 1. Drücken Sie auf der Fernbedienung um den Reiter „Abspielen“ auszuwählen. 2. Drücken Sie um den Titel auszuwählen, den Sie abspielen wollen. 3. Drücken Sie um die Aufnahme abzuspielen. 4. -
Page 25: Sortieren Von Dateien
4. Benutzen Sie die Navigationstasten um Zahlen und Buchstaben auszuwählen. Mit CAPS können Sie zwischen Groß- und Kleinschreibung wechseln. Drücken Sie <- um einen Buchstaben zu löschen. Mit -> können Sie ein Leerzeichen einfügen. Drücken Sie das angewählte Zeichen einzufügen. 5. -
Page 26: Titel Bearbeitungsmenü
Sortiert die Titel nach ihrer Aufnahmezeit Aufnahmezeit Titelname Sortiert die Titel alphabetisch nach ihrem Titelnamen Neue Titel Sortiert die Titel nach dem Datum der Aufnahme. Die neuesten Titel werden zuerst angezeigt.. 4.6 Titel Bearbeitungsmenü Drücken Sie um den Titel Edit. Reiter auszuwählen. Drücken Sie und das Menü... - Page 27 AB löschen Einen bestimmten Abschnitt aus dem Film entfernen (schneiden). Wählen Sie A Einstellen und drücken Sie den Startpunkt für den zu löschenden Abschnitt auszuwählen. Wählen Sie B Einstellen und drücken um das Ende des Abschnittes festzulegen. Drücken Sie Bestätigen und drücken Sie den Abschnitt zu löschen.
- Page 28 Titel verbinden Wählen Sie mindesten 2 Titel aus und fügen Sie diese zu einem zusammen. Wählen Sie Bestätigen um die Titel zusammenzufassen. Kapitelmarkierung Fügt eine Kapitelmarkierung zu dem ausgewählten Titel hinzufügen hinzu. Eine Kapitelmarkierung ist ein Markierungspunkt innerhalb eines Titels. Sie können zwischen den Markierungspunkten mit oder hin- und...
-
Page 29: Extras
Auf Media Partition Wählen Sie in der Titelliste durch Drücken von kopieren (nur oder aus, welchen Titel Sie von der FAT32) Aufnahme-Partition (UDF) auf die Media-Partition (FAT32) kopieren wollen. 4.7 Extras Drücken Sie um den Extras Reiter auszuwählen. . Drücken Sie und das Menü... -
Page 30: Zeitgesteuerte Aufnahme
5. Zeitgesteuerte Aufnahme Das Menü für die zeitgesteuerte Aufnahme erlaubt ihnen das Anlegen, Löschen und Bearbeiten von Aufzeichnungsterminen sowie den Status und den Verlauf anzusehen. Um in das Menü zu gelangen drücken Sie 5.1 Einen neuen Termin anlegen Drücken Sie um Bearbeiten auszuwählen. -
Page 31: Bearbeiten Eines Aufzeichnungstermins
5.2 Bearbeiten eines Aufzeichnungstermins Drücken Sie und wählen Sie den Bearbeiten Reiter aus. Wählen Sie den Aufzeichnungstermin den Sie bearbeiten und drücken Sie . Das Menü zum Bearbeiten des Aufzeichnungstermins erscheint. Bearbeiten Sie den Aufzeichnungstermin so wie in Kapitel 5.1 Einen neuen Aufzeichnungstermin erstellen beschrieben. -
Page 32: Anzeigen Des Termin Status
5.4 Anzeigen des Termin Status Drücken Sie wählen Sie den Status Reiter aus. Alle Aufzeichnungstermine werden angezeigt. Wählen Sie einen Termin aus und drücken Sie Wählen Sie Timer über Einstellungen aktivieren oder den ausgewählten Termin kurz anhalten. Drücken Sie zum Bestätigen. 5.5 Anzeigen des Aufnahmeverlaufes Drücken Sie und wählen Sie den Verlauf Reiter aus. -
Page 33: Einstellungen
6. Einstellungen Das Einstellungsmenü erlaubt ihnen Einstellung für die Sprache, Audio, Video, Aufnahme, Netzwerk und Systemeinstellungen vorzunehmen. Um in das Menü zu gelangen wählen Einstellungen im Hauptmenü oder drücken Sie auf der Fernbedienung. 6.1 Videoeinstellungen Drücken Sie und Wählen Sie den Video Reiter. Seitenverhältnis Auswählen um das Seitenverhältnis einzustellen. - Page 34 16:9: Das komplette Breitbild wird angezeigt. Wählen Sie dieses Format, wenn Sie einen 16:9 Fernseher angeschlossen haben. Auswählen um die Helligkeit zu ändern. Helligkeit Drücken Sie um die Helligkeit einzustellen. Sie bekommen eine Vorschau auf dem Fernseher angezeigt. Drücken Sie zum Bestätigen.
-
Page 35: Aufnahmeeinstellungen
TV System Auswählen um das TV Systems zu ändern. Drücken Sie um das TV System abhängig von den Einstellungen ihres Fernsehers zu ändern. Drücken Sie Bestätigen. 6.2 Aufnahmeeinstellungen Drücken Sie um den Aufnahme Reiter auszuwählen. Qualität Auswählen um die Voreinstellungen für die Aufnahmequalität zu ändern. - Page 36 unten immer geringer. Allerdings wird durch eine geringere Aufnahmequalität auch weniger Speicherplatz auf der Festplatte benötigt. Drücken Sie zum Bestätigen. Automatische Kapitel Auswählen, um in bestimmten Zeitabständen automatisch eine Kapitelmarkierung einzufügen. Drücken Sie um das Intervall für das Einfügen einer Kapitelmarkierung auszuwählen. Kapitelmarkierungen erlauben es ihnen, einfacher durch ihre Aufnahmen zu spulen.
-
Page 37: Netzwerk Einstellungen
Drücken Sie um entweder die Festplatte oder ein angeschlossenes USB-Gerät als Zwischenspeicher festzulegen. Drücken Sie zum Bestätigen. 6.3 Netzwerk Einstellungen Drücken Sie um den Netzwerk Reiter auszuwählen. Bevor Sie die Netzwerkfunktionen nutzen, überprüfen Sie bitte folgendes: 1) Schließen Sie das Gerät zuerst an das LAN oder WLAN an. 2) Aktivieren Sie das NETBios-Protokoll an ihrem PC. - Page 38 DHCP IP (AUTO) Die IP-Adresse wird automatisch festgelegt (Ein DHCP-Server sollte in ihrem Netzwerk vorhanden sein). Drücken Sie zum Bestätigen. FIX IP (MANUAL) Wählen um eine statische IP-Adresse zu verwenden. Die folgenden Angaben sind notwendig: IP-Addresse, Subnetzmaske Standardgateway. Für nähere Informationen zu den Einstellungen wenden Sie sich bitte an ihren Netzwerkadministrator.
- Page 39 Es erscheinen 2 Verbindungsmodi: Infrastrukture (AP) Modus und Peer to Peer (Ad Hoc) Modus. Drücken Sie um abzubrechen und um die nächsten Schritte aufzurufen. Drücken Sie um eine Option auszuwählen und zum Bestätigen. Infrastructure (AP) Der Infrastruktur Modus wenn Sie das Gerät in eine bestehende WLAN Infrastruktur mit einem WLAN-Router oder einem Access-Point einfügen wollen.
- Page 40 Hinweis: In der Spalte Sicherheit wird angezeigt ob eine Netzwerkverschlüsselung, wie z. B. WEP (Wired Equivalent Privacy) and WPA (Wi-Fi Protected Access) verwendet wird. Hier benötigen Sie einen Netzwerkschlüssel um sich mit diesem verbinden zu können. Wird keine Verschlüsselung verwendet wird keine angezeigt 2) Bestätigen des SSID Name 3) WLAN Sicherheitseinstellungen Wählen Sie System öffnen, wenn das Netzwerk unverschlüsselt ist.
- Page 41 4) WLAN Address Einstellungen Wählen Sie DHCP IP (AUTO) um die IP-Adresse automatisch beziehen zu lassen oder wählen Sie FIX IP (MANUAL) um selber eine statische IP-Adresse zu vergeben.. 5) Einstellungen Hier werden die Einstellungen, die Sie gemacht haben noch einmal angezeigt.
- Page 42 Wenn der Test bestanden wurde, werden die Netzwerkeinstellungen noch einmal angezeigt Peer to Peer (Ad Hoc) Der Peer to Peer Modus, der auch als Ad Hoc Modus oder Computer-zu-Computer Modus bezeichnet wird, wird benutzt um 2 WLAN Clients mit einander zu verbinden, ohne das ein WLAN-Router oder Access-Point eingesetzt werden muss.
- Page 43 2) Sichern der Einstellungen Wählen Sie OK um ihre Einstellungen zu bestätigen. Wenn ihre Einstellungen den Test bestanden haben, werden die Netzwerkinformationen angezeigt. DE 43 / 214...
-
Page 44: Systemeinstellungen
6.4 Systemeinstellungen Drücken Sie um den Reiter System auszuwählen. Menüsprache Wählen, um die Menüsprache zu ändern. Drücken Sie , um die Sprachen zu wählen. Drücken Sie zum Bestätigung. Textkodierung Auswählen, um die Textkodierung einzustellen Drücken Sie , um aus den verschiedenen Kodierungen zu wählen. - Page 45 Uhrzeit Wählen, um die Zeiteinstellungen des Systems zu ändern. Drücken Sie um ins die Einstellungen zu gelangen. Drücken Sie , um in das Feld zu gelangen, welches Sie ändern wollen. Mit den Tasten können Sie den Wert ändern. Drücken Sie zum Bestätigen.
- Page 46 Drücken Sie , um OK auszuwählen. Drücken Sie zum Bestätigen. Drücken Sie und , um die Größe des Puffers für die Time-Shift Funktion einzustellen. Drücken Sie , um weiter auszuwählen. Bestätigen Sie mit Drücken Sie , um die Aufnahmekapazität und Größe der Media Partition festzulegen.
- Page 47 Drücken Sie , um die Speicherkapazität der FAT32 und NTFS Partition einzustellen. Drücken Sie um weiter auszuwählen und bestätigen Sie mit Drücken Sie , um Formatieren auswählen und bestätigen Sie mit . Die Formatierung startet nun. Dies kann einige Minuten dauern. Wenn die Formatierung abgeschlossen ist drücken Sie Sie gelangen in das Hauptmenü...
-
Page 48: Info
HDD-Abschaltung Wählen um die Abschaltzeit der Festplatte im Leerlauf einzustellen. Drücken Sie um Nie, 10 Minuten, 20 Minuten, und 30 Minuten auszuwählen. Drücken Sie zum Bestätigen. Standardwerte laden Wählen, um das Gerät auf die Werkseinstellungen zurück zusetzen.. Eine Sicherheitsabfrage erscheint. Wählen Sie OK und alle Einstellungen werden auf die Werkseinstellungen zurückgesetzt. -
Page 49: Browser Menü
7. Browser Menü Das Browser Menü ermöglicht das Suchen und Abspielen von Musik, Foto und Filmdateien, die auf der Festplatte, einem externen USB-Gerät oder im Netzwerk gespeichert sind. Um in das Browsermenü zu gelangen, wählen Sie Browser im Hauptmenü.. Drücken Sie um das Speichermedium zu wählen, welches die Mediendateien enthält die Sie suchen. -
Page 50: Musik Durchsuchen
7.2 Musik durchsuchen Drücken Sie um den Reiter Musik zu wählen. Alle Verzeichnisse und unterstützten Musiktitel werden angezeigt. Drücken Sie und um den Titel zu markieren, den Sie abspielen wollen. Bestätigen Sie mit Drücken Sie und ein Menü erscheint, welches ihnen ermöglicht, den Titel zu einer Playlist hinzuzufügen. -
Page 51: Filme Durchsuchen
Alle Verzeichnisse und unterstützten Bilder werden angezeigt. Drücken Sie um das Bild zu markieren, das Sie abspielen wollen. Bestätigen Sie mit Das Foto wird im Vollbildmodus angezeigt. Hinweis: 1. Wenn das Bild im Vollbildmodus angezeigt wird, startet automatisch eine Slide Show. 2. -
Page 52: Das Netzwerk Durchsuchen
Es werden folgende Dateitypen unterstützt: DAT, VOB, IFO, MPG, AVI, und TS. Während Sie einen Film im Vollbildmodus betrachten, können Sie mit das Bild vergrößern oder verkleinern. 4 Zoom-Faktoren stehen zur Verfügung. 7.5 Das Netzwerk durchsuchen Sie können mit Hilfe von Streaming Multimedia Dateien aus dem Netzwerk (Ethernet oder WLAN) wiedergeben. - Page 53 Hinweis: 1. Wenn Sie HD-Filme (Auflösung bis zu 720p / 1080i / 1080p) über das LAN oder WLAN betrachten wollen, kann es sein, dass das Video vor der Wiedergabe gepuffert wird. Dies ist abhängig von der Netzwerk Geschwindigkeit. 2. Abhängig von den Netzwerkeinstellungen, kann gelegentlich nicht auf die Arbeitsgruppe zugegriffen werden oder Sie wird nicht in der Liste angezeigt.
- Page 54 Geben Sie den Benutzernamen (Netz User ID) sowie das Passwort Netzwerk Browser ein sowie die IP-Adresse ihres Rechners ein. Ihr Rechner wird nun unter ‘My_Shortcuts’ eingetragen. Wählen Sie Benutzername und das Eingabefenster erscheint. Benutzen Sie die Navigationstasten um Zahlen und Buchstaben auszuwählen.
-
Page 55: Wiedergabeliste - Playlist
Wählen Sie IP-Adresse und benutzen Sie die Navigations- und Zahlenfeld-Tasten um die IP-Adresse einzugeben. Sie können auch Detail wählen, um denVerbindungsnamen, die Domain und Host Name einzustellen. Danach wählen Sie OK und drücken zum Bestätigen. Wählen Sie den Shortcut aus, den Sie erstellt haben und drücken Sie zum Bestätigen. -
Page 56: Dateien Kopieren
9. Dateien kopieren Drücken Sie um das Menü zum kopieren von Dateien zu öffnen. Dieses ermöglicht ihnen Dateien zwischen den Festplatten, USB-Geräten und dem Netzwerk zu kopieren. Schritt 1: Wählen Sie das Quell- und Zielgerät aus Drücken Sie , um ein Gerät auszuwählen. Drücken Sie Abbrechen und , um zum nächsten Schritt zu gelangen. - Page 57 Drücken Sie , um Dateien auszuwählen, zum Abbrechen und . um zum nächsten Schritt zu gelangen. Schritt 3: Wählen Sie den Ordner aus, in den Sie die gewählten Dateien kopieren wollen. Drücken Sie , um den Ordner anzuwählen. Drücken Sie Abbrechen und für den nächsten Schritt.
-
Page 58: Nas Function
10. NAS Function Der Player kann auch als NAS-Laufwerk (Network-Attached Storage) benutzt werden. Es kann per LAN oder WLAN in das Netzwerk eingebunden werden. Dies erlaubt ihnen große Mengen an Daten über das Netzwerk zu speichern. Wenn Sie die Netzwerkverbindung richtig eingerichtet haben, geben Sie “\\NAS” oder “\\IP-Addresse”... -
Page 59: Internet Radio Hören
11. Internet Radio hören Dieser Player bietet ihnen die Möglichkeit, Internet Radio Sender die auf shoutcast.com angeboten werden, zu hören. Wählen Sie das Internet Radio Symbol im Hauptmenü, um zu dieser Funktion zu gelangen. Hinweis: 1. Stellen Sie bitte sicher, dass der Player über LAN oder WLAN Zugriff auf das Internet hat. Hinweise für die Netzwerkeinstellungen finden Sie in Kapitel ‘6.3 Netzwerkeinstellungen’. -
Page 60: Genre
Wenn Sie einen Sender ausgewählt haben, gelangen Sie in die Kanal-Liste. Drücken Sie um den Stream auszuwählen, den Sie hören wollen. Drücken Sie oder um einen Stream abzuspielen. Drücken Sie oder um die Wiedergabe zu beenden. Wenn Sie einen Sender markiert haben, können Sie diesen durch Drücken der Taste zu ihren Favoriten hinzufügen. -
Page 61: Favoriten
Drücken Sie um das Genre anzuwählen, aus dem Sie Musik hören wollen. Drücken Sie zum Bestätigen. Wenn Sie einen Sender markiert haben, können Sie diesen durch Drücken der Taste zu ihren Favoriten hinzufügen. 11.3 Favoriten Drücken Sie um FAVORITEN auszuwählen und drücken Sie Bestätigen. -
Page 62: Firmware Updates Einspielen
Drücken Sie um den Ausgewählten Sender zu löschen. Hinweis: Sie können maximal 20 Sender in die Favoriten aufnehmen. 12. Firmware Updates einspielen Die Firmware ist das Betriebssystem (OS), welches auf dem Player installiert ist . Firmware Updates können neue Funktionen, Verbesserungen und Fehlerkorrekturen enthalten . Um zu ermitteln, welche Firmwareversion auf dem Player installiert ist 1. -
Page 63: Anhang
Schritt 2: Verbinden des USB Sticks Stecken Sie den USB Stick in eine der beiden USB Host Buchsen des Players. Schritt 3: Drücken Sie den Standby-Schalter Drücken Sie den Standby-Schalter an der Frontblende des Gerätes und halten Sie diesen gedrückt. Stecken Sie den Stecker des Netzteils in die DC Eingangsbuchse. Warten Sie mindestens 3 Sekunden und lassen Sie dann den Standby-Schalter wieder los. - Page 64 Unterstützte Medienformate: DAT/VOB/IFO/MPG/AVI/MPEG-2 TS MP3/OGG/WMA/AAC/WAV Kompressionsrate zwischen 32 Kb/s und 320 Kb/s JPEG/JPG/BMP Unterstützte Video Codecs: MPEG-1/MPEG-2 MPEG-4 ASP: XviD Unterstützte Audio Codecs: MP2/MP3 /OGG Vorbis/WMA Standard (DRM, Pro & Advanced Profile werden nicht unterstützt)/PCM Unterstützte Untertitel Formate: SRT, SMI, SSA, IDX/SUB, SUB Unterstütze Speichermedien zur Aufnahme: Eingebaute Festplatte USB-Festplatte...
-
Page 65: Faq
Audio Performance DA-Konverter 24-bit/192kHZ AD-Konverter 24-bit/96kHZ Signal-Lautstärke (1kHZ) ≥ 95dB Pegelumfang ≥90dB (1kHZ) Kanal Trennung ≥95dB Klirrfaktor (1kHZ) ≤-85dB Allgemeines Netzteil AC 100~240V 50~60Hz Leistungsaufnahme Durchschnittlich. 35 W Betriebstemperatur +5°C to +35°C (+36°F to +95°F) Luftfeuchtigkeit 5% to 80% RH Festplatte 3.5’’... - Page 66 Frage 2. Wenn ich den Player entfernen will, erhalte ich die Meldung “Probleme beim Auswerfen von USB-Massenspeicher. Das Gerät ‚Standartdatenträger’ kann zurzeit nicht deaktiviert werden. Wiederholden Sie den Vorgang später.”. Was soll ich tun? Antwort: Schließen Sie alle Programme, die auf die Festplatte zugreifen könnten, einschließlich des Windows®...
- Page 67 (4) Drücken Sie “OK”. Frage 7. Wenn ich den Player anschalte, erscheint kurz ein Flackern, ein Bluescreen oder der Bildschirmschoner meines Fernsehers. Antwort: Dies ist normal. Wenn das System hochfährt, werden einige Einstellungen vorgenommen um das Bild korrekt auf dem Fernseher anzuzeigen. Während dieser Einstellungsphase werden einige Signale an den Fernseher gesendet, die dieser nicht richtig interpretieren kann.
-
Page 68: Copyrights And Trademarks
Antwort: Wenn einige Funktionen des Players nicht richtig funktionieren, setzen Sie bitte die Systemeinstellungen auf die Werkseinstellungen zurück (Kapitel 6.6 Systemeinstellungen). Frage 12. Ich kann keine SSID empfangen: Es wird immer ‘Can’t get any SSID!!’ angezeigt. Antwort: Wenn der WLAN USB Adapter am Player angeschlossen wird, dauert es einige Zeit bis dieser initialisiert ist. -
Page 69: Garantie
13.4 Garantie Unsere Garantie deckt nicht ab: - Durch natürliche Einflüsse entstandener Schaden wie z.B. Feuer oder statische Entladung. - Schäden durch unsachgemäße Reparatur, Umbau oder einen Unfall. - Schäden durch unsachgemäßen Gebrauch, falsche Installation oder Nachlässigkeit. - Schäden an einem Gerät, die durch institutionellen oder kommerziellen Gebrauch entstanden sind. - Page 70 Multimedia Media Recorder & Player FANTEC MM-HDRL User Manual...
- Page 71 Table of Contents 1. Introduction .......................... 73 1.1 Preface ......................73 1.2 Packing List ....................74 1.3 Caution ......................75 1.4 Connection ....................77 1.5 First Time Usage ..................82 2. About the Player ........................83 2.1 Remote Control .................... 83 2.2 Front Panel ....................
- Page 72 8. Playlist Menu ........................124 9. File Copy Menu ........................124 10. NAS Function ........................126 11. Listening to Internet Radio ..................... 127 11.1 Station List Menu ..................127 11.2 Genre List Menu ..................128 11.3 My Favorite Station .................. 129 12.
-
Page 73: Introduction
1. Introduction 1.1 Preface Dear Customer, thank you very much for purchasing this new Home Multimedia Center. In the digital area, this product is quite suitable to be a home entertainment partner. With its outstanding designed features, you can enjoy movies and music, view photos and record your favorite TV or movie programs to make up for your regret of not being able to enjoy them in time. -
Page 74: Packing List
1.2 Packing List Part Quantity Player A/V cable Y/Pb/Pr OUT cable SCART-IN Adapter SCART-IN Adapter USB cable Remote Control Remote Control Battery AC/DC adapter AC/DC adapter Power Cord User Manual Driver CD Warranty Card Note: The actual contents in the package might be different from the packing list in this manual. EN 74 / 214... -
Page 75: Caution
1.3 Caution This player’s design and manufacture has your safety in mind. In order to a safe and effective use of this player, please read the following before usage. 1.3.1 Usage cautions User should not modify this player. If commercial hard disk is being used, the environmental temperature should be within +5℃... - Page 76 - Physical impact may create bad sector in the hard disk, you can use CHKDSK to fix the problem. - All data stored in the player may be lost due to physical impact, electrical shock, power lost, HDD format etc. Please backup your data. - It is suggested to do defragment after a long period of usage.
-
Page 77: Connection
1.4 Connection 1.4.1 Connect to Computer (1) Make sure the player is powered on; (2) Plug in the mini connector of the USB cable to this player’s USB DEVICE port; (3) Plug in the big connector of the USB cable to Computer. 1.4.2 Connecting USB Mass Storage Devices* (like USB pen drive, MP3, USB HDD etc.) (1) Make sure the player is powered on;... - Page 78 1.4.3 TV connection 1. A/V IN (Recording function) (1) Follow the picture and plug in the 3 color connector to the player’s A/V IN jack; (2) Follow the picture and plug in the 3 color connector to the A/V OUT jack of the TV/IPTV Set-Top Box (STB)/ satellite receiver/ etc..
- Page 79 3. Y/Pb/Pr Component OUT (1) Follow the picture and plug in the 3 color connector to the player’s Y/Pb/Pr jack; (2) Follow the picture and plug in the 3 color connector to the TV’s Y/Pb/Pr jack. Audio Connection while using Y/Pb/Pr Video out: First method: use the audio output from the A/V OUT jack;...
- Page 80 1.4.4 Digital Audio Device connection (1) Follow the picture and plug in the RCA connector on your coaxial cable to the player’s S/PDIF Coaxial jack. Or if you use optical fiber, please plug in the Toslink connector on your optical fiber to the player’s S/PDIF Optical jack;(not supplied) (2) Follow the picture and plug in the other connector on your coaxial cable or optical fiber to the digital audio device.(not supplied) 1.4.5 Power connection...
- Page 81 1.4.6 Ethernet connection To connect to a LAN (Local Area Network) you require a cat5, cat5e or cat6 network cable (not supplied). (1) Connect one of the crystal plugs on the cable to the player’s RJ45 LAN socket; (2) Connect the other crystal plug on the cable to a RJ45 LAN port on your router, switch or network outlet.
-
Page 82: First Time Usage
1.5 First Time Usage 1.5.1 HDD Format For users who bought the player without HDD inside, and want to install the SATA HDD om their own, please see ‘HDD Format’ in ‘6.5 Changing System Settings’ for details. 1.5.2 Remote Control First time usage of Remote control Install the batteries before using the remote control, installation steps are as the picture shows: 1.5.3 Power on/off, language control... -
Page 83: About The Player
2. About the Player 2.1 Remote Control All procedures in this manual can be carried out using the remote control buttons. See the following for details on each button and its function: 1. POWER/STANDBY 2. DISPLAY 3. MENU 4. MUSIC 5. - Page 84 Button Function POWER/STANDBY button: Press to enter standby mode or wake up. DISPLAY button: Press to display current status. Press during playback and an onscreen display appears, showing track number and time elapsed/remaining. Press during recording and an onscreen display appears, showing the recording quality setting and time elapsed.
- Page 85 USB, and NET. GUIDE button: Press to view the Guide menu. See The Guide Menu in 3. Getting Started for more details. ENTER button: Press to select options in menus. Numeric buttons: Press to enter channel numbers or numeric input when changing settings.
- Page 86 Press to resume playback. REC LIST button: Press to show the recording List. INSTANT REPLAY button. Press to backward 10 seconds of the current playback, which suitable for sport program. A-B button: Press to set the beginning and end points of a section to repeat.
- Page 87 PREVIOUS button: Press to go to the previous file or the previous chapter on a title. STOP button: Press to stop playback. GOTO button: Press to jump to a specific point on a title. Specify the point using Title, Chapter and Time. Navigational buttons: Press the arrow buttons to select menu options.
-
Page 88: Front Panel
2.2 Front Panel 1 – standby-Switch 2 – hard disk 3 – record Name Function STANDBY indicator Indicator (red) turns on when the system is in standby mode. Indicator (blue) turns on when the system is alive. Hard disk indicator Indicator (blue) turns on during disk is working. -
Page 89: Rear Panel
2.3 Rear Panel 1. Air Flow hole 2. Y/Pb/Pr jack (componet video) 3. A/V OUT jack 4. A/V IN jack 5. S/PDIF Coaxial jack 6. POWER switch 7. DC IN jack 8. RJ45 LAN socket 9. HDMI jack 10. S/PDIF Optical jack 11. -
Page 90: Getting Started
3. Getting Started Power on the system and after a few seconds the system will enter a guide menu. To re-enter this menu again, press on the remote control. 3.1 Selecting Video In – Live TV, Recording and Time Shift To pre-view the video to be recorded, or have time shift function (See TIME SHIFT button in 2.1 Remote Control for more details). -
Page 91: Selecting Browser - Playback Multimedia Files
3.3 Selecting Browser – Playback Multimedia Files You can browse all the multimedia (Videos/Music/Photos) files on the internal HDD/USB or Network, and playback them on TV. Press on the remote control or select Browser button on the guide menu page to browse movie, photo, and music files stored either on a HDD, USB device, or Network. -
Page 92: The Title List Menu For Recorded Videos
4. The Title List Menu for Recorded Videos The Title List menu allows you to play and edit all saved titles. To enter the menu, press to enter Title List. Playback from the Guide menu will enter the Title List, too. 4.1 Title List Menu Number Function... -
Page 93: Playing Back Titles
4.2 Playing Back Titles To play a recorded title, do the following: 1. Press on the remote control to select the Play tab from the menu bar. 2. Press on the remote control to select the title you wish to play. 3. -
Page 94: Sorting Files
4. Use the navigation arrows to select letters and numbers. Select CAPS to toggle between uppercase and lowercase letters. Press <- to delete a letter. Press -> to insert a space. Press to input each letter or number. 5. Once you have entered the new name, select OK and press to confirm all changes. -
Page 95: Title Edit Menu
Title Name Select to sort all files alphabetically, according to title name. Fresh Titles Select to sort all files according to freshness (i.e. the most recent recordings), listing the most recent recording first. 4.6 Title Edit Menu Press on the remote control to select the Title Edit tab from the menu bar. Press , and the menu appears. - Page 96 AB Erase Delete a specified clip in a title. (cut) Select SET A and press to mark the start for the section to be deleted. Select SET B and press to mark the end of the section to be deleted. Select CONFIRM and press to delete the section.
- Page 97 Merge Title Select more than two titles and combine them into one title. A confirmation message appears. Select CONFIRM to merge the files. Add Chapter Mark Add a chapter mark to the selected file. A chapter mark is a marker inserted into the title. You can jump between marked sections by pressing on the remote control.
-
Page 98: Tools
Copy to media In the Title List Menu, press on the partition (FAT32 remote control to select which title you want to copy only) from record partition (UDF) to media partition (FAT32). 4.7 Tools Press on the remote control to select the Tools tab from the menu bar. Press and the menu appears. -
Page 99: Timer Record Menu
5. Timer Record Menu The Timer Record menu allows you to create, edit and delete recording schedules and view all schedule status and history. Press on the remote control to enter the menu. 5.1 Create a New Schedule Press on the remote control to select the Edit tab from the menu bar. Select Add a New Schedule and press . -
Page 100: Editing Schedule
5.2 Editing Schedule Press on the remote control to select the Edit tab from the menu bar. Select the schedule you want to edit from the list and press . The schedule setting screen appears. Modify the schedule as described in 5.1 Creating a New Schedule. 5.3 Deleting Schedules Press on the remote control to select the Delete tab from the menu bar. -
Page 101: Viewing Schedule Status
5.4 Viewing Schedule Status Press on the remote control to select the Status tab from the menu bar. The schedule list is displayed. Select a schedule and press Select Enable the timer by user’s setting or Pause the selected schedule. Press confirm. -
Page 102: Setup Menu
6. Setup Menu The Setup Menu allows you to configure language, audio, video, record, network and system settings. To enter the menu, select Setup from the Guide menu or select on the remote control. 6.1 Changing Video Settings Press on the remote control to select the Video tab from the menu bar. Aspect Ratio Select to set aspect ratio. - Page 103 Select to set brightness levels. Brightness Press to adjust brightness. The new setting is previewed onscreen. Press to confirm. Contrast Select to set contrast levels. Press to adjust contrast. The new setting is previewed onscreen. Press to confirm. Video Output Select to adjust video output type.
-
Page 104: Changing Record Settings
Video System Select to adjust TV system. Press to set the TV system, depending on your viewing preferences. Press to confirm. 6.2 Changing Record Settings Press on the remote control to select the Record tab from the menu bar. Quality Select to set the default recording quality setting. - Page 105 Auto Chapter Select to add chapter marks automatically at set intervals. Press to select the interval you require. An automatic chapter mark will be added at each interval, allowing you to browse titles easily after recording. Press to confirm. Record Device Select to set device to restore the recorded files.
-
Page 106: Changing Network Settings
6.3 Changing Network Settings Press on the remote control to select the Network tab from the menu bar. Before using the Network functions, please check the following items: 6) Connect the player to a LAN or WLAN first; 7) Please enable NetBIOS of TCP/IP on computer; 8) Please turn off your PC’s firewall;... - Page 107 DHCP IP (AUTO) Set the IP address by auto. (DHCP-Server recommended) Press to confirm. FIX IP (MANUAL) Using Fixed IP, it is required to enter the followings: IP address, Subnet Mask, and Default Gateway. For further assistance to the above settings, please contact the network administrator.
- Page 108 There appear two connection modes: Infrastructure (AP) mode and Peer to Peer (Ad Hoc) mode. Press to cancel, and for next step. Press select items, and to confirm. Infrastructure (AP) Infrastructure mode is used to connect computers with wireless network adapters, also known as wireless clients, to an existing wired network with the help from wireless router or access point.
- Page 109 8) Confirm SSID Name 9) WLAN Security Setting Select Open System if the network is not encrypted. Otherwise, select Shared Key (WEP) or WPA Key to enter the encryption key. 10) Wireless Address Setup Select DHCP IP (AUTO) to set the IP address automatically. Or select FIX IP (MANUAL) to set the IP address manually.
- Page 110 11) Setting List The Setting List displays the network settings just now you configured. 12) Test Connection The test will take for a while, please be patient to wait. If the test is ok, the network information will be displayed. EN 110 / 214...
- Page 111 Peer to Peer (Ad Hoc) Peer to Peer mode, which is also called Ad Hoc mode or computer-to-computer mode, is used to connect wireless clients directly together, without the need for a wireless router or access point. 3) Ad Hoc Setup Select Manual if you wish to change the default settings.
-
Page 112: Changing System Settings
If the test is ok, the network information will be displayed. 6.4 Changing System Settings Press on the remote control to select the System tab from the menu. Menu Language Select to choose the OSD (On Screen Display) language. EN 112 / 214... - Page 113 Press to select the language. Press confirm. Text Encoding Select to set text encoding. Press to select from Unicode, Chinese GBK, BIG5, and etc. Press to confirm. Time Select to set the system time. Press and enter Manual setup. EN 113 / 214...
- Page 114 Enter the system menu and press to select each field and the up and down navigation arrows to adjust each setting. Press to confirm. HDD Format Select to format the HDD. Press to select HDD Format. Press confirm. Press to select OK. Press to confirm.
- Page 115 Press to adjust the capacity of time shift buffer. Press to select NEXT, and to confirm. Press to adjust the capacities of recording and multimedia partitions. Press to select NEXT, and to confirm. Press to adjust the capacities of FAT32 and NTFS partitions.
- Page 116 Press to select Format. Press to confirm. And the formatting will start, which will take for several minute, please be patient to wait. When formatting is completed, press to return to the GUIDE menu. Connect the player to PC via a USB cable, and copy the ‘sys’ folder from the firmware folder to the first multimedia partition (HDD1, FAT32).
-
Page 117: Miscellaneous
Restore Default Select to restore factory defaults. A confirmation message appears. Select OK and press Enter to restore all settings to defaults. 6.5 Miscellaneous Press on the remote control to select the MISC tab from the menu. 7. Browser Menu The Browser menu allows you to browse and play music, photo and movie files stored on a HDD, an external USB device, and Network. -
Page 118: Browsing All
Press to select the device on which the media is stored. Choose from HDD, USB, NET, and press . When data on HDD, USB device is connected or connect the system to Network, you can also browse photos, listen to music, and watch movies. 7.1 Browsing All on the remote control to select the All tab. -
Page 119: Browsing Photos
All directories and supported audio files in current directory will be displayed. Press to select the file you want to play and press . Press and a tools menu appears which enables you to add the current music to the playlists. 7.3 Browsing Photos on the remote control to select the Photos tab. -
Page 120: Browsing Movies
full screen. Note: 1. When the photo is displayed in full screen mode, the slide show starts automatically. 2. While listening to music files, you can browse the photos at the same time. While browsing a photo, you can press to rotate a photo in any angle. - Page 121 7.5.1 Browsing through Workgroup You can choose the workgroup which your PC belongs to from the workgroup list, find your PC name, and press to confirm. Then select the shared multimedia file that you want to browse. Note: 1. While browsing high definition video files (resolution up to 720p / 1080i / 1080p) via Ethernet or WLAN, the video might be buffering.
- Page 122 2. Due to different network conditions, sometimes the workgroup might not be accessed or shown in the list. And then you need to use ‘My_Shortcuts’ to browse shared files. 7.5.2 Browsing through ‘My_Shortcuts’ You can also set ‘Specific File Server IP’ and access it from ‘My_Shortcuts’ in the menu. Press and a tools menu appears.
- Page 123 Select Net User ID and the entry screen will appear. Use the navigation arrows to select letters and numbers. Select CAPS to toggle between uppercase and lowercase letters. Press <- to delete a letter. Press -> to insert a space. Press to input each letter or number.
-
Page 124: Playlist Menu
Select the shortcut you added and press to confirm. Then select the shared multimedia file that you want to browse. 8. Playlist Menu The Playlist menu allows you to browse and play your favourite music in the playlists. To enter the menu, select Playlist from the Guide menu. - Page 125 Step 1: Select the source device and destination device. Press to select device. Press to cancel, and for next step. Step 2: Select the source files you want to copy. Press to select files, to cancel, and to next step. Step 3: Select the destination folder to store the above files.
-
Page 126: Nas Function
Step 4: Proceed to copy selected files. Press to select OK, press to confirm. And the copy will start. 10. NAS Function This player can be used as a NAS (Network-Attached Storage) device. It can be attached to the home network via either Ethernet or WLAN. This feature allows homes to store and retrieve large amounts of data more affordably than ever before. -
Page 127: Listening To Internet Radio
Then you can view, and edit the files stored on the hard disk installed on the player. In this way, you can also playback and copy files via network between your PC and the player. 11. Listening to Internet Radio This player integrates the SHOUTcast free Internet radio function. -
Page 128: Genre List Menu
confirm. You can also press to page up and down. When a station is selected, then you will enter the CHANNEL List menu. Press to select the channel you wish to listen to. Press to start listening to the channel. And press to stop. -
Page 129: My Favorite Station
Press to select the genre you wish to visit from the list. Press confirm 11.3 My Favorite Station Press to select FAVORITE, and press to confirm. All the favorite stations you added from the station list menu can be found and managed here. When a station is highlighted, you can press to delete it from the favorite. -
Page 130: Upgrading The Firmware
Note: You can have a maximum of 20 favorite stations in the list. 12. Upgrading the Firmware The firmware is the operating system (OS) installed on the device. Firmware upgrades can bring new features, improvements and bug fixes. To check whether you have the latest version of firmware: 4. -
Page 131: Appendixes
Step 2: Connect the USB Pen Drive Plug the USB Pen Drive into one of the USB HOST ports of the player. Step 3: Hold the POWER/STANDBY button Press and hold the POWER/STANDBY button on the front panel, and do not loosen. Plug the power cable into the DC IN jack, wait for about 3 seconds or more, and then loosen your finger on the POWER/STANDBY button. - Page 132 CONTENT FORMATS SUPPORTED: DAT/VOB/IFO/MPG/AVI/MPEG-2 TS MP3/OGG/WMA/AAC/WAV Compression rate: between 32 kbps and 320 kbps JPEG/JPG/BMP VIDEO CODECS SUPPORTED: MPEG-1/MPEG-2 MPEG-4 ASP: XviD AUDIO CODECS SUPPORTED: MP2/MP3 /OGG Vorbis/WMA Standard (DRM, Pro & Advanced Profile not supported)/PCM SUBTITLE FORMATS SUPPORTED: SRT, SMI, SSA, IDX/SUB, SUB RECORDABLE DEVICES SUPPORTED: Built in HDD USB HDD...
-
Page 133: Frequently Asked Questions
AUDIO PERFORMANCE DA Converter 24-bit/192kHZ AD Converter 24-bit/96kHZ Signal-Noise (1kHZ) ≥ 95dB Dynamic Range ≥90dB (1kHZ) Channel ≥95dB Separation Total Harmonic Distortion (1kHZ) ≤-85dB GENERAL Power Supply AC 100~240V 50~60Hz Power Approx. 35 W Consumption Operating +5°C to +35°C (+36°F to +95°F) Temperature Operating Humidity 5% to 80% RH... - Page 134 ‘Generic volume’ cannot be stopped right now. Try stopping the device again later.” message, what should I do? Answer: Close any program that might be accessing data on the player, including Windows® Explorer. If it does not work, close all programs and wait for another 20 seconds, then try the green arrow icon again.
- Page 135 (4) Click the “OK” icon. Question 7. When the player is powered on, why will the TV have a short flashing, blue screen or screensaver? Answer: This is normal, when the system initializes, it will setup the corresponding parameters so it can output the correct video signal to the TV, during the initializing time, the TV will receive incorrect signals or the signals will not be stable and will cause the TV screen to flash, some TV’s will treat this as no signal, and will display a blue screen or screensaver.
-
Page 136: Copyrights And Trademarks
Question11. Some functions like recording, time shift etc. do not work. What should I Answer: If you find some functions do not work properly on the player, please change system settings to the default (Refer to 6.6 for changing system settings). Question 12. -
Page 137: Warranty
All other trademarks are property of their respective holders. 13.4 Warranty What your warranty does not cover: -Acts of nature, such as fire, static discharge. -Damage from unauthorized repair, alteration or accident. -Damage from misuse or neglect. -A unit that has been modified or incorporated into other products or is used for institutional or other commercial purposes. - Page 138 Lecteur & Enregistreur Multimedia FANTEC MM-HDRL Manuel Utilisateur...
- Page 139 Table des matières 1. Introduction ........................141 1.1 Préface ......................141 1.2 Liste des articles ..................142 1.3 Consigne de sécurité ................... 143 1.4 Connexion ....................145 1.5 Première utilisation ..................151 2. À propos du lecteur ......................152 2.1 Télécommande ................... 152 2.2 Panneau Avant ....................
- Page 140 7.5 Navigation via le Réseau ................190 8. Menu Liste de Lecture (Playlist) ..................193 9. Menu Copie de Fichier ....................... 194 10. Fonction NAS ........................196 11. Ecouter la Radio Internet ....................197 11.1 Menu Liste des Stations ................197 11.2 Menu Genre ....................
-
Page 141: Introduction
1. Introduction 1.1 Préface Cher client, Nous vous remercions beaucoup pour l’achat de ce nouveau Combiné Home Multimédia. À l'ère du numérique, cet appareil est un excellent partenaire de divertissement à domicile. Avec ses fonctionnalités incroyables vous êtes en mesure d’apprécier vos films, musiques et photos et d’enregistrer vos programmes favoris de TV et de cinéma de façon à... -
Page 142: Liste Des Articles
1.2 Liste des articles Articles Quantité Lecteur Câble A/V Câble Y/Pb/Pr OUT Adaptateur SCART-IN Adaptateur SCART-IN Câble USB Télécommande Pile Adaptateur AC/DC Cordon d’alimentation Manuel Utilisateur CD d’installation Carte de Garantie Note: Le contenu dans l'emballage pourrait être différent de la liste de colisage dans le manuel. FR 142 / 214... -
Page 143: Consigne De Sécurité
1.3 Consigne de sécurité La fabrication de ce lecteur est conçue pour votre tranquillité d’esprit. Afin de sécuriser et d'utiliser efficacement ce lecteur, lisez ce qui suit avant de l'utiliser. 1.3.1 Avertissement à l’utilisation L’utilisateur ne devrait pas modifier ce lecteur. Si le disque dur est en cours d'utilisation, la température ambiante doit être comprise de +5°C ~ 35°c. - Page 144 utiliser CHKDSK pour corriger le problème. - Toutes les données stockées dans le lecteur peuvent être perdues à la suite d’un impact physique, les chocs électriques, une panne de courant, ou par un formatage du disque dur etc. Veuillez sauvegardez de vos données. - Il est suggéré...
-
Page 145: Connexion
1.4 Connexion 1.4.1 Connecter le lecteur à l'ordinateur (1) Assurez-vous que le lecteur est sous tension ; (2) Brancher le connecteur carré du câble USB au port USB de ce lecteur; (3) branchez le connecteur rectangulaire du câble USB à l'ordinateur. 1.4.2 Périphériques de stockage de masse (comme clé... - Page 146 1.4.3 Connexion avec la télévision 1. Entrée A/V IN (fonction d’Enregistrement) (1) Comme sur l’image, branchez les connecteurs de 3 couleurs sur les entrées A/V IN du lecteur; (2) Comme sur l’image branchez les connecteurs de 3 couleurs dans les A/V OUT de la TV, du récepteur satellite/IPTV Set Top Box (STB).
- Page 147 3. Y/Pb/Pr Composants de sortie (1) Comme indiqué branchez les connecteurs de 3 couleurs sur les fiches femelles Y/Pb/Pr du lecteur; (2) Comme indiqué branchez les connecteurs de 3 couleurs sur les fiches femelles Y/Pb/Pr de la TV. Connexion audio en utilisant la sortie vidéo Y/Pb/Pr : Première méthode: Utiliser la sortie audio de l'A/V OUT;...
- Page 148 4. Sortie HDMI (1) Selon l’image brancher sur un connecteur votre câble HDMI à la fiche femelle du lecteur HDMI; (2) Selon l’image branchez l'autre connecteur de votre câble HDMI sur la fiche femelle HDMI de la TV. De cette façon, vous pouvez avoir la plus haute qualité vidéo et audio via un seul câble. 1.4.4 Connexion de périphériques audio numérique (1) Selon l’image et branchez le connecteur RCA de votre câble coaxial à...
- Page 149 1.4. Connexion électrique (1) D’après l’image connecter l'adaptateur AC à la fiche femelle DC IN du lecteur; (2) D’après l’image branchez l'adaptateur AC à la prise électrique. 1.4.6 Connexion Ethernet Se connecter à un réseau LAN (local Area Network), vous avez besoin d'un câble réseau CAT5, CAT5e, cat6 (non fourni).
- Page 150 1.4.7 Connexion Wifi (accessoires additionnels requis) (1) Assurez-vous que le lecteur est sous tension. (2) Brancher l’adaptateur sans fil LAN USB (c'est-à-dire clef Wifi USB) au port USB du lecteur. FR 150 / 214...
-
Page 151: Première Utilisation
1.5 Première utilisation 1.5.1 Formatage du disque dur Pour les utilisateurs qui ont acheté le lecteur de disque dur sans disque dur, et que vous voulez installer un disque dur SATA, voir "Formatage Disque Dur (HDD)" dans le chapitre "6.5 Modification des paramètres système" pour plus de détails. 1.5.2 Télécommande Première utilisation de la télécommande Installez les piles avant d'utiliser la télécommande, les étapes de l'installation sont comme les... -
Page 152: À Propos Du Lecteur
Le langage du menu du lecteur peut être mis en anglais ou en d’autres langues. Dans l'interface de configuration se trouve la configuration des langues, la langue choisie prendra effet immédiatement. 2. À propos du lecteur 2.1 Télécommande Toutes les procédures dans ce manuel peuvent être effectuées en utilisant les touches sur la télécommande. - Page 153 Button Function Touche POWER/STANDBY: Presser pour allumer ou mettre mode veille. Touche DISPLAY: Presser pour afficher l’état actuel. Appuyer sur la touche pendant la lecture et une fenêtre s'ouvre, indiquant le numéro de piste et le temps écoulé / restant. Appuyer sur la touche pendant l'enregistrement et une fenêtre s'ouvre, montrant les paramètres d'enregistrement et le temps écoulé.
- Page 154 Touche TV SYSTEM: A utiliser pour basculer entre NTSC, PAL, 480P, 576P, 720P, and 1080I. Touche BROWSER: A utiliser pour naviguer dans vos fichiers musique, photo, and vidéo sur Disque Dur interne, USB, et réseau. Touche GUIDE: A utiliser pour afficher le menu Guide, voir Le Menu Guide in 3.
- Page 155 Démarre la lecture d’un titre. Touche TIMER: Appuyez pour accéder directement au menu de la minuterie, ajouter, modifier et supprimer des horaires enregistrements. voir 5.1 Créer un Nouveau planning pour plus de détails. Touche PAUSE / STEP: Appuyez pour mettre en pause la lecture. Appuyez une nouvelle fois pour avancer à...
- Page 156 Touche CM SKIP: Appuyer pour avancer de 30 secondes dans la lecture ou enregistrement en cours. Touche NEXT: Appuyez pour accéder au titre ou chapitre suivant / programme / chaîne de télévision. Touche SLOW MOTION: appuyez pour une lecture au ralenti. 3 vitesses de ralenti disponible.
-
Page 157: Panneau Avant
Touche SETUP: Presser pour accéder directement au menu d’installation. 2.2 Panneau Avant 1 – Switch-standby 2 – Disque dur 3 – enregistrement Name Function indicateur STANDBY Indicateur (rouge) s’allume quand le système est en mode Standby. Indicateur (bleu) devient bleu quand le système est en fonctionnement. -
Page 158: Panneau Arrière
2.3 Panneau Arrière 1. Grille d’Aération 2. Port Y/Pb/Pr (port vidéo) 3. Port A/V OUT 4. Port A/V IN 5. Port S/PDIF Coaxial 6. Switch POWER 7. Port DC IN 8. Socket LAN RJ45 9. Port HDMI 10. Port Optique S/PDIF 11. -
Page 159: Mise En Route
3. Mise en Route Allumer le lecteur et après quelques secondes il entrera dans un menu guide. Pour enter à nouveau dans ce menu pressez la touche sur la télécommande.. 3.1 Sélection de Vidéo In – TV en direct, Enregistrement et mode Différé. -
Page 160: Sélection De Browser - Lecture De Fichiers Multimédia
3.3 Sélection de Browser – Lecture de Fichiers Multimédia Vous pouvez naviguer dans tous vos fichiers multimédia (Vidéos/Musique/Photos) sur le Disque Dur interne /USB ou Réseau, et les lire sur votre TV. Presser sur la télécommande ou sélecter la touche Browser sur la page du menu guide pour naviguer dans vos fichiers films, photos, photo, et audio rangés aussi bien sur un disque interne, sur un disque USB ou Réseau. -
Page 161: Le Menu Liste De Titres Pour Les Vidéos Enregistrées
4. Le Menu Liste de Titres pour les Vidéos enregistrées Le menu liste de titres vous permet de lire et éditer tous les titres sauvegardés. Pour entrer dans ce menu, presser . Une lecture depuis le menu Guide vous fera tout aussi bien entrer dans ce menu. -
Page 162: Lecture De Titres
4.2 Lecture de Titres Pour lire un titre enregistré faites comme indiqué ci-après : 1. Presser sur la télécommande pour sélecter l’onglet Lecture depuis la barre du menu. 2. Presser sur la télécommande pour sélecter le titre que vous souhaitez lire. -
Page 163: Trier Vos Fichiers
4. Utiliser les flèches de navigation pour sélecter lettres et chiffres. Sélecter CAPS pour basculer entre majuscules et minuscules. Presser <= pour effacer une lettre. Presser => pour insérer un espace. Presser pour entrer chaque chiffre ou lettre. 5. Une fois que le nom est complet, sélecter OK and presser pour confirmer toutes les modifications. -
Page 164: Menu Edition De Titre
Numéro de Titre Sélecter cette fonction pour trier tous les fichiers en fonction de leur numéro. Sélecter cette fonction pour trier tous les fichiers en Durée fonction de leur durée d’enregistrement. Enregistrement Sélecter cette fonction pour trier tous les fichiers par Nom de Titre ordre alphabétique, selon leur nom. - Page 165 point sur lequel vous souhaitez insérer, presser pour sélecter CONFIRMER et presser Effacement AB Effacer un clip spécifique dans un titre. (coupure) Sélecter Insérer A et presser pour marquer le début de la sélection à effacer. Sélecter Insérer B et presser pour marquer la fin de la section à...
- Page 166 Assembler des Sélecter plus de deux titres et assemblez-les en un Titres titre. Un message de confirmation apparaît. Sélecter CONFIRMER pour assembler les fichiers. Ajouter Chapitre Ajoute une marque de chapitre au fichier sélectionné. Marque Une marque de chapitre est un marqueur inséré dans un titre.
-
Page 167: Tools
Copier dans la Dans le menu Liste de titres, presser partition sur la télécommande pour sélecter quel titre multimédia (FAT32 vous souhaiter copier de la partition d’enregistrement seulement) (UDF) à la partition de fichiers (FAT32). 4.7 Tools Presser sur la télécommande pour sélecter l’onglet Outils depuis la barre du menu. Presser et le menu apparaît. -
Page 168: Menu Minuterie D'enregistrement
5. Menu Minuterie d’Enregistrement Le menu Minuterie d’Enregistrement vous permet de créer, modifier et effacer des horaires d’enregistrement de voir ceux en cours ainsi que l’historique. Presser sur la télécommande pour entrer dans ce menu. 5.1 Créer Un Nouvel Horaire Presser sur la télécommande pour sélecter l’onglet Edition depuis la barre du menu. -
Page 169: Modification D'horaires
5.2 Modification d’Horaires Presser sur la télécommande pour to sélecter l’onglet Edition depuis la barre du menu. Sélecter dans la liste l’horaire que vous souhaiter modifier et presser . L’écran des paramètres de cet horaire s’affiche. Modifier l’horaire comme indiqué en 5.1 Créer un Nouvel Horaire. -
Page 170: Vérification D'horaires
5.4 Vérification d’Horaires Presser sur la télécommande pour sélecter l’onglet Etat depuis la barre du menu. La liste d’horaire s’affiche. Sélecter un horaire et presser Sélecter Activer la minuterie réglée par l’utilisateur ou Arrêter l’horaire sélectionné. Presser pour confirmer. 5.5 Voir l’Historique d’Enregistrement Presser sur la télécommande pour sélecter l’onglet Historique depuis la barre du menu. -
Page 171: Menu De Configuration
6. Menu de Configuration Ce menu vous permet de configure la langue langage, les paramètres audio, vidéo, d’enregistrement, de réseau et ceux du système. Pour entrer dans le menu, sélecter Configuration depuis le menu Guide ou sélecter sur la télécommande. 6.1 Changer les Paramètres Vidéo Presser sur la télécommande pour sélecter l’onglet Video depuis la barre du menu. - Page 172 16:9: Condense l’image pour la convertir. A utiliser avec une TV 16:9. Sélecter ce menu pour régler les niveaux de luminosité. Luminosité Presser pour ajuster la luminosité. Le nouveau paramétrage est prévisualisé sur l’écran. Presser pour confirmer. Contrast Sélecter ce menu pour régler les niveaux de contraste. Presser pour ajuster le contraste Le nouveau paramétrage est prévisualisé...
-
Page 173: Changer Les Paramètres D'enregistrement
Système Vidéo Sélecter ce menu pour ajuster le système de TV. Presser pour régler le système TV, en fonction de vos préférences. Presser pour confirmer. 6.2 Changer les Paramètres d’Enregistrement Presser sur la télécommande pour sélecter l’onglet Record depuis la barre du menu. - Page 174 disque. Presser pour confirmer. Sélecter ce menu pour ajouter automatiquement des marques de Marquage Auto de Chapitre chapitre à intervalles réguliers. Presser pour sélecter l’intervalle souhaité. Une marque de chapitre sera ajoutée automatiquement à chaque intervalle, vous permettant ainsi de naviguer plus facilement parmi vos titres après enregistrement.
-
Page 175: Changer Les Paramètres Réseau
6.3 Changer les Paramètres Réseau Presser sur la télécommande pour sélecter l’onglet Network depuis la barre du menu. Avant d’utiliser les fonctionnalités réseau, effectuez les vérifications suivantes: 11) Connecter d’abord le lecteur à un LAN ou WLAN; 12) Veillez a bien activer NetBIOS dans TCP/IP sur votre ordinateur; 13) Eteignez le firewall de vôtre PC;... - Page 176 DHCP IP (AUTO) Réglage automatique de l’adresse IP. (Serveur DHCP- recommandé) Presser pour confirmer. IP FIXE (MANUEL) Pour utilise l’IP Fixe, Il est nécessaire d’entrer les informations suivantes: adresse IP, Masque de sous-réseau, et la passerelle par défaut. Pour plus d’assistance pour ces paramètres contactez votre administrateur réseau.
- Page 177 Deux modes de connexion apparaissent alors: Le mode Infrastructure (AP) et le mode Peer to Peer (Ad Hoc). Presser pour annuler, et pour l’étape suivante. Presser pour faire votre choix, et pour confirmer. Infrastructure (AP) Le mode Infrastructure est utilisé pour connecter les ordinateurs disposant d’un adaptateur réseau sans fil (clients réseau) à...
- Page 178 Note: Dans la liste de sécurité, WEP (Wired Equivalent Privacy) et WPA (Wi-Fi Protected Access) désignent un réseau encrypté, i.e. Une clef d’encryptage est nécessaire pour accéder au réseau. AUCUN signifie que le réseau est ouvert. 14) Confirmer le choix de nom SSID (nom de réseau). 15) Configuration de sécurité...
- Page 179 16) Configuration de l’adresse IP Sélecter IP DHCP (AUTO) pour régler l’adresse IP automatiquement. Ou sélecter IP FIXE (MANUEL) pour régler l’adresse IP manuellement. 17) Liste de Configuration Cette liste affiche les paramètres du réseau tels que vous venez de les configurés.
- Page 180 Peer to Peer (Ad Hoc) Le mode Peer to Peer, qui est aussi appelé mode Ad Hoc ou mode pc-à-pc, est utilise pour connecter directement entre eux des clients réseaux sans fil, sans l’aide d’un routeur ou d’un point d’accès sans fil. 5) Configuration Ad Hoc Sélecter Manuel si vous souhaitez changer les paramètres par défaut.
- Page 181 Si le test est concluant, toutes les informations du réseau s’affichent. FR 181 / 214...
-
Page 182: Changer Les Paramètres Système
6.4 Changer les Paramètres Système Presser sur la télécommande pour sélecter l’onglet Système depuis le menu. Menu Langue Choisir Votre langue d’affichage (On Screen Display). Presser pour sélecter la langue. Presser pour confirmer. Encodage Texte Sélecter ce menu pour régler l’encodage texte. Presser pour choisir entre Unicode, Chinese GBK, BIG5, etc... - Page 183 Heure Sélecter ce menu pour régler le temps du système. Presser et entrer dans la configuration manuelle. Entrer dans le menu système et presser pour sélecter chaque champs et les flèches de navigation haut et bas pour ajuster chaque paramètre. Presser pour confirmer.
- Page 184 Presser pour choisir OK. Presser pour confirmer. Presser pour ajuster la taille du tampon de visionnage différé. Presser pour choisir NEXT, et pour confirmer. Presser pour ajuster les tailles des partitions d’enregistrement and multimédia. Presser pour choisir SUIVANT, et pour confirmer. FR 184 / 214...
- Page 185 Presser pour ajuster les tailles des partitions FAT32 et NTFS. Presser choisir SUIVANT, et pour confirmer. Presser pour choisir de Formater les partitions du disque. Presser pour confirmer. Et le formatage débutera, cela prendra quelques minutes soyez patient. Quand le formatage est terminé, presser pour revenir au menu GUIDE.
-
Page 186: Divers
Veille du Disque Dur Sélecter ce menu pour régler le délai d’entrée en veille du disque dur quand il n’est pas utilisé. Presser pour choisir entre Never (jamais), 10 Minutes, 20 Minutes, and 30 Minutes. Et presser pour confirmer. Restauration des Sélecter ce menu pour restaurer les réglages usines. -
Page 187: Menu De Navigation
7. Menu de Navigation Ce menu vous permet de naviguer et de lire tous vos fichiers multimédia (music, photo et vidéo) stockés sur le disque dur interne, un disque dur externe USB, et un disque réseau. Pour entrer dans ce menu, sélecter Explorateur depuis le menu Guide. Presser pour choisir l’endroit ou est stocké... -
Page 188: Navigation Audio
7.2 Navigation Audio Utiliser sur la télécommande pour sélecter l’onglet Audio. Tous les répertoires et fichiers aux formats audio supportés dans le répertoire courant s’afficheront à l’écran. Presser pour sélecter le fichier que vous voulez lire et presser . Presser un menu outils qui vous permet de créer vos liste audio apparaît. -
Page 189: Navigation Vidéo
Tous les répertoires et fichiers images du répertoire courant aux formats supportés s’afficheront a l’écran. Presser pour choisir la photo que vous souhaitez voir et presser . La photo s’affichera en plein écran. Note: 1. Quand la photo est affichée en mode plein écran, le diaporama démarre automatiquement. 2. -
Page 190: Navigation Via Le Réseau
7.5 Navigation via le Réseau Vous pouvez lire le streaming de fichiers multimédia partagés sur le réseau local (Ethernet or WLAN). Avant de lire ce qui suit, assurez-vous d’avoir bien lu 6.3 Changer les Paramètres Réseau et avoir fait les bons réglages. Quand vous choisissez NET dans le menu de navigation, il y a deux façons de localiser les fichiers multimédia partagés sur votre réseau local. - Page 191 Note: 1. Quand vous naviguer parmi des fichiers vidéo haute définition (résolution jusqu’à 720p / 1080i / 1080p) via Ethernet ou WLAN, la vidéo doit utiliser une mémoire tampon (buffer). Cela se fait en fonction de la limite de la vitesse du réseau ou de la force du signal de celui-ci.
- Page 192 Sélecter pour régler l’ID réseau Utilisateur, le mot de passe Réseau, Navigation Réseau et l’IP Spécifique du serveur de fichier, qui rend possible la navigation des fichiers sur le réseau via ‘Mes_Raccourcis’. Sélecter Identifiant Utilisateur réseau et l’écran de saisie apparaît. Utiliser les flèches de navigation pour choisir les lettres et les chiffres.
-
Page 193: Menu Liste De Lecture (Playlist)
Sélecter IP Spécifique du Serveur de Fichiers, et utiliser les touches de Navigation et celles Numériques pour entrer l’adresse IP. Vous pouvez aussi choisir Detail pour entrer l’étiquette, le domaine, et le nom d’Hôte ainsi que le nom du raccoucis. Puis choisissez OK et presser pour confirmer. -
Page 194: Menu Copie De Fichier
9. Menu Copie de Fichier Presser sur la télécommande pour entrer dans le menu Copie de Fichier, qui vous permet De copier vos fichiers vers et depuis les disques interne, externe USB, et réseau. Etape 1: Sélecter le disque source et celui de destination. Presser pour choisir. - Page 195 Etape 2: Sélecter la source des fichiers que vous souhaitez copier. Presser pour choisir les fichiers, pour annuler, et pour l’étape suivante. Etape 3: Sélecter le répertoire de destination où ranger les fichiers précédents. Presser pour choisir le répertoire. Presser pour annuler, et pour l’étape suivante.
-
Page 196: Fonction Nas
Presser pour choisir OK, presser pour confirmer. Et la copie démarrera. 10. Fonction NAS Ce lecteur peut être utilisé comme un NAS (Network-Attached Storage). Il peut être attaché à votre réseau domestique via soit une liaison filaire Ethernet ou sans fil (WLAN). Cette fonctionnalité... -
Page 197: Ecouter La Radio Internet
11. Ecouter la Radio Internet Ce lecteur comprend la fonction de radio gratuite internet SHOUTcast. Sélecter l’icône Radio Internet sur l’interface principale pour entrer dans ce menu. Note: 7. Assurez-vous que le Lecteur est correctement connecté au réseau LAN ou WLAN avec accès Internet. -
Page 198: Menu Genre
pour choisir le canal que vous souhaitez écouter. Presser pour commencer à écouter votre canal. Presser pour arrêter. Quand une station est surlignée, vous pouvez presser pour l’ajouter a vos favoris. 11.2 Menu Genre Presser pour sélecter GENRE, et presser pour confirmer. -
Page 199: Ma Station Favorite
Presser pour sélecter le genre que vous souhaitez dans la liste. Presser pour confirmer. 11.3 Ma Station Favorite Presser pour choisir FAVORIS, et presser pour confirmer. Toutes les stations ajoutées depuis le menu station se retrouvent ici, d’ou vous pouvez également les gérer. -
Page 200: Mise À Jour Du Firmware
12. Mise à jour du Firmware Le firmware est le système d’exploitation (OS) installé sur l’équipement. Les mises à jour du firmware peuvent comporter des nouvelles fonctions, ides améliorations et des corrections de bogues. Pour vérifier si vous avez la dernière version du firmware: 7. -
Page 201: Annexes
Attendez environ 2 minutes, L’installation sera alors terminée, les indicateurs LED s’éteindront, et le lecteur s’éteindra lui aussi automatiquement. Vous pourrez alors presser la touche POWER pour allumer à nouveau le lecteur et en profiter selon vos gouts. Note: Ne jamais éteindre le lecteur durant cette procédure; La clef USB ne peut pas non plus être débranchée durant cette procédure. - Page 202 APPAREILS D’ENREGTISTREMENT SUPPORTÉS: Built in HDD USB HDD MODE D’ENREGISTREMENT VIDÉO (Sélection) Mode 80 GB HDD 120 GB HDD 160 GB HDD 16hrs 24hrs 33hrs 32hrs 48hrs 66hrs 48hrs 72hrs 99hrs 64hrs 96hrs 132hrs 96hrs 144hrs 198hrs FORMAT D’ENREGISTREMENT VIDÉO HQ/SP/LP/EP/SLP mode: MPEG-2 MP@ML FORMAT D’ENREGISTREMENT AUDIO HQ/SP/LP/EP/SLP mode: MP2 2-canaux...
-
Page 203: Faq
Fonctionnement Humidité supportée 5% to 80% RH Disque Dur 3.5’’ SATA HDD Dimensions 61x198x171mm (L/H/P) Poids Net Approx 1.5 kg Note: Les caractéristiques et la conception de ce produit sont sujets à changement sans préavis. 13.2 FAQ Question 1. Mon Ordinateur ne reconnait pas mon Lecteur. Réponse : (1) Assurez-vous que le lecteur est allumé. - Page 204 aucun cas endommager votre lecteur. Question 4. J’ai utilisé mon lecteur pour transférer beaucoup fichiers entre plusieurs ordinateurs. Une défragmentation du lecteur risque-t-elle de l’abîmer? Réponse : Une défragmentation du lecteur après une telle utilisation peut s’avérer très judicieuse. Il n’est jamais dommageable d’utiliser la défragmentation sur le disque de lecteur.
- Page 205 Réponse : Ceci est normal durant l’initialisation du système. Cela va permettre la configuration des paramètres adéquats de façon à faciliter l’établissement du signal vidéo correspondant à celui de la TV. Durant l’initialisation, la TV des signaux incorrects ou instables qui causeront ces flashs à...
-
Page 206: Droits D'auteur Et Marques
Si vous disposez d’un firewall, il a sans doute besoin d’être configuré ou d’avoir des exceptions paramétrées pour vous permettre de communiquer facilement avec le lecteur sur le réseau. Pour tester si votre firewall fait barrage à vos communications réseau (y compris le PING et l’accès aux répertoires partagés), désactiver-le pour vois si vous pouvez vous connecter. - Page 207 GNU GENERAL PUBLIC LICENSE Version 2, June 1991 Copyright (C) 1989, 1991 Free Software Foundation, Inc., 51 Franklin Street, Fifth Floor, Boston, MA 02110-1301 USA Everyone is permitted to copy and distribute verbatim copies of this license document, but changing it is not allowed. Preamble The licenses for most software are designed to take away your freedom to share and change it.
- Page 208 software. If the software is modified by someone else and passed on, we want its recipients to know that what they have is not the original, so that any problems introduced by others will not reflect on the original authors' reputations. Finally, any free program is threatened constantly by software patents.
- Page 209 2. You may modify your copy or copies of the Program or any portion of it, thus forming a work based on the Program, and copy and distribute such modifications or work under the terms of Section 1 above, provided that you also meet all of these conditions: a) You must cause the modified files to carry prominent notices stating that you changed the files and the date of any change.
- Page 210 3. You may copy and distribute the Program (or a work based on it, under Section 2) in object code or executable form under the terms of Sections 1 and 2 above provided that you also do one of the following: a) Accompany it with the complete corresponding machine-readable source code, which must be distributed under the terms of Sections 1 and 2 above on a medium customarily used for software interchange;...
- Page 211 this License will not have their licenses terminated so long as such parties remain in full compliance. 5. You are not required to accept this License, since you have not signed it. However, nothing else grants you permission to modify or distribute the Program or its derivative works.
- Page 212 through that system in reliance on consistent application of that system; it is up to the author/donor to decide if he or she is willing to distribute software through any other system and a licensee cannot impose that choice. This section is intended to make thoroughly clear what is believed to be a consequence of the rest of this License.
- Page 213 OTHERWISE STATED IN WRITING THE COPYRIGHT HOLDERS AND/OR OTHER PARTIES PROVIDE THE PROGRAM "AS IS" WITHOUT WARRANTY OF ANY KIND, EITHER EXPRESSED OR IMPLIED, INCLUDING, BUT NOT LIMITED TO, THE IMPLIED WARRANTIES OF MERCHANTABILITY AND FITNESS FOR A PARTICULAR PURPOSE. THE ENTIRE RISK TO THE QUALITY AND PERFORMANCE OF THE PROGRAM IS WITH YOU.
- Page 214 it under the terms of the GNU General Public License as published by the Free Software Foundation; either version 2 of the License, or (at your option) any later version. This program is distributed in the hope that it will be useful, but WITHOUT ANY WARRANTY;...