Advertisement
Operation Guide CT32
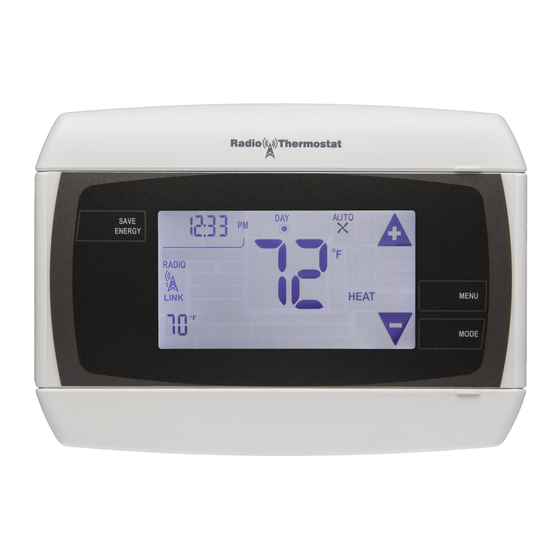
The CT32 communicating thermostat operates
via a high-quality, easy-to-use touch screen. To
set or adjust your CT32, simply touch your finger
firmly to the screen. The screen will automatically
light up and you will hear a "beep." Do not use a
sharp or metallic device; it will scratch the screen.
To open top and bottom covers, rotate the cover
toward the wall. This will expose the battery
compartment on the bottom and the wire terminals
on the top.
Statement of use: 100% Compatible with all popular
residential HVAC systems; 24VAC single, two stage
conventional heating systems (gas/oil/electric), heat pumps
with up to two stages of heat and two stage auxiliary
heat(electric or fossil), zoned forced air and zoned hot water
(2 or 3 wire), millivolt systems (with a 12-24 AC or DC source),
one or two stage cooling, and hybrid systems.
1209-001-004
top cover
Reset
HVAC
selections
switches
Save
Energy
button
Power Grid
status
indicator
bottom
cover
OPERATION
Wire
terminal
MENU
button
MODE
button
Touch screen
ENGLISH
Advertisement
Table of Contents

Related Manuals for Radio Thermostat CT32


Summary of Contents for Radio Thermostat CT32
- Page 1 Operation Guide CT32 The CT32 communicating thermostat operates top cover Reset via a high-quality, easy-to-use touch screen. To set or adjust your CT32, simply touch your finger HVAC selections switches firmly to the screen. The screen will automatically light up and you will hear a “beep.” Do not use a...
-
Page 2: Home Screen
Control Screens HOME Screen Before you operate the CT32 please get familiar with these basic control screens. All the CT32 functions are accessed through these screens: HOME, MENU, and MANUAL. The CT32 touch screen technology allows you to select (by... -
Page 3: Menu Screen
MENU Screen The MENU screen is the gateway to many functions or settings of the CT32. It is displayed when you press the MENU button. [See page 9 for details] Lock Program Set Time DAY of the Touch this to set... -
Page 4: Program Screen
PROGRAM Screen The stand alone PROGRAM screen sets the CT32 control for your home HVAC system without using a remote system. You access this screen from the MENU screen. For Manual control see page 5. Return HOME When programming is... -
Page 5: Manual Screen
The Manual control screen is where you can make temporary changes to your CT32’s operation. From the HOME screen, touch the main temperature display to use this screen. This temporary change in target will revert to the programmed target at the next time slot. -
Page 6: Initial Settings
Initial Settings Press MENU to access the following commands (from HOME screen). Set time of day Touch the Time of Day arrows to move the time selection forward or backward until it displays the current time. Touch and hold for faster Backward Forward setting. -
Page 7: To Change The Program
All Days TO CHANGE THE PROGRAM: Make sure the CT32 mode is set to either HEAT or COOL, touch MENU then touch PROGRAM. This puts you at the PROGRAM screen [see page 4]. The programmed start time is displayed in the upper left. - Page 8 PROGRAM cont. Select the day you want to program. The day of the week starts at SU - Sunday and can be advanced to the day you want to program. Touch the day of the week area to cycle through the days of the week to the desired day. The HOLIDAY is at the 8th day position and has two time slots.
-
Page 9: Menu Screen Functions
0.5 to 4.0°F (.25 to 2°C). For example, if SWING is set to 2.0°F and the CT32 is set to 70°F Target Temperature, the heat cycle will start when room temperature drops to 68°F. Similarly, the cooling system will start when the room temperature increases to 72°F. The HVAC then runs and will shut off at the Target Temperature. - Page 10 Touch icon for 5 seconds; the unit will go into the PARTIAL lock mode. The user can temporarily override the CT32 target by 2°F to 9°F with the +/- buttons only. (1 bar) For FULL lock : Touch the (1 bar) icon again for 5 seconds to go to full lock. No changes can be (2 bars).
- Page 11 CALIBRATE Your thermostat was accurately calibrated at the factory to ±1° F of actual ambient temperature. You do have the option, however, to change the display temperature to match that of a previous thermostat, or to match another thermostat already in your home. The range of change is from -6°F to +6°F or -3°C to +3°C.
-
Page 12: Manual Screen Functions
EMER only if the heat pump cannot keep up or is defective. To use EMER heat automatically - If DIFF is set to 2F and RECOVERY is set to FAST, the CT32 will use EMER heat automatically if the heat pump cannot keep up. -
Page 13: Other Functions
OFF to the next mode: HEAT -> OFF-> COOL -> OFF -> AUTO, etc. If the CT32 is in OFF and you want to return to the mode you were previously in, touch the OFF indicator on upper left of the screen. - Page 14 3. Touch and hold the PROGRAM icon for 15 seconds. This Simple home screen gives you limited access to COOL the CT32’s on screen display and no programming TARGET TEMP capability. It makes the CT32 behave like a simple one Thermostat Temperature Target Mode setting thermostat.
-
Page 15: Communicating Thermostat
Only one USNAP radio can be used at a time. 1. Power off the CT32. 2. Remove the slot cover and insert radio module in either slot on the back of the CT32. Take care to ensure that the radio mates well with the connection pins on the thermostat. - Page 16 WI-FI SETUP FOR RTCOA WI-FI MODULES Before you set-up your Wi-Fi Thermostat to connect to the Internet, you will need access to these items: 1. Your favorite Wi-Fi device (iOS device or PC with Wi-Fi connected to the Internet) that is connected to your Wi-Fi network.
- Page 17 (PC or iOS) to connect and provision your thermostat. Then the Android app will be able log in to your cloud server account and control your thermostat. SAFE Screen - When you see this screen the CT32 is in SAFE Screen. This means that the CT32 is undergoing a firmware update.