
Related Manuals for Icom IC-SAT100M


Summary of Contents for Icom IC-SAT100M
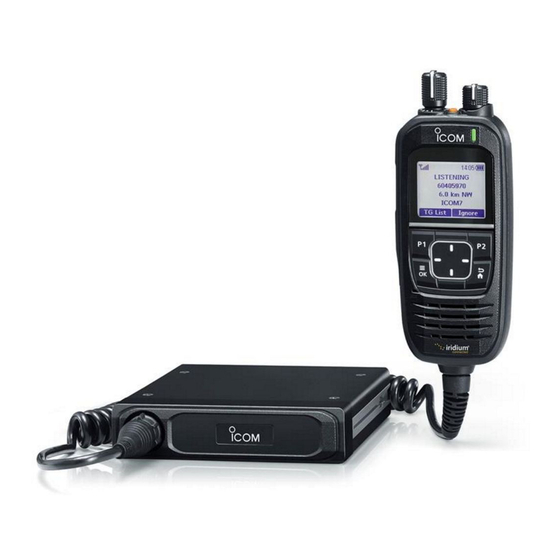
- Page 1 OPERATING MANUAL SATELLITE PTT INTRODUCTION 1 PANEL DESCRIPTIONS 2 BASIC OPERATION 3 OTHER FUNCTIONS 4 MENU SCREEN 5 CONNECTING AND MAINTENANCE 6 SPECIFICATIONS AND OPTIONS 7 TROUBLESHOOTING...
-
Page 2: Introduction
INTRODUCTION Thank you for choosing this Icom product. This product is designed and built with Icom’s state of the art technology and craftsmanship. With proper care, this product should provide you with years of trouble-free operation. Important READ ALL INSTRUCTIONS carefully before using the transceiver. -
Page 3: Table Of Contents
Using the Menu screen ......... 6 Menu items ............ 6 Icom, Icom Inc. and the Icom logo are registered trademarks of Icom Incorporated (Japan) in Japan, the United States, the United Kingdom, Germany, France, Spain, Russia, Australia, New Zealand and/or other countries. -
Page 4: Microphone Description
PANEL DESCRIPTIONS Microphone Description Microphone Speaker EMERGENCY KEY [EMER] BACK/HOME KEY [BACK] Hold down to transmit an Emergency call. Push to return to the previous Menu screen. SIDE 1 KEY [S1] Hold down to exit the Menu screen. Push to display the Message List. DIRECTIONAL KEY [UP]/[DOWN]/[LEFT]/[RIGHT] PTT SWITCH [PTT] Push to select a menu item, setting, and so on. -
Page 5: Function Display
PANEL DESCRIPTIONS Function display Icon area 00:00 Text area Last call Scan Key display area The display is shown in English as an example. Select other languages on the Menu screen, if necessary. ([OK] > Display > Language) Icon Area Text Area Displays the status, preset transceiver name, and selected Talkgroup Name. -
Page 6: Basic Operation
BASIC OPERATION Receiving and transmitting Turning ON the transceiver Transmitting Hold down [VOL] for 1 second to turn ON the CAUTION: DO NOT transmit without an antenna. transceiver. 1. Hold down [PTT]. • The transceiver searches a satellite. “REQUESTING” is displayed while the transceiver •... -
Page 7: Using The Message Function
OTHER FUNCTIONS Using the Message function Using the Emergency mode The transceiver can receive and send short In the Emergency mode, the transceiver can transmit messages. an Emergency call, as shown below. Receiving satellite. When receiving, a received message’s header and the 1. -
Page 8: Using The Surveillance Function
OTHER FUNCTIONS Using the Surveillance function Using the RX Speaker function When this function is turned ON, the beep is not heard The transceiver can output received call audio to an and the backlight and the Status indicator do not light, external speaker. -
Page 9: Menu Screen
MENU SCREEN Using the Menu screen You can use the Menu screen to set infrequently changed values or function settings. Menu The Menu screen is constructed in a tree structure. Talkgroup You can go to the next tree level by pushing [RIGHT] PTT Options or [OK], go back a level pushing [LEFT] or [BACK]. - Page 10 MENU SCREEN Menu items Bluetooth PTT Beep (VS-3) Set the beep sound when pushing [PTT] on the optional VS-3 Bluetooth headset. Bluetooth ON/OFF • OFF: No beep sounds when pushing PTT. Turn the Bluetooth function ON or OFF. • ON: A beep sounds when pushing PTT.
- Page 11 MENU SCREEN Menu items Functions Clock Auto Key Lock Clock Display Turn the Auto Keypad Lock function ON or OFF. Select whether or not to display the clock on the Main • OFF: Turns OFF the function. screen. • no key is pushed for 30 seconds. Time Format Select time format for the clock.
- Page 12 MENU SCREEN Menu items Display Information Backlight Battery Info Select a Backlight setting. Displays the battery voltage. • OFF: The backlight is always OFF. • ON: The backlight is always ON. RSSI • Auto (Key): When any switch except [PTT] is pushed, Displays the Received Signal Strength Indication the backlight lights for 5 seconds.
-
Page 13: Connecting And Maintenance
CONNECTING AND MAINTENANCE Rear panel connection Optional speaker WARNING! NEVER remove the fuse holders Red: from the DC power cable. Black: Fuse holders NOTE: Use the terminals as shown below for the cable connections. Crimp Solder 12 V or 24 V Battery EXTERNAL SPEAKER JACK LAN CABLE (Gray: for antenna, Black: for IP Network) - Page 14 CONNECTING AND MAINTENANCE Connecting the supplied microphone Cleaning Connect the supplied microphone as illustrated below. If the transceiver becomes dusty or dirty, wipe it clean with a soft, dry cloth. DO NOT use harsh solvents such as Benzine or alcohol when cleaning, as they damage the transceiver’s surfaces.
-
Page 15: Installing The Antenna
CONNECTING AND MAINTENANCE Installing the antenna Installing the outdoor antennas Keep a minimum of 20 cm (7.9 inch) between the Antenna unit and your body. Move away from buildings and use the transceiver in areas with an open sky. Install the outdoor antennas in a place with a clear view of the sky. Make sure that there are no obstacles, such as buildings or trees, at higher than about 8 degrees around the antenna. -
Page 16: Antenna Unit
CONNECTING AND MAINTENANCE Antenna unit A key element in the performance of any communication systems is the antenna. Contact your dealer for information regarding antennas and how to install them. NOTE: • Connect the Antenna unit with the LAN cable (Category 5e or higher). •... - Page 17 CONNECTING AND MAINTENANCE Connect the antenna unit and the LAN cable Connect the main unit and the supplied LAN cable as describe below. You can also connect a user supplied LAN cable up to 100 m. 1. Remove the cover attached to the LAN cable. 2.
-
Page 18: Mounting The Transceiver
Flat washers Lever Mounting bracket IC-SAT100M Nuts To reduce vibration, place the cushion on the transceiver and put the sheet on it. When mounting the bracket on the bottom side, attach the cushion and the sheet to the bottom of the transceiver. -
Page 19: Specifications And Options
SPECIFICATIONS AND OPTIONS General • Frequency range: 1616 ~ 1626.5 MHz • Number of channels: 240 Channels • Type of emission: 41K7Q7W • Duplexing method: TDD (Time Domain Duplex) • Multiplexing method: TDMA/FDMA • Antenna impedance: • Output impedance (audio): •... -
Page 20: Options
[PTT] switch. About the third party Bluetooth® headsets: Icom has checked the PTT operation with some 3M Peltor headsets such as the WS Headset XP, WS ProTac XP and WS Alert XP. (Compatibility not guaranteed.) External speakers •... -
Page 21: Using A Bluetooth ® Headset
SPECIFICATIONS AND OPTIONS ® Using a Bluetooth headset The transceiver can operate with Bluetooth headsets. 2. Entering the VS-3 Pairing mode The communication range of Bluetooth is 1. Confirm the VS-3 is turned OFF. approximately 10 meters (33 ft). 2. Hold down [ ] for 6 seconds. •... -
Page 22: Installing The Ah-40
SPECIFICATIONS AND OPTIONS Installing the AH-40 The AH-40 can be connected instead of the antenna 3. Detach the metal plate, and then push the cover element attached to the RF unit. to remove. See also Installing the antenna (p. 12) to connect Metal plate the AH-40. - Page 23 SPECIFICATIONS AND OPTIONS Installing the AH-40 6. Attach antenna unit cover. Y Type Screw NOTE: When the AH-40 cable is inserted into the antenna cover, or the antenna unit cover is removed, the antenna unit does not meet IP67 requirements for waterproof protection.
-
Page 24: Troubleshooting
TROUBLESHOOTING Troubleshooting PROBLEM POSSIBLE CAUSE SOLUTION REF. No power comes ON • Bad connection to the power supply. • Check the connection to the p. 15 • Fuse is blown. transceiver and power supply. p. 11 • Find the cause, repair, and then replace the fuse. - Page 25 A7597-2EX 1-1-32 Kamiminami, Hirano-ku, Osaka 547-0003, Japan © 2020 Icom Inc. Jul. 2020...