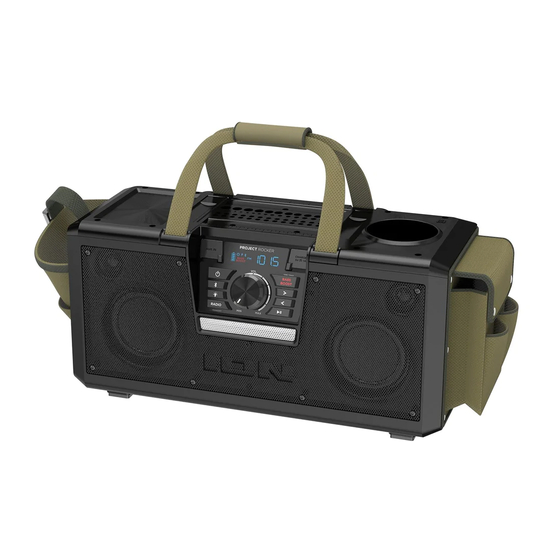
Summary of Contents for ION PROJECT ROCKER
- Page 1 Quickstart Guide English ( 3 – 8 ) Guía de inicio rápido Español ( 9 – 14 ) Appendix English ( 15 )
- Page 3 Quickstart Guide (English) Introduction Thank you for purchasing the Project Rocker. At ION, your entertainment is as important to us as it is to you. That’s why we design our products with one thing in mind—to make your life more fun and more convenient.
-
Page 4: Quick Setup
Please do not place Project Rocker in standing water. • Please do not connect the power cable to Project Rocker in a wet environment. Make sure the power input, power cable, and power outlet are all completely dry before making any connections. - Page 5 2. Power Button: Turns Project Rocker on or off. Please note that while Project Rocker is connected to a power source, it does not need to be powered on to charge the battery.
- Page 6 Rear Panel 1. Power Cable Input: Insert the included power cable here to charge the unit. Note that the Project Rocker can be used with the power cable while it simultaneously charges the battery. Side Panels...
-
Page 7: Operation
2. Enter your device’s Settings menu and check that NFC is turned On (one-time step). 3. Power on Project Rocker. 4. Touch and briefly hold your device to the NFC logo located on Project Rocker’s top panel. 5. Follow the pairing instructions that appear on your phone. If a passcode is required, enter “0000”. -
Page 8: Troubleshooting
Rocker in the list of available or previously connected devices in your audio device's Bluetooth menu, tap the "gear" or “i” icon located next to it and then select Unpair or Forget. Turn Project Rocker off and back on and try pairing again once it reappears in your available devices list. -
Page 9: Guía De Inicio Rápido (Español)
Guía de inicio rápido (Español) Introducción Gracias por comprar el Project Rocker. En ION, su entretenimiento es tan importante para nosotros como para usted. Por eso es que diseñamos nuestros productos con una sola cosa en mente—hacer que su vida sea más divertida y cómoda. -
Page 10: Instalación Rápida
Uso y cuidado a la intemperie Aunque el Project Rocker es resistente al agua y capaz de tolerar salpicaduras, lea las sugerencias que se incluyen a continuación para obtener el mejor rendimiento del Project Rocker: • El Project Rocker sólo puede usarse en exteriores con tomas de corriente o cables de prolongación aptos para el uso en exteriores. - Page 11 2. Botón de encendido: Enciende y apaga el Project Rocker. Tenga en cuenta que mientras el Project Rocker está conectado a un suministro eléctrico, no es necesario encenderlo para que cargue la batería.
- Page 12 Panel trasero 1. Entrada del cavo de alimentación: Inserte aquí el cable de alimentación incluido para alimentación la unidad. Tenga en cuenta que el Project Rocker puede funcionar...
- Page 13 Cómo aparear un dispositivo Bluetooth 1. Encienda su dispositivo Bluetooth. 2. Encienda el Project Rocker. Si ya lo había conectado a otro dispositivo Bluetooth previamente, el Project Rocker se reconectará. Para desconectar el apareamiento si el icono de Bluetooth está encendido permanentemente, mantenga pulsado el botón de Bluetooth.
-
Page 14: Solución De Problemas
Mantenga su dispositivo de audio (por ej., teléfono inteligente [smartphone] o tableta) y el Project Rocker lo más cerca posible entre sí al realizar la conexión. Asegúrese que tanto el dispositivo de audio como el Project Rocker no estén obstruidos por paredes, muebles, etc. -
Page 15: Technical Specifications
ION Audio is a trademark of ION Audio, LLC, registered in the U.S. and other countries. The Bluetooth word mark and logos are owned by the Bluetooth SIG, Inc. and any use of such marks by ION Audio is under license. - Page 16 ionaudio.com Manual Version 1.3...


