Table of Contents
Advertisement
Quick Links
WARNING
If the information in these instructions is not followed exactly, a fire or explosion may
result, causing property damage or personal injury.
Do not store or use petrol or other flammable vapours and liquids in the vicinity of this or any
–
other appliance.
Installation and service must be performed by a qualified installer or service agency.
–
Condensing Blue Flame Oil-Fired Boiler
Installation &
Operation
Manual
Installation Location
Internal
External
Keep this manual near this boiler for future reference
whenever maintenance or service is required.
Type
Model
LCB700-21RS
Regular
LCB700-28RS
LCB700-36RS
LCB700-21LS
System
LCB700-28LS
LCB700-36LS
LCB700-21LC
Combi
LCB700-28LC
LCB700-36LC
LCB700-21RSX
Regular
LCB700-28RSX
LCB700-36RSX
LCB700-21LSX
System
LCB700-28LSX
LCB700-36LSX
LCB700-21LCX
Combi
LCB700-28LCX
LCB700-36LCX
Advertisement
Table of Contents

Related Manuals for Navien LCB700-21RS


Summary of Contents for Navien LCB700-21RS
- Page 1 Condensing Blue Flame Oil-Fired Boiler Installation & Operation Manual Installation Location Type Model LCB700-21RS Regular LCB700-28RS LCB700-36RS LCB700-21LS Internal System LCB700-28LS LCB700-36LS LCB700-21LC Combi LCB700-28LC LCB700-36LC LCB700-21RSX Regular LCB700-28RSX LCB700-36RSX LCB700-21LSX External System LCB700-28LSX LCB700-36LSX LCB700-21LCX Combi LCB700-28LCX LCB700-36LCX Keep this manual near this boiler for future reference whenever maintenance or service is required.
-
Page 2: Table Of Contents
Contents 1. Safety Information 8. Connecting the Power Supply 2. About the Boiler 9. Connecting Electrical Supplies 2.1 Items Included 9.1 Accessing the Main Controller (PBA) 2.2 Accessories 9.2 About the Main Controller (PBA) 2.3 Specifications 9.3 Setting the Heating Demand 2.4 Components 9.4 Connecting Applications - Low Voltage (DC) Application Part... -
Page 3: Safety Information
1. Safety Information The following safety symbols are used in this manual. Read and follow all safety instructions in this manual precisely to avoid DANGER unsafe operating conditions, fire, explosion, property damage or personal injury. DANGER Indicates an imminently hazardous situation which, if not avoided, could result in severe injury or death. - Page 4 WARNING WARNING This appliance can be used by children aged from 8 years and above and persons with reduced physical, sensory or mental capabilities or lack of experience and knowledge if they have been given supervision or instruction concerning use of the appliance in a safe way and understand the hazards involved.
- Page 5 DANGER CAUTION Do not turn on the boiler unless the water and oil supplies are fully opened. Doing so may damage the boiler. Do not turn on the water if the cold BURN water supply shut-off valve is closed. Doing so may damage the boiler. To prevent burns: Do not use this boiler for anything Use the lowest operating temperature...
- Page 6 Compliance with a British Standard does not, in itself, confer immunity from legal obligations. In particular, the installation Navien ensures that this product contains no harmful of this appliance must be in accordance with the relevant substances and that no harmful materials have been used in its requirements of the following British Standards and regulations manufacture.
- Page 7 OFTEC Technical book three - Regional requirements: Republic of Ireland EC Conformity Declaration Navien, hereby declares that the LCB700 models to which this declaration refers, conform to and comply with the essential requirements of the following applicable European Standards and Directives.
-
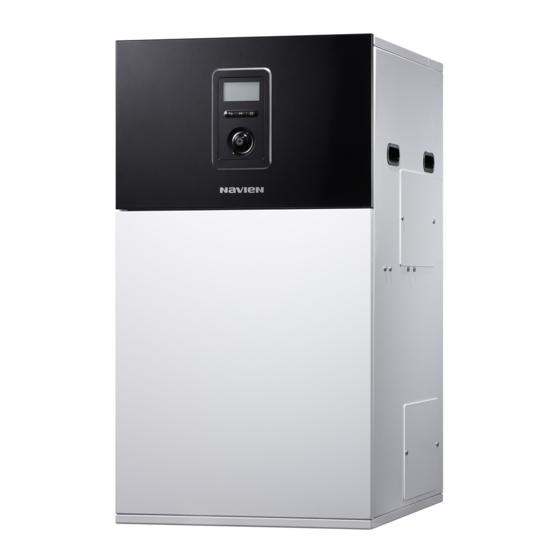
Page 8: About The Boiler
If it seems like there is a problem, do not use the boiler. Contact your supplier. Keep the included items out of the reach of children, as they can be dangerous. When you no longer wish to use the boiler, disable any parts that could be potentially hazardous. KD Navien NCB-24LSWE... -
Page 9: Specifications
2.3 Specifications The following tables list the general specifications and energy consumption for the boiler. Internal Model External Model 21RS 28RS 36RS 21RSX 28RSX 36RSX DESCRIPTION UNITS 21LS 28LS 36LS 21LSX 28LSX 36LSX 21LC 28LC 36LC 21LCX 28LCX 36LCX Heat Input Stage 1/Stage 2 17/22 22/29... - Page 10 Product Datasheet On Energy Consumption The following product data complies with the requirements of EU Regulations No. 811/2013 and No. 812/2013 as supplement to the Directive 2010/30/EU. LCB700 21RS, RSX 28RS, RSX 36RS, RSX Product data Symbol Unit 21LS, LSX 28LS, LSX 36LS, LSX 21LC, LCX...
-
Page 11: Components
2.4 Components Internal Model The following diagram shows the key components of the boiler. Component assembly diagrams and particular parts lists are included in the Appendixes. Flue Duct Oil Burner Auto Air Vent Main Controller Front Panel Heating Supply Heating Supply Heating Return Temperature Sensor Flue... - Page 12 Combi Internal Model The following diagram shows the key components of the boiler. Component assembly diagrams and particular parts lists are included in the Appendixes. Flue Duct Oil Burner Auto Air Vent Auto Air Vent Main Controller Front Panel DCW Inlet DHW Outlet CH Return CH Supply...
- Page 13 External Model The following diagram shows the key components of the boiler. Component assembly diagrams and particular parts lists are included in the Appendixes. Flue Duct Oil Burner Auto Air Vent Main Controller Front Panel Heating Supply Heating Supply Heating Return Temperature Flue Temperature Sensor Sensor...
- Page 14 Combi External Model The following diagram shows the key components of the boiler. Component assembly diagrams and particular parts lists are included in the Appendixes. Flue Duct Oil Burner Auto Air Vent Auto Air Vent Main Controller Front Panel Cold Water Inlet DHW Outlet Expansion Vessel CH Return...
-
Page 15: Dimensions
2.5 Dimensions The following diagrams show the dimensions of the boiler and the table lists the supply connections. Internal Model External Model Supply Connections Top View Right View LCB700 Symbol Description 21RS, RSX 28RS, RSX 36RS, RSX 21LS, LSX 28LS, LSX 36LS, LSX Flue Exhaust Φ60/100... - Page 16 Combi Internal Model Combi External Model Supply Connections Top View LCB700 Symbol Description 21LC, LCX 28LC, LCX 36LC, LCX Flue Exhaust Φ60/100 Central Heating Φ22 Φ22 Φ22(Φ28) Supply Central Φ22 Φ22 Φ22(Φ28) Heating Return DCW Inlet ” Ball Valve (Female) DHW Outlet More than Φ21.5 (Plastic Pipe) Oil Supply...
-
Page 17: Installing The Boiler
3. Installing the Boiler 3.1 Installation Procedure The flow diagram below provides a step-by-step description of the recommended procedure for clear, easy installation of the LCB700 boiler in its final location. A detailed description is given of the procedure in the sequenced sections below: Installation Location »... -
Page 18: Choosing An Installation Location
Navien will not be responsible for water damages that occur as a Carefully consider the following factors when choosing an result. For more information about condensate drainage, refer to installation location. - Page 19 Adequate Installation Clearances Clean, Debris and Chemical-free Combustion Air Do not install the boiler in areas where dust and debris may accumulate or where hair sprays, spray detergents, chlorine, CAUTION or similar chemicals are used. Do not install the boiler in areas where petrol or other Do not install the boiler on carpet mmables are used or stored.
-
Page 20: Installing The System Piping
Any pipes exposed to the elements or which could freeze old and new, must be cleaned to remove flux, grease and in winter must be insulated with suitable insulating carbon residue. Navien recommends cleaning the boiler material. system with cleaning products specially formulated for boiler systems. -
Page 21: Installing A Central Heating System
4.1.1 Guidelines for a Central Heating Installation Read and follow the guidelines listed below to ensure safe and The fire-tube type heat exchanger of the Navien LCB700 boiler is proper installation of a boiler heating system. designed to attain the highest level of heat transfer in a compact design. - Page 22 Pressure Relief Valve WARNING The requirements recommended for the pressure relief valve are as follows: Immediately repair any leaks in the system plumbing to avoid adding make-up water. Make-up water adds The pressure relief valve is calibrated to be activated at a oxygen and minerals to the system that may lead to heat maximum pressure of 3 bar, and all the pipes and connections must therefore be able to withstand pressures of up to 3 bar.
-
Page 23: Installing A System Application
4.1.4 Water Quality Standards for Appliance Quality Assurance CAUTION The water supplied to the boiler must satisfy the water quality If the water supplied to the boiler does not satisfy the water requirements on the following table. quality requirements, contact an authorised technician or licensed professional to avoid product malfunctions due to poor water quality before supplying water to the boiler. - Page 24 <S Plan Layout> <Y Plan Layout> Auto Air Temp. Pressure Auto Air Vent 2Way 3Way Vent Sensor Gauge Valve Valve 3Way Valve Auto Air Vent Pressure Gauge Pressure High Limit Stat Relief Valve Automatic Temp. Bypass Valve Sensor Circulating Pump Mixing Valve Circulating Pump High Limit Stat...
-
Page 25: Connecting The Condensate Drain Line
If the appliance is installed in non-heated premises, the tube system must be treated as if it was an outdoor installation. The Navien LCB700 boiler creates condensation when it operates. To prevent the risk of tripping, the outdoor tubes must be This condensation has an acidic pH of 2-5. -
Page 26: Installing The Support (Optional)
To connect the condensate drain: 4.4 Installing the Support (Optional) 1. Connect an integrated drain hose to the 21.5 mm at the Place the support on a flat floor, and then place the boiler on bottom of the boiler. the support securely so that the boiler does not move during Use only corrosion-resistant material for the integrated drain operation. -
Page 27: Testing The Water System
Refer to the following illustration for system fill. 4.6 Testing the Water System WARNING Ensure that the boiler is full of water before firing the burner. Operating the unit without filling it will damage the boiler. Such damage is not covered by the warranty, and may result Central Heating Return in property damage or severe personal injury. -
Page 28: Connecting The Oil Supply
5. Connecting the Oil Supply 5.1 Essential Elements in the Oil Supply Fuel Pipes Fuel supply pipes should be of copper tubing with an external This appliance is suitable for Kerosene (Class C2) and Light-oil. diameter of at least 10 mm. No other fuel may be used. -
Page 29: Connecting The Flexible Hose To The Fuel Pipe
5.2 Connecting the Flexible Hose to the Fuel Pipe After installing the boiler, use the oil line nipple (included with the boiler) to connect the flexible hose to the fuel pipe of the oil storage tank. Flexible Hose Fuel Pipe Storage Tank Oil Line Nipple... -
Page 30: Oil Supply
5.3 Oil Supply Single Pipe Gravity Feed System The oil storage tank must be positioned so that the oil level does not exceed 4 metres above the level of the boiler oil pump and, in addition, the oil level must be at least 300 mm above the oil pump. Where the maximum oil level in the oil storage tank exceeds 4 metres, a head breaking device must be installed between the tank and the boiler oil pump. - Page 31 Double Pipe Sub-Gravity Feed System With the storage tank outlet below the burner, a two pipe system should be used. The return pipe should be at the same level in the tank as the supply pipe, both being 75 to 100 mm above the base of the tank. The pipe ends should be a sufficient distance apart so as to prevent any sediment from being disturbed by the return entering the supply pipe.
- Page 32 Single Pipe Suction Lift with De-Aerator System When the storage tank is below the burner, an alternative to a two pipe system can be achieved using an oil de-aerator. This effectively removes the air from the oil supply on a single pipe lift. The maximum suction height 3.5 metres.
-
Page 33: Burner Oil Connection
5.4 Burner Oil Connection The oil pump is supplied for use with a double pipe oil supply system. The oil pump return line plug is supplied in the boiler accessory pack. Stage 2 Valve Stage 1 Valve Pressure Connection Cartridge Filter Pressure Oil Nozzle... -
Page 34: Flue System
6. Flue System The minimum distances between the flue exhaust terminal and the building elements must comply with those shown in the WARNING following table: Improper flue of the boiler can result in excessive levels of carbon monoxide, which can lead to severe personal injury. Flue should be performed only by a licensed professional. -
Page 35: Coaxial Systems
For vertical ducts, the outlet must be at least 60 cm Extended Removal System Note from any opening. The dimensions (B, C, D, and E) may be reduced to 25 mm, as long as the flue terminal is extended to clear any overhangs. -
Page 36: Measuring Flue Length
Carefully study the diagrams representing the different types of removal and select the one that best suits the conditions of your installation. To choose the removal accessories required for each installation, see the list of accessories on the NAVIEN price list. Maximum Total Length Pipe Diameter... -
Page 37: Terminating The Flue
1.22 m horizontal clearance is maintained. 6.5 Fixing the Flue After installing the flue vent, fasten the screw to fix the flue vent to the flue duct. (Use screws supplied by Navien.) WARNING The screw must be fastened completely to fix the flue vent to the flue duct. -
Page 38: Setting The Dip Switches
7. Setting the DIP Switches Switch 1 Function Setting CAUTION 21 kW 5-OFF, 6-OFF Do not remove the front cover unless the power to the 28 kW 5-ON, 6-OFF boiler is turned off or disconnected. Failure to do so may 5 &... - Page 39 Switch 2 Function Setting 6-OFF, 7-OFF, Switched Live 8-OFF 6-ON, 7-OFF, CH Thermostat 8-OFF 6-OFF, 7-ON, Navien Thermostat 8-OFF 6-ON, 7-ON, OT R/C 8-OFF CH Heat 6 & 7 & 8 Demand 6-OFF, 7-OFF, Not Used 8-ON 6-ON, 7-OFF, Not Used...
-
Page 40: Connecting The Power Supply
Do not connect the boiler to a 110-120 V AC power supply. Doing so will damage the boiler and void the warranty. All the Navien LCB boilers are supplied with a factory- installed, 3 core wire (Live, Neutral, Earth). The boiler’s current rating is 3 A and can be plugged into any grounded electrical outlet adjacent to the boiler. -
Page 41: Connecting Electrical Supplies
9. Connecting Electrical Supplies To access the PBA, carefully follow the steps below: WARNING 1. Turn off the power supply to the boiler. Improperly connecting the electrical supplies can result 2. Open the front cover by pulling its sides. in electrical shock and electrocution. Follow all applicable electrical codes of the local authority having jurisdiction. -
Page 42: About The Main Controller (Pba)
9.2 About the Main Controller (PBA) Refer to the following illustration for the main controller (PBA) wiring description. Part Applications System/Combi: Internal recirculation pump Regular: External recirculation pump Combi: 3 Way Valve (Internal) System/Regular: DHW Valve (S,Y plan) System/Regular: CH Valve (S, Y, W plan) AC application Junction box connection 1. -
Page 43: Setting The Heating Demand
When VCU-10R (wiring centre) is connected Centre to the boiler The 4-2 Wiring Centre menu is displayed only when Note the CH heat demand is set to Navien Thermostat and the wiring centre (VCU-10R) is connected to the boiler. Connecting Electrical Supplies... -
Page 44: Connecting Applications - Low Voltage (Dc) Application Part
9.4 Connecting Applications - Low Voltage (DC) Application Part These connections are low voltage DC only and 240 V AC is not to be fitted to these terminals. Doing so may damage the PCB and will not be covered under warranty. 9.4.1 Connecting the OpenTherm The boiler is designed to be connected to an OpenTherm. - Page 45 9.4.3 Connecting the CH Thermostat The boiler is designed to be connected to a CH thermostat. The CH thermostat cables are to be connected to the CONH1 in the low voltage (DC) application part. Low Voltage (DC) Application Part Thermostat 9.4.4 Connecting the Outdoor Temperature Sensor The boiler is designed to be able to function with an outdoor temperature sensor.
-
Page 46: Connecting Applications To The Ac Application Part
9.5 Connecting Applications to the AC Application Part 9.5.1 Connecting the 2 Port Diverter Valve (CH) The boiler is designed to be connected to a 2 port diverter valve (CH). The valve cables are connected to the terminals 1 (L) and 2 (N) of the CONM3 in the AC application part. - Page 47 9.5.3 Connecting the 3 Port Diverter Valve The boiler is designed to be connected to a 3 port diverter valve. The valve cables are connected to the terminals 1 (L) and 2 (N) of the CONM3 in the AC application part. It only operates when there is an operating signal from the cylinder stat or CH thermostat. Application Part Brown...
-
Page 48: Connecting Applications To Ac Application Part (With Junction Box)
9.6 Connecting Applications to AC Application Part (With Junction Box) 9.6.1 Connecting the Junction Box Connection (S Plan) The boiler is designed to be connected to a junction box (S Plan). The Junction box cables are connected to the terminals 1-5 of the CONM4 in the AC application part and the CONZ3 (POWER OUT) in the AC power line part. - Page 49 9.6.2 Connecting the Junction Box Connection (Y Plan) The boiler is designed to be connected to a junction box (Y Plan). The Junction box cables are connected to the terminals 1-5 of the CONM4 in the AC application part and the CONZ3 (POWER OUT) in the AC power line part. 3-Port Mid Position Zone Valve...
-
Page 50: Installation Check List
If you have additional questions or need assistance with installation, contact an official Technical Assistance Service (TAS), or refer to the technical support section of Navien’s website (www.navien.co.uk). Installing the Boiler Have you maintained the proper service and maintenance clearances? - Page 51 Connecting the Oil Supply Is the fuel used Kerosene or Light-oil? Did you use a galvanized pipe as the fuel line? Did you install a fire valve? If the oil line was installed with a single pipe, did the oil tank be installed more than 300 mm above the oil pump? Did you check for leaks in oil supply piping? Flue System...
-
Page 52: Operating The Boiler
11. Operating the Boiler 11.1 Using the Front Panel The front panel allows you to adjust the temperature and view the operating status or error codes. Remove the protective film from the front panel before using it. 11.1.1 Icons and Digital Display The icons and digital display on the front panel provide important information required for the boiler’s operation. - Page 53 11.1.2 Buttons and Command Dial Using the buttons and the Command dial on the front panel, you can turn on or off the boiler, monitor the current operation status, and set the values required for the boiler’s operation, such as central heating and DHW supply temperatures. Refer to the following table for detailed information.
-
Page 54: Turning The Boiler On Or Off
11.2 Turning the Boiler on or off 11.3 Adjusting the Temperature To turn the boiler on or off, press the Power button ( ) for 0.3 seconds. 11.3.1 Adjusting the Central Heating Temperature To adjust the heating temperature: 1. In normal operation mode, rotate the Command dial ) . - Page 55 You can adjust the temperature while the highlighted section 2. Rotate the Command dial ( ) to the right to select the is flashing. Once the flashing stops, the current temperature DHW temperature ( setting is stored. The central heating temperature cannot be Note adjusted when the Outdoor Reset Control is used.
-
Page 56: Accessing Basic Menu Items
11.3.3 Resetting the Boiler 11.4.1 Quick Setup Menu If an error message appears during boiler operation, reset the The Quick Setup Menu is designed to help configure the boiler boiler to resolve the problem. Press the Back button ( ) on the settings after installation is complete. - Page 57 System/Regular Models Item Description 6. Burner Temp Burner housing sensor temperature (°C) Item Description 7. Outdoor Temp Outdoor temperature (°C) 1. Operation State Current Operation State 8. Water Press Water pressure (bar) 2. Heat Capacity Heat capacity (Low or High) 8.
- Page 58 The graph shows how the set temperature is determined. 11.4.3 Setting the Central Heating Operation K-factor values can be set using the front panel or the Smart Room Controller. To set the boiler’s central heating operation, press the Menu button ( ), and then select “3.
- Page 59 2. Wiring Centre: This option is or to increase/decrease setting values. Press the Command dial available only when CH Demand is ) to select an item or to confirm after making changes. set to Navien Thermostat. Item Description Combi Models 1.
- Page 60 Combi Models - Central Heating Mode 11.4.6 Viewing Error History To view the error history, press the Menu button ( ), and then Item Description select “6. Error History”. Schedule a command for each day of 1. 7 Day the week. Schedule a command for weekday 2.
- Page 61 11.4.7 Viewing Other System Information 11.4.8 Setting the Display Options To view the miscellaneous system information, press the Menu To set the front panel display options, press the Menu button button ( ), and then select “7. EMS Data”. ), and then select “8. Configuration”. Rotate the Command dial ( ) to switch between the Rotate the Command dial (...
-
Page 62: Accessing Advanced Menu Items
11.5 Accessing Advanced Menu Items 11.5.2 Viewing Input and Output Status To view the boiler’s input and output status, press the Back button ( ) and the Menu button ( ) simultaneously for 11.5.1 Viewing Service Information 3 seconds, and then select “2. Input/Output Status”. To view service information about the boiler, press the Back button ( ) and the Menu button (... - Page 63 11.5.3 Setting the Operation Parameters After entering the parameter setting screen, rotate the Command dial ( ) to switch between the parameters or to To set the boiler’s operation parameters, press the Back button increase/decrease setting values. Press the Command dial ( ) and the Menu button ( ) simultaneously for 3 seconds, to select a parameter or to confirm after making changes.
- Page 64 Item Description Item Description Set the oil consumption Set the anti-fast cycling time. 5. Anti Fast Cycling compensation rate. Setting range: 0 – 20 min Time* 10. Oil CMPS Rate Setting range : -25% – 25% Default: 3 min Default : 0 % Set the DHW Pre-Heating Set temperature.
- Page 65 11.5.4 Diagnosing the Boiler System Item Description To run a series of test procedures for a system diagnosis, press Set the service notification according the Back button ( ) and the Menu button ( ) simultaneously to the operating times. for 3 seconds, and then select “4.
- Page 66 11.5.5 Setting the Special Operation Modes Item Description To operate the boiler in special operation modes, press the Back Test the 2 way valve operation. button ( ) and the Menu button ( ) simultaneously for The 2 way valve is turned on as 3 seconds, and then select “5.
-
Page 67: Error Codes
11.6 Error Codes When an error code appears on the front panel, refer to the following chart for a definition and possible remedy for the situation. Item Error Code Description Reset E001 Overheating of heat exchanger Manual E003 Ignition failure Manual E004 False flame detection... -
Page 68: Maintaining The Boiler
12. Maintaining the Boiler 12.1 Cleaning the Boiler 12.2 Draining the Boiler You will need to drain either both the central heating side and domestic hot water (DHW) side, or one side only before CAUTION performing maintenance tasks, such as cleaning the adapter filter, or to prevent the boiler from freezing when it will not be Make sure the boiler is turned off and the power supply is used for an extended period. -
Page 69: Protecting The Boiler From Freezing
12.3 Protecting the Boiler from Freezing there is no valve, turn off the water supply at the water main. CAUTION Damage due to freezing is not covered by the Navien limited warranty. Closed If the boiler is connected to a circuit that could freeze, the circuit pipes must be suitably insulated. -
Page 70: Maintenance Schedules
If hot water will not flow and you suspect that the boiler is 12.4 Maintenance Schedules frozen, follow these steps: 1. Press the Power button ( ) on the front panel to turn off Owner maintenance the boiler. Check boiler area 2. -
Page 71: Maintaining The Parts
12.5 Maintaining the Parts Cleaning the Condensate Trap 1. Loosen the eight screws on the condensate trap cover and remove the cover, case packing, ball, ball packing, ball guide WARNING packing, and ball guide. Follow the service and maintenance procedures given throughout this manual and in component literature Screw shipped with the boiler. - Page 72 2. Remove any deposits accumulated at the bottom of the UV sensor. WARNING Failure to inspect for the above conditions and have them repaired can result in severe personal injury. Checking the Water System 1. Verify all system components are correctly installed and operational.
- Page 73 2. Replace the old flexible oil hoses with new ones. Flexible Oil Hose 21RS/RSX 28RS/RSX 36RS/RSX Model 21LS/LSX 28LS/LSX 36LS/LSX 32 mm 37 mm 42 mm Ignition 18 mm 20 mm 26 mm Dim. 3. Remove the three screws on the burner housing and replace the old oil nozzle with new one.
- Page 74 21RS/RSX 28RS/RSX 36RS/RSX Model 21LS/LSX 28LS/LSX 36LS/LSX Oil Nozzle 0.55G 80˚ ES 0.75G 80˚ ES 1.0G 80˚ ES “Kerosene” “ES” UK Standard Pattern 6.5 bar 6.5 bar 6.5 bar Heating Oil Oil Nozzle Pressure High 11.5 bar 9.5 bar 10 bar Oil Nozzle 0.45G 80˚...
- Page 75 Measuring Combustion and Adjusting Oil Pressure 3. Using a 4 mm Allen wrench, adjust the oil pump pressure at the top of the burner based on the following table (+: Clockwise, -: Counterclockwise). Measure combustion 2 minutes after boiler Note operation.
-
Page 76: Appendices
13. Appendices 13.1 Wiring Diagram Appendices... -
Page 77: Component Assembly Diagrams And Parts
13.2 Component Assembly Diagrams and Parts 13.2.1 Controller and Panel Screws Description Part # Remark Controller 30021889A System Controller 30021890A Regular Controller 30021891A Combi Panel 30021314A System/Regular Panel 30024506A Combi Front Case 20043423A Internal(System/Regular) Front Case 20046860A Internal(Combi) Front Case 20044629A External(System/Regular) Front Case... - Page 78 13.2.2 Burner Cover Flame Tube Appendices...
- Page 79 Description Part # Remark Burner Assembly 30021123A Burner Assembly 30021124A Burner Assembly 30021125A Ignition Transformer 30021149A UV Sensor 30021145A Oil Pipe 30021150A Nut - Oil Inner Tube Fix 20009942A Oil Pump Assembly 30021151A Flexible Oil Hose 20010105E Packing for Burner House 20043392A Packing for Fan 20042399A...
- Page 80 Orifice Swirl Plate <Flame Holder Assembly> <Intake Pipe> Oil Pump Motor Oil Pump Coupling <Oil Pump> Appendices...
- Page 81 Description Part # Remark Air Nozzle 20043449A Air Nozzle 20043450A Air Nozzle 20043451A Oil Nozzle (Kerosene) 20043603A Oil Nozzle (Kerosene) 20043604A Oil Nozzle (Kerosene) 20043605A Oil Nozzle (Light-Oil) 20047433A Oil Nozzle (Light-Oil) 20047434A Oil Nozzle (Light-Oil) 20047435A Flame Holder 30021071A Ignition 30022883B Ignition...
- Page 82 13.2.3 Heat Exchanger Turbulence and Exhaust Duct Cover Burner Assembly Silencer Appendices...
- Page 83 Description Part # Remark Heat Exchanger 30021066A Heat Exchanger 30021067A Heat Exchanger 30021068A Guide for Combustion 30021083A 21/28 Guide for Combustion 30021204A Insulation 20043518A Turbulence 20043515A High Limit Stat for Heat Exchanger 30002557A Packing for Exhaust 20029713A Air Supply Packing 20043645A 30021130A System/Regular...
- Page 84 13.2.4 Water Piping Parts Drain Hose Drain Hose for Screw Pressure Relief Valve Drain Hose for Heat Exchanger Condensate Trap Cover Case Packing Ball Ball Packing Clip Ball Guide Packing Ball Guide Condensate Trap Case Connection Hose for Expansion Clip Vessel Drain Cork Clip...
- Page 85 Description Part # Remark Expansion Vessel 30022587A System/Combi Flexible Hose 20043593A System/Combi Circulation Pump 30022230A System/Combi Packing 20044484A System/Combi Pump Inlet Adapter 30022969A System/Combi Pump Outlet Adapter 30022970A System/Combi Pressure Gauge 30020258A Air Vent 30023517A 20043463A System/Regular Central Heating Supply Water Adapter 20047273A Combi Temperature Sensor...
- Page 86 13.2.5 DHW Parts Appendices...
- Page 87 Description Part # Remark Storage Tank 30022441A Temperature Sensor 30002659A Air Vent 30023517A Pipe_Tank Outlet 30023511A Pipe_Tank Inlet 30023282A Pipe_Heat Exchanger Outlet 30023512A Pipe_Domestic Cold Water Inlet 30023281A Pipe_Domestic Hot Water Outlet 30023280A Pipe_Heating Outlet 30023285A Pipe_Heating Return 30024736A Pipe_Heating Return_Pump 30023287A Pipe_Heat Exchanger Inlet 30023513A...
- Page 88 13.2.6 DHW Block and Heating Supply Assembly Appendices...
- Page 89 Description Part # Remark DHW Heat Exchanger 30018296A Packing_DHW Heat Exchanger 20035234B DHW_Heating Supply Assembly 30023439A DHW_Cold Water Inlet Assembly 30023438A Bolt_Hex Wranch M5×10L 20009865A Manifold_Heating Supply 20044482A O-ring_P22 20018011A Adaptor_DHW_In/Outlet 20047162A Temperature Sensor 30015178A O-ring_P26 20032409A Clip_Φ36 20017724A Heating Water Return 20046493A 3-Way Valve XXXXXXXXA...
- Page 90 13.2.7 DHW Cold Water Inlet Assembly Description Part # Remark Clip_STS430,Φ19.2×1t 20007733B O-ring_P22 20018011A Adaptor_DHW_In/Outlet 20047162A O-ring_P26 20032409A Clip_Φ36 20017724A O-ring_P16 20017210A Clip_D_Φ25 20007859A Manifold_Cold Water Inlet 20044471A O-ring_P18 20006947A Adapter_Connect 20044469A Water Adjust Valve 30008247A Adapter_Elbow_Temp. Sensor 20044470A Temperature Sensor 30022207A Clip_Φ27 20017726A...
- Page 91 13.2.8 APS Hose Connection Locations Connect the “H” Pressure. Connect the “L” Pressure. “H” Pressure “L” Pressure Description Part # Remark Air Pressure Sensor 30022962A Appendices...
- Page 92 Memo...
- Page 93 Memo...
- Page 94 Memo...
- Page 96 Model number Serial number Date purchased Installation location and type Error code, if any appears on the front panel display Version: 1.10 (Dec. 2019) Navien LTD Building 2, Guildford Business Park, Guildford, GU2 8XH TEL 0844 332 2323 www.navien.co.uk...