Table of Contents
Advertisement
Quick Links
Advertisement
Table of Contents

Related Manuals for Tricity Bendix SE210/1W


Summary of Contents for Tricity Bendix SE210/1W
- Page 1 Operating & Installation Instructions Electric Cooker SE210/1W...
-
Page 2: Table Of Contents
CONTENTS Instructions for the user Important Safety Information Description of the appliance Electric hotplates Hints & Tips Electric oven Electric grill Cooking chart Hints and Tips Accessories Maintenance and Cleaning Something Not Working The symbols below will guide you when reading the instruction book Instructions for the installer Technical features Important safety requirements... -
Page 3: Important Safety Information
IMPORTANT SAFETY INFORMATION You MUST read these warnings carefully before installing or using the appliance. If you need assistance, contact our Customer Care Department on 08705 950950 Installation • This cooker must be installed by qualified personnel, according to the manufacturer’s instructions and to the relevant British Standards. -
Page 4: Environmental Information
Service • This cooker should only be repaired or serviced by an authorized Service Engineer and only genuine approved spare parts should be used. Environmental Information • After installation, please dispose of the packaging with due regard to safety and the environment. -
Page 5: Description Of The Appliance
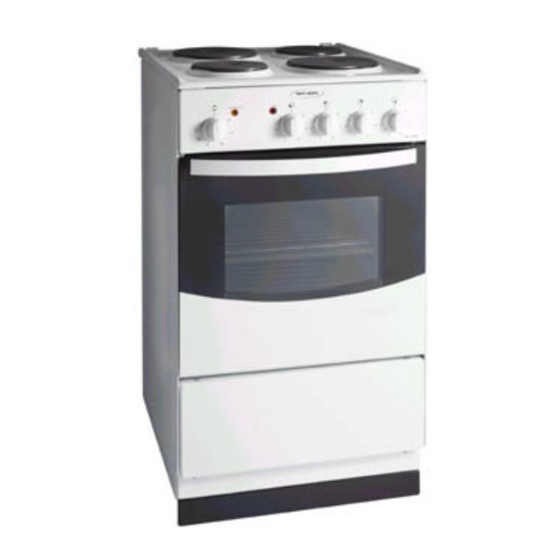
DESCRIPTION OF THE APPLIANCE Control panel Oven function control knob Main pilot light Oven thermostat pilot light Control panel Door handle Oven door Adjustable small feet Front left hotplate control knob Back left hotplate control knob Back right hotplate control knob Front right hotplate control knob Hotplate ∅... -
Page 6: Electric Hotplates
ELECTRIC HOTPLATES To switch on a hotplate, turn the relevant control knob to the required heat setting. The control knob is numbered 0 – 6 0 – OFF 1 – Minimum 6 – Maximum. The hob has two types of hotplates: Normal Hotplates We recommend the plates are switched to maximum (6) for a short while to boost the... -
Page 7: Hints And Tips
HINTS AND TIPS Saucepans for use on solid plates should have several characteristics: They should be fairly heavy duty They should fit the heat area exactly, or be slightly larger for efficient use, NEVER smaller. They should have a flat base to ensure good contact with the plate. -
Page 8: Electric Oven
ELECTRIC OVEN Before the First Use of the Oven Before the first use ensures that the room is well ventilated: V.M.C. (Mechanic ventilation) or opened window. Remove all packaging, both inside and outside the oven, before using the oven. Before first use, the oven should be heated without food. - Page 9 Grilling Heat comes from the top of the oven. It is suitable for grilling meat (beef bacon, pork bacon …) that remains tender, for toast or to brown already cooked food. When using the grill it has to be supervised. Children should be kept away.
-
Page 10: Cooking Chart
COOKING CHART Tray type or Food dimension (dxwxh) cm Roasting meal - beef Roasting tray delivered with the - lamb cooker - pork and veal Poultry - chicken Roasting tray - turkey below 4.5 Kg delivered with the cooker - duck Grilling Roasting tray half cut chicken... -
Page 11: Hints And Tips
Put the dishes in the center of the shelf The oven grid in the position The longer side of the tray must be parallel with oven door Hints and Tips Condensation and steam When food is heated it produces steam in the same way as a boiling kettle. -
Page 12: Maintenance And Cleaning
MAINTENANCE AND CLEANING The oven should be kept clean at all times. A build-up of fats or other foodstuffs could result in a fire. Before cleaning, ensure all control knobs are in the OFF position, and the appliance has cooled completely. Before any maintenance or cleaning can be carried out, you must DISCONNECT the cooker from the... -
Page 13: The Hotplates
The Hotplates Spills onto the actual plate should be removed using warm water and a soft brush, nylon or plastic scourer. To keep the plates looking as new, hotplate conditioner can be purchased from most hardware stores, e.g. “4 Hob” by Homecare Products (follow the manufacturer’s instruction for use). -
Page 14: Something Not Working
SOMETHING NOT WORKING If the appliance is not working correctly, please carry out the following checks, before contacting your local Service Force Service Centre. Symptoms The hob hotplate does not heat up The hotplate is not giving satisfactory results The oven does not come on It takes too long to finish the dishes, or they are cooked too fast Steam and condensation settle on the... -
Page 15: Instructions For The Installer
INSTRUCTIONS FOR THE INSTALLER Technical features Free standing Front right Back right Front left Back left Total hob rating Oven Oven element Grill element Cleaning Total oven rating Accessories Trivet Oven shelf Dripping pan / roasting tray Legs Supply Rated voltage Rated frequency Total rating Dimensions... -
Page 16: Important Safety Requirements
IMPORTANT SAFETY REQUIREMENTS Important This cooker must be installed in accordance with the IEE Wiring Regulations (Current Edition). Detailed recommendations are contained in the following British Standards Codes Of Practice: B.S. 6172/ B.S. 5440, Par.2 and B.S. 6891 Current Editions. LOCATION It is essential that the appliance is positioned as in the enclosed figure i.e. -
Page 17: Electrical Connections
LEVELLING Fix the support with two legs with the washer and nuts, delivered with the cooker, see the figure. • Unscrew the legs as far as possible (approx. 16mm from fully screwed in). • Place the plinth (pos.3) so that the springs (pos.2) reach the threaded area of the legs and the clamp of the plinth (pos.4) is in front of the holes (pos.5) on the under... - Page 18 Connection type Cable connection to the terminal block Mains Voltage Voltage of heating elements Fuse capacity Cable section NOTE: The earth wire should be about 10-12 cm longer than the live and neutral wires. Brown (L) Blue (N) Green and Yellow (PE earth) After installation and connecting, the cable must be placed so that it cannot at any point reach a temperature of more than 50°C above the...
-
Page 19: Service And Spare Parts
Bedfordshire, LU4 9QQ Tel: 08705 727 727 (*) For Customer Service in the Republic of Ireland please contact us at the address below: Tricity Bendix Electrolux Group ( Ire ) Ltd Long Mile Road Dublin 12 Republic of Ireland Tel: + 353 (0) 1 4090 752 Email: service.eid@electrolux.ie... -
Page 20: Guarantee Conditions
GUARANTEE CONDITIONS Standard Guarantee Conditions We Tricity Bendix undertake that if, within 12 months of the date of the purchase, this Tricity Bendix appliance or any part thereof is proved to be defective by any reason only of faulty workmanship or materials, we will, at our... -
Page 21: European Guarantee
European Guarantee If you should move to another country within Europe then your guarantee moves with you to your new home subject to the following qualifications: • The guarantee starts from the date you first purchased your product. • The guarantee is for the same period and to the same extent for labour and parts as exists in the new country of use for this brand or range of products. - Page 22 www.electrolux.com Albania Belgique/België/Belgien Česká republika Danmark Deutschland Eesti España France Great Britain Hellas Hrvatska Ireland Italia Latvija Lietuva Luxembourg Magyarország Nederland Norge Österreich Polska +35 5 4 261 450 +32 2 363 04 44 +420 2 61 12 61 12 +45 70 11 74 00 +49 180 32 26 622 +37 2 66 50 030...
- Page 23 Portugal Romania Schweiz - Suisse - Svizzera Slovenija Slovensko Suomi Sverige Türkiye Россия +35 12 14 40 39 39 +40 21 451 20 30 +41 62 88 99 111 +38 61 24 25 731 +421 2 43 33 43 22 www.electrolux.fi +46 (0)771 76 76 76 +90 21 22 93 10 25...
- Page 24 www.electrolux.com 342 702 369 – 00 – 17042007 Subject to change without notice...