Cisco NCS 5500 Series Hardware Installation Manual
Modular routers
Hide thumbs
Also See for NCS 5500 Series:
- Configuration manuals (268 pages) ,
- Configuration manual (172 pages) ,
- Manual (25 pages)
Table of Contents
Advertisement
Advertisement
Table of Contents

Related Manuals for Cisco NCS 5500 Series


Summary of Contents for Cisco NCS 5500 Series
- Page 1 Hardware Installation Guide for Cisco NCS 5500 Series Modular Routers First Published: 2015-12-23 Last Modified: 2019-07-14 Americas Headquarters Cisco Systems, Inc. 170 West Tasman Drive San Jose, CA 95134-1706 http://www.cisco.com Tel: 408 526-4000 800 553-NETS (6387) Fax: 408 527-0883...
- Page 2 Cisco has more than 200 offices worldwide. Addresses and phone numbers are listed on the Cisco website at www.cisco.com/go/offices. Cisco and the Cisco logo are trademarks or registered trademarks of Cisco and/or its affiliates in the U.S. and other countries. To view a list of Cisco trademarks, go to this URL: www.cisco.com...
-
Page 3: Table Of Contents
C H A P T E R 2 Prepare for Installation Review Installation Roadmap Review Safety Guidelines Cautions and Regulatory Compliance Statements for NEBS Review Installation Guidelines Procure Tools and Equipment Rack Mount and Accessory Kits Hardware Installation Guide for Cisco NCS 5500 Series Modular Routers... - Page 4 Bale Clasp SFP or SFP+ Module Install a Bale Clasp SFP or SFP+ Module Remove a Bale Clasp SFP or SFP+ Module Install and Remove QSFP+/QSFP28 Transceiver Modules Required Tools and Equipment Hardware Installation Guide for Cisco NCS 5500 Series Modular Routers...
- Page 5 Remove Fan Tray Install Fan Tray Replace Fabric Card Removing a Fabric Card Install a Fabric Card Replace Power Supplies Replace AC Power Supply Replace DC Power Supply Replace HVAC/HCDC Power Supply Hardware Installation Guide for Cisco NCS 5500 Series Modular Routers...
- Page 6 A P P E N D I X A LEDs Chassis LEDs System Controller LEDs Route Processor Card LEDs Fan Tray LEDs Fabric Card LEDs Line Card LEDs MPA LEDs Power Supply LEDs Port Status LEDs Hardware Installation Guide for Cisco NCS 5500 Series Modular Routers...
-
Page 7: Ncs 5500 Series Modular Router Overview
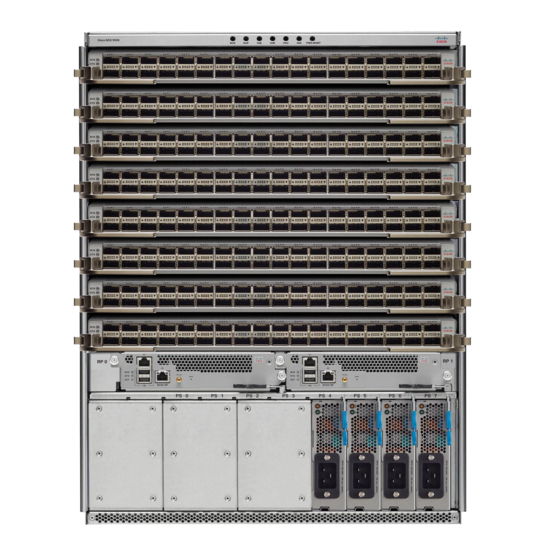
Pinouts, on page 12 • Power Supply Power Cord Specifications, on page 14 NCS 5500 Series Modular Routers The following table describes the NCS 5500 series modular routers, components and the supported quantity. Component NCS 5504 NCS 5508 NCS 5516 Line cards –... - Page 8 Use only with Caution Use only with NC55-5508-FC. NC55-5516-FC. NC55-5508-FAN2 NC55-5516-FAN2 Use only with Use only with Caution Caution NC55-5508-FC2. NC55-5516-FC2. Power supplies: • NC55-PWR-3KW-AC • NC55-PWR-3KW-DC • NC55-PWR-3KW-2HV (3.15-kW HVAC/HVDC dual-input) Hardware Installation Guide for Cisco NCS 5500 Series Modular Routers...
-
Page 9: Line Card Overview
2nd generation fans and fabric cards (NC55-55xx-FAN2 and NC55-55xx-FC2). Attempting to mix 1st generation and 2nd generation components could result in equipment damage. Line Card Overview The following table describes the line cards supported on the NCS 5500 series modular routers: Hardware Installation Guide for Cisco NCS 5500 Series Modular Routers... - Page 10 • 24 x 100GE–100GE, 40GE, or 4x10GE via breakout • 12 x 40GE–40GE or 4x10GE via breakout • QSFP-to-SFP adapter (QSA) with 1GE SFP (GLC-TE, GLC-SX-MMD, GLC-LH-SMD) and 10 GE SFP+ (ER, ER-S, ZR, ZR-S, DWDM fixed-wavelengths) Hardware Installation Guide for Cisco NCS 5500 Series Modular Routers...
- Page 11 In 400GE configuration, the odd numbered ports (except Port 19, Port 21, and Port 23) marked in orange at the bottom row (see Figure 1: NC57-18DD-SE Line Card, on page 6) are not used. The NC57-18DD-SE supports 200GE optics or 100GE optics in all 30 ports. Hardware Installation Guide for Cisco NCS 5500 Series Modular Routers...
-
Page 12: Modular Port Adapters
The temperature-hardened NC55-MPA-4H-HD-S MPA operates within industrial temperature range when installed in the temperature-hardened routers. Note The temperature-hardened conformal-coated NC55-MPA-4H-HX-S MPA operates within industrial temperature range when installed in the temperature-hardened routers. Hardware Installation Guide for Cisco NCS 5500 Series Modular Routers... - Page 13 1-port 100GE/200GE with CFP2-DCO + 2-Port 40GE or 100GE with QSFP+/QSFP28 The 1-port 100GE/200GE + 2-Port 40GE/100GE combination MPA (NC55-MPA-1TH2H-S) provides 1 port for CFP2-DCO transceivers and 2 ports for 4x25GE (via cable breakout), QSFP+ (40Gbps) or QSFP28 (100Gbps) transceivers. Hardware Installation Guide for Cisco NCS 5500 Series Modular Routers...
-
Page 14: Route Processor Card Overview
The 12-port 10GE MPA (NC55-MPA-12T-S) provides 12 ports for SFP+ transceivers. STATUS LED ATTN LED SFP+ ports and LEDs Route Processor Card Overview Route processor cards manage all routing operations on the Cisco NCS 5500 Series modular chassis. Hardware Installation Guide for Cisco NCS 5500 Series Modular Routers... - Page 15 Management Ethernet Mini coax connector for 1 PPS, input and output 10/100/1000-Mbps RJ-48 connector for BITS Ethernet RJ-45 (Copper) interface, input and output port, supports 1588 Precision Time Protocol (PTP) Hardware Installation Guide for Cisco NCS 5500 Series Modular Routers...
-
Page 16: Environmental And Physical Specifications
Sheet. Airflow Direction The airflow through the fan trays and power supplies on the Cisco NCS 5500 series modular router is from the port side intake (front-to-back cooling). To ensure proper airflow, you must make sure that when you install the router its air intake is positioned in a cold aisle and the air exhaust is positioned in a hot aisle. - Page 17 18900 W 15750 W 9450 W 22050 W 18900 W 9450 W 25200 W 22050 W 12600 W 28350 W 25200 W 12600 W 31500 W 28350 W 15750 W Hardware Installation Guide for Cisco NCS 5500 Series Modular Routers...
-
Page 18: Transceivers, Connectors, And Cables
Pin 1 Pin 2 Pinouts The following sections describe the pinouts for the Cisco NCS 5500 RP-E (NC55-RP-E) interfaces: BITS Port Pinouts The table below summarizes the BITS port pinouts. Hardware Installation Guide for Cisco NCS 5500 Series Modular Routers... -
Page 19: Time-Of-Day Port Pinouts
Management and PTP Ethernet Port Pinouts The table below summarizes the Management and Precision Time Protocol (PTP) Ethernet port pinouts. Table 5: Management and PTP Ethernet Port Pinouts Signal Name TRP0+ Hardware Installation Guide for Cisco NCS 5500 Series Modular Routers... -
Page 20: Usb Flash Or Mem Port Pinouts
Data - Data + Ground Power Supply Power Cord Specifications Standard AC Power Cords Locale Part Number Cord Set Rating Power Cord Illustration Australia and New Zealand CAB-AC-16A-AUS 16A, 250 VAC Hardware Installation Guide for Cisco NCS 5500 Series Modular Routers... - Page 21 Japan and North America (non CAB-AC-2500W-US1 16A, 250 VAC locking) 200-240 VAC operation Japan and North America CAB-AC-C6K-TWLK 16A, 250 VAC (locking) 200-240 VAC operation Power distribution unit (PDU) CAB-C19-CBN 16A, 250 VAC Hardware Installation Guide for Cisco NCS 5500 Series Modular Routers...
- Page 22 Locale Part Number Power Cord Set Rating Power Cord Illustration Australia CAB-AC-16A-SG-AZ 16A, 250 VAC Brazil CAB-AC-16A-SG-BR 16A, 250 VAC China CAB-AC-16A-SG-CH 16A, 250 VAC Europe CAB-AC-16A-SG-EU 16A, 250 VAC Hardware Installation Guide for Cisco NCS 5500 Series Modular Routers...
- Page 23 North America (non locking) CAB-AC-20A-SG-US2 20A, 250 VAC 200-240 VAC operation North America (locking) CAB-AC-20A-SG-US3 20A, 250 VAC 200-240 VAC operation North America 277 VAC CAB-AC-20A-SG-US4 20A, 277 VAC operation Hardware Installation Guide for Cisco NCS 5500 Series Modular Routers...
- Page 24 International, Ring Terminal CAB-HV-25A-SG-IN2 20A, 300 VAC/500 VDC source plug, Ring Terminal/Saf-D-Grid North America, CAB-HV-25A-SG-US1 20A, 400 VDC Saf-D-Grid/Saf-D-Grid North America, Ring Terminal CAB-HV-25A-SG-US2 20A, 300 VAC/500 VDC source plug, Ring Terminal/Saf-D-Grid Hardware Installation Guide for Cisco NCS 5500 Series Modular Routers...
-
Page 25: Prepare For Installation
Prepare Rack for Chassis Installation, on page 26 Review Installation Roadmap The following figure lists the steps to install Cisco NCS 5500 Series chassis and its components and prepare the system for operation. For information about a step, see the respective section of this installation guide. -
Page 26: Cautions And Regulatory Compliance Statements For Nebs
• Do not wear loose clothing, jewelry, or other items that could get caught in the router or other associated components. • Cisco equipment operates safely when used in accordance with its specifications and product-usage instructions. • Be sure to power down a fixed configuration PDU or modular configuration power shelf before removing it from the chassis. -
Page 27: Review Installation Guidelines
Procure Tools and Equipment Obtain these necessary tools and equipment for installing the chassis: • Number 1 and number 2 Phillips screwdrivers with torque capability to rack-mount the chassis Hardware Installation Guide for Cisco NCS 5500 Series Modular Routers... -
Page 28: Rack Mount And Accessory Kits
• M4 screws to fix brackets (16) • M4 screws to fix ground lug (2) Rack Mount and Accessory Kits Rack Mount Kit Rack mount kit for the Cisco 5504 (NC55-5504-RMK), Cisco NCS 5508 (NC55-5508-RMK), or NCS 5516 (NC55-5516-RMK) chassis includes the following: Illustration Description Quantity •... - Page 29 1-Year Limited Warranty for Hardware Additional Hardware Components If you purchased this product through a Cisco reseller, you might receive additional contents in your kit, such as documentation, hardware, and power cables. The shipped cables depend on your specification when placing an order. See the...
-
Page 30: Prepare Your Location
The figures show how to cuff the ESD strap around the wrist and the ground cord that connects the cuff to the ground. ESD wrist straps are the primary means of controlling static charge on personnel. Hardware Installation Guide for Cisco NCS 5500 Series Modular Routers... - Page 31 Prepare for Installation Prepare Yourself Figure 4: Wearing the ESD Strap Hardware Installation Guide for Cisco NCS 5500 Series Modular Routers...
-
Page 32: Prepare Rack For Chassis Installation
Figure 5: Handling the Chassis Prepare Rack for Chassis Installation Install the NCS 5500 Series chassis into a standard 19-inch, four-post Electronic Industries Alliance (EIA) cabinet or rack with mounting rails that conform to English universal hole spacing per section 1 of the ANSI/EIA-310-D-1992 standard. -
Page 33: Clearance Requirements
(if used) or the edge of the cold aisle (if not cabinet) for the optional side filter and front door Hardware Installation Guide for Cisco NCS 5500 Series Modular Routers... - Page 34 No right-side clearance required (no airflow on right side) For the clearances required for an installation of NCS 5508 and NCS 5516 chassis, see the following figure. Hardware Installation Guide for Cisco NCS 5500 Series Modular Routers...
- Page 35 (if used) or the edge of the cold aisle (if not cabinet) for the optional side filter and front door Hardware Installation Guide for Cisco NCS 5500 Series Modular Routers...
- Page 36 (keep this area clear of rack, cable management, and other components that can prevent full rotation of the ejector levers) No right-side clearance required (no airflow on right side) Hardware Installation Guide for Cisco NCS 5500 Series Modular Routers...
-
Page 37: Install The Chassis
Ensure there is sufficient room around the chassis pallet for unpacking. For information about the chassis dimensions and clearance requirements see, Clearance Requirements, on page Carefully move the pallet containing the chassis to the staging area where you plan on unpacking it. Hardware Installation Guide for Cisco NCS 5500 Series Modular Routers... -
Page 38: Install Bottom-Support Rails
Check spacing considerations. You can expand the rail so that its mounting brackets are spaced between 24 to 32 inches (61.0 to 81.3 cm). Note Hardware Installation Guide for Cisco NCS 5500 Series Modular Routers... - Page 39 (using a total of 6 screws for the rail as shown in the following figure) and tighten each screw to 40 in-lbs (4.5 N.m) of torque. Figure 9: Attach Bottom-Support Rails to a Rack Hardware Installation Guide for Cisco NCS 5500 Series Modular Routers...
-
Page 40: Transfer Chassis To A Mechanical Lifting Device
Place the mechanical lifting device in front of the chassis on the pallet (PLIM side) as shown in Figure 10: Align the Lifting Device In Front of the Chassis on the Pallet , on page 35 Hardware Installation Guide for Cisco NCS 5500 Series Modular Routers... - Page 41 With at least two or three people move the chassis carefully from the pallet onto the lifting device as shown in Figure 11: Move the Chassis On To the Lifting Device , on page 36 Hardware Installation Guide for Cisco NCS 5500 Series Modular Routers...
-
Page 42: (Only Ncs 5504) Install The Rear Chassis Brackets
To install the chassis on a 4-post 635 mm rack, attach the bracket as follows: a) Align the side bracket so that it is flush with the top of the chassis. See the figure below- Hardware Installation Guide for Cisco NCS 5500 Series Modular Routers... - Page 43 Use 6 M4 screws with 12 in-lbs (1.4 N-m) to attach the side bracket to the chassis. c) Repeat a and b on the other side of the chassis. d) Slide the rack-mount bracket through the side bracket. Hardware Installation Guide for Cisco NCS 5500 Series Modular Routers...
- Page 44 To install the chassis on a 4-post 780 mm rack, attach the bracket as follows: a) Align the side bracket so that it is flush with the top of the chassis. See the figure below- Hardware Installation Guide for Cisco NCS 5500 Series Modular Routers...
- Page 45 Use 4 M6 screws with (4.5 N-m) 40 in-lbs of torque to attach the side bracket to the chassis. c) Repeat a and b on the other side of the chassis. d) Slide the rack mount bracket through the side bracket. Hardware Installation Guide for Cisco NCS 5500 Series Modular Routers...
-
Page 46: Mount Chassis Into The Rack
• Power supplies—For each power supply, press and hold the eject lever, and use the handle on the front of the power supply to pull the power supply out of the chassis. Hardware Installation Guide for Cisco NCS 5500 Series Modular Routers... - Page 47 Using your mechanical lift, raise the chassis to the height of the rack's horizontal mounting rails. Elevate the lift platform to the level of the bottom of the chassis (or no more than 1/4 inch [0.635cm] below the bottom of the chassis). Hardware Installation Guide for Cisco NCS 5500 Series Modular Routers...
- Page 48 (see the following figure). Ensure that the chassis does not get caught on any of the expansion edges of the bottom-support rail. Hardware Installation Guide for Cisco NCS 5500 Series Modular Routers...
- Page 49 Use four M6 x 19 mm or 24 x 3/4-inch screws to attach each of the two chassis vertical mounting brackets to the two rack vertical mounting rails (total of eight screws). See Callout 2 in the figures. Hardware Installation Guide for Cisco NCS 5500 Series Modular Routers...
- Page 50 Install the Chassis Mount Chassis Into the Rack Figure 14: Attach NCS 5504 Chassis to Rack Figure 15: Attach NCS 5508 Chassis to Rack Hardware Installation Guide for Cisco NCS 5500 Series Modular Routers...
- Page 51 To install the air filter or door kit, which is optional (see the (Optional) Install Air Filter, Cable Management Bracket, or Door Kit on a Chassis , on page 46 section). Hardware Installation Guide for Cisco NCS 5500 Series Modular Routers...
-
Page 52: (Optional) Install Air Filter, Cable Management Bracket, Or Door Kit On A Chassis
Door Kit PID NCS-5504-DOOR= NCS-5508-DOOR= NCS-5516-DOOR= M4x12 Flat Head, Phillip Screw M3x12 Flat Head, Phillip Screw M3x12 PAN Head, Phillip Screw M3x8 PAN Head, Phillip Screw M4x8 Flat Head, Phillip Screw Hardware Installation Guide for Cisco NCS 5500 Series Modular Routers... - Page 53 (4.5 N·m) of torque. The number of screws can vary based on the chassis. d) Repeat Steps 1a - 1c to attach the other side of the extension bracket to the vertical mounting bracket on the opposite side of the chassis. Hardware Installation Guide for Cisco NCS 5500 Series Modular Routers...
- Page 54 Install the Chassis (Optional) Install Air Filter, Cable Management Bracket, or Door Kit on a Chassis Figure 17: Attach Two Side Extension Bracket on NCS 5504 Chassis Hardware Installation Guide for Cisco NCS 5500 Series Modular Routers...
- Page 55 Install the Chassis (Optional) Install Air Filter, Cable Management Bracket, or Door Kit on a Chassis Figure 18: Attach Two Side Extension Bracket on NCS 5508 Chassis Hardware Installation Guide for Cisco NCS 5500 Series Modular Routers...
- Page 56 Position one of the side frame assemblies on the vertical mounting bracket attached to one side of the front of the chassis. For NCS 5504: Ensure that the upper most 4 screw holes in the assembly align with the screw holes in 4 visible standoffs on the mounting bracket. Hardware Installation Guide for Cisco NCS 5500 Series Modular Routers...
- Page 57 Figure 20: Attach Side Filter Assembly or Cable Management Brackets to NCS 5504 Chassis For NCS 5508: Ensure that the 5 screw holes in the assembly align with the screw holes in five standoffs on the mounting bracket. Hardware Installation Guide for Cisco NCS 5500 Series Modular Routers...
- Page 58 Figure 21: Attach Side Filter Assembly or Cable Management Brackets to NCS 5508 Chassis For NCS 5516: Ensure that the 17 screw holes in the assembly align with the screw holes in 17 standoffs on the mounting bracket. Hardware Installation Guide for Cisco NCS 5500 Series Modular Routers...
- Page 59 For NCS 5508: Use 5 M4 x 12 mm, flat-head, Phillips screws. For NCS 5516: Use 17 M4 x 12 mm, flat-head, Phillips screws. Tighten each screw to 11.5 to 15 in-lb (1.3 to 1.7 N·m) of torque. Hardware Installation Guide for Cisco NCS 5500 Series Modular Routers...
- Page 60 NCS 5516: Use 14 M3 x 12 mm screws. c) Tighten the M3 screws to 5 to 7 in-lb (0.56 to 0.79 N.m) of torque. Figure 23: Attach Side Filter Assembly to NCS 5504 Chassis Hardware Installation Guide for Cisco NCS 5500 Series Modular Routers...
- Page 61 Install the Chassis (Optional) Install Air Filter, Cable Management Bracket, or Door Kit on a Chassis Figure 24: Attach Side Filter Assembly to NCS 5508 Chassis Hardware Installation Guide for Cisco NCS 5500 Series Modular Routers...
- Page 62 NCS 5504 and NCS 5508: Attach the bottom plate and top hood to the two side assemblies as follows: For NCS 5504, use 2 M3 x 8 mm pan head screws to secure the bottom plate. Note Hardware Installation Guide for Cisco NCS 5500 Series Modular Routers...
- Page 63 Figure 26: Attach Bottom Plate to NCS 5504 Side Brush Filter Kit For NCS 5504, use 4 M4 x 8 mm flat head screws to secure the top hood. Note Hardware Installation Guide for Cisco NCS 5500 Series Modular Routers...
- Page 64 Install the Chassis (Optional) Install Air Filter, Cable Management Bracket, or Door Kit on a Chassis Figure 27: Attach Top Hood to NCS 5504 Chassis and Side Brush Filter Kit Hardware Installation Guide for Cisco NCS 5500 Series Modular Routers...
- Page 65 Phillips screws (use two screws for each assembly). Tighten each screw to 11.5 to 15 in-lb (1.3 to 1.7 N·m) of torque. Step 5 NCS 5516: Attach the top hood to the chassis and the tops of the two side brush filter kit assemblies as follows: Hardware Installation Guide for Cisco NCS 5500 Series Modular Routers...
- Page 66 Ensure that there is a perpendicular edge facing the front. This edge stops the front doors when they are closed. Hardware Installation Guide for Cisco NCS 5500 Series Modular Routers...
-
Page 67: Attach Front Door To Ncs 5504 And Ncs 5008 Chassis
(NCS 5504) With the door resting on the bar holders, move the top of the door towards the top hood. Step 3 (NCS 5508) With the door resting on the bar holders, rotate the top of the door to the top hood Hardware Installation Guide for Cisco NCS 5500 Series Modular Routers... - Page 68 Attach Front Door to NCS 5504 and NCS 5008 Chassis The latch on the door will slide and lock in-position. Figure 31: Attach Front Door to NCS 5504 Chassis Figure 32: Attach Front Door to NCS 5508 Chassis Hardware Installation Guide for Cisco NCS 5500 Series Modular Routers...
-
Page 69: Attach Front Door To Ncs 5516 Chassis
The front doors come with pre-installed air filters. If air filters need replacement, follow this procedure. Step 1 Remove existing door filter and side brush brackets as follows: a) Remove the front door. Hardware Installation Guide for Cisco NCS 5500 Series Modular Routers... -
Page 70: Replace Chassis Door Foam Air Filters On The Ncs 5508
Replace Chassis Door Foam Air Filters on the NCS 5508 Note In general, we recommend that you inspect the air filter every 3 months and replace, if necessary, every 6 months. Hardware Installation Guide for Cisco NCS 5500 Series Modular Routers... -
Page 71: Replace Chassis Door Foam Air Filters On The Ncs 5516
Replace Chassis Door Foam Air Filters on the NCS 5516 Note In general, we recommend that you inspect the air filter every 3 months and replace, if necessary, every 6 months. Hardware Installation Guide for Cisco NCS 5500 Series Modular Routers... - Page 72 Front door back side facing Air filter for inside of door Alignmnent pins (two on Three screws used to secure top, side and bottom of the filter to the the door door) Hardware Installation Guide for Cisco NCS 5500 Series Modular Routers...
-
Page 73: Ground The Front Id Door
Step 2 Apply the star ring terminal end of the grounding cable to the front ID door. Tighten the screw to 7 in-lb (0.79 N-m) of torque to provide proper bonding. Hardware Installation Guide for Cisco NCS 5500 Series Modular Routers... - Page 74 Install the Chassis Ground the Front ID Door Figure 37: Ground the NCS 5504 Front ID Door Hardware Installation Guide for Cisco NCS 5500 Series Modular Routers...
- Page 75 Install the Chassis Ground the Front ID Door Figure 38: Ground the NCS 5508 Front ID Door Hardware Installation Guide for Cisco NCS 5500 Series Modular Routers...
- Page 76 Tighten the M4 screw to 9 to 12 in-lb (1.01 to 1.35 N-m) of torque. Step 4 Repeat Steps 1 through 3 to install the grounding cable to the other front door. Step 5 Close and lock the front ID door. Hardware Installation Guide for Cisco NCS 5500 Series Modular Routers...
-
Page 77: Locate And Ground The Chassis
Locate and Ground the Chassis What to do next Locate and Ground the Chassis Locate and Ground the Chassis Step 1 Locate the chassis grounding receptacles on your router chassis. Hardware Installation Guide for Cisco NCS 5500 Series Modular Routers... - Page 78 (Only NCS 5504) Insert one screw through the hole in the grounding lug. Ensure that the grounding lug does not interfere with other router hardware, such as power supplies or the network processing engine. Hardware Installation Guide for Cisco NCS 5500 Series Modular Routers...
-
Page 79: Connect Ac Power Supply To Ac Power Source
Take care when connecting units to the supply circuit so that wiring is not overloaded. Step 1 For each 3-kW Standard AC power supply, connect an AC power cable to the AC power source and to the power receptacle on the power supply. Hardware Installation Guide for Cisco NCS 5500 Series Modular Routers... -
Page 80: Connect 3Kw Dc Power Supply To Dc Power Source
• Four power cables (6 AWG cables recommended) Note If you use colors to designate positive and negative cables, you need two cables colored for positive polarity and two cables colored for negative polarity. Hardware Installation Guide for Cisco NCS 5500 Series Modular Routers... - Page 81 40 in-lb (4.5 N·m) of torque. g) Replace the safety cover on the terminal box and fasten it in place using its three screws. Hardware Installation Guide for Cisco NCS 5500 Series Modular Routers...
-
Page 82: Connect Hvac/Hvdc Power Supply To Power Source
3.15KW with either 1 or 2 input power lines operating. The HVAC/HVDC power supply provides n+n or n+x line redundancy mode in a single power supply for the NCS 5500 series modular routers. The HVAC/HVDC power supply accepts 200–240VAC or 240/380VDC input power. - Page 83 ID LED on the specified power supply. sysadmin-vm:0_RP0# config sysadmin-vm:0_RP0(config)# hw-module attention-led location 0/PM2 sysadmin-vm:0_RP0(config-location-0/PM2)# commit Tue Aug 27 18:59:28.740 UTC Commit complete. sysadmin-vm:0_RP0(config-location-0/PM2)# end sysadmin-vm:0_RP0# show led location 0/PM2 Hardware Installation Guide for Cisco NCS 5500 Series Modular Routers...
- Page 84 Connect HVAC/HVDC Power Supply to Power Source Tue Aug 27 18:59:59.723 UTC ============================================================= Location LED Name Mode Color ============================================================= 0/PM2 0/PM2-FAIL WORKING 0/PM2-IN WORKING GREEN 0/PM2-OUT WORKING GREEN 0/PM2-ATTENTION (ID) WORKING BLINKING BLUE Hardware Installation Guide for Cisco NCS 5500 Series Modular Routers...
-
Page 85: Connect Router To The Network
(QSFP+), QSFP28, SFP, SFP+, CFP2, CFP-DCO, and RJ-45 connectors to connect the ports on the line cards to other network devices. To prevent damage to the fiber-optic cables, Cisco recommends that you keep the transceivers disconnected from their fiber-optic cables when installing the transceiver in the line card. Before removing a transceiver from the router, remove the cable from the transceiver. -
Page 86: Connecting A Console To The Router
• Network cabling should already be routed to the location of the installed router. Step 1 Configure the console device to match the following default port characteristics: • 9600 baud • 8 data bits • 1 stop bit Hardware Installation Guide for Cisco NCS 5500 Series Modular Routers... -
Page 87: Connect The Management Interface
Route the cable through the central slot in the cable management system. Step 3 Connect the other end of the cable to a 10/100/1000 Ethernet port on a network device. Hardware Installation Guide for Cisco NCS 5500 Series Modular Routers... -
Page 88: Install And Remove Transceiver Modules
Avoid getting dust and other contaminants into the optical ports of your SFP or SFP+ modules, because the optics do not work correctly when obstructed by dust. Hardware Installation Guide for Cisco NCS 5500 Series Modular Routers... -
Page 89: Bale Clasp Sfp Or Sfp+ Module
Step 2 Close the bale clasp before inserting the SFP module. Step 3 Line up the SFP module with the port and slide it into the port (see the figure below). Hardware Installation Guide for Cisco NCS 5500 Series Modular Routers... -
Page 90: Remove A Bale Clasp Sfp Or Sfp+ Module
Grasp the SFP module between your thumb and index finger and carefully remove it from the port, as shown in the figure below. This action must be performed during your first instance. After all the ports are populated, this may not be Note possible. Hardware Installation Guide for Cisco NCS 5500 Series Modular Routers... - Page 91 Step 6 Protect your line card by inserting a clean SFP module cage covers into the optical module cage when there is no SFP module installed. Hardware Installation Guide for Cisco NCS 5500 Series Modular Routers...
-
Page 92: Install And Remove Qsfp+/Qsfp28 Transceiver Modules
The QSFP+ or QSFP28 transceiver module is a static-sensitive device. Always use an ESD wrist strap or similar individual grounding device when handling QSFP+ or QSFP28 transceiver modules or coming into contact with system modules. To install an QSFP+ or QSFP28 transceiver module, follow these steps: Hardware Installation Guide for Cisco NCS 5500 Series Modular Routers... - Page 93 Press firmly on the front of the QSFP+ or QSFP28 transceiver module with your thumb to fully seat the transceiver in the module’s transceiver socket (see the below figure). Caution If the latch is not fully engaged, you might accidentally disconnect the QSFP+ or QSFP28 transceiver module. Hardware Installation Guide for Cisco NCS 5500 Series Modular Routers...
-
Page 94: Attach The Optical Network Cable
• Inspect and clean the MPO connector end faces just before you make any connections. • Grasp the MPO connector only by the housing to plug or unplug a fiber-optic cable. Note 40-Gigabit QSFP+ or QSFP28 transceiver modules are keyed to prevent incorrect insertion. Hardware Installation Guide for Cisco NCS 5500 Series Modular Routers... -
Page 95: Removing The 40-Gigabit Qsfp+ Or 100-Gigabit Qsfp28 Transceiver Module
For QSFP+ or QSFP28 transceivers equipped with a pull tab latch (see the below figure, bottom view): a) Immediately install the dust plug into the transceiver’s optical bore. b) Grasp the tab and gently pull to release the transceiver from the socket. Hardware Installation Guide for Cisco NCS 5500 Series Modular Routers... -
Page 96: Installing And Removing Cfp2 Modules
Step 1 Attach an ESD-preventive wrist or ankle strap and follow its instructions for use. Step 2 Align the CFP2 module into the transceiver port socket of the line card. Hardware Installation Guide for Cisco NCS 5500 Series Modular Routers... -
Page 97: Removing A Cfp2 Module
120 seconds to complete. Removing a CFP2 Module To remove a CFP2 module, follow these steps: Step 1 Attach an ESD-preventive wrist or ankle strap and follow its instructions for use. Hardware Installation Guide for Cisco NCS 5500 Series Modular Routers... -
Page 98: Connect Interface Ports
Attenuation (loss of light) is increased by contamination and should be below 0.35 dB. Refer to Inspection and Cleaning Procedures for Fiber-Optic Connections document for inspection and cleaning processes for fiber optic connections. Hardware Installation Guide for Cisco NCS 5500 Series Modular Routers... -
Page 99: Create Initial Configuration
When the system is booted up for the first time, a new username and a password is to be created. The following prompt appears: !!!!!!!!!!!!!!!!!!!! NO root-system username is configured. Need to configure root-system username. !!!!!!!!!!!!!!!!!!!! Hardware Installation Guide for Cisco NCS 5500 Series Modular Routers... -
Page 100: Verify Chassis Installation
Verify Chassis Installation After installing the chassis, use the following show commands to verify the installation and configuration. If any issue is detected, take corrective action before making further configurations. Hardware Installation Guide for Cisco NCS 5500 Series Modular Routers... - Page 101 5 seconds and continuously sends system messages as configured. Note Cisco recommends that you install dual route processor cards. If you are using a router without dual route processor cards, Cisco recommends that you immediately replace the fan card if just one fan is not working.
- Page 102 Create Initial Configuration Verify Chassis Installation Hardware Installation Guide for Cisco NCS 5500 Series Modular Routers...
-
Page 103: Replace Chassis Components
Warning Statement 1034—Backplane Voltage Hazardous voltage or energy is present on the backplane when the system is operating. Use caution when servicing Watch Replace a Route Processor Card (Video) Hardware Installation Guide for Cisco NCS 5500 Series Modular Routers... - Page 104 The card unseats its connectors from the midplane and moves slightly out of the chassis. Figure 54: Remove Route Processor card from Chassis Slide the middle handle toward the end of the ejector Rotate the ejector lever away from the card. lever. Hardware Installation Guide for Cisco NCS 5500 Series Modular Routers...
- Page 105 Screw in the two captive screws to secure the card to the chassis. Tighten the screws to 8 in-lb (0.9 N·m) of torque. f) Attach the following cables to the card: • Console cable—Attach to the Console port. • Management cable—Attach to the Management Ethernet port. Hardware Installation Guide for Cisco NCS 5500 Series Modular Routers...
-
Page 106: Replace A System Controller Module
Warning Statement 1034—Backplane Voltage Hazardous voltage or energy is present on the backplane when the system is operating. Use caution when servicing Watch Replace a System Controller Module (Video) Hardware Installation Guide for Cisco NCS 5500 Series Modular Routers... - Page 107 Slide the module all the way into the chassis. end of the lever and rotate the lever away from the module. Align the back of the module to the open slot in the chassis. Hardware Installation Guide for Cisco NCS 5500 Series Modular Routers...
-
Page 108: Replace A Line Card
If the module is damaged, contact the Technical Assistance Center (TAC). Step 2 If you are replacing a module that is currently in the chassis, remove the existing module from the chassis by following these steps: Hardware Installation Guide for Cisco NCS 5500 Series Modular Routers... - Page 109 The module stops when its front is about 0.25 inches (0.6 cm) outside the front of the chassis. The two levers move part way to the front of the chassis. Hardware Installation Guide for Cisco NCS 5500 Series Modular Routers...
-
Page 110: Installing And Removing Modular Port Adapters
The following sections describe how to install or remove MPA on the NC55-MOD-A-S and NC55-MOD-A-SE-S line card. Handling Modular Port Adapters Each modular port adapter (MPA) circuit board is mounted to a metal carrier and is sensitive to electrostatic discharge (ESD) damage. Hardware Installation Guide for Cisco NCS 5500 Series Modular Routers... -
Page 111: Online Insertion And Removal
Online Insertion and Removal Caution Cisco IOS XR Software 6.6.1 and later releases support online insertion and removal (OIR) of Cisco NCS 5500 series modular port adapters (MPAs). Cisco NCS 5500 series modular port adapters (MPAs) support online insertion and removal (OIR). Modular port adapters (MPAs) can be inserted or removed independently from the modular line card (MLC). -
Page 112: Modular Port Adapter Installation And Removal
MPA inside the slot until you hear a click. Continue to push the MPA further until you hear a second click. The MPA is fully seated only after the second click is heard. Hardware Installation Guide for Cisco NCS 5500 Series Modular Routers... -
Page 113: Replace A Fan Tray
Remove only one fan tray at a time during router operations. If you remove more than one fan tray at a time, the router will shut down within two minutes unless you replace the extra fan trays that you removed within that time. Hardware Installation Guide for Cisco NCS 5500 Series Modular Routers... -
Page 114: Install Fan Tray
Set the fan tray on antistatic material or inside an antistatic bag. Install Fan Tray Before you begin • Fan tray slot is open in the chassis. • Fan tray is available for installation. Hardware Installation Guide for Cisco NCS 5500 Series Modular Routers... - Page 115 Slide the fan tray all the way into the slot until the front of the fan tray touches the chassis. Make sure that the four captive screws on the front of the fan tray align with the four screw holes in the chassis. Hardware Installation Guide for Cisco NCS 5500 Series Modular Routers...
-
Page 116: Replace Fabric Card
Labeled as FC1, FC2, FC3, and FC5 Labeled as FC0, FC1, FC2, FC3, and FC5, or Labeled as FC1, FC2, FC3, FC4, and FC5 6 (Fully populated) Labeled as FC0, FC1, FC2, FC3, FC4, and FC5 Hardware Installation Guide for Cisco NCS 5500 Series Modular Routers... -
Page 117: Removing A Fabric Card
Unscrew the four captive screws on the front of the fan tray (one on each corner of the front of the fan tray) until each screw is free of the chassis (see Callout 1 in the following figure). Hardware Installation Guide for Cisco NCS 5500 Series Modular Routers... - Page 118 Remove the fabric card that you are replacing by following these steps: a) Unscrew the screw on the center of each of the two handles on the fabric card (see Callout 1 in the following figure). Hardware Installation Guide for Cisco NCS 5500 Series Modular Routers...
- Page 119 (see Callout 2 in the previous figure). c) With each of the two handles in your two hands, pull the module a couple of inches (about 5 cm) out of the slot (see the following figure). Hardware Installation Guide for Cisco NCS 5500 Series Modular Routers...
-
Page 120: Install A Fabric Card
Install a Fabric Card Step 1 Place one hand on the front of the module and turn the module 90 degrees so that the electrical connectors are on the bottom. Hardware Installation Guide for Cisco NCS 5500 Series Modular Routers... - Page 121 Reinstall the fan module over the replaced fabric card by following these steps: a) Use both of your hands to hold the two handles on the front of the fan tray that you are installing. Hardware Installation Guide for Cisco NCS 5500 Series Modular Routers...
- Page 122 Screw in the four captive screws to secure the fan tray to the chassis. Tighten the screws to 8 in-lb (0.9 N·m) of torque. f) Verify that the fan tray and fabric card STATUS LEDs (on the fan tray) turn on and become green. Hardware Installation Guide for Cisco NCS 5500 Series Modular Routers...
-
Page 123: Replace Power Supplies
• NCS 5504: The power supplies in slots 1 and 2 must be connected to one power source and the power supplies in slots 3 and 4 must be connected to the other power source Hardware Installation Guide for Cisco NCS 5500 Series Modular Routers... - Page 124 Hold the front of the module with one hand and place your other hand under the module to support its weight. Hardware Installation Guide for Cisco NCS 5500 Series Modular Routers...
- Page 125 The lever should click when you rotate it all the way to the front of the power supply. Be sure that the power supply is fully inserted into the slot (the front of the power supply should be even with the surface of the chassis) and securely in place. Hardware Installation Guide for Cisco NCS 5500 Series Modular Routers...
-
Page 126: Replace Dc Power Supply
3. Verify that the OK LED has turned off (indicates that there is no power going to the power supply). Note The FAULT LED might be on and amber colored to indicate that the power source connection has been broken. Hardware Installation Guide for Cisco NCS 5500 Series Modular Routers... - Page 127 Slide the guide bracket into the track of the power supply slot. Slide the power supply into the slot until the front of the module stops about 0.25 inches (0.6 cm) in front of the module. Hardware Installation Guide for Cisco NCS 5500 Series Modular Routers...
- Page 128 Rotate the ejector lever toward the front of the power supply and be sure that the other end of the lever locks into the chassis. Hardware Installation Guide for Cisco NCS 5500 Series Modular Routers...
- Page 129 Turn the power switch on the power supply to ON (labeled 1 on the power supply). The LEDs should flash and then the OK LED should turn on (green) in addition to the Input LEDs. Hardware Installation Guide for Cisco NCS 5500 Series Modular Routers...
-
Page 130: Replace Hvac/Hcdc Power Supply
Go to Step 4. Step 3 If you are replacing a power supply that is currently in the chassis, remove the existing module from the chassis by following these steps: Hardware Installation Guide for Cisco NCS 5500 Series Modular Routers... - Page 131 Press and hold the release Pull the module out of the button on the plug. slot and place it on an antistatic surface or inside an antistatic bag. Hardware Installation Guide for Cisco NCS 5500 Series Modular Routers...
- Page 132 Step 5 Attach the power cable to the power receptacle on the power supply. Hardware Installation Guide for Cisco NCS 5500 Series Modular Routers...
- Page 133 If you connected the power supply to a DC power source do the following, turn on the circuit breaker for the DC power source. Step 8 Turn on the power supply by setting the power switch to on (1). Step 9 Verify that the OK LED turns on and eventually becomes green. Hardware Installation Guide for Cisco NCS 5500 Series Modular Routers...
- Page 134 Replace Chassis Components Replace HVAC/HCDC Power Supply Hardware Installation Guide for Cisco NCS 5500 Series Modular Routers...
-
Page 135: Leds
Amber Check the FAB LED description in the Fabric Card LEDs for more information. No fabric cards are present, or all present fabric cards are in the shutdown configuration state. Hardware Installation Guide for Cisco NCS 5500 Series Modular Routers... -
Page 136: System Controller Leds
• Insufficient power for at least one of the installed modules. • The configured power redundancy mode differs from the operational power redundancy. System Controller LEDs The system controller module LEDs are located on the left side of the module. Hardware Installation Guide for Cisco NCS 5500 Series Modular Routers... - Page 137 The controller module is operational and in active mode. This mode is Green established after the SysAdmin VM is booted up. Amber The controller module is operational and in standby mode. The hardware mastership has not been established. Hardware Installation Guide for Cisco NCS 5500 Series Modular Routers...
-
Page 138: Route Processor Card Leds
ACT (Active) LED STS (Status) LED Management port link and active LEDs ATTN (Attention) LED 1588 port link and active LEDs STS (Status) LED SYNC LED ACT (Active) LED SYNC LED Hardware Installation Guide for Cisco NCS 5500 Series Modular Routers... - Page 139 (NC55-RP-E only) The 1588 port is not linked up. 1588 port ACT Flashing green The 1588 port is transmitting or receiving. (NC55-RP-E only) The 1588 port is not transmitting or receiving. Hardware Installation Guide for Cisco NCS 5500 Series Modular Routers...
-
Page 140: Fan Tray Leds
This module is not being identified. Green The fan tray is operational. Flashing Red One or more fans in this fan tray has failed. No power is going to the fan tray. Hardware Installation Guide for Cisco NCS 5500 Series Modular Routers... -
Page 141: Fabric Card Leds
Software is ready to handle the graceful shutdown using the push button. Pushbutton Green (Graceful Flashing Graceful shutdown in progress. Shutdown) yellow Graceful shutdown is complete; the module can be safely removed. Hardware Installation Guide for Cisco NCS 5500 Series Modular Routers... -
Page 142: Line Card Leds
Table 13: Line Card LED Descriptions Color Status ATTN Flashing blue The operator has activated this LED to identify this module in the chassis. This LED is not being used. Hardware Installation Guide for Cisco NCS 5500 Series Modular Routers... -
Page 143: Mpa Leds
LED). Color Status ATTN Flashing blue The operator has activated this LED to identify this MPA in the chassis. This LED is not being used. Hardware Installation Guide for Cisco NCS 5500 Series Modular Routers... -
Page 144: Power Supply Leds
The power supply LEDs are located on the upper left front portion of the module. Table 14: Power Supply LED Descriptions OK LED FAIL or FAIL/ID LED Status Green Power supply is on and outputting power to the router. Hardware Installation Guide for Cisco NCS 5500 Series Modular Routers... - Page 145 Flashing green Green Power supply is connected to input power source but not outputting power to the router. The power supply might not be properly installed in the chassis. Hardware Installation Guide for Cisco NCS 5500 Series Modular Routers...
-
Page 146: Port Status Leds
Port is administratively enabled and the link is up. Amber Port is administratively enabled and the link is down. Single Amber Flash Card reload is occurring. The LED blinks off-amber-off. Hardware Installation Guide for Cisco NCS 5500 Series Modular Routers...