Shure IntelliMix P300 User Manual
Audio conferencing processor
Hide thumbs
Also See for IntelliMix P300:
- Safety information manual (96 pages) ,
- User manual (85 pages) ,
- Manual (49 pages)

Related Manuals for Shure IntelliMix P300


Summary of Contents for Shure IntelliMix P300
- Page 1 P300 ® IntelliMix Audio Conferencing Processor Complete user guide for the P300. Includes system diagrams, specifications, installation instructions, command strings, and more. Version: 5 (2020-B)
-
Page 2: Table Of Contents
Mobile Phone System Crosspoint Gain Mobile Connection Cable Requirements Routing Channels P300 Default Settings Controlling Devices with Shure Designer Software Mute Synchronization P300 Hardware Setting Up Mute Sync on the MXA310 and P300 Power Over Ethernet Plus (PoE+) Cable Requirements... - Page 3 Troubleshooting Encryption Event Log Troubleshooting Networking and Dante Networking Best Practices Important Product Information Network Audio and Shure Control Data Information to the user Device IP Settings Specifications Configuring IP Settings Mobile Pin Assignments (TRRS) Manually Assigning Static IP Address...
-
Page 4: P300Intellimix® Audio Conferencing Processor
Shure Incorporated P300 ® IntelliMix Audio Conferencing Processor Safety Information IMPORTANT SAFETY INSTRUCTIONS READ these instructions. KEEP these instructions. HEED all warnings. FOLLOW all instructions. DO NOT use this apparatus near water. CLEAN ONLY with dry cloth. DO NOT block any ventilation openings. Allow sufficient distances for adequate ventilation and install in accordance with the manufacturer’s instructions. -
Page 5: Overview
Compact form factor is easy to mount without equipment rack Getting Started To control the P300, use Shure Designer software to adjust settings and route audio between Shure devices. After completing this basic setup process, you should be able to: •... -
Page 6: Step 1: Connect To A Network
To route audio in Designer, create a project and a location. Learn more about both in Designer’s Help section. For this example, we’ll connect an MXA910 ceiling array microphone. The process is the same for any networked Shure micro phone in Designer. -
Page 7: Step 4: Adjust Dsp And Route Signals
Drag and drop the P300 to add it to your location. Add the MXA910 to the same location. Go to Signal flow. This page creates Dante audio routes between Shure devices. Note: To route audio to non-Shure devices, use Dante Controller software. -
Page 8: Get More Information
With firmware 4.x and newer, Shure Designer software is the only way to control the P300. • You can access basic settings for the device by opening it from the Shure Web Device Discovery tool, but you must use Designer for full control. - Page 9 Shure Incorporated Device Purpose Physical Connections Dante I/Os 8 individual channel outputs Ceiling array microphone or 1 automix channel output 1 PoE port with IntelliMix DSP with IntelliMix DSP MXA910 1 AEC reference input 4 individual channel outputs Table array microphone...
-
Page 10: P300 And Computer With Soft Codec
Shure Incorporated P300 and Computer with Soft Codec Connect the computer to the USB port on the P300. Connect a powered loudspeaker or amplifier to the P300 analog output 2. In the matrix mixer, this is labeled Analog - To Speaker. -
Page 11: Hardware Codec System
Shure Incorporated Adapter Compatibility This device is compatible with USBB to USBC adapters. Using an adapter is only recommended for desktop and laptop com puters, as many mobile devices do not support bi-directional audio through USB or lightning ports. Hardware Codec System Connect the hardware codec audio output to the P300 analog input 1. -
Page 12: Mobile Phone System
Shure Incorporated Mobile Phone System In this example, when the phone is plugged in, the built-in microphone and speaker are disabled -- the phone simply carries the call. The MXA310 microphone captures near-end audio, and the loudspeaker delivers audio from the far end of the call. -
Page 13: Controlling Devices With Shure Designer Software
The Enable auto-mute feature on the mobile input channel must be turned off in this case. Controlling Devices with Shure Designer Software To control this device's settings, use Shure Designer software. Designer enables integrators and system planners to design au dio coverage for installations using MXA microphones and other Shure networked devices. -
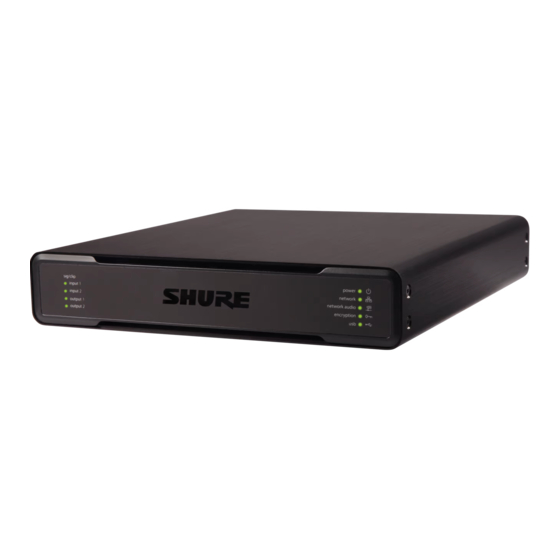
Page 14: P300 Hardware
To identify devices, click the product icon to flash the lights on a device. Select your device in the list and click Config ure to control device settings. Learn more at shure.com/designer. You can also access basic device settings using Shure Web Device Discovery. Full control is available in Designer. P300 Hardware Rear panel Front panel ①... -
Page 15: Usb Port
Shure Incorporated Pin Assignments: Audio Input (Left) Ring 1 Audio Input (Right ) Ring 2 Ground Sleeve Audio Output (To Phone) Note: Left and Right audio signals are summed to a mono signal. ② Audio Inputs (Block Connector) Balanced audio input connects to an analog audio device. Set the analog input level to match the output level of the analog device. -
Page 16: Led Indicators
Shure Incorporated Resets the device settings back to the factory default. ⑧ LED Indicators Power: Power over Ethernet Plus (PoE+) present Note: Use a PoE+ injector if your network switch does not supply PoE+. Network: Ethernet connection active Network Audio: Dante audio present on the network... -
Page 17: Power Over Ethernet Plus (Poe+)
Default Settings (Presets > Load Preset > Default Settings): Reverts audio settings back to the factory configuration (excluding Device Name, IP Settings, and Passwords). If you’re using Shure Designer software to configure your system, please check the Designer help section for more about this topic. 17/46... -
Page 18: Installation
Shure Incorporated Installation Installation and Rack Mounting Two mounting solutions are available for installing the P300: CRT1 19" Rack Tray (optional accessory): Supports up to 2 devices (two P300s or one P300 and one ANI4IN, ANI4OUT, ANI22, or ANIUSB); mountable in a rack or under a table... - Page 19 Shure Incorporated Align the holes as shown for securing up to two devices in the 19" rack tray. Rack Ear Configuration (CRT1) The adjustable rack ears support mounting in a standard equipment rack or underneath a table. Standard 19" Rack Mount Align the ears with the mounting holes pointed forward.
-
Page 20: Schematic View
Shure Incorporated Under-table Mounting Align the ears with the mounting holes pointed upward. Install the two screws that hold the ear to the tray as shown. Installing Underneath a Table Hold the tray in the desired location under a table Use a pencil to mark the location of the mounting holes on the table. -
Page 21: Customizing The Workspace
Shure Incorporated Mute / unmute Mutes or activates the channel Enable / disable Turns processing on or off (does not apply to matrix mixer or automixer) Edit Opens the dialog to adjust parameters Global (right-click in blank area) Mute all inputs... -
Page 22: Mute And Fader Groups
Shure Incorporated Mute and Fader Groups Check the Mute group box to add the channel to a group. Muting any channel within the Mute Groups Mute group mutes all channels in the group. Check the Fader group box to add the channel to a group. All faders within the group are Fader Groups linked, and move together when a single fader is adjusted. -
Page 23: 4-Band Equalizers
Shure Incorporated Filter Type Each band has a selectable filter: Low Cut: Rolls off the audio signal below the selected frequency Low Shelf: Attenuates or boosts the audio signal below the selected frequency High Cut: Rolls off the audio signal above the selected frequency... -
Page 24: Equalizer Applications
Shure Incorporated Equalizer Applications Conferencing room acoustics vary based on room size, shape, and construction materials. Use the guidelines in following ta ble. EQ Application Suggested Settings Add a high shelf filter to boost frequencies greater than 1 Treble boost for improved speech intelligibility kHz by 3-6 dB. -
Page 25: Using Optimize Audio
-3 and -6 dB) to minimize the unwanted room sound. If you’re using Shure Designer software to configure your system, please check the Designer help section for more about this topic. Using Optimize audio Optimize audio speeds up microphone and DSP configuration. After routing audio from a compatible microphone to a compati... -
Page 26: Automatic Gain Control (Agc)
Shure Incorporated Select Optimize audio. This process automatically adjusts gain, EQ, automixer, and DSP settings on the microphone and P300 to improve your signal. Listen to your signal and adjust settings as needed. Use the P300 EQ to adjust for the room's acoustic conditions. -
Page 27: Noise Reduction
Shure Incorporated • If connecting to a Shure MXA910, disable the Echo Reduction on the microphone. Training the Acoustic Echo Cancellation Training is the process where the AEC optimizes processing based on the acoustic environment. It only trains when far-end audio is present and near-end talkers are quiet. -
Page 28: Delay
Connect inputs and outputs by selecting the box where they intersect. P300 Default Settings The default configuration enables calling to multiple far ends with near-end Shure microphones. Connections are established for operating hardware codecs, software codecs, and mobile phones simultaneously. - Page 29 Example Scenario: Connecting a Three-Way Call Near-end audio from Dante microphones (Shure MXA 310) and the mobile phone are both routed to the video codec and sent to the far end. The mobile phone is simply carrying the audio from the remote caller -- its built-in microphone and speaker are disabled.
-
Page 30: Mute Synchronization
Mute status is synchronized in the devices using logic signals or USB connections. To use mute synchronization, enable logic on connected devices using the web application or Shure Designer software. Many Shure devices have logic enabled automatically. -
Page 31: Adjusting Input Levels
Shure Incorporated Adjusting Input levels The Inputs tab controls a channel's gain before it reaches the matrix mixer. However, you should also adjust the source's gain before it reaches the P300. To monitor a source's input level before it reaches the P300: Set metering to Pre-gain in the Settings menu. -
Page 32: Pre- And Post-Gain Metering
Shure Incorporated Pre- and Post-Gain Metering The 2 metering modes allow you to monitor signal levels before and after the gain stages. Input Metering • Pre-gain: Displays the pre-fader signal level. If signals are too low or clipping, adjust them at the source. -
Page 33: Automixer Direct Out Tap Points
Select the microphone that is used with the automixer for best performance. For best results, route microphone channels to the processing device and click Auto configure (this automatically selects the correct mic optimization mode). Use the Off setting when using a Shure Microflex Wireless system, or traditional wired microphones. Gate Inhibit (P300 only) Enable gate inhibit to prevent far-end audio from gating on near-end microphone channels. -
Page 34: Encryption
Important: For encryption to work: • Encryption must be universally enabled or disabled on all connected Shure devices in the same location. • AES67 must be disabled in Dante Controller to turn encryption on or off. AES67 encryption is currently not supported. -
Page 35: Device Ip Settings
Configuring IP Settings IP configurations are managed in Shure Designer software. By default, they are set to Automatic (DHCP) mode. DHCP mode enables the devices to accept IP settings from a DHCP server, or automatically fall back to Link-Local settings when no DHCP is available. -
Page 36: Digital Audio Networking
Tip: For larger wireless microphone configurations, it’s recommended to increase the multicast transmission rate to provide adequate bandwidth. Important: For best performance, use a Wi-Fi router that does not limit the multicast rate to 1-2 Mbps. Shure recommends the following Wi-Fi router brands: •... -
Page 37: Aes67
Considerations for Shure devices controlled by DDM: • When you add Shure devices to a Dante domain, set the local controller access to Read Write. Otherwise, you won't be able to access to Dante settings, perform a factory reset, or update device firmware. -
Page 38: Packet Bridge
MAC address, as array of 6 bytes Note: The Shure device should respond in less than one second on a typical network. If there is no response, try sending the query again after verify ing the destination IP address and port number. -
Page 39: Ip Ports And Protocols
8180 HTML Required for web application Open † 8427 Multcast SLP Required for inter-device communication Open 64000 Telnet Required for Shure firmware update Open Dante Audio & Controller Port TCP/UDP Protocol Description SNMP Used by Dante † [319-320]* Dante clocking... -
Page 40: Using A Third-Party Control System
The Export feature creates a CSV (comma separated values) document to save and sort the log data. Refer to the log file for details when troubleshooting or consulting with Shure Systems Support. To view the event log:... -
Page 41: Troubleshooting
Shure Incorporated Error A problem has occurred that could inhibit functionality. Log Details Description Provides details on events and errors, including IP address and subnet mask. Time Stamp Power cycles:days:hours:minutes:seconds since most recent boot-up. Event ID Indicates event type for internal reference. -
Page 42: Important Product Information
EMC conformance to Environment E2: Commercial and Light Industrial. Testing is based on the use of supplied and recommended cable types. The use of other than shielded (screened) cable types may degrade EMC performance. Changes or modifications not expressly approved by Shure Incorporated could void your authority to operate this equipment. Industry Canada ICES-003 Compliance Label: CAN ICES-3 (B)/NMB-3(B) Authorized under the verification provision of FCC Part 15B. -
Page 43: Specifications
This product meets the Essential Requirements of all relevant European directives and is eligible for CE marking. The CE Declaration of Conformity can be obtained from Shure Incorporated or any of its European representatives. For contact information please visit www.shure.com... - Page 44 Shure Incorporated Operating Temperature Range −6.7°C (20°F) to 50°C (122°F) Storage Temperature Range −29°C (20°F) to 74°C (165°F) Thermal Power Dissipation Maximum 17.5 W (60 BTU/hr) typical 14.6 W (50 BTU/hr) Audio Frequency Response +1, -1.5 dB 20 to 20,000 Hz...
- Page 45 Shure Incorporated Equivalent Input Noise 20 Hz to 20 kHz, A-weighted, input terminated with 150Ω Line -86 dBV -98 dBV Total Harmonic Distortion @ 1 kHz, 0 dBV Input, 0 dB analog gain <0.05% Common Mode Rejection Ratio 150Ω balanced source @ 1 kHz >50 dB...
-
Page 46: Mobile Pin Assignments (Trrs)
Shure Incorporated Total Harmonic Distortion @ 1 kHz, 0 dBV Input, 0 dB analog gain <0.05% Input Impedance 3.7 kΩ Input Clipping Level +4 dBV Output Impedance 1.4 kΩ Output Clipping Level Output terminated with 2.2 kΩ -20 dBV Networking...