RIDGID RE 6 Manual
Electrical tool
Hide thumbs
Also See for RE 6:
- Operator's manual (290 pages) ,
- Manual manual (13 pages) ,
- Manual (12 pages)
Table of Contents
Advertisement
Available languages
Available languages
Quick Links
Download this manual
See also:
Operator's Manual
Advertisement
Chapters
Table of Contents

Related Manuals for RIDGID RE 6


Summary of Contents for RIDGID RE 6
- Page 1 Manual RE 6/RE 60 Electrical Tool • Français – 11 • Castellano – 23 Türkçe – 35 • русский – 47 • www.tiendaisso9000.com / www.isso9000.com.mx...
-
Page 2: Table Of Contents
Required Maintenance At RIDGID Independent Service Center ................8 Accessories ..................................8 Storage ..................................8 Service And Repair ..............................8 Machine Disposal ................................8 Troubleshooting ................................9 RE 6/RE 60 Electrical Tool Diagnostic Codes ......................10 Lifetime Warranty ............................Back Cover *Original Instructions - English www.tiendaisso9000.com / www.isso9000.com.mx... -
Page 3: Recording Form For Machine Serial Number
Failure to understand and follow the contents of RE 6/RE 60 Electrical Tool this manual may result in Record Serial Number below and retain product serial number which is located on nameplate. electrical shock, fire and/or serious personal injury. -
Page 4: Safety Symbols
RE 6/RE 60 Electrical Tool Safety Symbols In this operator’s manual and on the product, safety symbols and signal words are used to communicate important safe- ty information. This section is provided to improve understanding of these signal words and symbols. -
Page 5: Personal Safety
RE 6/RE 60 Electrical Tool er tool or these instructions to operate the power Personal Safety tool. Power tools are dangerous in the hands of • Stay alert, watch what you are doing and use com- untrained users. mon sense when operating a power tool. Do not •... -
Page 6: Specific Safety Information
The RIDGID ® Models RE 6 and RE 60 Electrical Tools are • Never repair a damaged head. A head that has electro-hydraulic tools, which when used with appropriate been welded, ground, drilled or modified in any man- interchangeable heads perform a variety of functions, ner can break during use. -
Page 7: Specifications
Amperage ....18 Amp tromagnet interference to other equipment. Power .....324 Watts The RIDGID Model RE 6 and RE 60 Electri - ® NOTICE Battery......18V Li-Ion, Rechargeable cal Tools conform to all applicable EMC standards. -
Page 8: Tool Inspection
RE 6/RE 60 Electrical Tool Tool Inspection • Any other condition which may prevent safe and normal operation. WARNING If any problems are found, do not use the tool until the problems have been repaired. 4. Inspect and maintain any other equipment being used per its instructions to make sure it is functioning prop- erly. -
Page 9: Maintenance Instructions
2. Inspect the work to be done and determine the cor- 6. With dry hands, install a fully charged battery into the rect RIDGID tool and interchangeable head for the electrical tool. Press the ON/OFF (Figure 2) button to application. Using an incorrect interchangeable head power on the electrical tool. -
Page 10: Cleaning And Lubrication
RE 60. To prevent serious injury, use only accessor - ies specifically designed and recommended for use Service and repair on this RE 6/RE 60 Electrical Tool with the RE 6 or RE 60, such as those listed below. must be performed by an independent Crimp Tool Service Catalog Cent er. -
Page 11: Troubleshooting
RE 6/RE 60 Electrical Tool For EC Countries: Do not dispose of elec- Disposal trical equipment with household waste! Parts of the Electrical Tool contain valuable materials According to the European Guideline 2012/ - and can be recycled. There are companies that specialize 19/ EU for Waste Electrical and Electronic in recycling that may be found locally. -
Page 12: Re 6/Re 60 Electrical Tool Diagnostic Codes
RE 6/RE 60 Electrical Tool Troubleshooting (Continued) SYMPTOM POSSIBLE REASONS SOLUTION Oil leaks from tool. Seal or mechanical problems. Contact Ridge Tool Technical Service Department at (800) 519-3456 for nearest Independent Service center. Motor runs but tool will Oil level low. -
Page 13: Fiche D'enregistrement Du Numéro De Série De L'appareil
Familiarisez-vous avec cette notice avant d’utiliser l’appareil. Tout manque de compréhension ou de respect des con- Pinces multifonctions électriques RE 6 et RE 60 signes ci-présentes augmenterait les Enregistrez ci-dessous le numéro de série indiqué sur la plaque signalétique de l’appareil. - Page 14 Accessoires ................................19 Stockage ..................................20 Révisions et réparations ............................20 Recyclage de l’appareil ..............................20 Dépannage ..................................21 Codes de diagnostic pour pinces multifonctions électriques RE 6 et RE 60............22 Garantie à vie ............................Page de garde *Traduction de la notice originale. www.tiendaisso9000.com / www.isso9000.com.mx...
-
Page 15: Symboles De Sécurité
Pinces multifonctions électriques RE 6 et RE 60 Symboles de sécurité Les symboles et mots clés utilisés à la fois dans ce mode d’emploi et sur l’appareil lui-même servent à signaler d’importants risques de sécurité. Ce qui suit permettra de mieux comprendre la signification de ces mots clés et symboles. -
Page 16: Sécurité Individuelle
Pinces multifonctions électriques RE 6 et RE 60 mentation endommagés ou entortillés augmentent aspirateurs peuvent limiter les risques associés à la dis- les risques de choc électrique. persion des poussières. • Lors de l’utilisation de l’appareil à l’extérieur, pré - Utilisation et entretien de l’appareil... -
Page 17: Service Après-Vente
– Visiter le site www.RIDGID.com ou www.RIDGID.eu a - • Ne jamais modifier l’appareil ou ses têtes. La moin- fin de localiser le représentant RIDGID le plus proche ; dre modification de l’appareil ou de ses têtes aug- – Consulter les services techniques Ridge Tool par menterait les risques d’accident. -
Page 18: Description, Caractéristiques Techniques Et Équipements De Série Description
Pinces multifonctions électriques RE 6 et RE 60 Description, caractéristiques techniques et équipements de série Touche Marche/ Description Arrêt Les pinces multifonctions RIDGID ® RE 6 et RE 60 sont des appareils électrohydrauliques qui, équipés des têtes inter- changeables appropriées, assurent une variété de fonc- tions comprenant le sertissage des connecteurs électriques... -
Page 19: Equipements De Série
Les pinces multifonctions RIDGID ® AVIS IMPORTANT RE 6 et RE 60 sont conformes à l’ensemble des normes EMC applicables. Cependant, la possibilité de parasitage des appareils environnants ne peut pas être exclue. L’ensemble des normes EMC concernées qui ont été... -
Page 20: Préparation Et Utilisation
Pinces multifonctions électriques RE 6 et RE 60 • Toute autre anomalie susceptible de nuire à la Ne jamais utiliser la pince multifonction en l’ab - sence d’une des têtes interchangeables équipée sécurité et au bon fonctionnement de l’appareil. des inserts appropriés. Cela risquerait d’endom - Faites corriger toute anomalie éventuelle avant de... -
Page 21: Entretien
Cela assure le sertissage complet des connecteurs RE 6 ou la RE 60, tels que ceux indiqués ci-après. électriques. Pour obtenir la liste complète des accessoires RIDGID prévus pour cet appareil, consultez le cat-... -
Page 22: Stockage
RE 6 et RE 60. Ces pinces multifonctions peuvent s’avérer dangereuses entre les mains d’un non initié. Révisions et réparations AVERTISSEMENT Toute révision ou réparation mal effectuée pourrait compromettre la sécurité de l’appareil. La révision et la réparation des pinces électriques RE 6 et www.tiendaisso9000.com / www.isso9000.com.mx... -
Page 23: Dépannage
Pinces multifonctions électriques RE 6 et RE 60 Dépannage ANOMALIE CAUSE POSSIBLE SOLUTION L’appareil ne s’allume Bloc-piles déchargé ou défaillant. Insérer un bloc-piles rechargé ou recharger le pas lorsque l’on appui bloc-piles existant. sur la touche Marche/Arrêt. Bloc-piles mal inséré. -
Page 24: Codes De Diagnostic Pour Pinces Multifonctions Électriques Re 6 Et Re 60
Pinces multifonctions électriques RE 6 et RE 60 RE 6/RE 60 Diagnostic Codes Désignation Icon Vert Appareil en marche. Bloc-piles 18V déchargé Rouge Hors plage des températures de 15 °F (-10 °C) à 122 °F (50 °C). Indicateur de révision des 30 000 cycles. NOTA : Jaune L’appareil se verrouillera au bout de 32 000 cycles. -
Page 25: Formulario De Registro Para El Número De Serie Del Aparato
Antes de utilizar este aparato, lea detenidamente su Manual del Operario. Pueden ocurrir descar- Herramienta eléctrica RE 6/RE 60 gas eléctricas, incendios y/o Apunte aquí y guarde el número de serie del producto; se encuentra en su placa de características. - Page 26 Accesorios ..................................32 Almacenamiento ................................32 Servicio y reparaciones ..............................32 Eliminación de la máquina ............................32 Resolución de problemas ............................33 Códigos de diagnóstico de la herramienta eléctrica RE 6 o RE60 ................34 Garantía vitalicia ..........................Carátula posterior *Traducción del manual original www.tiendaisso9000.com / www.isso9000.com.mx...
-
Page 27: Simbología De Seguridad
Herramienta eléctrica RE 6/RE 60 Simbología de seguridad En este manual del operario y en el producto mismo encontrará símbolos y palabras de advertencia que comunican impor- tante información de seguridad. Para su mejor comprensión, en esta sección se describe el significado de estas palabras y símbolos de advertencia. -
Page 28: Seguridad Personal
Herramienta eléctrica RE 6/RE 60 • No maltrate el cordón eléctrico del aparato. Nunca • Vístase adecuadamente. No lleve ropa suelta ni joyas. Mantenga su cabello, ropa y guantes aparta- transporte el aparato tomándolo de su cordón eléctrico ni jale del cordón para desenchufarlo del dos de las piezas en movimiento. -
Page 29: Uso Y Cuidado De Las Herramientas A Batería
• Utilice la herramienta eléctrica solamente con podría producir una situación peligrosa. cabezales intercambiables QuickChange System™ (QCS™ o sistema de conexión rápida) de RIDGID ® Uso y cuidado de las herramientas a como son el cabezal cortador, el cabezal engarzador, batería... -
Page 30: Descripción, Especificaciones Y Equipo Estándar Descripción
Botón de Descripción, especificaciones encendido/apagado y equipo estándar Descripción Las herramientas eléctricas modelo RE 6 y modelo RE 60 de RIDGID ® son herramientas electrohidráulicas capaces de desempeñar diversas funciones cuando se usan con el Figura 2 – Panel de diagnóstico LED cabezal intercambiable correspondiente. -
Page 31: Equipo Estándar
QCS, mangos y también pesan más. controles. Esto facilita su inspección y ayuda a evitar Las herramientas eléctricas modelo RE 6 o la modelo que la máquina se resbale de sus manos. RE 60 de RIDGID ®... -
Page 32: Instrucciones De Puesta En Marcha Y Operación
Figura 5 – Hendiduras formadas en las ranuras del cuál herramienta y cuál cabezal intercambiable de acoplamiento QCS RIDGID utilizará para la aplicación. El uso de un cabezal intercambiable que no corresponda a una aplicación podría causar lesiones, dañar la herra - Instrucciones de puesta en mienta y producir conexiones incompletas. -
Page 33: Instrucciones De Mantenimiento
Herramienta eléctrica RE 6/RE 60 En la mayoría de las operaciones, se completa el 5. Extraiga la batería del aparato. Empuje el collar QCS ciclo del aparato al seguir oprimiendo el interruptor de hacia atrás en la herramienta eléctrica y quite o funcionamiento hasta que el ariete se retraiga auto - inserte el cabezal intercambiable apropiado (Figura 6). -
Page 34: Accesorios
ADVERTENCIA RE 6 y RE 60, tales como los que se indican en la La máquina se torna insegura cuando el servicio o lista siguiente. la reparación se hacen en forma indebida. -
Page 35: Resolución De Problemas
Herramienta eléctrica RE 6/RE 60 bles deben desecharse por separado en una forma que cumpla con las normas del medio ambiente. Resolución de problemas SÍNTOMA POSIBLES RAZONES SOLUCIÓN La herramienta no se La batería está completamente descargada o ha Inserte una batería completamente cargada o enciende cuando se fallado. -
Page 36: Códigos De Diagnóstico De La Herramienta Eléctrica Re 6 O Re60
Coloque hojas que correspondan al material que El material no corresponde a las especificaciones de desea cortar. la hoja de corte. Códigos de diagnóstico de la herramienta eléctrica RE 6 o RE 60 Color Descripción Icon Verde La herramienta está encendida. -
Page 37: Makine Seri Numarası İçin Kayıt Formu
U Y A R I ! Bu aleti kullanmadan önce Kullanıcı Kılavuzu'nu dikkat- lice okuyun. Bu kılavuzun içeriğinin anlaşılmaması ve RE 6/RE 60 Şarjlı Pabuç Sıkma Cihazı ona uyulmaması elektrik çarpması, yangın ve/veya Aşağıdaki Seri Numarasını kaydedin ve isim levhasındaki ürün seri numarasını muhafaza edin. - Page 38 RE 6/RE 60 Şarjlı Pabuç Sıkma Cihazı İçindekiler Makine Seri Numarası İçin Kayıt Formu........................35 Güvenlik Sembolleri ..............................37 Genel Güvenlik Kuralları Çalışma Alanı Güvenliği ............................37 Elektrik Güvenliği ..............................37 Kişisel Güvenlik ................................38 Şarjlı Pabuç Sıkma Cihazı Kullanımı Ve Bakımı ......................38 Pil Kullanımı Ve Bakımı ............................38 Servis ..................................39...
-
Page 39: Güvenlik Sembolleri
RE 6/RE 60 Şarjlı Pabuç Sıkma Cihazı Güvenlik Sembolleri Bu kullanıcı kılavuzunda ve ürün üzerinde güvenlik sembolleri ve uyarı kelimeleri önemli güvenlik bilgilerini bildirmek için kullanılmıştır. Bu kısım, bu uyarı kelimelerinin ve sembollerin daha iyi anlaşılması için sunulmuştur. Bu güvenlik uyarısı sembolüdür. Sizi potansiyel kişisel yaralanma tehlikesine karşı uyarmak için kullanılır. Muhtemel yaralanma veya ölümden sakınmak için bu sembolü... -
Page 40: Kişisel Güvenlik
RE 6/RE 60 Şarjlı Pabuç Sıkma Cihazı • Şarjlı pabuç sıkma cihazını ayarlamadan, aksesu- • Şarjlı pabuç sıkma cihazının nemli ortamda kulla- nılması kaçınılmaz ise bir topraklama hatası devre arlarını değiştirmeden ya da saklamadan önce fişini güç kaynağından çekin ya da pilini çıkarın. Bu kesici (GFCI) korumalı... -
Page 41: Servis
Asla yalnız bir bileşeni değiştirmeyin. Yaralanma Açıklama riskini azaltmak için hasarlı başlıkları atın. The RIDGID Model RE 6 ve RE 60 Şarjlı Pabuç Sıkma ® • Kullanım döngüsü esnasında parmaklarınızı ve Cihazları, uygun değiştirilebilir başlıklarla kullanıldığında ellerinizi değiştirilebilir başlıktan uzak tutun. Başlığa elektrik sıkıştırma bağlantılarının sıkıştırılması, elektrik kab-... -
Page 42: Açıklama, Teknik Özellikler Ve Standart Ekipman Açıklama
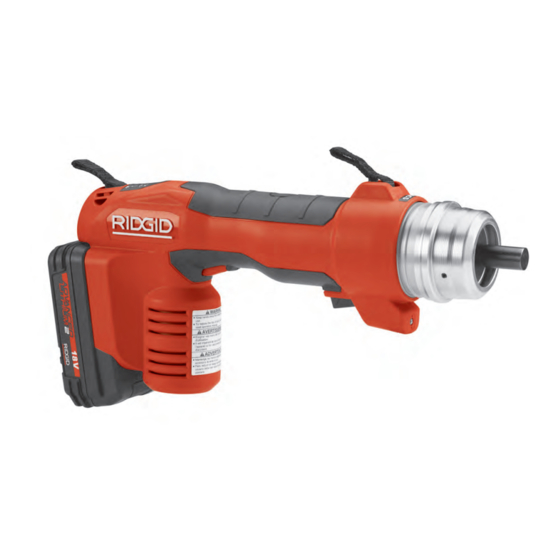
Bırakma Çalıştırma Lambası Düğmesi Anahtarı Uyarı Etiketleri Şekil 1 – RE 6 Şarjlı Pabuç Sıkma Cihazı Şekil 3 – Makine Seri Numarası ON/OFF Düğmesi Standart Ekipman Şarjlı Pabuç Sıkma Cihazı, pillerle birlikte sipariş edil- mişse, 2.0 Ah pillerle birlikte gelir. 4.0 Ah piller aksesuar olarak mevcuttur (Bkz. -
Page 43: Elektromanyetik Uyumluluk (Emc)
ürünün, sorunsuz olarak çalışması anlamına gelir. RIDGID Model RE 6 ve RE 60 Şarjlı Pabuç BİLDİRİM ® Sıkma Cihazları tüm geçerli EMC standartlarına uygundur. Ancak diğer cihazlarda parazite neden olma ihtimali önle- nemez. -
Page 44: Ayarlama Ve Çalıştırma Talimatları
(Şekil 2) elektrikli aleti açma düğmesi. Üç LED’in tümü bir kez yanıp söner. Ardından aletin 2. Yapılacak işi inceleyin ve uygulama için doğru RIDGID çalışmak için hazır olduğunu gösteren yeşil LED sabit aletini ve değiştirilebilir başlığı belirleyin. Bir uygulama şekilde yanmalıdır ( Şekil 7’deki Arıza Teşhis Kodlarına... -
Page 45: Bakım Talimatları
UYARI landırılması için nihai konumunun belirlenmesini sağlar. Aşağıdaki alet aksesuarları RE 6 ve RE 60 Şarjlı Pabuç Çoğu işlemde aletin döngüsünü tamamlamak için, Sıkma Cihazlarıyla çalışacak şekilde tasarlanmıştır. Diğer değiştirilebilir başlık talimatlarında aksi belirtilmediği aletlerle kullanım için uygun başka aksesuarlar, RE 6 ve... -
Page 46: Bakım Ve Onarım
Bakım ve Onarım UYARI Hatalı bakım ve onarım makinenin çalışmasını güvensiz kılabilir. Bu RE 6/RE 60 Elektrikli Alet üzerindeki servis ve onarım bağımsız bir Sıkma Aleti Servis Merkezinde yapılmalıdır. Alet tutturucuları, hizmetin yetkili olmayan kişiler tarafından gerçekleştirilip gerçekleştirilmediğini gösterecek şekilde işaretlenmiştir. -
Page 47: Sorun Giderme
RE 6/RE 60 Şarjlı Pabuç Sıkma Cihazı Sorun Giderme BELİRTİ OLASI NEDENLER ÇÖZÜM ON/OFF düğmesine Pil tamamen boşalmış veya pil arızalı olabilir. Tam olarak şarj edilmiş pil takın/pili şarj edin. basıldığında alet çalışmı- yor. Pil, aletin koluna doğru şekilde takılmamış. -
Page 48: Re 6/Re 60 Arıza Teşhis Kodları
RE 6/RE 60 Şarjlı Pabuç Sıkma Cihazı RE 6/RE 60 Arıza Teşhis Kodları Renk Işık Açıklama Simge Makine AÇIK. Yeşil 18V: Pili yeniden şarj edin. Kırmızı 15°F (-10°C) ila 122°F (+50°C) sıcaklık aralığının dışında. 30000 döngüden sonra servis sinyali. NOT: 32000 döngüden sonra alet kilitlenecektir. -
Page 49: Бланк Для Записи Серийного Номера Инструмента
В Н И М А Н И Е ! Прежде чем пользоваться этим инструментом, внимательно про- читайте данное руководство по эксплуатации. Непонимание и Электроинструмент RE 6/RE 60 несоблюдение содержания дан- ного руководства может приве- Запишите серийный номер, указанный далее, и сохраните серийный номер, сти к поражению электрическим... - Page 50 Электромагнитная совместимость (ЭМС) ......................54 Осмотр инструмента ..............................54 Инструкция по подготовке и эксплуатации устройства ..................55 Инструкция по техническому обслуживанию Чистка и смазка ..............................56 Техобслуживание, выполняемое в независимых сервис-центрах RIDGID ............56 Дополнительные принадлежности ........................57 Хранение ..................................57 Обслуживание и ремонт............................57 Утилизация ................................58 Поиск и устранение неисправностей ........................59 Диагностические...
-
Page 51: Знаки Безопасности
Электроинструмент RE 6/RE 60 Знаки безопасности В данном руководстве по эксплуатации и на продукте, обозначения техники безопасности и сигнальные слова используются для сообщения важной информации по безопасности. В данном разделе объясняется значение этих сигнальных слов и знаков. Этот символ обозначает опасность. Он используется, чтобы предупредить вас о риске травмы. Соблюдайте все требования... -
Page 52: Личная Безопасность
Электроинструмент RE 6/RE 60 • Не прикасайтесь к заземленным поверхно- • Не допускайте непреднамеренного запуска электроинструмента. Прежде чем брать элек- стям, например, трубам, нагревателям, печам и холодильникам. В противном случае, если тело троинструмент в руки, переносить его или под- ключать к источнику постоянного и (или) человека... -
Page 53: Использование Прибора С Аккумулятором И Уход За Ним
Электроинструмент RE 6/RE 60 • Храните неиспользуемый электроинструмент • Храните неиспользуемый блок аккумулятор- ной батареи в стороне от других металличе- вдали от детей. Не допускайте использования электроинструмента лицами, не работавшими ских предметов, таких как скрепки для бумаг, монеты, ключи, гвозди, винты или иные метал- ранее... -
Page 54: Электробезопасность Инструмента
Если у вас возникли вопросы, касающиеся изделий • Не ремонтируйте поврежденную головку. компании RIDGID ® Головка, которая была сварена, прошлифована, – Обратитесь к местному дистрибьютору RIDGID ® рассверлена или модифицирована каким-либо спо- – Контактную информацию ближайшего представи- собом, может разрушиться во время использова- тельства... -
Page 55: Технические Характеристики
я кнопка фонарь ния. (12 = год, 06 = месяц). Кнопка Предупредительные ВКЛ/ВЫКЛ наклейки Аккумуляторная батарея Рис. 1 – Электроинструмент RE 6 Светодиод Кнопка ВКЛ/ ВЫКЛ Рис. 3 – Серийный номер инструмента Стандартные принадлежности Электроинструмент, при заказе с аккумуляторными батареями, поставляется в комплекте с аккумулятор- Рис. -
Page 56: Электромагнитная Совместимость (Эмс)
муфте QCS во всех отверстиях и отсутствие их Электроинструменты RIDGID ПРЕДУПРЕЖДЕНИЕ ® повреждений. На рис. 4 показана внутренняя моделей RE 6 и RE 60 соответствуют всем действующим сторона очищенной полнокомплектной муфты стандартам по электромагнитной совместимости ЭМС. QCS. Однако, невозможно полностью исключить вероятность... -
Page 57: Инструкция По Подготовке И Эксплуатации Устройства
Рис. 5 – Углубления в канавках муфты QCS использовать инструмент, стоя в воде. 2. Изучите работу, которую предстоит выполнить, Инструкция по подготовке и определите надлежащий инструмент RIDGID и подходящую для применения сменную головку. и эксплуатации устройства Использование не подходящей для применения... -
Page 58: Инструкция По Техническому Обслуживанию
Электроинструмент RE 6/RE 60 нения, убедитесь, что плунжер полностью отве- Если плунжер отведен не полностью, нажмите ден, нажав кнопку сброса давления). кнопку сброса давления. Если нажать эту кнопку во время обжима электрического разъемного Нажмите на муфту Вставная соединения, обжим будет дефектным, и потре- головка... -
Page 59: Дополнительные Принадлежности
лежности. Иные принадлежности, подходящие для работы с другим оборудованием, могут быть опасны- условиях экстремально высокой или низкой темпе- ми при использовании с RE 6 и RE 60. Во избежание ратуры. Датчик температуры электроинструмента не серьезных травм используйте только дополнитель- позволит включить инструмент, если температура... -
Page 60: Утилизация
Электроинструмент RE 6/RE 60 Утилизация Детали электроинструмента содержат ценные мате- риалы и могут быть подвергнуты повторной перера- ботке. В своем регионе вы можете найти компании, специализирующиеся на утилизации. Утилизируйте компоненты в соответствии со всеми нормативами. Узнайте дополнительную информацию в местной... -
Page 61: Поиск И Устранение Неисправностей
Электроинструмент RE 6/RE 60 Поиск и устранение неисправностей ПРИЗНАК ВОЗМОЖНЫЕ ПРИЧИНЫ РЕШЕНИЕ НЕИСПРАВНОСТИ ПРИЧИНЫ Аккумуляторная батарея полностью разряже- Вставьте полностью заряженную аккумулятор- Инструмент не включа- на или неисправна. ную батарею/зарядите батарею. ется при нажатии кнопки ВКЛ/ВЫЛ. Аккумуляторная батарея неправильно вставле- Проверьте, полностью... -
Page 62: Диагностические Коды Инструмента Re 6/Re 60
соответствующие сменные детали. работы. Материал не соответствует техническим харак- Замените на лезвие, технические характери- теристикам лезвия. стики которого соответствуют разрезаемому материалу. Диагностические коды инструмента RE 6/RE 60 Цвет Лампа Описание Символ Инструмент включен. Зеленый 18 В: Зарядите аккумуляторную батарею. Красный... - Page 63 RE 6/RE 60 Electrical Tool CE Conformity This instrument complies with the European Council Electromagnetic Compatibility Directive 2004/108/EC using the following standards: EN 61326-1:2006, EN 61326- 2-1:2006. Conformité CE Cet instrument est conforme à la Directive du Conseil européen relative à...
- Page 64 RE 6/RE 60 Electrical Tool www.tiendaisso9000.com / www.isso9000.com.mx...
- Page 65 ISSO POWER 9000 SA DE CV AV. VALLE DE SANTIAGO No.27 COL. VALLE DE ARAGON 1a. SECC NEZAHUALCOYOTL EDO DE MEX. C.P 57100 TELS: 50620700/50620701/50620702/57120329/57120939/57120965/ FAX 57120430 Printed 8/14 999-999-463.08 © 2014 RIDGID, Inc. EC40843 REV. E...