ABB ACSM1-04 Series Hardware Manual
Drive modules (55 to 110 kw)
Hide thumbs
Also See for ACSM1-04 Series:
- Quick installation manual (70 pages) ,
- System manual (34 pages) ,
- Manual (16 pages)
Table of Contents
Advertisement
Quick Links
Advertisement
Table of Contents

Related Manuals for ABB ACSM1-04 Series


Summary of Contents for ABB ACSM1-04 Series
- Page 1 ACSM1 Hardware Manual ACSM1-04 Drive Modules (55 to 110 kW)
- Page 3 ACSM1-04 Drive Modules 55 to 110 kW Hardware Manual 3AFE68912130 REV A EN EFFECTIVE: 14.01.2008 © 2008 ABB Oy. All Rights Reserved.
-
Page 5: Safety Instructions
Safety instructions What this chapter contains This chapter contains the safety instructions which you must follow when installing, operating and servicing the drive. If ignored, physical injury or death may follow, or damage may occur to the drive, the motor, or driven equipment. Read the safety instructions before you work on the unit. -
Page 6: Installation And Maintenance Work
Installation and maintenance work These warnings are intended for all who work on the drive, motor cable or motor. WARNING! Ignoring the following instructions can cause physical injury or death, or damage to the equipment. Only qualified electricians are allowed to install and maintain the drive. •... - Page 7 WARNING! Ignoring the following instructions can cause physical injury or death, or damage to the equipment. • Never attempt to repair a malfunctioning drive; contact your local ABB representative or Authorized Service Center. • Make sure that dust from drilling does not enter the drive during the installation.
-
Page 8: Start-Up And Operation
Start-up and operation These warnings are intended for all who plan the operation of the drive, start up or operate the drive. WARNING! Ignoring the following instructions can cause physical injury or death, or damage to the equipment. • Before adjusting the drive and putting it into service, make sure that the motor and all driven equipment are suitable for operation throughout the speed range provided by the drive. -
Page 9: Table Of Contents
Providing feedback on ABB Drives manuals ........ - Page 10 Mechanical installation Contents of the package ............29 Delivery check and drive module identification .
- Page 11 Supply cable ............. 48 Motor and motor cable .
- Page 12 Dimensions, weights, noise ............74 Cooling characteristics .
-
Page 13: About This Manual
Product and service inquiries Address any inquiries about the product to your local ABB representative, quoting the type code and serial number of the unit in question. A listing of ABB sales, support and service contacts can be found by navigating to www.abb.com/drives... -
Page 14: Contents
Contents The chapters of this manual are briefly described below. Safety instructions give safety instructions for the installation, commissioning, operation and maintenance of the drive. About this manual lists the steps in checking the delivery and installing and commissioning the drive and refers to chapters/sections in this manual and other manuals for particular tasks. -
Page 15: Installation And Commissioning Flowchart
If the converter has been non-operational for more than one year, the converter DC link Only intact units may be started up. capacitors need to be reformed. Ask ABB for more information. Check the installation site. Mechanical... - Page 16 Task Connect the power cables. Electrical installation: Power cable connection: (page 54) and Connecting the control cables: Connect the control and the auxiliary control cables. (page 58) For optional equipment: Resistor braking (page 83) Manuals for any optional equipment Check the installation. Installation checklist (page 65) Commission the drive.
-
Page 17: Terms And Abbreviations
Terms and abbreviations Term/Abbreviation Explanation Electromagnetic Compatibility. FIO-01 Optional digital I/O extension for the ACSM1. FIO-11 Optional analogue I/O extension for the ACSM1. FEN-01 Optional TTL encoder interface for the ACSM1. FEN-11 Optional absolute encoder interface for the ACSM1. FEN-21 Optional resolver interface for the ACSM1. - Page 18 About this manual...
-
Page 19: The Acsm1-04
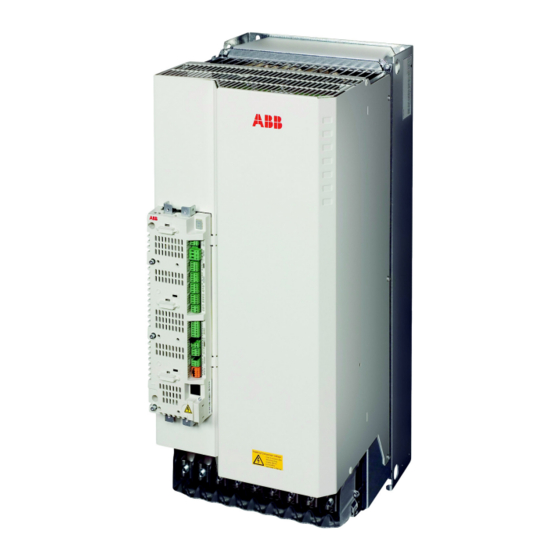
The ACSM1-04 What this chapter contains This chapter describes the construction and operating principle of the drive in short. The ACSM1-04 The ACSM1-04 is an IP20 drive module for controlling AC motors. It is to be installed into a cabinet by the customer. The ACSM1-04 is available in several frame sizes depending on output power. -
Page 20: Main Circuit And Control Interfaces
Main circuit and control interfaces The diagram below shows the control interfaces and the main circuit of the drive. For further information on the JCU Control Unit, see the chapter Electrical installation. Power unit Control unit (JCU), installed onto the power unit 7-segment status display (see page 69) Option 1 Slot 1... -
Page 21: Operation
Operation This table describes the operation of the main circuit in short. Component Description Braking chopper Conducts the energy generated by a decelerating motor from the DC bus to a braking resistor. The braking chopper is built in the ACSM1-04; braking resistors are external options. - Page 22 The ACSM1-04...
-
Page 23: Planning The Cabinet Assembly
Please note that the installation must, however, always be designed and made according to applicable local laws and regulations. ABB does not assume any liability whatsoever for any installation which breaches the local laws and/or other regulations. -
Page 24: Main Dimensions And Free Space Requirements
Main dimensions and free space requirements The modules can be installed side by side. The main dimensions of the drive modules as well as free space requirements are shown below. For more details, refer to the chapter Dimension drawings. Free space above the module: 200 mm (7.9”) 313.5 [12.34”] 415 [16.34”]*... -
Page 25: Cooling And Degrees Of Protection
Cooling and degrees of protection The cabinet must have enough free space for the components to ensure sufficient cooling. Observe the minimum clearances given for each component. The air inlets and outlets must be equipped with gratings that • guide the air flow •... -
Page 26: Preventing The Recirculation Of Hot Air
Preventing the recirculation of hot air Typical vertical mounting Push-through mounting Main Cabinet (side view) Cabinet (side view) flow AREA Air flow out Main airflow out HOT AREA Air baffle Air baffle plates plate COOL AREA COOL AREA Main airflow in Air flow in Main flow... -
Page 27: Emc Requirements
EMC requirements Generally, the fewer and smaller the holes in the cabinet, the better the interference attenuation. The maximum recommended diameter of a hole in galvanic metal contact in the covering cabinet structure is 100 mm. Special attention must be paid to the cooling air inlet and outlet gratings. -
Page 28: Cabinet Heaters
360° high frequency grounding of the control cable shields is recommended at their entries. The shields can be grounded by means of conductive shielding cushions pressed against the cable shield from both directions: Bare cable shield Shielding cushion (conductive) Cabinet bottom plate Cable Cable grommet Cabinet heaters... -
Page 29: Mechanical Installation
Mechanical installation Contents of the package The drive is delivered in a plywood box. The box contains: • ACSM1-04 drive module, with factory-installed options • one cable clamp plate for control cabling with screws • screw-type terminal blocks to be attached to the headers on the JCU Control Unit •... -
Page 30: Before Installation
Before installation Check the installation site according to the requirements below. Refer to Dimension drawings for frame details. Requirements for the installation site Technical data for the allowed operation conditions of the drive. The ACSM1-04 is to be mounted in an upright position. The wall the drive is to be mounted on must be as even as possible, of non-flammable material and strong enough to carry the weight of the drive. -
Page 31: Push-Through Mounting
Push-through mounting An installation kit is available for push-through mounting. The kit enables the installation of the drive module in the wall of a cooling air duct so that part of the module protrudes into the duct. Keep the screws removed during the procedure – they will later be used to fasten the push-through mounting parts. - Page 32 1. Place the drive module on its back on a level surface. 2. Remove the grounding terminals (3 × 2 screws) as well as the three screws nearby. 3. Remove the arrowed screws on each side of the module cover. (The middle row of screws is used later to attach the lateral supports of the mounting kit.) Mechanical installation...
- Page 33 4. Attach the grounding terminals to the lower collar. 5. Slide the lower collar onto the drive module into the position shown. Fasten through the holes (arrowed) using the three screws removed at step 2. Mechanical installation...
- Page 34 6. Slide the upper collar onto the drive module into the position shown. 7. Attach the lateral supports to the drive module and the collars. Each support is fastened to the collars by four nuts, and to the drive module by three (out of six) screws removed at step 3.
- Page 35 8. Join the collars by attaching lifting lugs on both sides. Attach further lifting lugs as needed. 9. Use the drawing below to cut the hole in the duct. Fasten the module to the edges using screws. WARNING: With the kit attached to the drive module, do not lift the module by one lifting lug only.
-
Page 36: Hole Dimensions For Push-Through Mounting
Hole dimensions for push-through mounting Braking resistor installation See the chapter Resistor braking on page 83. Mechanical installation... -
Page 37: Planning The Electrical Installation
The stress on motor insulation can be avoided by using optional ABB du/dt filters. du/dt filters also reduce bearing currents. -
Page 38: Supply Connection
Supply connection Use a fixed connection to the AC power line. WARNING! As the leakage current of the device typically exceeds 3.5 mA, a fixed installation is required according to IEC 61800-5-1. Supply disconnecting device Install a hand-operated input disconnecting device (disconnecting means) between the AC power source and the drive. -
Page 39: Protection Against Short-Circuit In The Supply Cable Or The Drive
The protective characteristics of circuit breakers depend on the supply voltage as well as the type and construction of the breakers. There are also limitations pertaining to the short-circuit capacity of the supply network. Your local ABB representative can help you in selecting the breaker type when the supply network characteristics are known. -
Page 40: Emergency Stop Devices
Emergency stop devices For safety reasons, install the emergency stop devices at each operator control station and at other operating stations where emergency stop may be needed. Note: Pressing the stop key on the control panel of the drive does not generate an emergency stop of the motor or separate the drive from dangerous potential. -
Page 41: Safe Torque Off
Safe Torque Off The drive supports the Safe Torque Off function according to standards EN 61800-5-2; EN 954-1 (1997); IEC/EN 60204-1: 1997; EN 61508: 2002 and EN 1037: 1996. (At the time of printing, certification pending.) The Safe Torque Off function disables the control voltage of the power semiconductors of the drive output stage, thus preventing the inverter from generating the voltage required to rotate the motor (see diagram below). -
Page 42: Selecting The Power Cables
Selecting the power cables General rules Dimension the supply (input power) and motor cables according to local regulations. • The cable must be able to carry the drive load current. See the chapter Technical data for the rated currents. ° •... -
Page 43: Motor Cable Shield
Motor cable shield To function as a protective conductor, the shield must have the same cross-sectional area as a phase conductor when they are made of the same metal. To effectively suppress radiated and conducted radio-frequency emissions, the shield conductivity must be at least 1/10 of the phase conductor conductivity. The requirements are easily met with a copper or aluminium shield. -
Page 44: Residual Current Device (Rcd) Compatibility
Install the protective component as close to the inductive load as possible, not at the relay output. Varistor 230 VAC Relay output RC filter 230 VAC Relay output Diode 24 VDC Relay output Residual current device (RCD) compatibility ACSM1-04 drives are suitable to be used with residual current devices of Type B. Other measures for protection in case of direct or indirect contact, such as separation from the environment by double or reinforced insulation or isolation from the supply system by a transformer, can also be applied. -
Page 45: Relay Cable
Control panel cable The cable connecting the control panel to the drive must not exceed 3 metres in length. The cable type tested and approved by ABB is used in control panel option kits. Connection of a motor temperature sensor to the drive I/O See page 60. -
Page 46: Control Cable Ducts
A diagram of the cable routing is below. Supply cable Drive Control cables min 300 mm (12”) Motor cable 90° min 200 mm (20”) min 500 mm (20”) Supply cable Motor cable 90° Braking resistor cable 90° min 500 mm (20”) Control cable ducts 24 V 230 V 24 V... -
Page 47: Electrical Installation
Electrical installation What this chapter contains This chapter describes the electrical installation procedure of the drive. WARNING! The work described in this chapter may only be carried out by a qualified electrician. Follow the Safety instructions on the first pages of this manual. Ignoring the safety instructions can cause injury or death. -
Page 48: Checking The Insulation Of The Assembly
Protective Earth conductor using a measuring voltage of 500 V DC. The insulation resistance of an ABB motor must exceed 10 Mohm (reference value at 25 °C or 77 °F). For the insulation resistance of other motors, please consult the manufacturer’s instructions. -
Page 49: Connection To An It (Ungrounded) Power System
Connection to an IT (ungrounded) power system WARNING! Before connecting the drive to an IT power system [an ungrounded power system or a high resistance-grounded (over 30 ohms) power system] or a corner-grounded power system, the internal EMC filtering of the drive must be disconnected. - Page 50 3. Lift the left-hand edge of the JCU control unit until the connector beneath disengages, then move JCU to the left to remove it. 4. Disconnect the two cables coming to the mounting base of the JCU. Electrical installation...
- Page 51 5. Remove the screw in the middle of the air outlet grating. 6. Remove the screws holding the drive module cover (8 on each side). Lift off the cover, bottom edge first. Electrical installation...
- Page 52 7. Undo the screw connecting the grounding wire to a standoff right next to the EMC filter. Cut off the lug. Discard the screw and the tubular insulator. EMC filter Standoff covered by insulator 8. Insulate the end of the grounding wire reliably with insulating tape, tube sleeving and a cable tie.
- Page 53 9. Near the top of the module, remove the grounding clip (held by two screws) that connects the varistor board to the module cover. 10. Refit the module cover (top edge first) and fasten using the screws removed at step 6. (The screw in the middle of the air outlet grating that was removed at step is no longer needed.) 11.
-
Page 54: Power Cable Connection
Power cable connection Power cable connection diagram ACSM1-04 INPUT OUTPUT UDC+ V1 W1 (PE) (PE) Optional braking For alternatives, see resistor (360° Planning the electrical grounding required) Motor installation: Supply disconnecting device. Notes: – If shielded supply (input) cable is used, and the conductivity of the shield is less than 50% of the conduc- tivity of a phase conductor, use a cable with a ground conductor (1) or a separate PE cable (2). -
Page 55: Procedure
Procedure 1. Remove the plastic shroud covering the main terminals. Remove the two screws at the sides, then release the two clips on the front edge as shown. 2. Connect the twisted shields of the power cables to the grounding terminals of the drive module. -
Page 56: Cable Lug Installation (16 To 70 Mm [Awg6 To Awg2/0] Cables)
Cable lug installation (16 to 70 mm [AWG6 to AWG2/0] cables) UDC+ R+ UDC- 30…44 N·m (22…32 lbf·ft) Insulate the ends of the cable lugs with tape or shrink tube 8 N·m (5.9 lbf·ft) Input power cable Motor cable Electrical installation... -
Page 57: Screw Terminal Installation (95 To 185 Mm [Awg3/0 To Awg400] Cables)
Screw terminal installation (95 to 185 mm [AWG3/0 to AWG400] cables) UDC+ R+ UDC- a. Connect the cable to the terminal. Tighten the 8 N·m (5.9 lbf·ft) Allen screw to 20…40 N·m (15…30 lbf·ft). b. Connect the terminal to the drive. Tighten to 30…44 N·m (22…32 lbf·ft). -
Page 58: Connecting The Control Cables
Connecting the control cables Control connections to the JCU Control Unit Notes: +24VI External power input [Default setting] 24 V DC, 1.6 A *Total maximum current: 200 mA **Default assignment with ACSM1 Relay output Motion Control Program 250 V AC / 30 V DC The wiring shown is for demonstrative purposes only. -
Page 59: Jumpers
Jumpers J1 – Determines whether Analogue input AI1 is used as a current or voltage input. Current Voltage J2 – Determines whether Analogue input AI2 is used as a current or voltage input. Current Voltage J3 – Drive-to-drive link termination. Must be set to the ON position when the drive is the last unit on the link. -
Page 60: External Power Supply For The Jcu Control Unit (X1)
External power supply for the JCU Control Unit (X1) External +24 V (minimum 1.6 A) power supply for the JCU Control Unit can be connected to terminal block X1. Using an external supply is recommended if • the application requires fast start after connecting the drive to the main supply •... -
Page 61: Drive-To-Drive Link (X5)
Drive-to-drive link (X5) The drive-to-drive link is a daisy-chained RS-485 transmission line that allows basic master/follower communication with one master drive and multiple followers. Termination activation jumper J3 (see section Jumpers above) next to this terminal block must be set to the ON position on the drives at the ends of the drive-to-drive link. -
Page 62: Control Cable Grounding
Control cable grounding The shields of all control cables connected to the JCU Control Unit must be grounded at the control cable clamp plate. Use three M4 screws to fasten the plate as shown below left. The plate can be fitted either at the top or bottom of the JCU. The shields should be continuous as close to the terminals of the JCU as possible. -
Page 63: Installation Of Options
Installation of options Options such as fieldbus adapters, I/O extensions and encoder interfaces are inserted into slots on the JCU Control Unit. See page for the available slots; see the appropriate option manual for specific installation and wiring instructions. Electrical installation... - Page 64 Electrical installation...
-
Page 65: Installation Checklist
The internal EMC filter is disconnected if the drive is connected to an IT (ungrounded) or corner-grounded supply network. The capacitors are reformed if stored over one year (ask local ABB representative for more information). The drive is grounded properly. - Page 66 Check The supply (input power) voltage cannot be applied to the output of the drive through a bypass connection. Motor connection box and other covers are in place. Installation checklist...
-
Page 67: Maintenance
Ignoring the safety instructions can cause injury or death. Maintenance intervals If installed in an appropriate environment, the drive requires very little maintenance. This table lists the routine maintenance intervals recommended by ABB. Maintenance Interval Instruction... -
Page 68: Cooling Fan
It is not possible to predict a capacitor failure. Capacitor failure is usually followed by a mains fuse failure or a fault trip. Contact ABB if capacitor failure is suspected. Replacements are available from ABB. Do not use other than ABB specified spare parts. -
Page 69: Other Maintenance Actions
Other maintenance actions Transferring the memory unit to a new drive module When a drive module is replaced, the parameter settings can be retained by transferring the memory unit from the defective drive module to the new module. WARNING! Do not remove or insert a memory unit when the drive module is powered. - Page 70 Maintenance...
-
Page 71: Technical Data
To achieve the rated motor power given in the table, the rated current of the drive must be higher than or equal to the rated motor current. The DriveSize dimensioning tool available from ABB is recommended for selecting the drive, motor and gear combination for the required motion profile. -
Page 72: Derating
Derating The continuous output currents stated above must be derated if any of the following conditions apply: • the ambient temperature exceeds +40 °C (+104°F) • the AC supply voltage is higher than 400 V • the drive is installed higher than 1000 m above sea level. Note: The final derating factor is a multiplication of all applicable derating factors. -
Page 73: Cyclic Loads
The above procedure can also be applied to longer load cycles by dividing the cycle into subcycles no longer than 10 seconds. If any of the subcycles fail the test, a more detailed study is required. The DriveSize dimensioning tool available from ABB is recommended for more detailed dimensioning. Technical data... -
Page 74: Dimensions, Weights, Noise
Dimensions, weights, noise See also the chapter Dimension drawings. Depth Depth (without options (with options Height Width Weight Noise Frame installed on installed on size JCU) JCU) mm (in.) mm (in.) mm (in.) mm (in.) kg (lbs) 700 (27.56) 313.5 (12.34) 398 (15.67) 415 (16.34) 67 (148) -
Page 75: Ac Input (Supply) Connection
AC input (supply) connection Voltage (U 380 … 480 V AC +10%/-15%, 3-phase 50 … 60 Hz ± 5% Frequency Network type Grounded (TN, TT) or ungrounded (IT). Note: Connection to an ungrounded (IT) or corner-grounded delta network is not allowed at altitudes of 2000 m (6600 ft) or higher. -
Page 76: Efficiency
Digital inputs/outputs Connector pitch 3.5 mm, wire size 1.5 mm DIO1…DIO3 (X3). As inputs: Input/output mode selection by Logic levels: “0” < 5 V, “1” > 15 V parameters. : 2.0 kohm Filtering: Adjustable, 0.25 ms min. (see also Firmware Manual) DIO2 can be configured as a frequency input (0…32 kHz). -
Page 77: Degree Of Protection
Degree of protection IP20 (UL open type). See chapter Planning the cabinet assembly. Ambient conditions Environmental limits for the drive are given below. The drive is to be used in a heated, indoor, controlled environment. Operation Storage Transportation installed for stationary use in the protective package in the protective package Installation site altitude... -
Page 78: Applicable Standards
EU. They must be removed and handled according to local regulations. For further information on environmental aspects and more detailed recycling instructions, please contact your local ABB distributor. Applicable standards The drive complies with the following standards. The compliance with the European Low Voltage Directive is verified according to standards EN 50178 and EN 60204-1. -
Page 79: Ce Marking
CE marking A CE mark is attached to the drive to verify that the drive follows the provisions of the European Low Voltage and EMC Directives (Directive 73/23/EEC, as amended by 93/68/EEC, and Directive 89/336/ EEC, as amended by 2004/108EC). Compliance with the European Low Voltage Directive The compliance with the European Low Voltage Directive has been verified according to standards EN 50178, EN 61800-5-1 and EN 60204-1. -
Page 80: Compliance With En 61800-3 (2004), Category C3
The drive is intended to be incorporated into machinery to constitute machinery covered by Machinery Directive (98/37/EC) and does therefore not in every respect comply with the provisions of the directive. For more information, see the Declaration of Incorporation by ABB Drives (code 64652770). C-Tick marking... -
Page 81: Ul Marking
UL marking See the type designation label for the valid markings of your drive. UL checklist Input power connection – See section AC input (supply) connection on page 75. Disconnecting device (Disconnecting means) – See section Supply disconnecting device on page Ambient conditions –... - Page 82 Technical data...
-
Page 83: Resistor Braking
2. Calculate the continuous power based on the braking duty cycle. 3. Calculate the braking energy during the duty cycle. Pre-selected resistors are available from ABB as shown in the table below. If the listed resistor is not sufficient for the application, a custom resistor can be selected within the limits imposed by the internal braking chopper of the ACSM1-04. -
Page 84: Chopper Data / Resistor Selection Table
• The braking energy must not exceed the energy dissipation capacity of the selected resistor • It is highly recommended that the resistor be protected from thermal overload; see the section Contactor protection of drive below. Chopper data / Resistor selection table The ratings apply at an ambient temperature of 40°C (104°F). -
Page 85: Resistor Installation And Wiring
Resistor installation and wiring All resistors must be installed outside the drive module in a place where they are cooled sufficiently, do not block the airflow to other equipment, or dissipate hot air into the air inlets of other equipment. WARNING! The materials near the braking resistor must be non-flammable. -
Page 86: Braking Circuit Commissioning
Braking circuit commissioning For more information, see the appropriate Firmware Manual. • Enable the braking chopper function. Please note that a braking resistor must be connected when the chopper is enabled • Switch off the overvoltage control of the drive •... -
Page 87: Dimension Drawings
Dimension drawings What this chapter contains Dimension drawings of the ACSM1-04 (frame size E) and related accessories are shown below. Dimension drawings... -
Page 88: Drive Module
Drive module Dimension drawings... - Page 89 Drive module (continued from previous page) Dimension drawings...
-
Page 90: Braking Resistor (Jbr-09)
Braking resistor (JBR-09) 560 ±2 460 ±1 Other JBR-09 dimensions Max. wire size – Main terminals 50 mm (AWG1) Tightening torque – Main terminals 10 N·m (7.4 lbf·ft) Max. wire size – Thermal switch terminals 4 mm (AWG12) Tightening torque – Thermal switch terminals 0.6 …... - Page 92 ABB Oy AC Drives P.O. Box 184 FI-00381 HELSINKI FINLAND Telephone +358 10 22 11 +358 10 22 22681 Internet http://www.abb.com...