Xerox WorkCentre 3335 User Manual
Hide thumbs
Also See for WorkCentre 3335:
- Quick use manual (18 pages) ,
- Service manual (434 pages) ,
- Quick start manual (2 pages)

Related Manuals for Xerox WorkCentre 3335


Summary of Contents for Xerox WorkCentre 3335
- Page 1 Version 2.0 October 2019 702P08153 Xerox WorkCentre 3335/3345 ® ® Multifunction Printer User Guide...
- Page 2 , ColorQube ® , Global Print Driver ® , and Mobile Express Driver ® are trademarks of Xerox Corporation in the United States and / or other countries. Adobe ® , Adobe PDF logo, Reader ® , Adobe ® Type Manager ®...
-
Page 3: Table Of Contents
Printing the Configuration Report at the Control Panel ............. 29 Administration Features ......................30 Xerox ® CentreWare ® Internet Services ................30 Accessing Xerox ® CentreWare ® Internet Services .............. 30 Locating the IP Address of the Printer ................30 Automatic Data Collection ....................31 Maintenance Assistant..................... - Page 4 Configuring the Duplex Unit Width Size ................72 Printing on Special Paper ....................... 75 Envelopes ........................75 Labels ..........................78 Transparencies......................... 83 5 Printing............................85 Printing Overview ........................86 Selecting Printing Options ...................... 87 Xerox ® WorkCentre ® 3335/3345 Multifunction Printer User Guide...
- Page 5 Lightening or Darkening the Image ................115 Automatically Suppressing Background Variation............115 Specifying the Original Size.................... 115 Erasing Edges ........................ 115 8 Faxing............................. 117 Basic Faxing......................... 118 Using the Document Glass ..................... 119 Xerox ® WorkCentre ® 3335/3345 Multifunction Printer User Guide...
- Page 6 Paper Tray Fails to Close....................147 Printing Takes Too Long ....................148 Printer Fails to Print......................148 Printer Makes Unusual Noises ..................149 Condensation has Formed Inside the Printer ..............149 Paper Jams .......................... 150 Xerox ® WorkCentre ® 3335/3345 Multifunction Printer User Guide...
- Page 7 B Regulatory Information...................... 215 Basic Regulations......................... 216 ENERGY STAR ® Qualified Product ................... 216 United States FCC Regulations..................216 European Union......................217 European Union Lot 4 Imaging Equipment Agreement Environmental Information ........................217 Xerox ® WorkCentre ® 3335/3345 Multifunction Printer User Guide...
-
Page 8: User Guide
North America ........................231 European Union........................232 Domestic/Household Environment ................. 232 Professional/Business Environment................. 232 Collection and Disposal of Equipment and Batteries............232 Battery Symbol Note...................... 233 Battery Removal ......................233 Other Countries........................234 Xerox ® WorkCentre ® 3335/3345 Multifunction Printer User Guide... -
Page 9: Safety
• Environmental, Health, and Safety Contact Information............. 21 Your printer and the recommended supplies have been designed and tested to meet strict safety requirements. Attention to the following information ensures the continued and safe operation of your Xerox printer. Xerox ®... -
Page 10: Notices And Safety
These include safety agency evaluation and certification, and compliance with electromagnetic regulations and established environmental standards. The safety and environment testing and performance of this product have been verified using Xerox ® materials only. -
Page 11: Electrical Safety
• Do not place the printer in an area where people can step on the power cord. • Do not place objects on the power cord. • If the power cord becomes frayed or worn, replace it. Xerox ® WorkCentre ®... -
Page 12: Emergency Power Off
E E m m e e r r g g e e n n c c y y P P o o w w e e r r O O f f f f If any of the following conditions occur, power the printer off immediately. Disconnect the power cord from the electrical outlet. Contact an authorized Xerox service representative to correct the problem if any of the following occurs: •... -
Page 13: Operational Safety
For more information in the United States and Canada, go to one of the following: • WorkCentre ® 3335: www.xerox.com/environment • WorkCentre ® 3345: www.xerox.com/environment In other markets, contact your local Xerox representative or go to one of the following: • WorkCentre ® 3335: www.xerox.com/environment_europe • WorkCentre ® 3345: www.xerox.com/environment_europe Xerox ®... -
Page 14: Printer Location
Agreement, and Total Satisfaction Guarantee do not cover damage, malfunction, or degradation of performance caused by use of non-Xerox supplies, or the use of Xerox supplies not specified for this printer. The Total Satisfaction Guarantee is available in the United States and Canada. -
Page 15: Maintenance Safety
• Do not use aerosol cleaners. Clean with a dry lint-free cloth only. • Do not burn any consumables or routine maintenance items. • For information on Xerox supplies recycling programs, go to one of the following: – WorkCentre ®... -
Page 16: Printer Symbols
Do not touch the part or area of the printer. Do not expose the drum cartridges to direct sunlight. Do not burn the toner cartridges. Do not burn the drum cartridges. Do not touch the part or area of the printer. Xerox ® WorkCentre ® 3335/3345 Multifunction Printer... -
Page 17: User Guide
Do not use transparencies or overhead projector sheets. Do not reload paper previously printed on or used. Do not copy money, revenue stamps, or postage stamps. Add paper or media. Paper jam Lock Xerox ® WorkCentre ® 3335/3345 Multifunction Printer User Guide... -
Page 18: User Guide
Unlock Document Paper WLAN Wireless Local Area Network Local Area Network Universal Serial Bus Telephone Line Modem Line Postcard Load envelopes in the tray with the flaps closed and facing up. Xerox ® WorkCentre ® 3335/3345 Multifunction Printer User Guide... -
Page 19: User Guide
Load envelopes in the tray with the flaps open and facing up. Near Field Communication Weight Data Transmission Paper Feeding Direction Indicator Symbol Description Start Button Stop Button Pause Printing Button Login In/Out Button Help Button Xerox ® WorkCentre ® 3335/3345 Multifunction Printer User Guide... -
Page 20: User Guide
Services Button Job Status Button Printer Status Button Language Button Power/Wake Button Clear All Button Clear Button Dial Pause/Redial Button This item can be recycled. For details, refer to Recycling and Disposal. Xerox ® WorkCentre ® 3335/3345 Multifunction Printer User Guide... -
Page 21: Environmental, Health, And Safety Contact Information
Safety Environmental, Health, and Safety Contact Information For more information on Environment, Health, and Safety in relation to this Xerox product and supplies, contact the following customer help lines: • United States and Canada: 1-800-ASK-XEROX (1-800-275-9376) • Europe: +44 1707 353 434 For product safety information in the United States, go to one of the following: •... -
Page 22: User Guide
Safety Xerox ® WorkCentre ® 3335/3345 Multifunction Printer User Guide... -
Page 23: Features
Features This chapter contains: • Parts of the Printer ........................24 • Information Pages ........................29 • Administration Features ......................30 • More Information ........................33 Xerox ® WorkCentre ® 3335/3345 Multifunction Printer User Guide... -
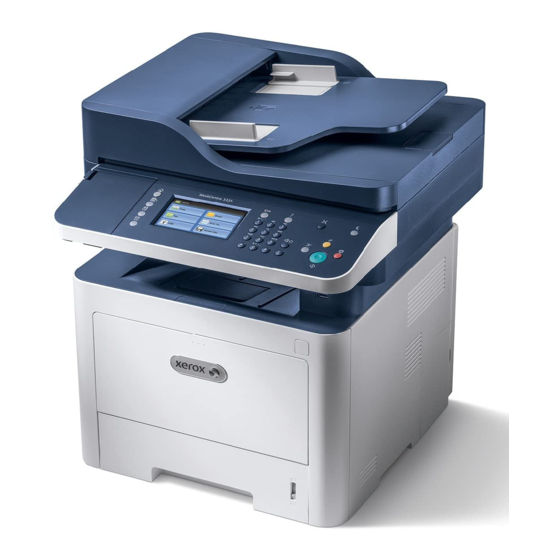
Page 24: Parts Of The Printer
2. Tray 1 with 250-Sheet Capacity 9. Document Feeder Output Tray 3. Bypass Tray 10. USB Port 4. Output Tray 11. Control Board Cover 5. Control Panel 6. Card Reader Bay for optional NFC Enablement Kit Xerox ® WorkCentre ® 3335/3345 Multifunction Printer User Guide... -
Page 25: Rear View
Features D D o o c c u u m m e e n n t t F F e e e e d d e e r r The WorkCentre 3335 ® uses an Automatic Document Feeder (ADF). The WorkCentre 3345 ®... -
Page 26: Internal Components
I I n n t t e e r r n n a a l l C C o o m m p p o o n n e e n n t t s s 1. Drum Cartridge 4. Document Glass Cover 2. Toner Cartridge 5. Document Feeder 3. Document Glass Xerox ® WorkCentre ® 3335/3345 Multifunction Printer User Guide... -
Page 27: Control Panel
This button enters and exits the low-power mode. Clear All Button This button clears previous and changed settings for the current selection. To reset all features to their default settings and clear existing scans, press this button twice. Xerox ® WorkCentre ® 3335/3345 Multifunction Printer... -
Page 28: Information
This button inserts a pause in a telephone number when the printer transmits a fax. C (clear) Button This button deletes numeric values or the last digit entered using the alphanumeric keys. Alphanumeric Keypad Use the keypad to enter alphanumeric information. Xerox ® WorkCentre ® 3335/3345 Multifunction Printer User Guide... -
Page 29: Information Pages
Pages. 1. At the printer control panel, press the Help button. 2. Touch System Configuration Report. 3. Touch Print. 4. To return to the Services Home menu, press the Services Home button. Xerox ® WorkCentre ® 3335/3345 Multifunction Printer User Guide... -
Page 30: Administration Features
You can view the IP address of your printer on the control panel or on the Configuration Report. To install print drivers for a network-connected printer, you need the IP address of your printer. You need the IP address to access and configure any printer settings in Xerox CentreWare Internet ®... -
Page 31: Automatic Data Collection
The printer collects data automatically and transmits the information to a secure off-site location. Xerox or a designated service provider uses this data to support and service the printer, or for billing, supplies replenishment, or product improvement. Automatically transmitted data can include product registration, meter readings, supplies levels, printer configuration and settings, software version, and problem or fault-code data. -
Page 32: Billing And Usage Information
Features 4. To send status information to Xerox, click Start an Online Troubleshooting Session at www. Xerox.com. 5. After the data is sent, your browser is redirected to www.xerox.com to start your online troubleshooting session. B B i i l l l l i i n n g g a a n n d d U U s s a a g g e e I I n n f f o o r r m m a a t t i i o o n n Billing and printer usage information appears on the Billing Meters information screen. -
Page 33: More Information
• www.xerox.com/office/WC3345support Support Assistant, and driver downloads. Information about menus or error messages Press the control panel Help (?) button. Information Pages Print information pages from the control panel, or from Xerox ® CentreWare ® Internet Services, select Properties→Services→Printing→Reports. Xerox ®... -
Page 34: User Guide
Features Xerox ® WorkCentre ® 3335/3345 Multifunction Printer User Guide... -
Page 35: Installation And Setup
• Installing a WSD Printer Manually Using the Add Printer Wizard ..........50 • AirPrint, Mopria, Google Cloud Print, and NFC ................51 Refer to: • Installation Guide packaged with your printer. • System Administrator Guide: – www.xerox.com/office/WC3335docs – www.xerox.com/office/WC3345docs Xerox ® WorkCentre ®... -
Page 36: Installation And Setup Overview
Routers, network hubs, network switches, modems, Ethernet cables, and USB cables are not included with your printer and must be purchased separately. Xerox recommends an Ethernet connection because, typically, it is faster than a USB connection, and it provides access to... -
Page 37: Selecting A Location For The Printer
Clearance Requirements for Standard Configuration. • After positioning the printer, you are ready to connect it to the power source and computer or network. Xerox ® WorkCentre ® 3335/3345 Multifunction Printer... -
Page 38: Connecting The Printer
A wireless network connection provides the same access and services as a wired connection provides. A wireless network connection is typically faster than USB and allows direct access to the setting of the printer using Xerox ®... -
Page 39: Connecting The Printer To The Network
Use a Category 5 or higher Ethernet cable to connect the printer to the network. An Ethernet network is used for one or more computers and supports many printers and systems simultaneously. An Ethernet connection provides direct access to printer settings using Xerox ®... -
Page 40: Powering On Or Off The Printer
P P o o w w e e r r i i n n g g O O n n o o r r O O f f f f t t h h e e P P r r i i n n t t e e r r Before powering on the printer, ensure that the power cord is plugged into the printer and wall outlet, and that the power switch is in the off position. Xerox ® WorkCentre ®... -
Page 41: User Guide
At the printer control panel, press the Power Saver button. b. Touch Power Down. Note: When all of the control panel lights are off, the printer power-off sequence is complete. Pressing the power switch off is optional. Xerox ® WorkCentre ® 3335/3345 Multifunction Printer... -
Page 42: Configuring Network Settings
IP address to every computer and printer on the network that is configured to use DHCP. If you use a cable or DSL router, for information on IP addressing, refer to the documentation for your router. Xerox ® WorkCentre ®... -
Page 43: Enabling The Printer For Scanning
• SMB • HTTP • HTTPS • SFTP • An email address • A shared folder on your computer For details, refer to Xerox CentreWare Internet Services. ® ® Note: If your printer is connected using the USB cable, you cannot scan to an email address or a network location, such as a shared folder on your computer. -
Page 44: Power Saver Mode
• Specify how long the printer remains idle before it goes from ready mode to low-power mode. • Specify how long the printer remains idle before automatically going from low-power mode to sleep mode. 4. Touch OK. Xerox ® WorkCentre ®... -
Page 45: Installing The Software
I I n n s s t t a a l l l l i i n n g g D D r r i i v v e e r r s s a a n n d d U U t t i i l l i i t t i i e e s s f f o o r r W W i i n n d d o o w w s s To access all the features of your printer, install the Xerox ®... -
Page 46: Installing Print Drivers For Macintosh Os X Version 10.9 And Later
1 1 0 0 . . 9 9 a a n n d d L L a a t t e e r r Use this procedure to install the Xerox print driver to access all features of your printer. -
Page 47: Operating System Requirements
I I n n s s t t a a l l l l i i n n g g S S c c a a n n D D r r i i v v e e r r s s f f o o r r M M a a c c i i n n t t o o s s h h To install the scan driver software: 1. To download the latest driver, go to: • www.xerox.com/office/WC3335drivers • www.xerox.com/office/WC3345drivers 2. Download the appropriate package for your operating system. -
Page 48: Other Drivers
O O t t h h e e r r D D r r i i v v e e r r s s The following drivers are available for download: • The Xerox ® Global Print Driver works with any printer on your network, including those printers made by other manufacturers. -
Page 49: Installing The Printer As A Web Service On Devices
If the printer you want to use does not appear in the list, click the Cancel button. Add the WSD printer manually using the Add Printer Wizard; for details, refer to Installing a WSD Printer Manually Using the Add Printer Wizard. 4. Click Close. Xerox ® WorkCentre ®... -
Page 50: Installing A Wsd Printer Manually Using The Add Printer Wizard
10. To identify the printer for sharing, enter a share name, location, and comments to identify the printer. Click Next. 11. To set the printer as the default, select an option. To test the connection, click Print a Test Page. 12. Click Finish. Xerox ® WorkCentre ®... -
Page 51: Airprint, Mopria, Google Cloud Print, And Nfc
10 centimeters of each other. You can use NFC to obtain the network interface to establish a TCP/IP connection between your device and the printer. For more information, refer to the System Administrator Guide: • www.xerox.com/office/WC3335docs • www.xerox.com/office/WC3345docs Xerox ®... -
Page 52: User Guide
Installation and Setup Xerox ® WorkCentre ® 3335/3345 Multifunction Printer User Guide... -
Page 53: Paper And Media
Paper and Media This chapter contains: • Supported Paper ........................54 • Loading Paper..........................58 • Printing on Special Paper......................75 Xerox ® WorkCentre ® 3335/3345 Multifunction Printer User Guide... -
Page 54: Supported Paper
Warranty, Service Agreement, or Xerox ® Total Satisfaction Guarantee does not cover damage caused by using unsupported paper or specialty media. The Xerox ® Total Satisfaction Guarantee is available in the United States and Canada. Coverage can vary outside these areas. For details, contact your local Xerox representative. -
Page 55: Paper Storage Guidelines
106–163 g/m Bond 105–120 g/m Recycled 60–85 g/m Archival Not Applicable Bypass Tray and Tray 1 Transparency Not Applicable only Bypass Tray only Labels 120–150 g/m Envelope 75–90 g/m Custom 60–220 g/m Xerox ® WorkCentre ® 3335/3345 Multifunction Printer User Guide... -
Page 56: Supported Standard Paper Sizes
S S i i d d e e d d P P r r i i n n t t i i n n g g Paper Types Weights Lightweight 60–70 g/m Recycled 60–85 g/m Plain 70–85 g/m Letterhead Hole-Punched Pre-printed Xerox ® WorkCentre ® 3335/3345 Multifunction Printer User Guide... -
Page 57: Supported Standard Paper Sizes For Automatic 2-Sided Printing
75 mm width x 125 mm length 2.95 in. width x 4.92 in. length) Duplex Plain, Lightweight, A4, Letter, Legal, Folio, Oficio 60–120 g (16–32 lb.) Heavyweight, Bond, Recycled Xerox ® WorkCentre ® 3335/3345 Multifunction Printer User Guide... -
Page 58: Loading Paper
1. Open the bypass tray. Note: If the bypass tray is open and loaded with paper already, remove any paper that is a different size or type. a. To open the bypass tray, press the cover. Xerox ® WorkCentre ® 3335/3345 Multifunction Printer... -
Page 59: User Guide
Paper and Media b. Extend the bypass tray fully. Xerox ® WorkCentre ® 3335/3345 Multifunction Printer User Guide... -
Page 60: User Guide
Paper and Media 2. Move out the length and width guides. Xerox ® WorkCentre ® 3335/3345 Multifunction Printer User Guide... -
Page 61: User Guide
This procedure separates any sheets that are stuck together and reduces the possibility of jams. Note: To avoid paper jams and misfeeds, do not remove paper from the packaging until you are ready to use the paper. Xerox ® WorkCentre ® 3335/3345 Multifunction Printer... -
Page 62: User Guide
4. Load the paper in the tray, then adjust the width guides until they touch the edges of the paper. Note: Do not load paper above the maximum fill line. Overfilling the tray can cause paper jams. • Load hole-punched paper with the holes toward the left side of the printer. Xerox ® WorkCentre ® 3335/3345 Multifunction Printer... -
Page 63: User Guide
Paper and Media • For 1-sided and 2-sided printing, to load letterhead or pre-printed paper, place letterhead face up with the top edge going into the printer first. Xerox ® WorkCentre ® 3335/3345 Multifunction Printer User Guide... -
Page 64: User Guide
Paper and Media 5. If the control panel Paper Settings screen prompts you, verify the paper size, type, and color. 6. Touch Confirm. Xerox ® WorkCentre ® 3335/3345 Multifunction Printer User Guide... -
Page 65: Loading Paper In Tray 1
1. Pull out and remove the tray. 2. Move out the length and width guides. a. Pinch the guide lever on each guide. b. Slide out the guides until they stop. c. Release the levers. Xerox ® WorkCentre ® 3335/3345 Multifunction Printer... -
Page 66: User Guide
3. Flex the sheets of paper back and forth and fan the sheets. On a level surface, align the edges of the paper stack. This procedure separates any sheets that are stuck together and reduces the possibility of paper jams. Xerox ® WorkCentre ®... -
Page 67: User Guide
• Load paper into the tray with the print side face down. • Load hole-punched paper with the holes toward the right side of the printer. • Do not load paper above the maximum fill line. Overfilling the tray can cause paper jams. Xerox ® WorkCentre ®... -
Page 68: User Guide
Paper and Media 5. Slide the tray into the printer and push in the tray until it stops. 6. If the control panel Paper Settings screen prompts you, verify the paper size, type, and color. 7. Touch Confirm. Xerox ® WorkCentre ®... -
Page 69: Loading Paper In Optional Tray 2
2. Move out the length and width guides. a. Pinch the guide lever on each guide. b. Slide out the guides until they stop. c. Release the levers. Xerox ® WorkCentre ® 3335/3345 Multifunction Printer... -
Page 70: User Guide
3. Flex the sheets back and forth and fan the paper. On a level surface, align the edges of the paper stack. This procedure separates any sheets that are stuck together and reduces the possibility of paper jams. Xerox ® WorkCentre ®... -
Page 71: User Guide
• Load paper into the tray with the print side face down. • Load hole-punched paper with the holes toward the right side of the printer. • Do not load paper above the maximum fill line. Overfilling the tray can cause paper jams. Xerox ® WorkCentre ®... -
Page 72: Configuring The Duplex Unit Width Size
C C o o n n f f i i g g u u r r i i n n g g t t h h e e D D u u p p l l e e x x U U n n i i t t W W i i d d t t h h S S i i z z e e Use the following procedure to change the duplex unit width size. Xerox ®... -
Page 73: User Guide
1. At the back of the printer, pull out and remove the duplex unit. 2. Adjust the width guide: a. To access the width guide, turn over the duplex unit. Note: The width guide is located on the bottom of the duplex unit. Xerox ® WorkCentre ® 3335/3345 Multifunction Printer... -
Page 74: User Guide
Adjust the width guide to match the width of paper that you are using for your print job. Note: You can use Letter/Legal or A4 width sizes. c. Turn over the tray. 3. Insert the duplex unit into the printer, then push in the unit until it stops. Xerox ® WorkCentre ® 3335/3345 Multifunction Printer... -
Page 75: Printing On Special Paper
Printing on Special Paper To order paper, transparencies, or other media, contact your local reseller or go to: • www.xerox.com/office/WC3335supplies • www.xerox.com/office/WC3345supplies E E n n v v e e l l o o p p e e s s Note: You can print envelopes only from the bypass tray. -
Page 76: User Guide
Paper and Media a. To open the bypass tray, press the cover. Xerox ® WorkCentre ® 3335/3345 Multifunction Printer User Guide... -
Page 77: User Guide
2. Move out the length and width guides. If you do not load envelopes in the bypass tray right after you remove the envelopes from the packaging, they can bulge. To avoid jams, flatten the envelopes before loading them into the printer. Xerox ® WorkCentre ®... -
Page 78: Labels
It could damage the printer. • Use labels designed for laser printing. • Do not use vinyl labels. • Do not feed a sheet of labels through the printer more than once. Xerox ® WorkCentre ® 3335/3345 Multifunction Printer... -
Page 79: User Guide
To load labels in the bypass tray: 1. Open the bypass tray. Note: If the bypass tray is open and loaded with paper already, remove any paper that is a different size or type. Xerox ® WorkCentre ® 3335/3345 Multifunction Printer... -
Page 80: User Guide
Paper and Media a. To open the bypass tray, press the cover. Xerox ® WorkCentre ® 3335/3345 Multifunction Printer User Guide... -
Page 81: User Guide
Paper and Media b. Extend the bypass tray fully. Xerox ® WorkCentre ® 3335/3345 Multifunction Printer User Guide... -
Page 82: User Guide
Paper and Media 2. Move out the length and width guides. Xerox ® WorkCentre ® 3335/3345 Multifunction Printer User Guide... -
Page 83: User Guide
• Remove all paper before loading transparencies in the bypass tray. • Handle transparencies by the edges using both hands. Fingerprints or creases can cause poor print quality. • After loading transparencies, change the paper type to Transparency on the printer control panel. Xerox ® WorkCentre ®... -
Page 84: Transparencies
Paper and Media • In the print driver software, for paper type, select Transparency. • Do not load more than 20 transparencies. Overloading the tray can cause the printer to jam. • Do not fan transparencies. Xerox ® WorkCentre ®... -
Page 85: Printing
Printing This chapter contains: • Printing Overview ........................86 • Selecting Printing Options ......................87 Xerox ® WorkCentre ® 3335/3345 Multifunction Printer User Guide... -
Page 86: Printing Overview
4. In your software application, access the print settings. For most software applications, press CTRL→P for Windows or CMD→P for Macintosh. 5. Select your printer. 6. To access the print driver settings for Windows, select Properties or Preferences. For Macintosh select Xerox ® Features. 7. Select the desired options. -
Page 87: Selecting Printing Options
Printing Selecting Printing Options Printing options, also called print driver software options, are specified as Printing Preferences in Windows, and Xerox ® Features in Macintosh. Printing options include settings for 2-sided printing, page layout, and print quality. You can choose default settings for various printing options; for more... -
Page 88: Windows Printing Options
To save a set of printing options: 1. With the document open in your application, click File→Print. 2. Select the printer, then click Properties. 3. In the Properties window, select the desired settings for each tab. Xerox ® WorkCentre ®... -
Page 89: Macintosh Printing Options
S S e e l l e e c c t t i i n n g g P P r r i i n n t t i i n n g g O O p p t t i i o o n n s s f f o o r r M M a a c c i i n n t t o o s s h h To use specific printing options, change the settings before sending the job to the printer. 1. With the document open in your application, click File→Print. 2. Select your printer. 3. Select Xerox Features. ® 4. Select the desired options. -
Page 90: Managing Jobs
You can also submit print requests through the command line using lp/lpr. For more information about Linux printing, click the Help (?) button in the Xerox print driver. -
Page 91: Printing Features
I I n n t t e e r r n n e e t t S S e e r r v v i i c c e e s s ® ® ® ® You can view a list of active jobs and delete print jobs from the Active Jobs list in Xerox ® CentreWare ®... -
Page 92: User Guide
• Automatically Scale: This option scales the document to fit the selected Output Paper Size. The scaling amount appears in the percentage box below the sample image. • Manually Scale: This option scales the document by the amount entered in the percentage box below the preview image. Xerox ® WorkCentre ®... -
Page 93: Saved Jobs
USB Flash drive. The system administrator must set up this feature before you can use it. For details, refer to the System Administrator Guide at: • www.xerox.com/office/WC3335docs • www.xerox.com/office/WC3345docs To print from a USB Flash drive: 1. -
Page 94: User Guide
5. Select the number of copies, paper size, paper color, paper type, 2-sided printing, and finishing options. 6. Press the green Start button. 7. To go back to the last screen, touch Back. 8. To look for other folders and printable files, touch Browse. Xerox ® WorkCentre ® 3335/3345 Multifunction Printer... -
Page 95: Copying
Copying This chapter contains: • Basic Copying ..........................96 • Selecting Copy Settings......................99 Xerox ® WorkCentre ® 3335/3345 Multifunction Printer User Guide... -
Page 96: Basic Copying
• Paper with paper clips or staples attached • Paper with wrinkles, curls, folds, tears, or notches • Coated or carbonless paper or items other than paper such as cloth or metal • Envelopes • Books Xerox ® WorkCentre ® 3335/3345 Multifunction Printer... -
Page 97: Document Feeder
• Adjust the paper guides so that they fit against the original documents. • Insert paper in the document feeder only when ink on the paper is dry. • Do not load original documents above the MAX fill line. Xerox ® WorkCentre ®... -
Page 98: User Guide
• The maximum feeder capacity is approximately 100 sheets of 75 g/m² paper. 1. Insert original documents face up, with page one on top. 2. Adjust the paper guides so that they fit against the original documents. Xerox ® WorkCentre ®... -
Page 99: Selecting Copy Settings
• Preset Scan Area: You can specify the area to scan when it matches a standard paper size. Note: Grayed-out options are not available. • Custom Scan Area: You can specify the height and width of the area to scan. 6. Touch OK. Xerox ® WorkCentre ® 3335/3345 Multifunction Printer... -
Page 100: Image Quality Settings
1. At the printer control panel, press the Services Home button. 2. Touch Copy. 3. On the Copy tab, touch the Right arrow. 4. Scroll down to and touch Background Suppression. 5. For Background Suppression, touchAuto Suppression. 6. Touch OK. Xerox ® WorkCentre ® 3335/3345 Multifunction Printer User Guide... -
Page 101: Output Adjustments
3. On the Copy tab, touch the Right arrow. 4. Scroll down to and touch Page Layout. 5. Touch an option. 6. For Paper Supply, touch the desired tray. 7. Touch OK. Xerox ® WorkCentre ® 3335/3345 Multifunction Printer User Guide... -
Page 102: Output Format Settings
1. At the printer control panel, press the Services Home button. 2. Touch Copy. 3. On the Copy tab, touch the Right arrow. 4. Scroll down to and touch Booklet Creation. 5. Touch On. Xerox ® WorkCentre ® 3335/3345 Multifunction Printer... -
Page 103: User Guide
If the paper supply is set to Auto Select, you cannot add transparency separators. 1. At the printer control panel, press the Services Home button. 2. Touch Copy. 3. On the Copy tab, touch the Right arrow. 4. Scroll down to and touch Transparency Separators. Xerox ® WorkCentre ® 3335/3345 Multifunction Printer... -
Page 104: Id Card Copying
8. Repeat the previous steps to copy the second side of the ID card. The second side of the ID card is copied, and the copy is generated. 9. Lift the document cover and remove the ID card or document. Xerox ® WorkCentre ®... -
Page 105: Scanning
• Sending a Scanned Image to a Destination ................113 • Adjusting Scanning Settings..................... 114 The system administrator must set up this feature before you can use it. For details, refer to the System Administrator Guide at: • www.xerox.com/office/WC3335docs • www.xerox.com/office/WC3345docs Xerox ®... -
Page 106: Loading Documents For Scanning
• Paper with paper clips or staples attached • Paper with wrinkles, curls, folds, tears, or notches • Coated or carbonless paper or items other than paper such as cloth or metal Xerox ® WorkCentre ® 3335/3345 Multifunction Printer... -
Page 107: Using The Document Feeder
• Adjust the paper guides so that they fit against the original documents. • Insert paper in the document feeder only when ink on the paper is dry. • Do not load original documents above the MAX fill line. Xerox ® WorkCentre ®... -
Page 108: Scanning To A Usb Flash Drive
Note: Do not remove the USB Flash drive until prompted. If you remove the Flash drive before the transfer is complete, the file can become unusable and other files on the drive can be damaged. Xerox ® WorkCentre ® 3335/3345 Multifunction Printer... -
Page 109: Scanning To A Shared Folder On A Network Computer
Scanning Scanning to a Shared Folder on a Network Computer Before you can scan to a shared folder, you must share the folder, then add the folder as an Address Book entry in Xerox ® CentreWare ® Internet Services. S S h h a a r r i i n n g g a a F F o o l l d d e e r r o o n n a a W W i i n n d d o o w w s s C C o o m m p p u u t t e e r r Before you begin: •... -
Page 110: Adding A Folder As An Address Book Entry Using Centreware Internet Services
8. If you want to change any other scan settings, use the arrow buttons to select the setting, and make your changes. For details, refer to Adjusting Scanning Settings. 9. To begin the scan, press Start. Xerox ® WorkCentre ® 3335/3345 Multifunction Printer... -
Page 111: Scanning To An Email Address
• Address Book: This option allows you to select an email address from the Address Book. Note: When using the Address Book, use the arrow buttons to select the address for the desired recipient. 5. Press the green Start button. Xerox ® WorkCentre ® 3335/3345 Multifunction Printer... -
Page 112: Scanning To A Computer
Scanning Scanning to a Computer If the system administrator enables Remote Start in Xerox ® CentreWare ® Internet Services, you can scan images directly from the scanner to a PC. Using Microsoft Clip Organizer, you can scan, import, and store images from the printer. You can also scan directly from the printer to a computer using most TWAIN-compliant scanning applications. -
Page 113: Sending A Scanned Image To A Destination
3. Select an option. 4. Select the desired name from the list, then touch OK. 5. Change scan settings as needed. 6. Press the green Start button. For details, refer to Adjusting Scanning Settings. Xerox ® WorkCentre ® 3335/3345 Multifunction Printer User Guide... -
Page 114: Adjusting Scanning Settings
1. At the printer control panel, press Clear All, then press Services Home. 2. Touch Scan To, then touch and hold the Right Arrow button until Scan To...Features appears. 3. Touch 2-Sided Scanning. 4. Select an option. 5. Touch OK. Xerox ® WorkCentre ® 3335/3345 Multifunction Printer... -
Page 115: Setting The File Format
E E r r a a s s i i n n g g E E d d g g e e s s 1. At the printer control panel, press Clear All, then press Services Home. 2. Touch Scan To, then touch and hold the Right Arrow button until Scan To...Features appears. 3. Touch Scan To Edge. Xerox ® WorkCentre ®... -
Page 116: User Guide
Scanning 4. Select an option. 5. Touch OK. Xerox ® WorkCentre ® 3335/3345 Multifunction Printer User Guide... -
Page 117: Faxing
• Printing or Deleting Stored Faxes ..................... 128 • Using the Address Book ......................129 The system administrator must set up this feature before you can use it. For details, see the System Administrator Guide at: • www.xerox.com/office/WC3335docs • www.xerox.com/office/WC3345docs Xerox ®... -
Page 118: Basic Faxing
4. Adjust additional fax options as needed. For details, refer to Selecting Fax Options. 5. Press the green Start button. The printer scans the pages and transmits the document when all pages have been scanned. Xerox ® WorkCentre ® 3335/3345 Multifunction Printer User Guide... -
Page 119: Using The Document Glass
• Paper with paper clips or staples attached • Paper with wrinkles, curls, folds, tears, or notches • Coated or carbonless paper or items other than paper such as cloth or metal • Envelopes • Books Xerox ® WorkCentre ® 3335/3345 Multifunction Printer... -
Page 120: Using The Document Feeder
• Adjust the paper guides so that they fit against the original documents. • Insert paper in the document feeder only when ink on the paper is dry. • Do not load original documents above the MAX fill line. Xerox ® WorkCentre ®... -
Page 121: Selecting Fax Options
3. At the top of the Fax Features screen, touch the Right arrow two times. 4. Scroll down to and touch Background Suppression. 5. Choose either Off or Auto Suppression. 6. Touch OK. Xerox ® WorkCentre ® 3335/3345 Multifunction Printer... -
Page 122: Sending Header Text
S S e e n n d d i i n n g g H H e e a a d d e e r r T T e e x x t t The system administrator must set up this feature before you can use it. For details, refer to the System Administrator Guide at: • www.xerox.com/office/WC3335docs • www.xerox.com/office/WC3345docs To include the fax header text: 1. -
Page 123: Storing A Fax In A Local Mailbox
The system administrator must create a mailbox and enable and configure Store to Mailbox before you can use these features. For details, refer to the System Administrator Guide at: • www.xerox.com/office/WC3335docs • www.xerox.com/office/WC3345docs To store a fax in a local mailbox: 1. -
Page 124: Printing Local Mailbox Documents
1. At the printer control panel, press Services Home. 2. Touch Fax→Mailboxes. 3. Touch Print From Mailbox. 4. Touch Local Mailbox. 5. Enter a mailbox number and pass code, and touch Print. Xerox ® WorkCentre ® 3335/3345 Multifunction Printer User Guide... -
Page 125: Sending A Fax To A Remote Mailbox
1. At the printer control panel, press Services Home. 2. Touch Fax→Mailboxes. 3. Touch Store To Mailbox→Remote Mailbox. 4. Enter a remote fax number. 5. Enter a remote mailbox number and passcode, then touch OK. Xerox ® WorkCentre ® 3335/3345 Multifunction Printer... -
Page 126: Storing A Fax For Local Or Remote Polling
To store a fax: 1. At the printer control panel, press Services Home. 2. Touch Fax→Polling. 3. Touch Store Locally for Remote Polling. 4. Touch an option. 5. Touch OK. Xerox ® WorkCentre ® 3335/3345 Multifunction Printer User Guide... -
Page 127: Polling A Remote Fax
You can retrieve documents that were stored using local polling on another fax machine. To poll a remote fax: 1. At the printer control panel, press Services Home. 2. Touch Fax→Polling. 3. Touch Retrieve/Print Remote Files. 4. Type the fax number. 5. Touch OK. Xerox ® WorkCentre ® 3335/3345 Multifunction Printer User Guide... -
Page 128: Printing Or Deleting Stored Faxes
Faxing Printing or Deleting Stored Faxes 1. At the printer control panel, press Services Home. 2. Touch Fax→Polling. 3. Touch Local File Management, then select Print All Files or Delete All Files. Xerox ® WorkCentre ® 3335/3345 Multifunction Printer User Guide... -
Page 129: Using The Address Book
1. At the printer control panel, press Services Home. 2. Touch Fax→Device Address Book. 3. Touch the Address Book Entry. 4. Touch the Contact Name. 5. To edit the fields, touch Details. 6. To delete the contact, touch Remove. Xerox ® WorkCentre ® 3335/3345 Multifunction Printer User Guide... -
Page 130: User Guide
Faxing Xerox ® WorkCentre ® 3335/3345 Multifunction Printer User Guide... -
Page 131: Maintenance
Maintenance This chapter contains: • Cleaning the Printer ......................... 132 • Ordering Supplies........................138 • Moving the Printer ........................141 • Billing and Usage Information ....................143 Xerox ® WorkCentre ® 3335/3345 Multifunction Printer User Guide... -
Page 132: Cleaning The Printer
Clean the scanner about once a month, when anything is spilled on it, or when debris or dust collect on any of the surfaces. Keep the feed rollers clean to ensure the best possible copies and scans. Xerox ® WorkCentre ®... -
Page 133: User Guide
C C l l e e a a n n i i n n g g t t h h e e D D o o c c u u m m e e n n t t G G l l a a s s s s 1. Slightly dampen a soft, lint-free cloth with water. 2. Remove any paper from the document feeder. 3. Open the document cover. Xerox ® WorkCentre ®... -
Page 134: User Guide
Maintenance 4. Wipe the surface of the document glass until it is clean and dry. For best results, to remove marks and streaks, use a standard glass cleaner. Xerox ® WorkCentre ® 3335/3345 Multifunction Printer User Guide... -
Page 135: User Guide
5. Wipe the Constant Velocity Transport (CVT) glass until it is free of debris, and it is clean and dry. Note: The CVT glass is the long narrow strip to the left of the document glass. Xerox ® WorkCentre ®... -
Page 136: User Guide
Maintenance 6. Wipe the white underside of the document cover until it is clean and dry. Xerox ® WorkCentre ® 3335/3345 Multifunction Printer User Guide... -
Page 137: User Guide
Maintenance 7. Close the document cover. Xerox ® WorkCentre ® 3335/3345 Multifunction Printer User Guide... -
Page 138: Ordering Supplies
Agreement, and Total Satisfaction Guarantee do not cover damage, malfunction, or degradation of performance caused by use of non-Xerox supplies, or the use of Xerox supplies not specified for this printer. The Total Satisfaction Guarantee is available in the United States and Canada. -
Page 139: Routine Maintenance Items
Maintenance Caution: Use of non-Xerox supplies is not recommended. Use of toner with other than genuine Xerox ® Toner can affect print quality and printer reliability. Xerox ® Toner is the only toner designed and manufactured under strict quality controls by Xerox for use with this specific printer. -
Page 140: Recycling Supplies
R R e e c c y y c c l l i i n n g g S S u u p p p p l l i i e e s s For more information on the Xerox ®... -
Page 141: Moving The Printer
Powering On or Off the Printer. 2. Remove any paper or other media from the output tray. 3. When moving the printer from one location to another, use caution to ensure that the printer does not topple. Xerox ® WorkCentre ® 3335/3345 Multifunction Printer... -
Page 142: User Guide
Maintenance 4. Lift and carry the printer as shown in the illustration. • Repack the printer and its options using the original packing material and boxes or a Xerox Repackaging Kit. For a repacking kit and instructions, go to: –... -
Page 143: Billing And Usage Information
4. Use the drop-down menu to select and view any of the following: • Impressions • Sheets • Images Sent • Fax Impressions • All Usage 5. If necessary, touch the Update Counters tab to bring all counter data up to current usage. Xerox ® WorkCentre ® 3335/3345 Multifunction Printer User Guide... -
Page 144: User Guide
Maintenance Xerox ® WorkCentre ® 3335/3345 Multifunction Printer User Guide... -
Page 145: Troubleshooting
This chapter contains: • General Troubleshooting ......................146 • Paper Jams ..........................150 • Print-Quality Problems......................188 • Copy and Scan Problems ......................193 • Fax Problems..........................194 • Getting Help ..........................197 Xerox ® WorkCentre ® 3335/3345 Multifunction Printer User Guide... -
Page 146: General Troubleshooting
A system error occurred. Turn off the printer, then turn it on again. From the printer control panel, access the Information Pages menu, then print the Error History report. If the error persists, contact your Xerox representative. Xerox ® WorkCentre ®... -
Page 147: Document Prints From Wrong Tray
P P a a p p e e r r T T r r a a y y F F a a i i l l s s t t o o C C l l o o s s e e Probable Cause Solution The paper tray does not close fully. Some debris or an object is blocking the tray. Xerox ® WorkCentre ® 3335/3345 Multifunction Printer... -
Page 148: Printing Takes Too Long
Solutions • To clear the error, turn off the printer, then turn it The printer has an error. on again. • If the error persists, contact your Xerox representative. The printer is out of paper. Load paper into the tray. -
Page 149: Printer Makes Unusual Noises
There is an obstruction or debris inside the printer. Turn off the printer and then remove the obstruction or debris. If you cannot remove it, contact your Xerox representative. C C o o n n d d e e n n s s a a t t i i o o n n h h a a s s F F o o r r m m e e d d I I n n s s i i d d e e t t h h e e P P r r i i n n t t e e r r Moisture can condense inside a printer where the humidity is above 85% or when a cold printer is located in a warm room. -
Page 150: Paper Jams
M M i i n n i i m m i i z z i i n n g g P P a a p p e e r r J J a a m m s s The printer is designed to function with minimal paper jams using Xerox supported paper. Other paper types can cause jams. -
Page 151: User Guide
Power off the printer immediately, then wait 30 minutes for the fuser to cool. After the printer cools, try to remove the jammed paper. If the error persists, contact your Xerox representative. Caution: Do not attempt to clear any paper jams using tools or instruments. -
Page 152: User Guide
5. Back of the Printer Printer 6. Duplex Area 2. Document Feeder Top Cover 7. Tray 1 3. Document Feeder Input Tray 8. Optional Tray 2 4. Document Feeder Inside Cover Xerox ® WorkCentre ® 3335/3345 Multifunction Printer User Guide... -
Page 153: User Guide
C C l l e e a a r r i i n n g g P P a a p p e e r r J J a a m m s s f f r r o o m m t t h h e e D D o o c c u u m m e e n n t t F F e e e e d d e e r r 1. Remove any documents from the document feeder. 2. Open the document feeder top cover. Xerox ® WorkCentre ®... -
Page 154: User Guide
Troubleshooting 3. If the paper is jammed in the exit of the document feeder, gently pull it out in the direction shown. Xerox ® WorkCentre ® 3335/3345 Multifunction Printer User Guide... -
Page 155: User Guide
4. If the jammed paper is not caught in the entry of the document feeder, gently pull it out in the direction shown. 5. If the jammed paper cannot be seen, perform the following steps to remove it. Xerox ® WorkCentre ®... -
Page 156: User Guide
Troubleshooting a. Open the inner cover. Xerox ® WorkCentre ® 3335/3345 Multifunction Printer User Guide... -
Page 157: User Guide
Troubleshooting b. Gently pull out the jammed paper in the direction shown. Xerox ® WorkCentre ® 3335/3345 Multifunction Printer User Guide... -
Page 158: User Guide
Troubleshooting c. Close the inner cover. Xerox ® WorkCentre ® 3335/3345 Multifunction Printer User Guide... -
Page 159: User Guide
Troubleshooting 6. Close the document feeder top cover. 7. To remove paper from the document feeder inside cover, perform the following steps: Xerox ® WorkCentre ® 3335/3345 Multifunction Printer User Guide... -
Page 160: User Guide
Troubleshooting a. Lift the document feeder. Xerox ® WorkCentre ® 3335/3345 Multifunction Printer User Guide... -
Page 161: User Guide
Troubleshooting b. Gently pull out any jammed paper. Xerox ® WorkCentre ® 3335/3345 Multifunction Printer User Guide... -
Page 162: User Guide
Troubleshooting c. Close the document feeder. 8. Remove any jammed paper from the document feeder output tray. Xerox ® WorkCentre ® 3335/3345 Multifunction Printer User Guide... -
Page 163: User Guide
Troubleshooting a. Raise the document feeder input tray. Xerox ® WorkCentre ® 3335/3345 Multifunction Printer User Guide... -
Page 164: User Guide
Troubleshooting b. Gently pull out the jammed paper in the direction shown. Xerox ® WorkCentre ® 3335/3345 Multifunction Printer User Guide... -
Page 165: User Guide
Troubleshooting c. Lower the document feeder input tray. d. Reload the documents in the document feeder input tray, and adjust the guides against the edges of the paper. Xerox ® WorkCentre ® 3335/3345 Multifunction Printer User Guide... -
Page 166: User Guide
3. If the paper is torn, check inside the printer for pieces of paper, then gently remove them. If you cannot remove the paper fragments easily, contact your Xerox representative. 4. When you reload the bypass tray, fan the paper and ensure that all four corners align neatly. -
Page 167: User Guide
C C l l e e a a r r i i n n g g P P a a p p e e r r J J a a m m s s f f r r o o m m T T r r a a y y 1 1 To resolve the error that appears on the control panel, clear all paper from the paper path. 1. Pull out tray 1 until it stops. Xerox ® WorkCentre ®... -
Page 168: User Guide
2. To remove any jammed paper, gently pull it straight out as shown. If the paper does not move when you pull it, or if you do not see the paper in this area, refer to Clearing Paper Jams from the Inside the Printer. Xerox ® WorkCentre ®... -
Page 169: User Guide
Troubleshooting 3. Close the tray. 4. If the control panel prompts you, on the Paper Settings screen, verify the paper size, type, and color. 5. Touch Confirm. Xerox ® WorkCentre ® 3335/3345 Multifunction Printer User Guide... -
Page 170: User Guide
C C l l e e a a r r i i n n g g P P a a p p e e r r J J a a m m s s f f r r o o m m T T r r a a y y 2 2 To resolve the error that appears on the control panel, clear all paper from the paper path. 1. Pull out tray 2 until it stops. Xerox ® WorkCentre ®... -
Page 171: User Guide
2. To remove any jammed paper, gently pull it straight out as shown. 3. If the paper does not move when you pull it, or if you do not see the paper in this area, perform the following: Xerox ® WorkCentre ®... -
Page 172: User Guide
Troubleshooting a. Pull tray 1 out. Xerox ® WorkCentre ® 3335/3345 Multifunction Printer User Guide... -
Page 173: User Guide
To remove any jammed paper, gently pull it straight up and out as shown. If the paper does not move when you pull, or if you do not see the paper in this area, refer to Clearing Paper Jams from the Inside the Printer. Xerox ® WorkCentre ®... -
Page 174: User Guide
Troubleshooting c. Push in tray 1. Xerox ® WorkCentre ® 3335/3345 Multifunction Printer User Guide... -
Page 175: User Guide
Troubleshooting 4. Push in tray 2. 5. If the control panel prompts you, in the Paper Settings screen, verify the paper size, type, and color. 6. Touch Confirm. Xerox ® WorkCentre ® 3335/3345 Multifunction Printer User Guide... -
Page 176: User Guide
2. If the paper tears or does not move when pulled, refer to Clearing Paper Jams from the Back of Printer. 3. If necessary, to resume printing, follow any remaining instructions on the printer control panel. Xerox ® WorkCentre ®... -
Page 177: User Guide
C C l l e e a a r r i i n n g g P P a a p p e e r r J J a a m m s s f f r r o o m m t t h h e e I I n n s s i i d d e e t t h h e e P P r r i i n n t t e e r r 1. Press the release lever, then open the front cover of the printer. Xerox ®... -
Page 178: User Guide
Troubleshooting 2. To remove any jammed paper from inside the printer, gently pull it straight out as shown. Xerox ® WorkCentre ® 3335/3345 Multifunction Printer User Guide... -
Page 179: User Guide
Troubleshooting 3. Close the front cover. Xerox ® WorkCentre ® 3335/3345 Multifunction Printer User Guide... -
Page 180: User Guide
C C l l e e a a r r i i n n g g P P a a p p e e r r J J a a m m s s f f r r o o m m t t h h e e B B a a c c k k o o f f t t h h e e P P r r i i n n t t e e r r 1. At the back of the printer, remove any jammed paper from the exit area. If the paper does not move when you pull it, continue to the next step. Xerox ® WorkCentre ®... -
Page 181: User Guide
Troubleshooting 2. Press the release lever, then open the back cover of the printer. 3. Gently remove any jammed paper from the back of the printer. Xerox ® WorkCentre ® 3335/3345 Multifunction Printer User Guide... -
Page 182: User Guide
If the paper does not move when you pull it, continue to the next step. 5. If paper is jammed in the fuser, perform the following steps: a. Lower both green levers, then open the fuser. b. Remove the jammed paper. Xerox ® WorkCentre ®... -
Page 183: User Guide
To open the paper guide and release the latches, press down both tabs, then lower the paper guide. d. Remove any jammed paper from the paper guide area. e. Close the paper guide. f. Close the fuser. 6. Close the back cover. Xerox ® WorkCentre ® 3335/3345 Multifunction Printer User Guide... -
Page 184: User Guide
C C l l e e a a r r i i n n g g P P a a p p e e r r J J a a m m s s f f r r o o m m t t h h e e D D u u p p l l e e x x A A r r e e a a 1. To access paper jams in the duplex area, pull out the duplex unit from the printer. 2. Gently remove any jammed paper from the duplex area. Xerox ® WorkCentre ®... -
Page 185: User Guide
Remove the paper from the tray, then replace it with new dry paper. Too much static electricity is present. Try a new ream of paper. Do not fan transparencies before loading them in tray. Xerox ® WorkCentre ® 3335/3345 Multifunction Printer User Guide... -
Page 186: User Guide
Remove the moist paper and replace it with new, dry paper. Using paper of the wrong size, thickness, or type. Use only Xerox approved paper. For details, refer to Supported Paper. L L a a b b e e l l a a n n d d E E n n v v e e l l o o p p e e M M i i s s f f e e e e d d s s... -
Page 187: User Guide
J J a a m m s s D D u u r r i i n n g g A A u u t t o o m m a a t t i i c c 2 2 - - S S i i d d e e d d P P r r i i n n t t i i n n g g Probable Causes Solutions • Use only Xerox-approved paper. For details, refer Using paper of the wrong size, thickness, or type. Supported Paper Types and Weights for Automatic 2-Sided Printing. -
Page 188: User Guide
When the print quality is poor, select the closest symptom from the following table and see the corresponding solution to correct the problem. You can also print a Demo Page to determine the print-quality problem more precisely. If the print quality does not improve after carrying out the appropriate action, contact your Xerox representative. Note: To maintain print quality, when toner becomes low, a warning message appears on the control panel. -
Page 189: User Guide
Troubleshooting Symptom Solutions • To check the toner level, check the control panel, The output is too light. use the print driver, or Xerox ® CentreWare ® Internet ® Services. If the toner cartridge is almost empty, replace it. • Verify that the toner cartridge is approved for use in this printer, and replace it as needed. -
Page 190: User Guide
Selecting a Location for the Printer. The output is blank. Turn off the printer, then turn it on again. If the error persists, contact your Xerox representative. Streaks appear in the output. Replace the Smart Kit Drum Cartridge. Contact your Xerox representative. -
Page 191: User Guide
Troubleshooting Symptom Solutions • Replace the Drum Cartridge. • To check the toner level, check the control panel, Auger marks appear on the printed output. use the print driver, or Xerox CentreWare ® ® Internet ® Services. If the toner cartridge is almost empty, replace it. -
Page 192: User Guide
The printed surface of the paper is bumpy. sheet of paper. 2 Load the printed sheet into the tray with the printed side face down. 3 Print five blank pages to remove debris from the fuser rollers. Xerox ® WorkCentre ® 3335/3345 Multifunction Printer User Guide... -
Page 193: User Guide
The image is too light or too dark. To lighten or darken the image, use the Lighten/ Darken tab in either the Scan To or Copy function. If the problem persists, for online support information, go to: • www.xerox.com/office/WC3335support • www.xerox.com/office/WC3345support Xerox ®... -
Page 194: User Guide
There is a problem with the fax Contact the recipient. machine of the recipient. The fax is not installed or is not Verify that the fax is installed and enabled. enabled. Xerox ® WorkCentre ® 3335/3345 Multifunction Printer User Guide... -
Page 195: User Guide
Ensure that Server Fax is disabled. If the problem persists, for online support information, go to: • www.xerox.com/office/WC3335support • www.xerox.com/office/WC3345support P P r r o o b b l l e e m m s s R R e e c c e e i i v v i i n n g g F F a a x x e e s s... -
Page 196: User Guide
Troubleshooting If the problem persists, for online support information, go to: • www.xerox.com/office/WC3335support • www.xerox.com/office/WC3345support Xerox ® WorkCentre ® 3335/3345 Multifunction Printer User Guide... -
Page 197: Getting Help
Troubleshooting Getting Help Xerox provides several automatic diagnostic utilities to help you maintain printer productivity and print quality. C C o o n n t t r r o o l l P P a a n n e e l l M M e e s s s s a a g g e e s s The printer control panel provides information and troubleshooting help. -
Page 198: User Guide
A A c c c c e e s s s s i i n n g g a a n n d d P P r r i i n n t t i i n n g g t t h h e e I I n n f f o o r r m m a a t t i i o o n n P P a a g g e e s s To access the full list of information pages for your printer: Xerox ®... -
Page 199: User Guide
Customer Assistance Report The Customer Assistance Report provides a summary of relevant information that you can provide to a Xerox support representative when you call for assistance. Demo Page The Demo page provides a demonstration of the current print quality. -
Page 200: Online Support Assistant
The Online Support Assistant is a knowledge base that provides instructions and troubleshooting help to solve your printer problems. You can find solutions for print-quality problems, paper jams, software installation issues, and more. To access the Online Support Assistant, go to: Xerox ® WorkCentre ®... -
Page 201: More Information
Technical support information for your printer, • www.xerox.com/office/WC3335support including online technical support, Online • www.xerox.com/office/WC3345support Support Assistant, and driver downloads. Information pages At the printer control panel, press Help. In Xerox CentreWare Internet Services, click ® ® Properties→General Setup→Configuration→Print System Data List. Xerox CentreWare... -
Page 202: User Guide
Troubleshooting Xerox ® WorkCentre ® 3335/3345 Multifunction Printer User Guide... -
Page 203: Printer Configurations And Options
Specifications This appendix contains: • Printer Configurations and Options ..................204 • Physical Specifications ......................207 • Environmental Specifications ....................211 • Electrical Specifications......................212 • Performance Specifications ...................... 213 Xerox ® WorkCentre ® 3335/3345 Multifunction Printer User Guide... - Page 204 • Letter (8.5 x 11 in.): Maximum 42 ppm • A4: Maximum 40 ppm 2-Sided print speed WorkCentre 3335 Printer: ® • Letter (8.5 x 11 in.): Maximum 17 ppm • A4: Maximum 16 ppm WorkCentre ® 3345 Printer: Xerox ® WorkCentre ® 3335/3345 Multifunction Printer User Guide...
- Page 205 • USB • Email • Computer • Document Glass: 216 x 297 mm (8.5 x 11.7 in.) Maximum scan size • Document Feeder: 216 x 356 mm (8.5 x 14 in.) Xerox ® WorkCentre ® 3335/3345 Multifunction Printer User Guide...
- Page 206 109 mm (4.3 in.) LCD touch screen and keypad navigation • Universal Serial Bus: USB 2.0 Connectivity • USB Flash drive • Ethernet 10/100/1000 Base-T • Wireless • WiFi • Mopria • AirPrint Remote Access Xerox ® CentreWare ® Internet Services Xerox ® WorkCentre ® 3335/3345 Multifunction Printer...
-
Page 207: Physical Specifications
46.9 cm (18.5 in.) Depth 44.4 cm (17.5 in.) 50.0 cm (19.7 in.) Height 48.2 cm (19.0 in.) 62.5 cm (24.5 in.) Weight 17.34 kg (38.23 lb.) 22.9 kg (50.41 lb.) Xerox ® WorkCentre ® 3335/3345 Multifunction Printer User Guide... - Page 208 S S t t a a n n d d a a r r d d C C o o n n f f i i g g u u r r a a t t i i o o n n Xerox ®...
- Page 209 S S t t a a n n d d a a r r d d C C o o n n f f i i g g u u r r a a t t i i o o n n Xerox ®...
- Page 210 C C l l e e a a r r a a n n c c e e R R e e q q u u i i r r e e m m e e n n t t s s f f o o r r S S t t a a n n d d a a r r d d C C o o n n f f i i g g u u r r a a t t i i o o n n Xerox...
-
Page 211: Environmental Specifications
E E l l e e v v a a t t i i o o n n For optimum performance, use the printer at elevations below 2500 m (8,202 ft.). Xerox ® WorkCentre ®... -
Page 212: Electrical Specifications
• Continuous printing: Less than 700W • Ready/Standby: Less than 50W This printer does not consume electric power when the power switch is turned off even if the printer is connected to an AC outlet. Xerox ® WorkCentre ® 3335/3345 Multifunction Printer... - Page 213 • Paper size: Letter (8.5 x 11 in.) and A4 (210 x 297 mm) sizes share the fastest print speed. • Paper type: Plain paper prints faster than Cardstock or Heavyweight. • Paper weight: Lightweight prints faster than heavier paper, such as Cardstock and Labels. Xerox ® WorkCentre ®...
- Page 214 Specifications Xerox ® WorkCentre ® 3335/3345 Multifunction Printer User Guide...
- Page 215 Regulatory Information This appendix contains: • Basic Regulations ........................216 • Copy Regulations ........................221 • Fax Regulations........................224 • Material Safety Data Sheets ....................228 Xerox ® WorkCentre ® 3335/3345 Multifunction Printer User Guide...
-
Page 216: Basic Regulations
• Connect the equipment into an outlet on a circuit different from that to which the receiver is connected. • Consult the dealer or an experienced radio/TV technician for help. Changes or modifications to this equipment not approved by Xerox can void the authority of the user to operate this equipment. Note: To ensure compliance with Part 15 of the FCC rules, use shielded interface cables. - Page 217 To ensure compliance with European Union regulations, use shielded interface cables. A signed copy of the Declaration of Conformity for this printer can be obtained from Xerox. E E u u r r o o p p e e a a n n U U n n i i o o n n L L o o t t 4 4 I I m m a a g g i i n n g g E E q q u u i i p p m m e e n n t t...
-
Page 218: Power Consumption
Regulatory Information Some Xerox models below these speed bands may also be enabled with 2-sided printing settings defaulted on at the time of install. Continuing to use the duplex function will reduce the environmental impact of your work. However, should you require simplex/1-sided printing, you may change the print settings in the print driver. - Page 219 Maschinenlärminformations-Verordnung 3. GPSGV: Der höchste Schalldruckpegel beträgt 70 dB(A) oder weniger gemäß EN ISO 7779. I I m m p p o o r r t t e e u u r r Xerox GmbH Hellersbergstraße 2-4 41460 Neuss Deutschland B B r r a a s s i i l l Este produto contém a placa SDGOB-1391 código de homologação ANATEL 01693-03269.
- Page 220 (2) this device must accept any interference received, including interference that may cause undesired operation. Changes or modifications to this device not specifically approved by the Xerox Corporation may void the user's authority to operate this equipment.
-
Page 221: Copy Regulations
“fair use” or library reproduction rights provisions of the copyright law. Further information of these provisions may be obtained from the Copyright Office, Library of Congress, Washington, D.C. 20559. Ask for Circular R21. Xerox ® WorkCentre ®... - Page 222 Canada or a department, board, Commission, or agency established by the Government of Canada or of a province or of a government of a state other than Canada Xerox ® WorkCentre ®...
- Page 223 • Copyright material or trademarks without the consent of the owner • Postage stamps and other negotiable instruments This list is not inclusive and no liability is assumed for either its completeness or accuracy. In case of doubt, contact your legal counsel. Xerox ® WorkCentre ®...
-
Page 224: Fax Regulations
Ask your local Telephone Company for the modular jack type installed on your line. Connecting this machine to an unauthorized jack can damage telephone company equipment. You, not Xerox, assume all responsibility and/or liability for any damage caused by the connection of this machine to an unauthorized jack. - Page 225 Telephone Company may request you to disconnect the equipment until the problem is resolved. Only a Xerox Service Representative or an authorized Xerox Service provider are authorized to make repairs to the printer. This applies at any time during or after the service warranty period. If unauthorized repair is performed, the remainder of the warranty period is null and void.
- Page 226 Modification of this product, connection to external control software, or connection to an external control apparatus not authorized by Xerox ® will invalidate its certification. S S o o u u t t h h A A f f r r i i c c a a This modem must be used in conjunction with an approved surge protection device.
- Page 227 9. For correct operation, total of the RNs of all devices connected to a single line at any time should not exceed five. Xerox ® WorkCentre ®...
-
Page 228: Material Safety Data Sheets
Regulatory Information Material Safety Data Sheets For Material Safety Data information regarding your printer, go to: • North America: – WorkCentre ® 3335: www.xerox.com/msds – WorkCentre 3345: www.xerox.com/msds ® • European Union: – WorkCentre ® 3335: www.xerox.com/environment_europe – WorkCentre ®... -
Page 229: Xerox ® Workcentre ® 3335/3345 Multifunction Printer
Recycling and Disposal This appendix contains: • All Countries..........................230 • North America ......................... 231 • European Union ........................232 • Other Countries........................234 Xerox ® WorkCentre ® 3335/3345 Multifunction Printer User Guide... -
Page 230: All Countries
Recycling and Disposal All Countries If you are managing the disposal of your Xerox product, please note that the printer may contain lead, mercury, perchlorate, and other materials whose disposal may be regulated due to environmental considerations. The presence of these materials is fully consistent with global regulations applicable at the time that the product was placed on the market. -
Page 231: North America
Recycling and Disposal North America Xerox operates an equipment take-back and reuse/recycle program. Contact your Xerox representative (1-800-ASK-XEROX) to determine if this Xerox product is part of the program. For more information about Xerox environmental programs, visit www.xerox.com/environment for WorkCentre ®... -
Page 232: European Union
In accordance with European legislation, end-of-life electrical and electronic equipment subject to disposal must be managed within agreed procedures. Prior to disposal, please contact your local reseller or Xerox representative for end-of-life take-back information. C C o o l l l l e e c c t t i i o o n n a a n n d d D D i i s s p p o o s s a a l l o o f f E E q q u u i i p p m m e e n n t t a a n n d d B B a a t t t t e e r r i i e e s s •... - Page 233 B B a a t t t t e e r r y y R R e e m m o o v v a a l l Batteries should only be replaced by a manufacturer-approved service facility. Xerox ®...
-
Page 234: Other Countries
Recycling and Disposal Other Countries Please contact your local waste management authority to request disposal guidance. Xerox ® WorkCentre ® 3335/3345 Multifunction Printer User Guide...