Whirlpool GLS3064R S Manual
Hide thumbs
Also See for GLS3064R S:
- Dimensions (1 page) ,
- Installation instructions manual (20 pages)

Related Manuals for Whirlpool GLS3064R S


Summary of Contents for Whirlpool GLS3064R S
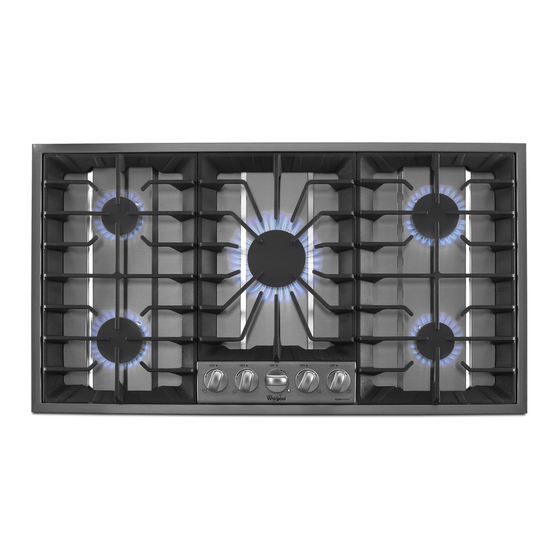
- Page 1 CONSUMER SERVICES TECHNICAL KR-37 EDUCATION GROUP PRESENTS 30˝ & 36˝ FLUSH-MOUNT GAS COOKTOPS Model GLS3064R S Model GLS3665R S JOB AID Part No. 8178526...
- Page 2 FORWARD This Whirlpool Job Aid, “30˝ & 36˝ Flush-Mount Gas Cooktops” (Part No. 8178526), provides the technician with information on the installation and service of the 30˝ & 36˝ Flush-Mount Gas Cooktops. For specific information on the model being serviced, refer to the “Use and Care Guide”...
-
Page 3: Table Of Contents
Safety First ............1-1 Whirlpool Model & Serial Number Designations ....... . 1-2 Model &... - Page 4 — NOTES — - iv -...
-
Page 5: General
GENERAL SAFETY FIRST Your safety and the safety of others is very important. We have provided many important safety messages in this Job Aid and on the appliance. Always read and obey all safety messages. This is the safety alert symbol. This symbol alerts you to hazards that can kill or hurt you and others. -
Page 6: Whirlpool Model & Serial Number Designations
WHIRLPOOL MODEL & SERIAL NUMBER DESIGNATIONS MODEL NUMBER MODEL NUMBER PRODUCT GROUP R = ELECTRIC COOKING PRODUCTS S = GAS COOKING PRODUCTS G = WHIRLPOOL GOLD PRODUCT IDENTIFICATION C = BUILT-IN COOKTOP J = GOLD ELECTRIC COOKTOP L = GOLD GAS COOKTOP... -
Page 7: Model & Serial Number Label Location
MODEL & SERIAL NUMBER LABEL LOCATION The Model/Serial Number label location is shown below. Model/Serial Number Label... -
Page 8: Specifications
SPECIFICATIONS Model Number GLS3064R S GLS3665R S Model Description Steel cooktop Steel cooktop Size-Confi guration 30" 36" Dimensions/Specifi cations Overall Width (in) 30" 36" Overall Depth (in) 20 1/8" 20 1/8" Cutout Width (in) 29 3/8" 35 3/8" Cutout Depth (in) 19 1/2"... -
Page 9: Whirlpool Gas Cooktop Warranty
FULL ONE-YEAR WARRANTY For one year from the date of purchase, when this appliance is operated and maintained according to instructions attached to or furnished with the product, Whirlpool Corporation will pay for FSP ® replacement parts and repair labor to correct defects in materials or workmanship. Service must be provided by a Whirlpool designated service company. - Page 10 — NOTES —...
-
Page 11: Installation Information
INSTALLATION INFORMATION L.P. GAS CONVERSION Turn the access cap over so that the let- WARNING ters L.P. are facing up, and then reinstall the cap on the valve. NAT Position L.P. Position Electrical Shock Hazard Disconnect power before servicing. Replace all parts and panels before operating. - Page 12 c) Open the L.P. Conversion pack and d) Use a 7 mm socket wrench and remove remove the contents. the orifices from the burner bases. NOTE: Place a small piece of masking NOTE: Each burner, and its associated gas tape along the inside edge of the socket valve, has a plastic bag containing an L.P.
- Page 13 To convert the gas valves for use with To check the burner operation: L.P. gas: a) Turn on the power and gas supply to a) Remove the control knobs from the the cooktop. gas valves. b) Light a burner, and quickly turn the gas b) Reach inside the control panel open- valve from low to high, and then back ings with your fingers, and slide...
- Page 14 — NOTES —...
-
Page 15: Component Access
COMPONENT ACCESS This section instructs you on how to service each component inside the 30˝ & 36˝ flush-mount gas cooktops. The components and their locations are shown below. COMPONENT LOCATIONS Cooktop Ignitor Power Supply Cord Spark Modules Cooktop Chassis Gas Valves & Ignition Switches Burner Base 30˝... -
Page 16: Removing The Burners And Cooktop
REMOVING THE BURNERS AND COOKTOP Remove the two screws from each of the WARNING burners and remove the burners from the cooktop. Burner Screws Electrical Shock Hazard Disconnect power before servicing. Replace all parts and panels before operating. Burners Failure to do so can result in death or electrical shock. - Page 17 Lift the cooktop off the cooktop chassis, disconnect the wires from the ignitor ter- minals, and remove the cooktop. Ignitors REASSEMBLY NOTE: Since each of the burner ignitors for the 30˝ and 36˝ cooktops has its own spark module, make sure that you connect each of the module output wires to its 5 Spark Module...
-
Page 18: Removing A Burner Base
REMOVING A BURNER BASE Remove the 9/16˝ gas line nut from the WARNING burner base. Remove the two screws from the burn- er base and remove the base from the cooktop chassis. Electrical Shock Hazard Disconnect power before servicing. Replace all parts and panels before operating. -
Page 19: Removing An Ignition Switch And Gas Valve
REMOVING AN IGNITION SWITCH AND GAS VALVE To remove an ignition switch: WARNING a) Disconnect the two wire connectors from the switch terminals. b) Unclip the e-ring from the gas valve shaft. c) Pull the switch straight up and off the gas valve. -
Page 20: Removing An Ignitor And A Spark Module
REMOVING AN IGNITOR AND A SPARK MODULE b) Disconnect the wire from the ignitor WARNING terminal (if not already done). c) Unclip the e-ring and remove the ig- nitor from the cooktop. Ignitor Wire Electrical Shock Hazard Disconnect power before servicing. Replace all parts and panels before operating. - Page 21 c) Disconnect the orange, white, and blue Blue wires from the spark module terminals. White Chassis Tab Spark Module d) Remove the mounting screw. e) Unhook the module from the cooktop chassis tab, and remove the module from the cooktop. IMPORTANT: Refer to the “Reassembly Note”...
-
Page 22: Removing The Power Supply Cord
REMOVING THE POWER SUPPLY CORD If installed, cut the wire tie from around WARNING the gas manifold and the power supply cord wires. Remove the twist-on connectors from the black and white power supply cord wires and separate the wires. Remove the chassis screw from the pow- Electrical Shock Hazard er supply cord green ground wire. -
Page 23: Component Testing
COMPONENT TESTING Before testing any of the components, perform • Check all connections before replacing the following checks: components, looking for broken or loose wires, failed terminals, or wires not pressed • The most common cause for control failure into connectors far enough. is corrosion on connectors. - Page 24 — NOTES —...
-
Page 25: Wiring Diagrams
WIRING DIAGRAMS 30˝ COOKTOP POWER SUPPLY IGNITER IGNITER VALVE SWITCH VALVE IGNITER IGNITER SWITCH SPARK MODULE VALVE SWITCH VALVE SWITCH... - Page 26 36˝ COOKTOP POWER SUPPLY IGNITER IGNITER IGNITER SPARK MODULE IGNITER IGNITER VALVE VALVE VALVE VALVE VALVE SWITCH SWITCH SWITCH SWITCH SWITCH CENTER...
- Page 27 PRODUCT SPECIFICATIONS WARRANTY INFORMATION SOURCES IN THE UNITED STATES: FOR PRODUCT SPECIFICATIONS AND WARANTY INFORMATION CALL: FOR WHIRLPOOL PRODUCTS: 1-800-253-1301 FOR KITCHENAID PRODUCTS: 1-800-422-1230 FOR ROPER PRODUCTS: 1-800-447-6737 FOR TECHNICAL ASSISTANCE WHILE AT THE CUSTOMER’S HOME CALL: THE TECHNICAL ASSISTANCE LINE: 1-800-253-2870...
- Page 28 CORPORATION...