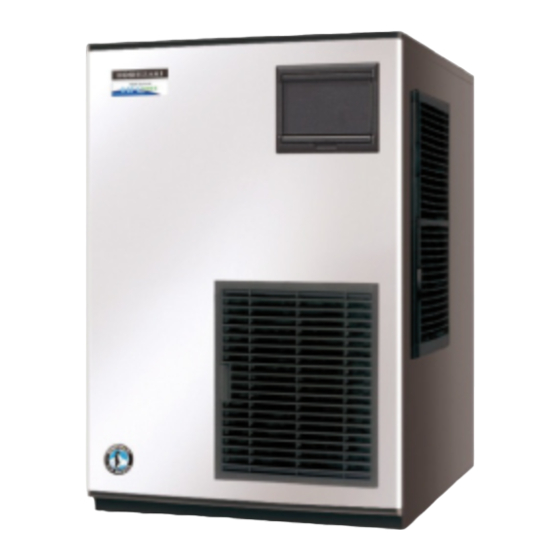
Hoshizaki FM-481AGE Service Manual
Modular flaker
Hide thumbs
Also See for FM-481AGE:
- Service manual (99 pages) ,
- Instruction manual (43 pages) ,
- Installation manual (32 pages)
Table of Contents
Advertisement
Advertisement
Table of Contents

Related Manuals for Hoshizaki FM-481AGE


Summary of Contents for Hoshizaki FM-481AGE
- Page 1 E2AH-582 E2AH-582 ISSUED: ISSUED: NOV. 12, 2001 NOV. 12, 2001 REVISED: SEP. 27, 2002 REVISED: SEP. 27, 2002 HOSHIZAKI HOSHIZAKI MODULAR FLAKER MODULAR FLAKER FM-481AGE FM-481AGE MODEL MODEL FM-481AWGE FM-481AWGE FM-481AGE-N FM-481AGE-N FM-481AWGE-N FM-481AWGE-N SERVICE MANUAL SERVICE MANUAL...
-
Page 2: Table Of Contents
I. SPECIFICATIONS I. SPECIFICATIONS --------------------------------------------------------------------------------------- ---------------------------------------------------------------------------------------1 1 1. DIMENSIONS/CONNECTIONS 1. DIMENSIONS/CONNECTIONS ----------------------------------------------------------------- -----------------------------------------------------------------1 1 [a] FM-481AGE, FM-481AGE-N [a] FM-481AGE, FM-481AGE-N --------------------------------------------------------------- ---------------------------------------------------------------1 1 [b] FM-481AWGE, FM-481AWGE-N [b] FM-481AWGE, FM-481AWGE-N --------------------------------------------------------- ---------------------------------------------------------2 2 [c] WITH STORAGE BIN [c] WITH STORAGE BIN -------------------------------------------------------------------------- --------------------------------------------------------------------------3 3 2. - Page 3 [f] BIN CONTROL SWITCH (Checking Actuator)----------------------------------------- ----------------------------------------- 40 [g] CHUTE SWITCH [g] CHUTE SWITCH ----------------------------------------------------------------------------- ----------------------------------------------------------------------------- 41 4. PERFORMANCE DATA 4. PERFORMANCE DATA ----------------------------------------------------------------------- ----------------------------------------------------------------------- 42 [a] FM-481AGE [a] FM-481AGE----------------------------------------------------------------------------------- ----------------------------------------------------------------------------------- 42 [b] FM-481AGE-N [b] FM-481AGE-N-------------------------------------------------------------------------------- -------------------------------------------------------------------------------- 43 [c] FM-481AWGE [c] FM-481AWGE --------------------------------------------------------------------------------...
-
Page 4: Specifications
I. SPECIFICATIONS I. SPECIFICATIONS 1. DIMENSIONS/CONNECTIONS 1. DIMENSIONS/CONNECTIONS [a] FM-481AGE, FM-481AGE-N [a] FM-481AGE, FM-481AGE-N E2AH5820209 E2AH5820209... - Page 5 [b] FM-481AWGE, FM-481AWGE-N [b] FM-481AWGE, FM-481AWGE-N E2AH5820209 E2AH5820209...
- Page 6 [c] WITH STORAGE BIN (B-300_F) [c] WITH STORAGE BIN (B-300_F) E2AH5820209 E2AH5820209...
-
Page 7: Specifications
2. SPECIFICATIONS [a] FM-481AGE AC SUPPLY VOLTAGE 1 PHASE 230V 50Hz AMPERAGE 7.5A (Ambient temp. 32°C, Water temp. 21°C) STARTING AMPERAGE 30.5A ELECTRIC CONSUMPTION 1522W (Ambient temp. 32°C, Water temp. 21°C) POWER FACTOR POWER SUPPLY CAPACITY Min 3.1kVA (13.3A) ICE PRODUCTION PER 24h Approx. -
Page 8: [B] Fm-481Awge [B] Fm-481Awge
[b] FM-481AWGE AC SUPPLY VOLTAGE 1 PHASE 230V 50Hz AMPERAGE 6.7A (Ambient temp. 32°C, Water temp. 21°C) STARTING AMPERAGE 30.5A ELECTRIC CONSUMPTION 1321W (Ambient temp. 32°C, Water temp. 21°C) POWER FACTOR POWER SUPPLY CAPACITY Min 3.1kVA (13.3A) ICE PRODUCTION PER 24h Approx. -
Page 9: [C] Fm-481Age-N [C] Fm-481Age
[c] FM-481AGE-N AC SUPPLY VOLTAGE 1 PHASE 230V 50Hz AMPERAGE 7.15A (Ambient temp. 32°C, Water temp. 21°C) STARTING AMPERAGE 30.5A ELECTRIC CONSUMPTION 1464W (Ambient temp. 32°C, Water temp. 21°C) POWER FACTOR POWER SUPPLY CAPACITY Min 2.2kVA (9.6A) ICE PRODUCTION PER 24h Approx. -
Page 10: [D] Fm-481Awge-N [D] Fm-481Awge-N
[d] FM-481AWGE-N AC SUPPLY VOLTAGE 1 PHASE 230V 50Hz AMPERAGE 6.74A (Ambient temp. 32°C, Water temp. 21°C) STARTING AMPERAGE 30.5A ELECTRIC CONSUMPTION 1356W (Ambient temp. 32°C, Water temp. 21°C) POWER FACTOR POWER SUPPLY CAPACITY Min 2.0kVA (8.7A) ICE PRODUCTION PER 24h Approx. -
Page 11: General Information
II. GENERAL INFORMATION 1. CONSTRUCTION 1. CONSTRUCTION Modular flaker model FM-481AGE/AWGE(-N) includes Water Supply, Evaporator, Modular flaker model FM-481AGE/AWGE(-N) includes Water Supply, Evaporator, Compressor, Condenser and Control Assemblies. As the unit is not equipped with an Ice Compressor, Condenser and Control Assemblies. As the unit is not equipped with an Ice Storage Bin, this must be purchased separately as an optional extra. - Page 12 ICE MAKING UNIT ICE MAKING UNIT Hex Bolt Hex Bolt Cutter Cutter Extruding Head Extruding Head Belt Heater Belt Heater Socket Head Cap Screw Socket Head Cap Screw w/ Plastic Seal w/ Plastic Seal Auger Auger Casing Casing Mechanical Seal Mechanical Seal Coupling Coupling...
-
Page 13: Controller Board
2. CONTROLLER BOARD Starting from the FM-481 model change, the electric control circuit has been changed from a Timer Board to a Controller Board. The Controller Board consists of the Operation Board (Controller Board - Operation), the Main Board (Controller Board - Main) and the Sub Board (Sub Board - Current). -
Page 14: [B] Details Of Functions
[b] DETAILS OF FUNCTIONS Operation Mode Display Indications Item Display Indication Details Illuminates: Icemaking 1) During icemaking cycle, or DRAIN 2) When Storage Bin is full STOP Illuminates: 1) For 15 minutes during automatic drain cycle after 6 hours Automatic Drain DRAIN in continuous icemaking cycle from the last drain cycle, or, after 1 hour with Storage Bin full, or... - Page 15 Basic Control Sequences Start icemaking: Water supply à Reservoir fills à Gear Motor ON à Compressor ON after 5 minutes Stop drain: Compressor OFF à Gear Motor OFF after 5 minutes à Water supply à Reservoir fills à Flush Water Valve ON à Flush Water Valve OFF after 10 minutes Bin full (self-contained type): Bin Control Switch continuously OFF for 7 seconds à...
-
Page 16: [C] Main Board Layout
[c] MAIN BOARD LAYOUT K5 FLOAT SWITCH K8 ROTATION SENSOR K7 BIN CONTROL SWITCH DIP SWITCH K7 PRESSURE SWITCH K1 24V AC INPUT K2 CONTROL WATER VALVE K2 FLUSH WATER VALVE K3 FAN MOTOR FOR CONTROL BOX 12V DC OUTPUT K6 OPERATION BOARD LOT NO. -
Page 17: [D] Sub Board Layout
[d] SUB BOARD LAYOUT CN1 MAIN BOARD DIP SWITCH 12V DC * * Note: As the previous Timer Board marking is applied, the Sub Board is marked 24V. But the actual input is 12V. E2AH5820209... -
Page 18: [E] Setting And Checking Operation
[e] SETTING AND CHECKING OPERATION The Controller Board has the following functions for setting and checking: (1) Shorten startup time (2) Indicate total operating hours (3) Indicate error record (4) Delete error record (5) Indicate cycle time (6) Apply to any model by adjusting Dip Switch (1) Shorten startup time Starting from the FM-481 model change, the startup control has been changed to “Power ON à... - Page 19 “98” is indicated for total operating hours of 98,000 to 98,999 hours. “99” is indicated for total operating hours of 99,000 hours and more. (The indication of total operating hours is up to “99”.) If the Display shows “- -” while the Option Button is pressed, the Controller Board must have a problem (The icemaker can continue normal icemaking operation but cannot memorize the total operating hours and error record).
- Page 20 3) (While pressing the Option Button) Press the Stop Button once. 4) The Display indicates the error record. 5) Check that the error record indication becomes “- -“. 6) (While pressing the Option Button) Press the Stop Button once again. 7) The Display indicates the error record (ongoing error).
- Page 21 To distinguish “min” from “sec”, the first digit for “min” is replaced by a letter of the alphabet as shown below. Actual Digit Letter For example, “A1” “10” stands for 11 min 10 sec. (ex.) If there is no cycle time record, the Display indicates “- -“. If the cycle time record is 10 min 30 sec (latest), 9 min 45 sec and 25 min 10 sec (oldest), the Display indicates “A0”...
- Page 22 Interlock Errors (Applicable Codes for FM-481 = E0, E1, E2, E4, E7, E8, Eb, EH, EL, EF, None) Code Error Condition Operation Reset Check/Repair Following initial water supply, Power supply, Water leaks, Flush Icemaking Float Switch trips at lower float Whole unit Turn OFF - Water Valve not...
- Page 23 cause of the overcurrent must be removed to avoid a repeat of the error. The Gear Motor amperage will increase if it locks or hunts due to an ice blockage or insufficient torque caused by low voltage. 2. The error code “E7” blinks after “E8” is displayed ten times. If “E8” appears repeatedly, the Evaporator assembly must be under excessive load each time (see Note 1 for details).
- Page 24 Dip Switch Setting (Main Board) Chute Switch Micro- Modular Icemaking Rotation Low Voltage Sensor ON Normally open computer Type Timer 1 Sensor OFF Automatic Drain Every 6h contact (Current) Check Self- Chute Switch Low Voltage Sensor OFF Icemaking Rotation Normal contained Normally closed Automatic Drain Every 12h...
- Page 25 Controller Board - Main (HO4052-100: 459866-##) [Improved Version] Dip Switch Setting (UK/CONT.) (A-1 and after) Dip Switch Model CM-230AFE FM-250AFE FM-481AGE FM-481AWGE FM-481ALGE FM-1000ASFE3 FM-1000ALE FM-1000ALF FM-2000ALE FM-2000ALF FM-1000ASFE3 (K-1, K-2, A-0) CM-110FE FM-120FE Dip Switch Setting (GENERAL/OCEANIA) (A-1 and after)
-
Page 26: Installation And Operating Instructions
III. INSTALLATION INSTRUCTIONS III. INSTALLATION INSTRUCTIONS 1. LOCATION 1. LOCATION WARNING WARNING 1. This icemaker is not intended for outdoor use. Normal operating ambient 1. This icemaker is not intended for outdoor use. Normal operating ambient temperature should be within 5°C to 40°C. Normal operating water temperature should be within 5°C to 40°C. -
Page 27: Water Supply And Drain Connections
* The maximum permissible system impedance (Zmax) at the interface point of the power * The maximum permissible system impedance (Zmax) at the interface point of the power supply to be connected with this icemaker must be 0.2908+j0.18175 ohm. Determine in supply to be connected with this icemaker must be 0.2908+j0.18175 ohm. -
Page 28: Start-Up Procedure
Note: Note: On water-cooled model, make the On water-cooled model, make the [Water-Cooled Model] [Water-Cooled Model] same connection to free end of 1/2- same connection to free end of 1/2- Water Supply Water Supply 1/2-3/4 Nipple 1/2-3/4 Nipple Inlet G3/4 Inlet G3/4 3/4 nipple on the water-cooled 3/4 nipple on the water-cooled... - Page 29 6) The following should occur in sequence: 6) The following should occur in sequence: a) Water Reservoir will fill. a) Water Reservoir will fill. b) Gear Motor will start. b) Gear Motor will start. c) Compressor will start. c) Compressor will start. 7) Replace the Front Panel in its correct position.
-
Page 30: Maintenance And Cleaning Instructions
IV. MAINTENANCE AND CLEANING INSTRUCTIONS IV. MAINTENANCE AND CLEANING INSTRUCTIONS IMPORTANT IMPORTANT 1. This icemaker must be maintained individually, referring to the instruction 1. This icemaker must be maintained individually, referring to the instruction manual and labels provided with the icemaker. manual and labels provided with the icemaker. -
Page 31: Gear Motor
3. GEAR MOTOR 3. GEAR MOTOR After the following hours of operation, check the Gear Motor for excessive noise caused by After the following hours of operation, check the Gear Motor for excessive noise caused by increased torque or deterioration of mechanical parts. increased torque or deterioration of mechanical parts. -
Page 32: Water Valve
6. WATER VALVE 6. WATER VALVE 1) Disconnect the power source. 1) Disconnect the power source. 2) Close the water supply tap. 2) Close the water supply tap. 3) Disconnect the Inlet Hose from the Water Valve. 3) Disconnect the Inlet Hose from the Water Valve. 4) Remove the Mesh Filter from the Water Valve. -
Page 33: Cleaning Of Water System
Prepare approximately 3 L of solution as directed on the container. Sanitising solution: Sanitising solution: 30 mL of 5.25% sodium hypochlorite with 7.6 L of water or the Hoshizaki 30 mL of 5.25% sodium hypochlorite with 7.6 L of water or the Hoshizaki recommended sanitiser as directed on the container. - Page 34 3) Remove all ice from the Storage Bin to avoid contamination by the cleaner. 3) Remove all ice from the Storage Bin to avoid contamination by the cleaner. 4) Unplug the icemaker. Remove the Top and Front Panels. 4) Unplug the icemaker. Remove the Top and Front Panels. 5) Remove the Cover of the Reservoir.
-
Page 35: Periodical Cleaning
Note: Some solutions may cause damage to the Bin liner surfaces or corrosion on the metal parts. parts. Always Always rinse the sanitiser unless directed otherwise by Hoshizaki guidelines. rinse the sanitiser unless directed otherwise by Hoshizaki guidelines. E2AH5820209 E2AH5820209... -
Page 36: Technical Information
V. TECHNICAL INFORMATION V. TECHNICAL INFORMATION 1. WATER AND REFRIGERANT CIRCUIT 1. WATER AND REFRIGERANT CIRCUIT [a] FM-481AGE, FM-481AGE-N [a] FM-481AGE, FM-481AGE-N Pressure Switch Pressure Switch Cut-out Cut-out 28.5 + 1.5/0 bar 28.5 + 1.5/0 bar Cut-in Cut-in 23 ± 1.5 bar 23 ±... - Page 37 [b] FM-481AWGE, FM-481AWGE-N [b] FM-481AWGE, FM-481AWGE-N Pressure Switch Pressure Switch Cut-out Cut-out 22 + 1.5/0 bar 22 + 1.5/0 bar Cut-in Cut-in 18 ± 1.5 bar 18 ± 1.5 bar E2AH5820209 E2AH5820209...
-
Page 38: Wiring Diagram
2. WIRING DIAGRAM 2. WIRING DIAGRAM E2AH5820209 E2AH5820209... -
Page 39: Timing Chart And Sequence Of Operation
3. TIMING CHART AND SEQUENCE OF OPERATION 3. TIMING CHART AND SEQUENCE OF OPERATION [a] STARTUP, ICEMAKING OPERATION [a] STARTUP, ICEMAKING OPERATION 1) 1) The icemaker starts icemaking operation when the Operation Switch is moved to the The icemaker starts icemaking operation when the Operation Switch is moved to the “RUN”... -
Page 40: [C] Automatic Flush Cycle
[c] AUTOMATIC FLUSH CYCLE [c] AUTOMATIC FLUSH CYCLE 1) 1) The icemaker starts the following automatic flush cycle every 6 hours. (If the icemaker is The icemaker starts the following automatic flush cycle every 6 hours. (If the icemaker is flushed by the Stop Button or Bin Control Switch operation, the automatic flush cycle will flushed by the Stop Button or Bin Control Switch operation, the automatic flush cycle will start 6 hours after the startup.) -
Page 41: [D] Bin Control Switch (Storage Bin Full For Less Than 60 Minutes) [D] Bin Control Switch (Storage Bin Full For Less Than 60 Minutes)
[d] BIN CONTROL SWITCH (Storage Bin full for less than 60 minutes) [d] BIN CONTROL SWITCH (Storage Bin full for less than 60 minutes) 1) 1) The Bin Control Switch trips or resets after the same condition lasts for more than 7 seconds. The Bin Control Switch trips or resets after the same condition lasts for more than 7 seconds. -
Page 42: [E] Bin Control Switch (Storage Bin Full For More Than 60 Minutes) [E] Bin Control Switch (Storage Bin Full For More Than 60 Minutes)
[e] BIN CONTROL SWITCH (Storage Bin full for more than 60 minutes) [e] BIN CONTROL SWITCH (Storage Bin full for more than 60 minutes) 1) 1) The Bin Control Switch trips or resets after the same condition lasts for more than 7 The Bin Control Switch trips or resets after the same condition lasts for more than 7 seconds. -
Page 43: [F] Bin Control Switch (Checking Actuator) [F] Bin Control Switch (Checking Actuator)
[f] BIN CONTROL SWITCH (Checking Actuator) [f] BIN CONTROL SWITCH (Checking Actuator) When the Bin Control Switch seems to have malfunctioned, check the dimensions of the When the Bin Control Switch seems to have malfunctioned, check the dimensions of the Actuator as well as the operation of the Proximity Switch. - Page 44 [g] CHUTE SWITCH [g] CHUTE SWITCH The Chute Switch consists of a microswitch and a band securing the Spout and Chute. When The Chute Switch consists of a microswitch and a band securing the Spout and Chute. When the Bin Control Switch breaks down, the band opens and presses the button on the microswitch the Bin Control Switch breaks down, the band opens and presses the button on the microswitch (contacts open) to stop the icemaker (error code: EL).
-
Page 45: Performance Data
4. PERFORMANCE DATA 4. PERFORMANCE DATA [a] FM-481AGE [a] FM-481AGE Head Pressure (bar) Suction Pressure (bar) 10/10 21/15 32/21 Ambient Temp/Water Temp (°C) Ice Production Capacity (kg/day) +10% -10% 10/10 21/15 32/21 Ambient Temp/Water Temp (°C) 10/10 21/15 32/21 Ambient Temp/Water Temp (°C) -
Page 46: [B] Fm-481Age-N [B] Fm-481Age-N
[b] FM-481AGE-N [b] FM-481AGE-N Head Pressure (bar) Suction Pressure (bar) 10/10 21/15 32/21 Ambient Temp/Water Temp (°C) Ice Production Capacity (kg/day) +10% -10% 10/10 21/15 32/21 Ambient Temp/Water Temp (°C) 10/10 21/15 32/21 Ambient Temp/Water Temp (°C) E2AH5820209 E2AH5820209... -
Page 47: [C] Fm-481Awge [C] Fm-481Awge
[c] FM-481AWGE [c] FM-481AWGE 2.80 Head Pressure (bar) 2.60 Suction Pressure (bar) 2.40 2.20 2.00 1.80 1.60 10/10 21/15 32/21 Ambient Temp/Water Temp (°C) Ice Production Capacity (kg/day) +10% -10% 10/10 21/15 32/21 Ambient Temp/Water Temp (°C) 10/10 21/15 32/21 Ambient Temp/Water Temp (°C) E2AH5820209 E2AH5820209... -
Page 48: [D] Fm-481Awge-N [D] Fm-481Awge-N
[d] FM-481AWGE-N [d] FM-481AWGE-N 2.80 Head Pressure (bar) 2.60 Suction Pressure (bar) 2.40 2.20 2.00 1.80 1.60 10/10 21/15 32/21 Ambient Temp/Water Temp (°C) Ice Production Capacity (kg/day) +10% -10% 10/10 21/15 32/21 Ambient Temp/Water Temp (°C) 10/10 21/15 32/21 Ambient Temp/Water Temp (°C) E2AH5820209 E2AH5820209... -
Page 49: Adjustment Of Components
VI. ADJUSTMENT OF COMPONENTS VI. ADJUSTMENT OF COMPONENTS 1. WATER REGULATING VALVE - WATER-COOLED MODEL ONLY 1. WATER REGULATING VALVE - WATER-COOLED MODEL ONLY The Water Regulating Valve (also called “Water Regulator”) is factory-adjusted. No adjustment The Water Regulating Valve (also called “Water Regulator”) is factory-adjusted. No adjustment is required under normal use. -
Page 50: Service Diagnosis
VII. SERVICE DIAGNOSIS Display error record by operating the Operation Board (See “II. 2. [d] (3) Indicate error record”). Check for a possible cause and service the unit. 1. NO ICE PRODUCTION PROBLEM POSSIBLE CAUSE REMEDY [1] The icemaker a) Power Supply 1. - Page 51 PROBLEM POSSIBLE CAUSE REMEDY [3] (Continued) 2. Activator does not 2. Clean Axle and its move freely. corresponding holes or replace Bin Control. See “V. 3. [f] BIN CONTROL SWITCH”. b) Gear Motor 1. Tripped. 1. Find out the cause, resolve Protector (Circuit it, and press Reset Button Breaker)
-
Page 52: Low Ice Production
2. LOW ICE PRODUCTION PROBLEM POSSIBLE CAUSE REMEDY [1] Low ice a) Refrigerant Line 1. Gas leaks. 1. See 1 - [5] - a). production. 2. Refrigerant line 2. Replace the clogged clogged. component. 3. Overcharged. 3. Recharge. b) High-side 1. - Page 53 PROBLEM POSSIBLE CAUSE REMEDY [1] (Continued) g) CPR (Condenser 1. Internal leaks. 1. Replace. Unit) [2] Overflow from a) Water Supply 1. Water pressure too 1. Install a Pressure Reservoir high. Reducing Valve. (Water does b) Water Valve 1. Diaphragm does not 1.
-
Page 54: Removal And Replacement Of Components
VIII. REMOVAL AND REPLACEMENT OF COMPONENTS VIII. REMOVAL AND REPLACEMENT OF COMPONENTS 1. SERVICE FOR REFRIGERANT LINES 1. SERVICE FOR REFRIGERANT LINES [a] SERVICE INFORMATION [a] SERVICE INFORMATION 1) Allowable Compressor Opening Time and Prevention of Lubricant Mixture [R404A] 1) Allowable Compressor Opening Time and Prevention of Lubricant Mixture [R404A] The compressor must not be opened more than 30 minutes in replacement or service. -
Page 55: [B] Refrigerant Recovery [B] Refrigerant Recovery
7) Evacuation, Vacuum Pump and Refrigerant Charge [R404A] 7) Evacuation, Vacuum Pump and Refrigerant Charge [R404A] Never allow the oil in the vacuum pump to flow backward. The vacuum level and vacuum Never allow the oil in the vacuum pump to flow backward. The vacuum level and vacuum pump may be the same as those for the current refrigerants. -
Page 56: Brazing
7) Turn on the icemaker. Release the High-side 7) Turn on the icemaker. Release the High-side Access Connector, and allow pressure in Access Connector, and allow pressure in the charging line to slowly enter the low side of the system. Cap off the High-side Access the charging line to slowly enter the low side of the system. -
Page 57: Compressor
3. COMPRESSOR 3. COMPRESSOR IMPORTANT IMPORTANT Always install a new Drier every time the sealed refrigeration system is opened. Always install a new Drier every time the sealed refrigeration system is opened. Do not replace the Drier until after all other repair or replacement has been Do not replace the Drier until after all other repair or replacement has been made. -
Page 58: Drier
15) Evacuate the system, and charge it with refrigerant. See the Nameplate for the required 15) Evacuate the system, and charge it with refrigerant. See the Nameplate for the required refrigerant charge (See “1. [c] EVACUATION AND RECHARGE”). refrigerant charge (See “1. [c] EVACUATION AND RECHARGE”). 16) Connect the Terminals to the Compressor, and replace the Terminal Cover in its correct 16) Connect the Terminals to the Compressor, and replace the Terminal Cover in its correct position. -
Page 59: Expansion Valve
5. EXPANSION VALVE 5. EXPANSION VALVE IMPORTANT IMPORTANT Sometimes moisture in the refrigerant circuit exceeds the Drier capacity and Sometimes moisture in the refrigerant circuit exceeds the Drier capacity and freezes up at the Expansion Valve. Always install a new Drier every time the freezes up at the Expansion Valve. -
Page 60: Water Regulating Valve - Water-Cooled Model Only
6. WATER REGULATING VALVE - WATER-COOLED MODEL ONLY 6. WATER REGULATING VALVE - WATER-COOLED MODEL ONLY IMPORTANT IMPORTANT Always install a new Drier every time the sealed refrigeration system is opened. Always install a new Drier every time the sealed refrigeration system is opened. Do not replace the Drier until after all other repair or replacement has been Do not replace the Drier until after all other repair or replacement has been made. -
Page 61: Evaporator Assembly
7. EVAPORATOR ASSEMBLY - See Fig. 14 7. EVAPORATOR ASSEMBLY - See Fig. 14 1) Push the Stop Button to drain the water in the Evaporator. 1) Push the Stop Button to drain the water in the Evaporator. 2) Disconnect the power source. 2) Disconnect the power source. - Page 62 12) Recover the refrigerant and store it in a proper container, if required by an applicable law 12) Recover the refrigerant and store it in a proper container, if required by an applicable law (See "1. [b] REFRIGERANT RECOVERY"). (See "1. [b] REFRIGERANT RECOVERY"). IMPORTANT IMPORTANT Always install a new Drier every time the sealed refrigeration system is opened.
- Page 63 GEAR MOTOR GEAR MOTOR 22) Cut the Connectors. 22) Cut the Connectors. 23) Remove the three Socket Head Cap Screws securing the Gear Motor. 23) Remove the three Socket Head Cap Screws securing the Gear Motor. 24) Assemble the removed parts in the reverse order of which they were removed. 24) Assemble the removed parts in the reverse order of which they were removed.
- Page 64 [Flake] [Flake] [Nugget] [Nugget] Rubber Rubber O-ring O-ring Nylon Nylon Ring Ring Auger Auger Bolt Bolt Cutter Cutter Extruding Extruding Head Head Mechanical Seal Mechanical Seal Gear Motor Cover Gear Motor Cover O-ring O-ring Housing Housing Socket Head Socket Head Cap Screw Cap Screw Coupling...
-
Page 65: Control Water Valve
8. CONTROL WATER VALVE 8. CONTROL WATER VALVE 1) Disconnect the power source. 1) Disconnect the power source. 2) Close the water supply tap. 2) Close the water supply tap. 3) Remove the panels. 3) Remove the panels. 4) Disconnect the Terminals from the Control Water Valve. 4) Disconnect the Terminals from the Control Water Valve. -
Page 66: Flush Water Valve
9. FLUSH WATER VALVE 9. FLUSH WATER VALVE 1) Close the water supply tap. 1) Close the water supply tap. 2) Remove the panels. 2) Remove the panels. 3) Push the Stop Button, and after 5 minutes disconnect the power source. 3) Push the Stop Button, and after 5 minutes disconnect the power source. -
Page 67: Controller Board
10. CONTROLLER BOARD 10. CONTROLLER BOARD IMPORTANT IMPORTANT A single type Controller Board is supplied as a Service Board. Some A single type Controller Board is supplied as a Service Board. Some modifications and adjustment will be required to fit the icemaker models. Do modifications and adjustment will be required to fit the icemaker models. - Page 68 HOSHIZAKI EUROPE LTD. HOSHIZAKI EUROPE LTD. UNIT A, STAFFORD PARK 18, TELFORD, UNIT A, STAFFORD PARK 18, TELFORD, SHROPSHIRE TF3 3DJ ENGLAND SHROPSHIRE TF3 3DJ ENGLAND PHONE: 01952-291777 PHONE: 01952-291777...