Table of Contents
Advertisement
Advertisement
Table of Contents

Related Manuals for Toshiba Copier


Summary of Contents for Toshiba Copier
- Page 2 • Do not install or use the machine near water, or when you are wet. Take care not to spill any liquids on the machine. The e-STUDIO15 is a multifunctional digital copier with fax function and the MD-1100 is a facsimile expansion kit for the analogue PSTN network which can be operated in the European networks which follow the CTR21 Standard.
-
Page 3: Table Of Contents
TABLE OF CONTENTS INSTALLATION Introduction ... 1-1 Choosing a Location ... 1-1 Parts Identification ... 1-2 Connections ... 1-3 Connecting theTelephone Line Cord ... 1-3 Final Preparations ... 1-4 Connecting Other Devices ... 1-4 INITIAL SETTINGS A Look at the Operation Panel ... 2-1 About the Liquid Crystal Display ... - Page 4 Table of contents HOW TO USE THE FAX FUNCTION Sending Documents ... 4-1 Setting the Document ... 4-1 Optional Transmission Settings ... 4-3 Resolution ... 4-3 Contrast ... 4-3 Cover Sheet ... 4-4 Auto Cover Sheet ... 4-5 Dialing and Transmitting ... 4-6 Direct Keypad Dialing ...
-
Page 5: Installation Introduction
This manual describes how to use the fax function of the e-STUDIO15. Part names and functions shared with the copy function (for example, the misfeed indicator and add paper indicator), are described in the copier operator's guide. For more information, please read the copier operator's guide. -
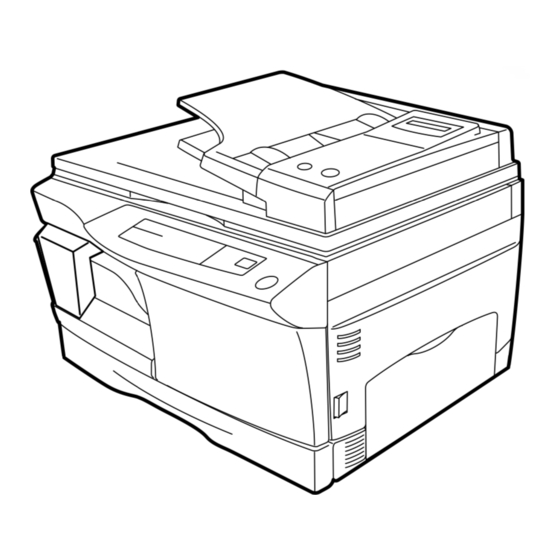
Page 6: Parts Identification
Parts Identification Fax control panel INSTALLATION... -
Page 7: Connections
Connecting the Telephone Line Cord Plug one end of the telephone line cord into the jack on the unit marked “TEL LINE.” Plug the other side into the wall jack (using the provided adaptator, if necessary). For Germany, please connect the cable from the fax unit with the wired plug connector code (F) with the wire down into the wall socket (TAE 6) code (F). -
Page 8: Final Preparations
Connecting Other Devices If desired, an answering machine or external telephone can be connected to the unit by plugging the external line cord in the external jack of the wall jack (wall socket code “N” for Germany) or in the provided adaptator. •... -
Page 9: Initial Settings
2. INITIAL SETTINGS A Look at the Operation Panel Left arrow key ( ) and right arrow key ( ) Press these keys to scroll through a menu. During input mode, these keys are also sometimes used to move the cursor. LIQUID CRYSTAL DISPLAY This display shows the various message during fax operation and programming. -
Page 10: About The Liquid Crystal Display
About the Liquid Crystal Display The unit is equipped with a two-line liquid crystal display (LCD) on the operation panel for displaying various messages and settings during operation. This LCD can display up to 20 characters on each line. When the unit is idle, the LCD shows the date, time, and the stand-by memory available. -
Page 11: Adjusting The Ringing Volume
Adjusting the Ringing Volume Adjust the ringing volume of the unit using the procedure below. Factory setting: 3 (MEDIUM) Step Press these keys FUNCTION ENTER STOP Setting the Length of Alarm Beeps You can select the length in seconds of the alarm beeps following the proce- dure below. -
Page 12: Turning Key Beeps Off
Turning Key Beeps Off If you prefer, you can choose to turn the key beeps off. To do this, follow the proce- dure below: Factory setting: 1 (ON) Step Press these keys FUNCTION STOP You can select language of display and reports. To do this, follow the procedure be- low: Step Press these keys... -
Page 13: Fax Setup
How to Enter Characters You can enter letters with the number keys. Letters are marked above each of the number keys “2” through “9”. To enter a letter, press the appropriate key repeatedly until the desired letter appears (the number of the key appears first, followed by letters in the order marked above the key). -
Page 14: Entering Your Name And Fax Number
(maximum of 24 characters). To enter a space, press the 1 key twice. To switch between lower case and capital letters, press the REDIAL PAUSE key once. (example: TOSHIBA) “STORED” will appear in the display. STOP Press the STOP key twice to exit. -
Page 15: Setting The Date And Time
Setting the Date and Time The date and time that appear in the display are printed at the top of each page you transmit. Set the date and time by pressing the keys on the operation panel as shown below. To correct a mistake, press the STOP key to move the cursor back to the mistake, and then enter the correct number. -
Page 16: Auto Summer Time Setting
Auto Summer Time Setting The unit can be set to adjust to time changes during the year, so that its internal clock and all subsequent notations of time (fax headers, programmed times, etc.) are automatically adjusted. When the Auto Summer Time Setting is on, the adjustments take place as shown below: On the last Sunday of every March: 01:00 On the last Sunday of every October: 01:00... -
Page 17: Selecting The Reception Mode
Selecting the Reception Mode Your unit has three modes for receiving incoming calls and faxes: • AUTO mode: Select this mode when you only want to receive faxes on your telephone line. The unit will automatically answer all calls and receive incoming faxes. •... -
Page 18: Setting The Number Of Rings For Auto Reception
Fax Setup Setting the Number of Rings for Auto Reception You can set the number of rings before the unit answers in AUTO mode using the procedure below. Factory setting: 2 Step Press these keys FUNCTION ENTER STOP Note: If the external telephone is connected, the external telephone rings once regardless the number of rings is set to 0. -
Page 19: Selecting The Reception Paper Size
Selecting the Reception Paper Size On the control panel, you can select the paper size that you want received faxes to be printed on (AUTO, A4, Letter, Legal). If you select the AUTO setting the unit automatically prints the fax out on the most appropriate size paper. Follow the procedure below: Factory setting: 4 (AUTO) Step... -
Page 20: Setting The Tray Paper Size
Fax Setup Setting the Tray Paper Size You must program the size of paper you have loaded in the unit so that Receive Reduce functions can properly adjust the size of documents printed out. Follow the steps below. Note: If you are using A4 size paper, you do not need to make any changes, as this is the factory setting. -
Page 21: Setting The Number Of Recall Times
Setting the Number of Recall Times You can select the number of times the unit will try to recall a busy number. If you enter 00, the unit will not try to recall. Follow this procedure: Factory setting: 02 Step Press these keys FUNCTION ENTER... -
Page 22: Setting The Recall Interval
Fax Setup Setting the Recall Interval The recall interval, the time the unit waits in between attempts to re-send a fax to a busy number, can be set from 1 to 15 minutes. Follow this procedure: Factory setting: 05 (5 minutes) Step Press these keys FUNCTION... -
Page 23: Setting The Index Function
Setting the Index Function You can print an index mark along the edge of the pages in each job. This makes it easy to separate different jobs on the output tray. Use the following procedure to set the index function. Separate faxes with index marks. -
Page 24: Setting Fine Resolution Priority
Fax Setup Setting Fine Resolution Priority For most faxing jobs, you will most likely want to specify the resolution. However, you can also set a default resolution when no setting is made using the RESOLU- TION key. When Fine Resolution Priority is turned on, all faxes will be sent in Fine Mode unless otherwise specified. -
Page 25: Using The Remote Reception Function
Using the Remote Reception Function The unit’s Remote Reception feature is designed to allow you to activate fax reception from an extension telephone. The Remote Reception function operates even when the FAX Signal Receive function is turned off. When you hear the fax tone, simply press the one-digit Fax Remote Number (Factory setting: 5) and procedures below to use this feature. -
Page 26: Pbx Setting
Fax Setup Setting a Fax Remote Number: Factory setting: 5 Step Press these keys FUNCTION ENTER STOP PBX setting The unit is connected to a PBX, you can program unit to access automatically public line outside PBX. Factory setting: 2 (OFF) Step Press these keys FUNCTION... -
Page 27: Storing Numbers For Automatic Dialing
Storing Numbers for Automatic Dialing Automatic Dialing is a quick and convenient way to dial by using only a Rapid key (Rapid Key Dialing), or pressing the SPEED/SEARCH key and select the SPEED and entering a two digit number (Speed Dialing). To use Automatic Dialing, you must first store the full number. - Page 28 Fax Setup STOP Step 4 or Note: You may need to add a pause between certain digits in the number to allow time for connection. For example, if you are on a PBX telephone system that requires an access number, such as “9”, to be dialed to access an outside line, you will need to enter a pause between the access number and the fax number of the other party.
-
Page 29: Chain Dialing For Long Numbers
Chain Dialing for Long Numbers The maximum number of digits which may be entered when storing a fax number is 20. If you need to store a number which is longer than 20 digits, use Chain Dialing. Chain Dialing allows you to combine two or more Automatic Dialing numbers, or use an Automatic Dialing number followed by additional digits entered manually with the number keys, to dial a single number. -
Page 30: Storing Numbers Under Group Keys
Fax Setup Storing Numbers Under Group Keys Group keys allow you to dial a group of fax numbers by simply pressing the appropriate Group key once. They are convenient for the Broadcasting function, which is used to transmit a document to a group of fax machines. All Rapid keys can be programmed as Group keys. - Page 31 ENTER STOP Step 3 or Enter the name of the group (maximum of 20 digits including pauses) by pressing number keys as described in “How to Enter Characters” in this chapter. If you do not want to enter a name, skip this step. (example) Setting: “GROUP SET”...
-
Page 32: Using The Unit With An Answering Machine
Using the Unit with an Answering Machine Quiet Detect Time Quiet Detect Time is the function that enables the unit to be used along with an answering machine for both phone messages and faxes. After the answering machine has answered, any duration of silence longer than a certain threshold time will prompt the unit to take over the line and prepare to receive a fax. -
Page 33: Answering Machine Backup
Using the Unit with an Answering Machine If Quiet Detect Time is not working properly... With some answering machines, there is simply no Quiet Detect Time that will allow both reception of faxes and uninterrupted voice messages. Even in this case, however, you can set up the unit to receive both phone and fax messages from callers on touch-tone lines. - Page 34 Notes INITIAL SETTINGS 2-26...
-
Page 35: Choosing Suitable Media
3. CHOOSING SUITABLE MEDIA Originals Suitable for Faxing Make sure that the documents you want to fax meet specifications and guidelines listed in this section. Size and Weight The size and weight of documents that you can load in the ADF (Auto Document) depend on whether you load one sheet at a time or several sheets at once. -
Page 36: Unsuitable Originals
• Originals with plastic or metallic coatings Notes: • TOSHIBA does not accept any responsibility for the loss or damage of originals. • It is a good idea to copy valuable originals on a flat-bed copier before using them with the unit. CHOOSING SUITABLE MEDIA... -
Page 37: How To Use The Fax Function
4. HOW TO USE THE FAX FUNCTION The standalone fax component of your unit offers a range of sophisticated features that allow you to control image quality, reception mode, broadcasting, polling, and transmission priorities. Functions such as sending documents from memory and substituting reception into memory are greatly enhanced by the large memory capacity. - Page 38 Sending Documents When placing the Original on the Table: Confirm that there are no documents in the ADF, and open the original cover. Place the document face down on the original table. Align the document according to the original scale in the illustration below.
-
Page 39: Optional Transmission Settings
Optional Transmission Settings There are several transmission settings that you can make before dialing and transmitting a document. Resolution Your fax has four resolution settings: • HALF TONE Use HALF TONE for photographs and illustrations. The original will be reproduced in 256 shades of gray. -
Page 40: Cover Sheet
Sending Documents Cover Sheet You can have your fax generate a cover sheet and send it as the last page of the transmission. The cover sheet includes the date and time, the sender’s name and number, and the receiver’s name and number if an automatic dialing number is used. The total number of pages sent is indicated on the bottom. -
Page 41: Auto Cover Sheet
Auto Cover Sheet If you want to send a cover sheet with your fax transmissions regularly, this function is very useful. This function differs from the Cover Sheet function in two ways. First, the Cover Sheet function must be programmed before every fax you want to use it with;... -
Page 42: Dialing And Transmitting
Sending Documents Dialing and Transmitting Once you have set the document (either in the automatic document feeder or on the original table), and have selected the desired transmission settings, you are ready to dial the number of the receiving fax machine and transmit the document. You can choose from one of the several ways of dialing that best suit your needs. -
Page 43: Rapid Key Dialing
Rapid Key Dialing If the number you want to dial has been stored as a Rapid key number (see “Storing Numbers for Automatic Dialing” in Chapter 2), you can dial it by pressing the appropriate Rapid key as shown: Speed Dialing If the number you want to dial has been stored as a Speed Dial number, you can dial it using the following procedure: Press the SPEED/SEARCH key... -
Page 44: Chain Dialing
Sending Documents Chain Dialing The Chain Dialing function allows you to combine an Automatic Dialing number set for Chain Dialing (see “Storing Numbers for Automatic Dialing” in Chapter 2) with another Automatic Dialing number or digits entered manually with the number keys to dial one phone number up to 50 digits long. -
Page 45: Using The Search Key
Using the SEARCH Key If you do not remember the Rapid key or Speed Dial number in which you have stored a particular fax number, you can search for the number by following the steps below: Press the SPEED/SEARCH key twice. -
Page 46: Receiving Faxes
You can set the unit to one of three modes of reception, AUTO, MANUAL, or A.M. (Answering Machine). To select the reception mode, press the RECEPTION MODE key until the light next to the desired mode comes on. Using AUTO Mode Select AUTO mode when you only want to receive faxes on your telephone line. -
Page 47: Optional Reception Settings
Optional Reception Settings The unit has various optional settings for the reception of faxes. Receive Reduce You may on occasion receive faxes that are larger than the paper loaded in the unit. To ensure that you do not lose any part of the original, you should use the Receive Reduce function, which scales the fax to the printing paper size. -
Page 48: Footer Printing
Optional Reception Settings Footer Printing You can choose whether or not to have a footer with the sending machine’s ID information (name, number, etc.) printed out. Factory setting: 2 (OFF) Step Press these keys FUNCTION STOP When using manual sending and receiving You need to use the SPEAKER key or an extension telephone to perform manual sending and receiving. -
Page 49: Special Functions
Memory Your unit has a memory area that can be used to store both incoming and outgoing documents. • Approximately 120 pages of average content can be held in memory for transmission. Less can be held if any of the pages were scanned using fine or superfine resolution. Memory Backup •... -
Page 50: Data Transfer
Special Functions Data Transfer If there is a problem with the unit, you can use the Data Transfer function to have received faxes read into memory and then sent to a different fax machine for printing. This function is used when you cannot print received faxes, for example when the unit runs out of toner, a misfeed occurs. -
Page 51: Transmission Reservation
Transmission Reservation When your fax is busy receiving a document or transmitting a document from memory, you can “reserve” a transmission by setting the document on the original table, reading it into memory, and entering the fax number. Once the current operation is completed, your fax will automatically dial the number and transmit the document saving you from having to wait. - Page 52 Special functions When using the original table : Confirm that there are no documents in the ADF and that copying is not in progres, then gently close the original cover. Place the document face down on the original table. Align the document according to the original scale in the illustration below.
-
Page 53: Broadcasting
Broadcasting This function allows you to send the same document to as many as 50 different locations with just one operation. Once the document is loaded, it is scanned and stored in memory. The fax numbers you have entered are then automatically dialed in succession, and the document is transmitted to each location. - Page 54 Special Functions Press the FAX START key. Transmission will begin. Broadcasting using a Group key If the fax machines to which you want to broadcast have all been programmed into one Group key, you can perform the broadcasting operation using the following simplified procedure.
-
Page 55: Polling
Polling Polling allows you to request another fax machine to send a document to your fax machine. In other words, the receiving fax machine, not the transmitting fax machine, activates the transmission. You can use your fax to both poll and be polled by others. Setting the Polling Key To use the polling function, you must first set Rapid key 20/POLL for use as a polling key. -
Page 56: Being Polled (Memory Polling)
Special Functions Being Polled (Memory Polling) To allow multiple fax machines to poll your fax, or in cases where you want to free up the Document Tray for other operations, use Memory Polling instead of Polling Standby. Programming a Memory Polling Operation You can choose whether to allow polling only once, or an unlimited number of times. - Page 57 Adding to Documents If you have a document stored in memory for polling, and you want to add pages to it, use the following procedure. If you allow polling only once, the document will be automatically cleared from memory after polling. If you allow polling an unlimited number of times, the document will remain in memory until you clear it using the procedure below: Step Press these keys...
-
Page 58: Timer Operations
Special Functions Timer Operations The timer function allows you to set a transmission or polling operation to be performed automatically at a time you specify. Up to three transmission operations or polling operations can be set at any one time, and the times they will be performed can be specified up to a week in advance. - Page 59 To set a timer operation: Step Press these keys FUNCTION ENTER ENTER ENTER RESOLUTION CONTRAST ENTER STOP HOW TO USE THE FAX FUNCTION Comments “TIMER MODE” will appear in the display. Select SET. “TIMER COMM. #=1”, “TIMER COMM. #=2” or “TIMER COMM.
-
Page 60: Anti Junk Fax
Special Functions To cancel a timer operation: If you need to cancel a timer operation after it has been set, follow the steps below: If the timer operation is a transmission operation, you will need to know the number assigned to it. If you do not remember the number (it appears in the display when you set the operation), print out the Timer List. - Page 61 To store junk fax numbers, use the following procedure: Step Press these keys FUNCTION ENTER STOP Step 3 or To clear junk fax numbers, use the following procedure: Step Press these keys FUNCTION STOP Step 4 or HOW TO USE THE FAX FUNCTION Comments “ANTI JUNK FAX”...
-
Page 62: Printing Out Reports
The unit is capable of printing a range of reports on faxing activities as well as various settings you have made. The reports are described below. 1. TRANSMISSIONS ACTIVITY REPORT: Faxes sent from the unit. DATE 01 SEP-21 2. RECEPTIONS ACTIVITY REPORT: Faxes received by the unit. -
Page 63: Group List
5. OPTIONAL SETTING LIST: Currently activated optional settings. SW # SUMMER TIME SETTING NAME NUMBER 6. GROUP LIST: Fax numbers stored under Group keys. NAME 7. ANTI JUNK FAX NUMBER LIST: Fax numbers designated as Anti Junk Fax numbers. ANTI JUNK FAX NUMBER LIST Use the following procedure to print out reports: Step Press these keys... -
Page 64: Activity Report Auto Listing
Printing Out Reports Activity Report Auto Listing It is also possible to have the unit automatically print out Transmission and Reception Activity Reports at designated times (for example, daily, every two days, weekly, etc.) and every 50 operations. Factory setting : 5 (NO) Step Press these keys FUNCTION... -
Page 65: Troubleshooting
COPY SERVICE ERROR FAX SERVICE ERROR (X) Note: If your problem cannot be solved by carrying out the instructions in the Check and Remedy column above, please contact your TOSHIBA dealer. Troubleshooting Check and Remedy Make sure that the telephone line is properly connected to both the unit and the wall jack. -
Page 66: Messages And Signals
DOCUMENT JAM FAX RX IN MEMORY LINE ERROR MEMORY FULL PAPER JAM PAPER SIZE ERROR SET XXX SIZE PAPER CAN NOT PRINT CHECK COPIER COVER PAPER OUT (XXX) LOAD DOCUMENT(S) NO RESPONSE RETURN ORG. XX SHEET (S) Messages and Signals TROUBLESHOOTING Meaning The original document is jammed. -
Page 67: Audible Signals
Audible Signals Sound Type Continuous tone Continuous tone Duration 3 seconds 1 second TROUBLESHOOTING Messages and Signals Meaning Indicates the end of transmission, reception, or line error. Warning tone... - Page 68 Notes TROUBLESHOOTING...
-
Page 69: Specifications
(using TOSHIBA standard document) The time should be slightly different when the line is busy. 2 megabytes of RAM (120 pages, when using TOSHIBA document with a standard resolution) Maximum B4, minimum A5 (When using the ADF: One sheet at a time: Max.257mm x 500mm, min. - Page 70 Auto Cover Sheet: Report: Printable setting lists: As a part of our policy of continuous improvement, TOSHIBA reserves the right to make design and specification changes for product improvement without prior notice. The performance specification figures indicated are nominal values of production units.
-
Page 71: Glossary
GLOSSARY A.M. mode: When set to A.M. (Answering Machine) mode, the unit directs all incoming calls to an answering machine connected to the same line. Anti Junk Fax: A faxing feature that enables the user to program up to ten fax numbers from which he/she does not want to receive faxes. - Page 72 Glossary Rapid Key Dialing: A form of Automatic Dialing by which only a single fax number programmed key (a Rapid key) has to be pressed in order to dial a number. Receive Reduce: A faxing function that automatically scales received faxes to the size of the paper loaded in the unit.
-
Page 73: Quick Reference
QUICK REFERENCE This page summarizes the operations you can perform with this unit. For detailed information about each operation, refer to the appropriate section of this manual. Load the document then following operation TRANSMITTING DOCUMENTS Set RESOLUTION CONTRAST MEMORY Direct Keypad Dialing Dial (press NUM keys) FAX START Rapid Key Dialing... - Page 74 Quick reference FUNCTION MODE STEP 1 Press FUNCTION key STEP 2 Press the menu number from the list below 1. TIMER MODE 1. OPERATION SET 2. LISTING MODE 1. TRANSMISSION ACTIVITY 3. TIMER LIST 5. OPTION SETTING LIST 7. ANTI JUNK FAX NUMBER LIST 3.
-
Page 75: Index
A.M. Mode ... 4-10 Activity Report Auto Listing ... 4-28 Alarm Beep Length ... 2-3 Answering Machine Backup ... 2-25 Anti Junk Fax ... 4-24 Arrow Keys ... 2-2 Audible Signals ... 5-3 Auto Cover Sheet ... 4-5 AUTO Mode ... 4-10 Automatic Dialing ... - Page 76 Index Reception into Memory ... 4-13 Reception Mode ... 2-9 Redialing ... 4-9 Remote Reception ... 2-17 Resolution ... 4-3 Ringing Volume ... 2-3 SEARCH Key ... 4-9 Sending Documents ... 4-1 Setting Date & Time ... 2-7 Setting the Language ... 2-4 Specifications ...
- Page 78 © Copyright TOSHIBA TEC CORPORATION 2001 XXXXXXXXXXX 01-0X TG ALL RIGHTS RESERVED...