
Related Manuals for Fiat F500-F65-3


Summary of Contents for Fiat F500-F65-3
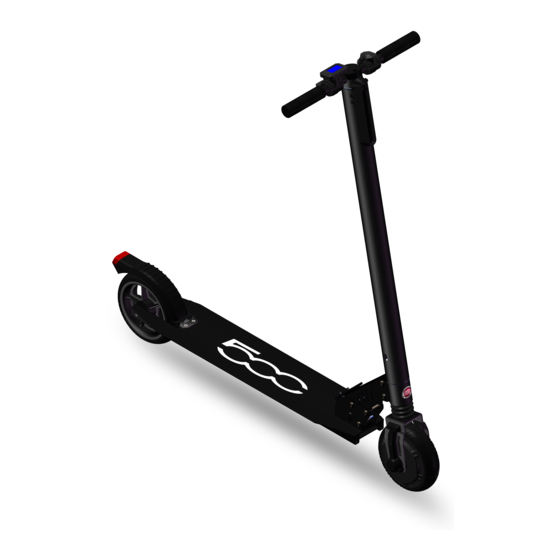
- Page 1 Model: F500-F65-3 FOLDAbLE ELECTRIC KICKSCOOTER USER MANUAL - ORIGINAL INSTRUCTIONS...
- Page 2 PAGE 3 PAGE 25...
- Page 3 Model: F500-F65-3 FOLDABLE ELECTRIC KICKSCOOTER USER MANUAL – ORIGINAL INSTRUCTIONS WARNING FOR BALANCE SCOOTER his appliance can be used by children aged from 10 years old and above, and by persons with reduced physical, sensory or mental capabilities or lack of experience and knowledge if they have been given supervision or instructions concerning use of the appliance in a safe way and understand the hazards involved.
- Page 4 INTRODUCTION Please carefully read this user manual before using the electric kickscooter. Keep this user manual for future references. For your safety, please read all instructions carefully. The user is responsible of all consequences from the incorrect use of the electric kickscooter. The Retailer and the Distributor are not responsible of damages to objects and/or people caused by the incorrect use of the electric kickscooter.
- Page 5 HOW TO UNFOLD THE ELECTRIC KICKSCOOTER The kickscooter is folded inside the box. Press the switch button and lift the handlebar up of 90 degrees. A sound will be heard: the unfolding procedure is completed. You can use the easel to keep the kiscooter standing alone.
- Page 6 HOW TO FOLD THE ELECTRIC KICKSCOOTER Press the button at the base of the handlebar. Fold the handlebar. A sound will be heard: the kickscooter is fully folded. The folding procedure is now completed.
- Page 7 REMOVAL OF THE HANDLES...
-
Page 8: Turn On And Turn Off
Handles can be removed, rotating them. TURN ON AND TURN OFF Before riding the kickscooter for the first time, the battery must be fully charged. Follow the instructions on this user manual to avoid technical problems. Put the kickscooter on a flat surface. Press for 2 seconds the ON/OFF button on the display, to turn-on the kickscooter. - Page 9 The unit will automatically turn off when not in use for approximately 10 minutes. DISPLAY There are 3 buttons on the display: power button, speed button, decel button. When the kickscooter is powered-on, short press the power button of the display: the display will show the level of charge of the battery, the mileage, the speed.
-
Page 10: Battery Level
ODOMETER ODO indicates the total mileage. This information will be kept after switching off the device. BATTERY LEVEL The display shows the battery level. During use of the kickscooter, when the battery is fully charged, the 5 lights are powered. When 5 lights are on, the battery has full power. When 3 lights are on, the power is at 60%. -
Page 11: Error Codes
It is also possible to select kilometres or miles (Km/H detail is selected with 0) (P2 function): IMPORTANT P3-P4-P5 functions are referred to parameters that the user must NOT modify. If modified, there might be a malfunction of the kickscooter. To reset to factory settings (P6 function), long press the Speed Up button till the display turns-off. - Page 12 DECELERATION Release the accelerator. Gently press the decelerator to slow down. The deeper you press, the greater is the deceleration. Pushing too hard will not increase the braking forse and may cause damage to the brake system and might make the device out-of- control.
- Page 13 In case of low light or when driving at night, please press the headlight switch button to turn-on the front light. The kickscooter is developed for flat grounds. Take care of uneven and bumpy grounds.
-
Page 14: Speed Limit
DISTANCE The maximum range of the kickscooter is 15 km approx. This maximum range is affected by the road type (flat and smooth ground will increase the distance, otherwise the distance will be reduced), ambient temperature, maintenance (tyres, battery). SPEED LIMIT The maximum speed is 20 Km/h. -
Page 15: Battery Charging
WARNING When battery is completely empty (0% charge), a normal charge of 3-4 hours might not be sufficient. It is necessary to proceed with a 24 hours charge. BATTERY CHARGING Always check the battery level positioned on the display. There are five lights. In case there is only one light turned-on, we suggest stop using the kickscooter and charge the battery. - Page 16 scrapped. The kickscooter must be disconnected from the supply mains when removing the battery. Only the original charger must be used. Please refer to your retailer in case replacement is required. CAUTIONS Do not use the kickscooter if the battery is low. Do not use the kickscooter in case of burning smell.
- Page 17 2. The indicator light on the charger will be red: this grants that the charge is proceeding. When the indicator light is turned to green color, the battery is fully charged. Please stop charging or the battery life will be reduced. Charging time is around 3-4 hours.
-
Page 18: Transport Of The Battery
Please check the temperature of the battery during the charging process. Charging temperature must be: 0°C ̴ ̴ 40°C. Humidity level during charge must be: 5% ̴ 95%. If the temperature is higher than 40°C, the scooter functioning might be damaged and battery life might be reduced. TRANSPORT OF THE BATTERY Lithium batteries are considered dangerous goods. - Page 19 Turn on the kickscooter pressing the power button on the display. Check the battery power level on the display. Put one foot on the pedal. Push the accelerator on the right handle. Step-on the other foot whilst the kisckcooter is moving. Release the acceleratore to slow-down.
-
Page 20: Maintenance Of The Product
14. Do not drive when raining. Avoid wet floors and puddles. The control of the kickscooter will be reduced. The user might fall. The electrical system of the kickscooter might be damaged. 15. Avoid driving the kickscooter on grounds with snow or ice. The scooter would not be under control. - Page 21 When battery is completely empty (0% charge), a normal charge of 3-4 hours might not be sufficient. It is necessary to proceed with a 24 hours charge. PARAMETERS Model name F500-F65-3 Maximum loading 100 kg Minimum loading 30 kg Maximum speed...
-
Page 22: After-Sale Service
AFTER-SALE SERVICE Please contact your Retailer for any technical problem. WARRANTY Carefully read all instructions before using the self-balanced scooter. Do not use the self-balanced scooter if use is forbidden. Do not use the self-balanced scooter if this might cause danger for the user and people/things around. -
Page 23: Correct Disposal Of The Product
CORRECT DISPOSAL OF THE PRODUCT According to the Directive 2012/19/UE This marking on the product, accessories or literature indicates that the product and its electronic accessories should not be disposed of with other household waste at the end of their working life. To prevent possible harm to the environment of human health from uncontrolled waste disposal, please separated these items from other types of waste and recycle them responsibly to promote the sustainable reuse of material... - Page 24 Manufactured under lIcense of FCA Italy S.p.A. “FIAt” and “500” are trademarks of and lIcensed by the FCA Group CompanIes DISTRIBUTED BY LEGGODT A/S RIBOVEJ 5 6950 RINGKØBING DENMARK MADE IN CHINA...
- Page 25 Brugervejledning Specifikationer: Model F500-F65-3 Maksimal vægt 100kg Minimum vægt 30kg Hastighed op til 20km/t Motorkraft 250W Kilometertal op til 15km Maks skråning 15° Strømforsyning AC 100-240V, 50/60Hz Batteri 4000mAh litium genopladeligt batteri Batteri energi / spænding / 144Wh / 36V / 4Ah...
- Page 26 kapacitet Opladningstemperatur 0° - 40° Luftfugtighed ved opbevaring 5% - 95% Genopladningstid 3 – 4 timer Dimensioner (udfoldet) 99 x 42 x 106 cm Dimensioner (foldet) 109 x 42 x 15.2 cm Vægt 10.5kg Hjuldiameter 6.5” Generel information • Produktet bør ikke benyttes af børn under 10 år samt personer ude af stand til at forstå...
- Page 27 at holde den røde knap nær hjulet nede og samtidigt rotere styret 90 grader. Bemærk at produktet låser fast i den nye position, hvilket kan høres som et lille klik.
- Page 28 Samme proces kan følges for at folde produktet. Samling af styret Håndtagene kan fjernes ved at rotere dem i den anviste retning. Tænd / sluk Før produktet benyttes første gang, skal batteriet oplades fuldt. Stil scooteren på en plan overflade. Hold tænd/sluk knappen nede i cirka 2 sekunder.
- Page 29 Display Der er 3 knapper på displayet: strøm, accelerer og decelerer. Når scooteren er tændt, vil et hurtigt tryk på strømknappen på displayet vise den resterende strøm, kilometertallet samt hastigheden. • ODO er kort for ’odometer’, og viser det resterende kilometertal.
- Page 30 fabriksindstillingerne Bemærk at systemindstillingerne ikke må ændres, da det kan destabilisere produktets software. returnere indstillingsskærmen skal de to knapper igen holdes nede i cirka 3 sekunder. Displayet er også ansvarligt for at vise fejlmeddelelser, illustreret med E1 – E6. Hvis en af disse vises, bør produktet ikke benyttes før fejlen er udbedret.
- Page 31 efter en. Hvis produktet benyttes i mørke omgivelser, kan forlygten aktiveres med et tryk på den anviste knap. Bemærk at produktet er beregnet til brug på jævne, plane overflader. Der bør derfor udvises ekstra forsigtighed på ujævne veje. Ekstra information Den maksimale rækkevidde af scooteren er omtrent 15 kilometer, men dette afhænger meget af hvilken type vej der køres på, samt scooterens tilstand.
- Page 32 Sørg for at batteriet oplades fuldt før produktet tages i brug første gang. Batteriet bør genoplades mindst én gang hver anden måned, også selvom produktet ikke har været i brug i denne periode. Strømforbruget (og dermed rækkevidden) afhænger af flere faktorer, såsom: •...
- Page 33 Sørg for at afskaffe batteriet på ansvarligt vis. Afbrænd aldrig batteriet, da det kan eksplodere. Batteriet og resten af produktet skal afskaffes separat. Scooteren må ikke være tilsluttet en stikkontakt når batteriet frakobles. Oplad og opbevar kun i et tørt og åbent område uden letantændelige genstande.
- Page 34 2. Lysindikatoren på opladeren vil være rød så længe opladningen fortsætter. Når den skifter til at lyse grøn, betyder det at opladningen er fuldført. Når dette er tilfældet bør opladningen straks afslutte for ikke at forringe batteriets tilstand. En gennemsnitlig opladning tager 3-4 timer. 3.